This tutorial will show you how to install and set up FreshRSS on the Raspberry Pi.
FreshRSS is a free and open-source RSS aggregator and reader that you can run locally on your Raspberry Pi.
This software allows you to easily follow any website that provides an RSS feed and place it all into one easy-to-read feed. Even our website offers an RSS feed that you can use to see our latest tutorials.
With the shutdown of many of the more prominent RSS aggregators, having your own self-hosted service is a must. You won’t ever have to worry about hopping from service to service.
For those who do not know, RSS stands for Really Simple Syndication and is a standard for web feeds. These feeds can provide information, but are most frequently used to push things like blog entries and news headlines.
Equipment
Below is a list of the equipment we used when installing and setting up FreshRSS on the Raspberry Pi.
Recommended
Optional
We tested this tutorial on a Raspberry Pi 400 using the latest version of Raspberry Pi OS Bullseye.
Setting up the Raspberry Pi for FreshRSS
Before we can start using FreshRSS on the Raspberry Pi, we will need to set up the software that the RSS aggregator relies on.
Throughout this section, we will walk you through installing Apache, MariaDB, and PHP.
Installing the Required Software
1. Our first task before doing anything is to update both the package list and any currently installed packages.
You can update the Raspberry Pi’s package list and packages using the following two commands within the terminal.
sudo apt update
sudo apt upgradeCopy
2. We can now install all the packages we require to run FreshRSS on our Raspberry Pi.
Use the command below in the terminal to install all the needed software.
sudo apt install git apache2 mariadb-server php8.1 php8.1-common php8.1-curl php8.1-xml php8.1-gmp php8.1-mbstring php8.1-zip php8.1-mysqlCopyPlease note that if you get an error that this PHP version is unavailable, please follow our guide on Installing the Latest Versions of PHP.
Securing the MariaDB Server
3. The only major piece of software we need to configure for FreshRSS on the Raspberry Pi is the MariaDB server.
If this is the first time you have installed the MariaDB server on your device, we should run through the steps of securing it.
To begin the secure process, type the following command into the terminal.
sudo mysql_secure_installationCopyPlease note that if you have already done this before, you can safely skip to the next section.
4. You will be prompted to type in the password for the root user. As MariaDB uses Unix sockets for authentication, you can safely press ENTER to skip this step.
5. When you are prompted if you want to switch to “unix_socket” authentication, you can either type in “Y” or “N” and then press ENTER.
6. After that, you will be asked if you want to change the password for your account. Since we aren’t using password authentication, you must press “N” followed by the ENTER key.
7. Finally, for the rest of the options, please type in “Y“, followed by the ENTER key. These options will disable various insecure behaviors of the MariaDB server.
Creating a Database and User for FreshRSS on the Raspberry Pi
8. With our SQL server now somewhat more secure, we can move on to creating a database and user for the FreshRSS software.
We will need to utilize the MariaDB command line interface to create the user and database. You can open this interface by using the command below.
sudo mariadb -u rootCopy9. With the command line interface open our first step is to create a database for FreshRSS on our Raspberry Pi.
Use the command below to create a new database with the name “freshrss_db“.
CREATE DATABASE freshrss_db;Copy10. With the database now created, we need to create a user to access it.
Using the following command, you will create a user with the name “freshrss_usr“. Make sure that you replace “PASSWORD” with a secure password of your own.
CREATE USER 'freshrss_usr'@'localhost' IDENTIFIED BY 'PASSWORD';Copy11. Even though we created a new user, it doesn’t currently have any rights to access our database.
We can grant all privileges to our new user on our database using the command below within the MariaDB CLI.
GRANT ALL PRIVILEGES ON freshrss_db.* TO 'freshrss_usr'@'localhost';Copy12. For our changes to take effect, we will need to flush the privilege table.
Flushing the privilege table is as easy as typing in the following command and pressing ENTER.
FLUSH PRIVILEGES;Copy13. We are finally finished setting up a database and SQL user for FreshRSS on our Raspberry Pi.
Quit out of the MariaDB CLI by typing in the following.
exit;CopyInstalling FreshRSS on the Raspberry Pi
Now that we have installed all the required software, we can finally move on to installing the FreshRSS software to the Raspberry Pi.
Within these steps, we will download the latest version of FreshRSS and set it up with Apache.
1. Let us start by changing the “/usr/share” directory using Linux’s cd command.
This directory is where we will be cloning the FreshRSS software on the Raspberry Pi.
cd /usr/share/Copy2. Now that we are in the correct directory, you will want to use the following command to clone the latest version of FreshRSS.
Using git, we are grabbing the latest code version directly from the repository.
sudo git clone https://github.com/FreshRSS/FreshRSS.gitCopy3. With the code now cloned, we need to ensure the “www-data” user owns these files.
Using the chown command in the terminal, we can take ownership of the files by using the following.
sudo chown -R www-data:www-data /usr/share/FreshRSSCopy4. Our next step is to create a configuration file so that Apache points to the current directory within FreshRSS.
sudo nano /etc/apache2/sites-available/freshrss.confCopy5. Within this file, type in the following lines. These lines set up a new virtual host that runs on port “80” and point to the “/usr/share/FreshRSS/p” directory.
If you want to run this under a specific domain name, you will need to add the “ServerName YOURDOMAIN.com” directive.
<VirtualHost *:80>
DocumentRoot /usr/share/FreshRSS/p
</VirtualHost>Copy
6. Once you are done editing the file, save and quit by pressing CTRL + X, followed by Y, then finally, the ENTER key.
7. With our configuration file created, we need to use the “a2ensite” tool to enable it.
sudo a2ensite freshrss.confCopy8. Since we are running on port “80” without having a server name set, we will need to disable the default configuration file.
You can disable the default configuration by using the following command.
sudo a2dissite 000-default.confCopy9. Our final task is to reload the Apache2 web server, so it reads in our new configuration.
To reload the server, all you need to do is use the following command.
sudo systemctl reload apache2CopyUsing the FreshRSS Web Interface
Now that we have installed FreshRSS on to the Raspberry Pi we will need to access its web interface and configure the software.
Accessing the FreshRSS Web Interface
1. To access the FreshRSS web interface from your local network, you will need to know the IP Address of your device.
You will get the local IP address assigned to the device by using the hostname command within the terminal.
hostname -ICopy2. With your IP address now handy, go to the following address.
Make sure you replace “[IPADDRESS]” with the IP you got in the previous step. Alternatively, if you are running this on your Pi, you can use “localhost“.
http://[IPADDRESS]/First Run of FreshRSS on the Raspberry Pi
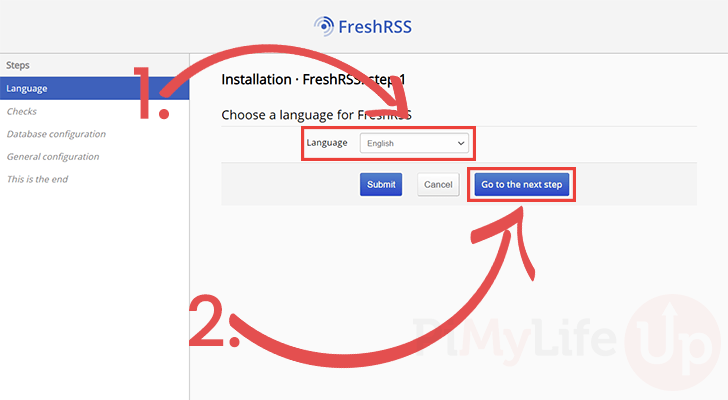
3. When you first load up the FreshRSS interface, you must choose a language for the interface (1.).
Once the language is set, click the “Go to the next step” button (2.).
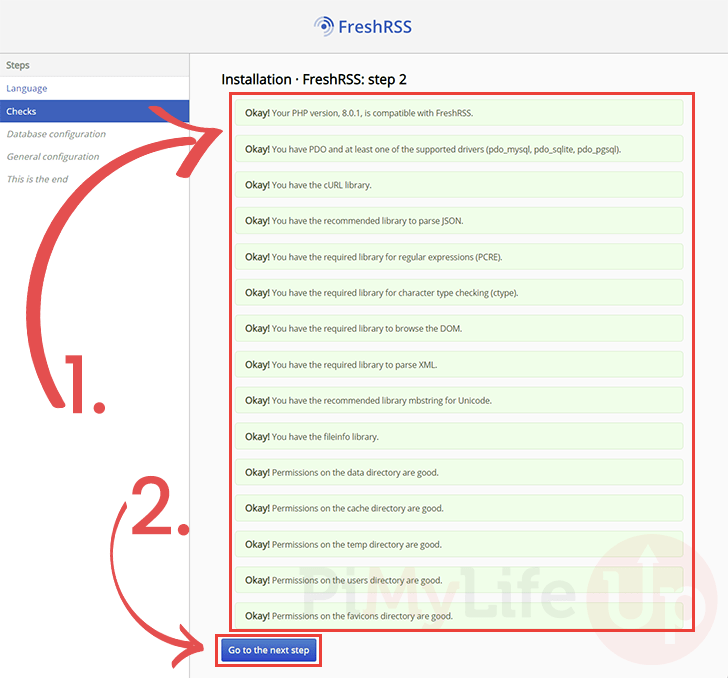
4. FreshRSS will check to see if your Raspberry Pi has all the required software.
All the prompts on this screen (1.) should be green if everything has been installed correctly.
Once you have verified everything is fine, click the “Go to the next step” button (2.) to continue.
5. We will now need to fill out all of the information for FreshRSS to connect to our Raspberry Pi’s database server.
First, you will need to fill out the username for your database user (1.). If you are following this tutorial, this should be “freshrss_usr“.
After that, you must type in the password you set for that database user (2.).
The final piece of information you need to fill in is the database name (3.). Again, if following the tutorial, this will be “freshrss_db“.
Once everything is filled out, click the “Submit” button (4.) at the bottom of the page.

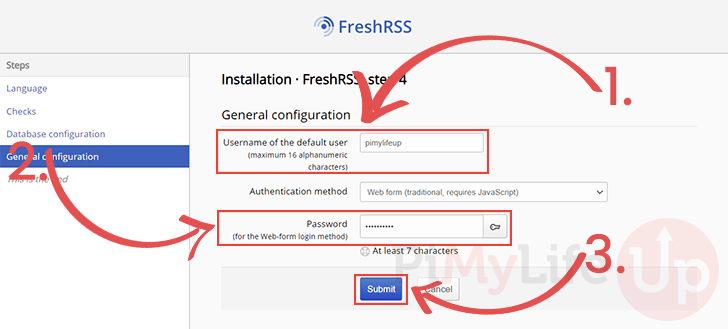
6. The last part of this installation requires you to create a user that you will use to log in to the FreshRSS interface.
First, enter the username you want to use to log in to the web interface (1.).
Next, specify the password for the user, ensure you set this to something secure (2.).
Finally, click the “Submit” button (3.) to finalize the installation.
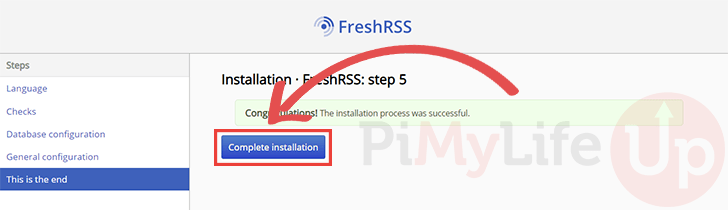
7. You will now see a message that you successfully completed the FreshRSS installation on your Raspberry Pi.
Click the “Complete installation” button to proceed to the login screen.
Logging into your Raspberry Pi’s FreshRSS Installation
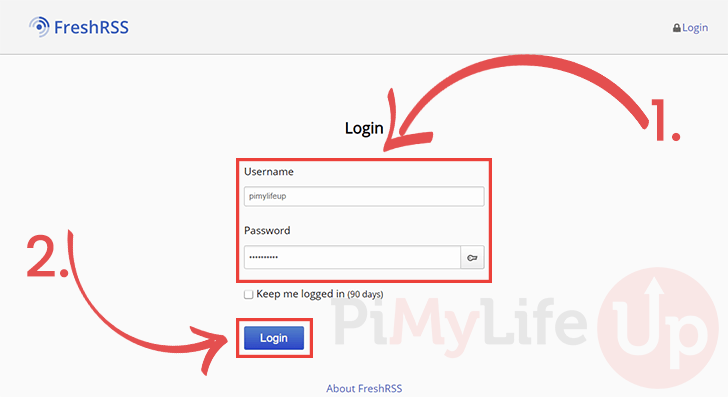
8. After setting up FreshRSS, you can log into the FreshRSS interface.
To log in, you must enter both your username and password (1.).
Once done, click the “Login” button to continue to the dashboard.
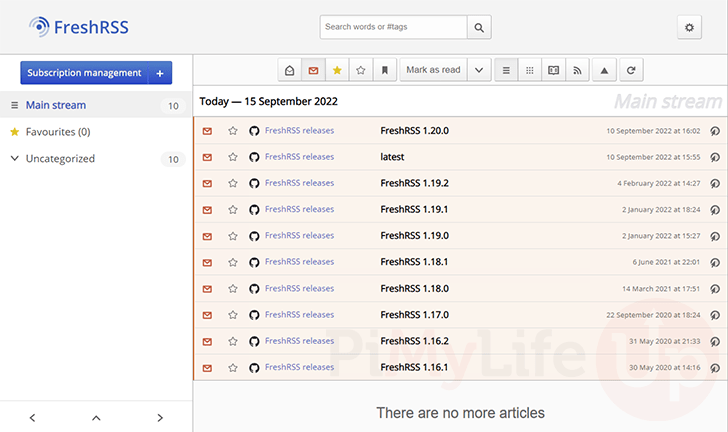
9. At this point, you will be greeted with the FreshRSS stream.
By default, the only RSS feed that you will see here is the FreshRSS GitHub releases.
Adding your RSS Feed
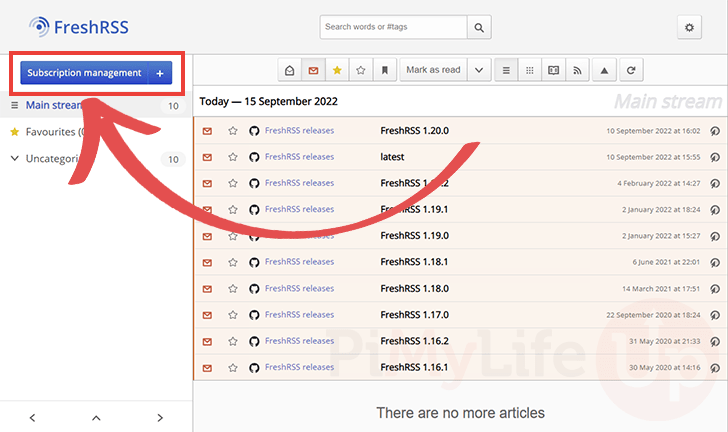
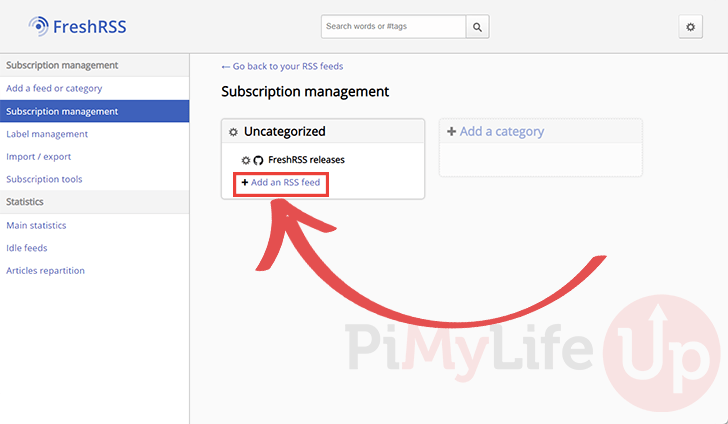
10. At this point, you will want to start customizing your FreshRSS feed and adding your RSS feeds.
To start this process, you should click the “Subscription management” button on the left-hand side of the screen.
11. On the next screen, you can click either “Add a feed or category” in the sidebar, “Add an RSS Feed” under a category, or the “Add a category” link.
All of these links will take you to the same screen.
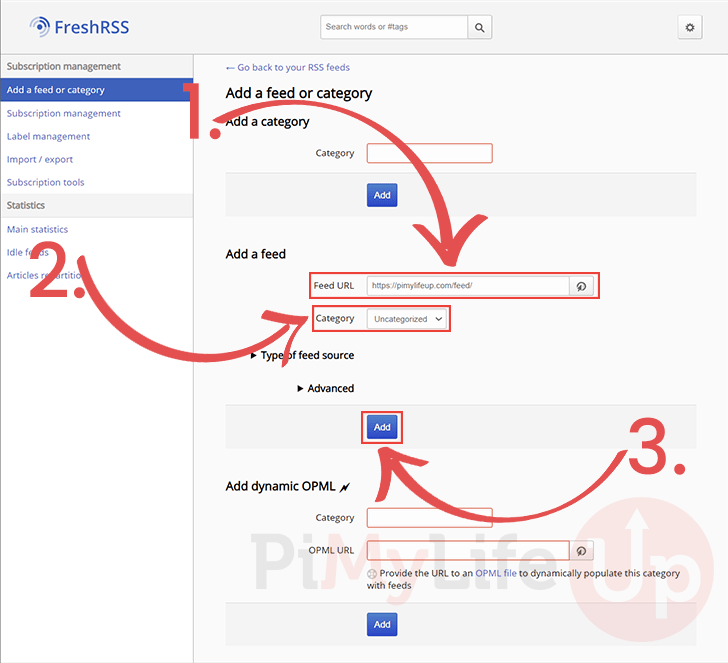
12. Adding a new RSS feed is a straightforward process. First, find the “Add a feed” section on this page.
Within this page, start by filling out the feed URL (1.). This is the URL FreshRSS will try to grab your feed from.
Next, you can select a category for this feed to be categorized under (2.). By default, there is only “Uncategorized“.
When you are happy with your setting choices, click the “Add” button (3.).
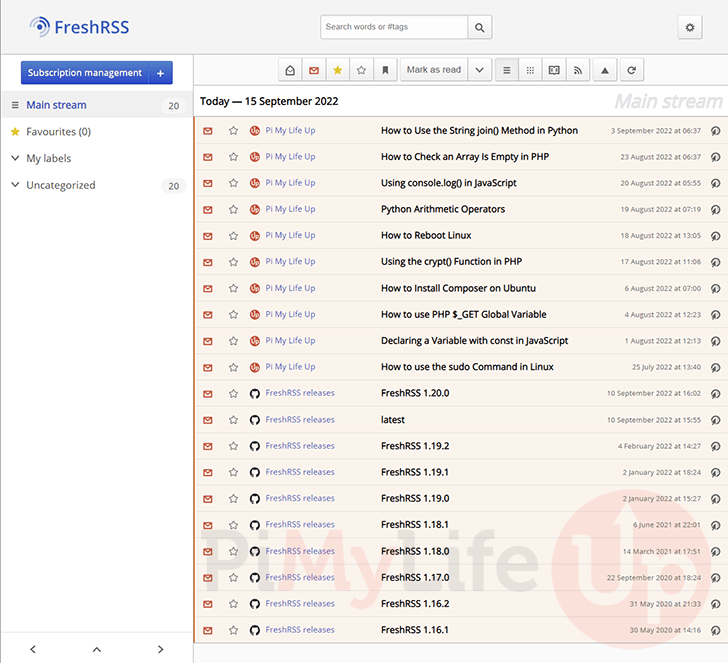
13. Now, if you return to the front page, you should see that your new RSS feed has been aggregated into your stream.
Automatically Updating your RSS Feed
By default, FreshRSS on the Raspberry Pi will only update the feed whenever you navigate to its dashboard.
It is possible to get FreshRSS to automatically refresh the feeds periodically by setting up a cron job. This cron job will call the PHP command line interface and execute the PHP file that grabs the latest feeds.
1. To add a new cron job, we need to edit the “crontab”.
You can edit this file by running the following command within the terminal.
sudo crontab -eCopyIf you are prompted to select which text editor you want to use, we highly recommend using “nano“.
2. Once the crontab is open, add the following line to the bottom.
This line will execute the script that updates your FreshRSS RSS feeds. With the way this cron job is written, the system will execute it every 30 minutes.
*/30 * * * * php /usr/share/FreshRSS/app/actualize_script.php3. Once you have added the above line to the crontab, you can safely save and quit.
If you are using nano, saving and quitting is as easy as pressing CTRL + X, followed by Y, then the ENTER key.
5. At this point, your Raspberry Pi will now automatically refresh your RSS feeds periodically, meaning you won’t have to wait for anything to update when you load up FreshRSS.
Conclusion
At this point in the guide, you should now have FreshRSS successfully running on your Raspberry Pi.
This software is a powerful and useful RSS aggregator that you can easily run on lower-powered devices.
Please comment below if you have any issues with getting the software to run on your Pi.
Also, check out our many other Raspberry Pi projects, such as setting up an internet speed monitor.


the command you have listed to download all the PHP dependencies need to be updated to at least PHP8.1+, otherwise FreshRSS will not load. other than that, this is a great article!
Thanks, Jacob. I’ve updated the PHP dependencies to PHP 8.1.
Accidentally typed the stray text on the command line in Step 10 which forced a do-over. On 2nd try I got to the FreshRSS start page but got “Blast! Cannot find PDO or one of the supported drivers (pdo_mysql, pdo_sqlite, pdo_pgsql).” I guess it’s pdo_mysql I need but not sure where to find it, how I might have missed it or how to install it. Any help appreciated.
Hi William,
Thank you very much for commenting about those mistakes within the tutorial. I fixed up the stray text that somehow got copied into the SQL command.
Additionally, it looks like a package somehow got shaved off from the install line. Could you please try installing the following package.
Cheers,
Emmet