In this tutorial, we will be showing you how to install Node-Red on your Raspberry Pi.
Node-RED is an open-source flow-based programming tool designed to help you connect hardware devices, APIs, and online services.
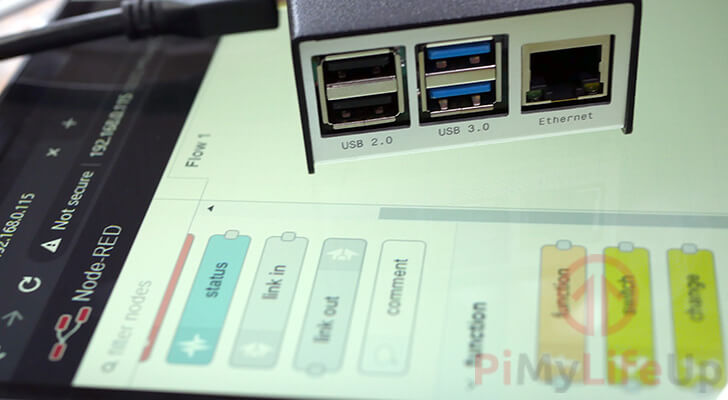
Being designed for the Internet of Things (IoT), Node-RED is a perfect match for the Raspberry Pi and can be useful for dealing with the Pi’s GPIO.
This software package will allow you to interpret data from your Raspberry Pi’s GPIO pins and create an action based on that data. You can also use Node-RED to interact with the GPIO pins based on an event.
For example, you can make Node-RED turn on and off a light, depending on the time of day.
One of the best things about Node-RED is that it provides you with an easy to use, browser-based editor.
Using this editor, you can easily create workflows and deploy them to the Node-RED runtime in a single-click while knowing little to nothing about programming.
Equipment List
Here is a list of the equipment we recommend for this tutorial on setting up Node-RED on the Raspberry Pi.
Recommended
Optional
This Node-RED tutorial was tested on a Raspberry Pi 4 running the latest version of Raspberry Pi OS.
Installing Node-RED on a Raspberry Pi
1. The first thing we need to do before we install Node-RED is to ensure that our Raspberry Pi is running an up to date version of Raspberry Pi OS.
Run the following command to update and upgrade all the pre-existing packages.
sudo apt update
sudo apt upgradeCopy
2. We need to install the “build-essential” package. This package is used to build any modules that NPM requires.
Run the command below to install “build-essential“.
sudo apt install build-essentialCopy3. Finally, we can install Node-RED by running the following command.
This command will install several things to our Raspberry Pi. These packages include Node.js, npm, and Node-RED itself.
bash <(curl -sL https://raw.githubusercontent.com/node-red/linux-installers/master/deb/update-nodejs-and-nodered)CopyWhile Node-RED is available through the Raspberry Pi OS package repository, the script is the officially recommended install method as it also installs npm.
npm is incredibly useful as it is a package manager for the JavaScript programming language that Node-RED is built on. Using npm, you will be able to install additional modules for use with Node-RED.
You can review the contents of the script by going directly to it in a web browser.
4. Before the script begins to run on your Raspberry Pi, you will be asked two questions.
The first prompt asks if you really want to proceed with the installation.
Are you really sure you want to do this ? [y/N] ?CopyType Y and then press ENTER to continue.
The second question will ask if you want to install Raspberry Pi specific Node-RED packages.
Would you like to install the Pi-specific nodes ? [y/N] ?CopyAgain to this question, press the letter Y and then press ENTER to continue.
5. As the installation script runs, it will complete five different tasks for us.
- First, the script will remove any pre-existing Node-RED and Node.js installations. This is to stop conflicting with older versions provided from a package repository.
- Next, the script will proceed to install the current Node.JS LTS release using the NodeSource package repository.
- Afteward,
npmwill be used to install the latest version of Node-RED to your Raspberry Pi. - In this step, the script will install any Raspberry Pi specific modules to the OS.
- Finally, a service for Node-RED will be generated by the script.
Starting Node-Red on the Raspberry Pi
1. With Node-RED finally installed to our Pi, we can now go ahead and start the software up.
There are two different ways to do this. One is to launch it as a service. The other is to launch it directly.
Launching Node-RED Directly
To launch Node-RED directly without starting it as a service, all you need to do is type in the following command.
node-redCopyThe advantage of starting Node-RED like this is that you have access to its terminal. You will see things such as errors appear here.
Starting Node-RED as a Service
Alternatively, you can start up the Node-RED service by using the command below.
sudo systemctl start noderedCopyIf you run into issues with Node-RED not starting correctly on your Raspberry Pi, we recommend trying the other method.
The alternative method should show you any errors that may be occurring during the start up process.
Alternatively, you can also check the status of the Node-RED service by making use of the following command.
sudo systemctl status noderedCopyThis command will give you various details about Node-RED and should let you know whether it is successfully running as well as the last few lines it outputted to the terminal.
Node-RED should now start silently in the background, and you should now be able to access its web interface.
Opening the Node-RED Editor
With Node-RED now installed and started up on our Raspberry Pi, we can proceed to access its web interface.
Using the browser-based Node-RED editor you can visually create event-driven applications with relative ease.
1. Let’s start by getting the local IP address of our Raspberry Pi.
The easiest way to do this is to use the following command. The hostname command will retrieve the IP that the Pi has been assigned.
If you want an alternative method, you can try following our guide on retrieving the Pi’s IP address.
hostname -ICopyKeep note of the IP address that this command returns as you will need it in the next step.
2. Now, connect to the Node-RED web editor by going to the following URL in your favorite web browser.
Make sure that when you use the following URL that you replace [IPADDRESS] with the IP you retrieved in the previous step.
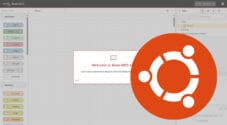
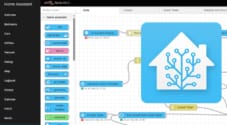
http://[IPADDRESS]:18803. If everything is working correctly, you should now be greeted by the following screen.
You can now start making use of the Node-RED web editor that is running off of your Raspberry Pi.

Getting Node-RED to Start on Boot
As the Node-RED install script automatically sets up a service file, all we need to do to get it to start at boot is to enable it.
1. To enable the Node-RED service on your Pi, you need to use the following command.
sudo systemctl enable noderedCopy2. Alternatively, if you want to stop Node-RED from automatically starting on boot, you can make use of the following command.
sudo systemctl disable noderedCopyConclusion
Hopefully, at this point in the guide, you will now have successfully got Node-RED, up and running on your Raspberry Pi.
If you are interested in learning more about how to use Node-RED, we recommend checking out the official guide on creating your first Node-RED flow.
If you have run into any issues with installing Node-RED on your Raspberry Pi or have any feedback, feel free to drop a comment below.


Worked well, Thanks!