In this tutorial, I will be going through the steps on how to set up a Raspberry Pi Print Server.
The process of getting the software installed is pretty simple, but configuring it and getting a Windows network to find the print server is a bit more of an involved process.
Setting up a print server is a simple way of bringing your regular USB printer to more modern standards without you having to shell out hundreds of dollars.
The software allows you to move the printer to wherever you want and have it accessible by multiple computers rather than having it connected straight into a single computer.
It’s also a great way to share a printer without needing a costly tower computer running all the time.
To make this all work, we will be making use of a piece of software called CUPS. CUPS stands for Common Unix Printing System and is the backbone of most Linux printing software.
Basically it is the software that communicates with your printer and gets it to print files correctly.
If you want to make sure the CUPS printing software supports your printer, then go to their website at open printing and look up your specific model number.
Equipment List
Below are the pieces of equipment that you will need for this Raspberry Pi print server tutorial.
Recommended
- Raspberry Pi Amazon
- Micro SD Card Amazon or an SD card if you’re using an old version of the Pi.
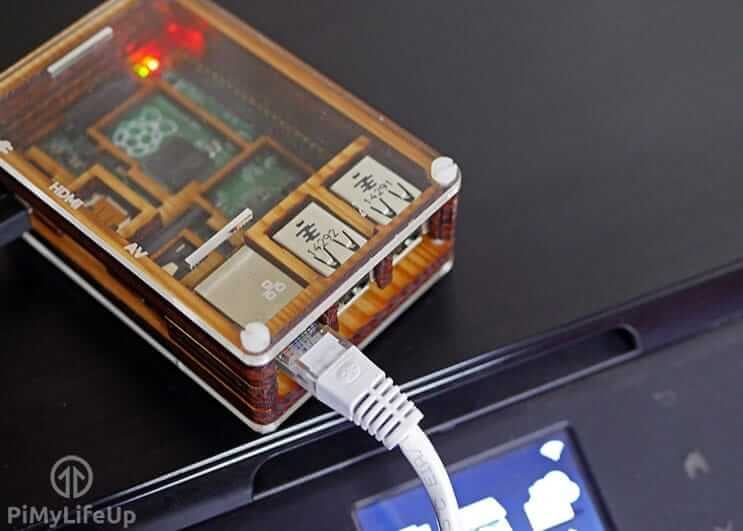
- Ethernet Cable Amazon or Wi-Fi Amazon
- USB Printer Amazon
Optional
Video
If you are interested, we have embedded a video on how you can set your Raspberry Pi up as a Print Server. Of course, if you prefer our written content, be sure to skip this video and proceed to the next section.
Installing the Raspberry Pi Print Server Software
Installing the print server for the Raspberry Pi is a simple process since it is available as a software package.
I will be using the latest version of Raspberry Pi OS throughout this tutorial so if you need to install it then be sure to check out my how to install Raspberry Pi OS tutorial.
1. To get started we should first update the Raspberry Pi to ensure we are running the latest software.
You can do this by entering the following commands into the terminal.
sudo apt update
sudo apt upgradeCopy
2. Once the Raspberry Pi has been updated, we can now start installing the print server software.
In this case, we will be installing CUPS. This software manages printers connected via USB or over the network, and it has the bonus of providing a management interface that you can view over the internet.
Alongside Cups we will also be installing two additional packages that help improve the number of printers that it will be able to work with.
printer-driver-gutenprint: This particular package provides drivers for many different brands of printers ranging from Canon to Epson. It greatly improves the number of printers that will work withs CUPS.hplip: The one major brand missing from the Gutenprint package is HP, luckily, this brand happens to provide their own drivers that can be installed with this package.
On top of these two packages, we will also be installing Samba as it will allow you to share your printer with Windows devices a little easier.
Install CUPS and these packages by typing the following command into the terminal on your Raspberry Pi.
sudo apt install cups printer-driver-gutenprint hplip samba Copy3. When CUPS has finished installing there are a few extra things that we will need to do.
The first thing to do is add your user to the lpadmin group.
This group will allow your user to access the administrative functions of CUPS without needing to use the superuser.
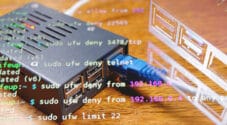
sudo usermod -a -G lpadmin $USERCopy4. There is one other thing that we will need to do to CUPS to ensure that it runs well on the home network and that is to make CUPS accessible across your whole network.
At the moment Cups is set up so that it will block any non-localhost traffic.
We can get it to accept all traffic by running the following two commands:
sudo cupsctl --remote-any
sudo systemctl restart cupsCopy
5. Now we should be able to access the Raspberry Pi print server from any computer within the network.
If you are unsure on what your Raspberry Pi’s local IP Address is then you can make use of the following command.
hostname -ICopy6. Once you have your Raspberry Pi’s IP Address, go to the following web address in your favorite web browser.
Make sure to swap out my IP address (192.168.1.105) with your own.
http://192.168.1.105:631Below we look at setting up SAMBA correctly to ensure Windows can properly identify the print server running on the Raspberry Pi.
We will also show you how to add a printer using the CUPS interface.
Setting up SAMBA for the Pi Print Server
If you intend on using your print server with Windows, then setting up SAMBA correctly is necessary.
We will need to install SAMBA and make a few changes to its configuration to ensure that it runs correctly and utilizes the CUPS print drivers.
1. Now firstly, we should make sure we have SAMBA installed, the easiest way to do this is simply run the install command in the terminal.
We can do that by entering the following command in the terminal.
sudo apt install sambaCopy2. With SAMBA now installed to our Raspberry Pi, we will need to open its configuration file and make several edits.
We can open the file with the nano text editor by using the following command:
sudo nano /etc/samba/smb.confCopy3. Now with the file open, we will need to scroll to the bottom of the file. The quickest way to do this is to use the following key combination: CTRL + V.
Once at the bottom of the file you should add or change the following lines.
In my case, the “[printers]” and the “[print$]” sections were already in the file, so I just needed to change the values to match the following.
# CUPS printing.
[printers]
comment = All Printers
browseable = no
path = /var/spool/samba
printable = yes
guest ok = yes
read only = yes
create mask = 0700

# Windows clients look for this share name as a source of downloadable
# printer drivers
[print$]
comment = Printer Drivers
path = /var/lib/samba/printers
browseable = yes
read only = no
guest ok = noCopy
Save the file by pressing CTRL + X and then pressing Y and then ENTER.
4. We can now restart SAMBA to get it to load in our new configuration.
To restart SAMBA, all we need to do is type the following command into the terminal.
sudo systemctl restart smbdCopyAdding a printer to CUPS
1. Adding a printer to CUPS is a rather simple process, but first, we need to load up the CUPS web interface.
If you’re unsure what your Raspberry Pi’s IP address is, then run the hostname command in the terminal.
hostname -ICopy2. With your Raspberry Pi’s IP address in hand, you need to go to the following address in your web browser.
When typing in this address make sure that you swap out our IP address (“192.168.1.105“) with your own.
https://192.168.1.105:6313. You should be greeted with the following homepage.
On here we need to click “Administration” in the navigation menu at the top of the screen.

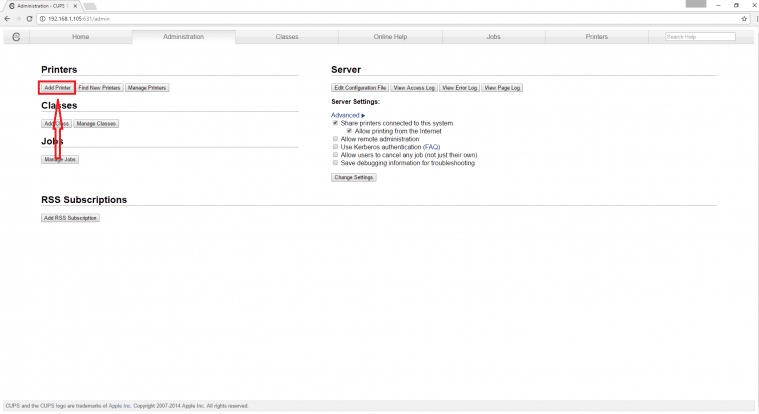
4. You will be taken to the Cups administration page.
On here, we need to click on the “Add Printer” button.
5. With the “Add Printer” screen now loaded, we can select the printer we want to set up Cups for.
In our case, that printer is the “Canon MG2500 series” printer.
Once you have your printed selected, click the “Continue” button.
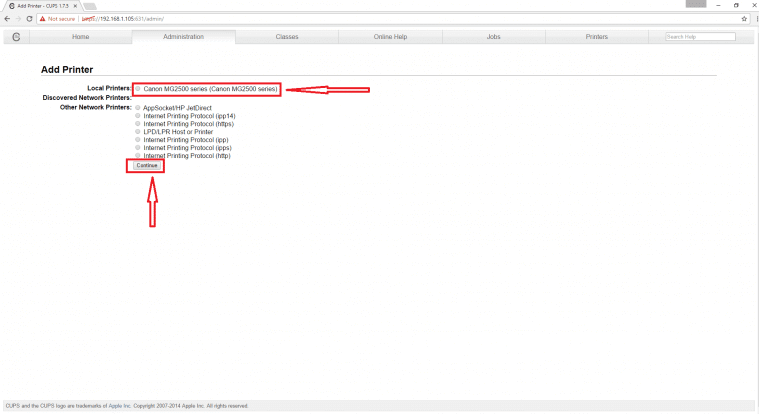
If your printer is not showing up on this screen, ensure that you have plugged it into one of the USB ports on the Raspberry Pi and that it is turned on.
You may need to restart your Raspberry Pi if it is still refusing to show up, ensure the printer is turned on and plugged in when you restart.
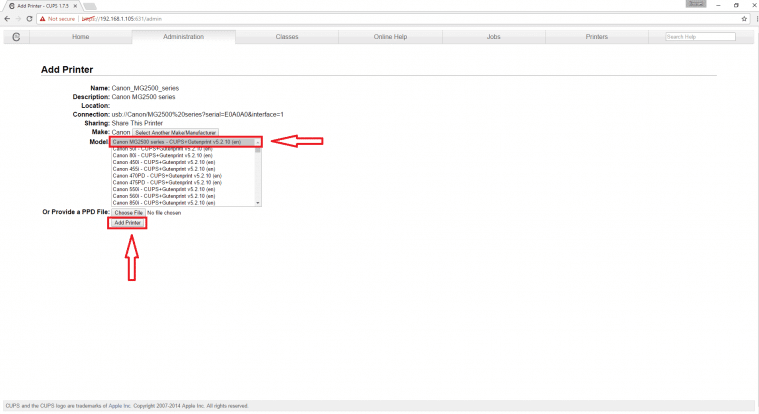
6. On this screen, you need to select the model of your printer. CUPS will try and automatically detect the model and pick the correct driver.
However, in some cases this will not function correctly, so you will have to go through the list yourself and find the most relevant driver.
Once you are satisfied everything is correct, click the “Add Printer” button.
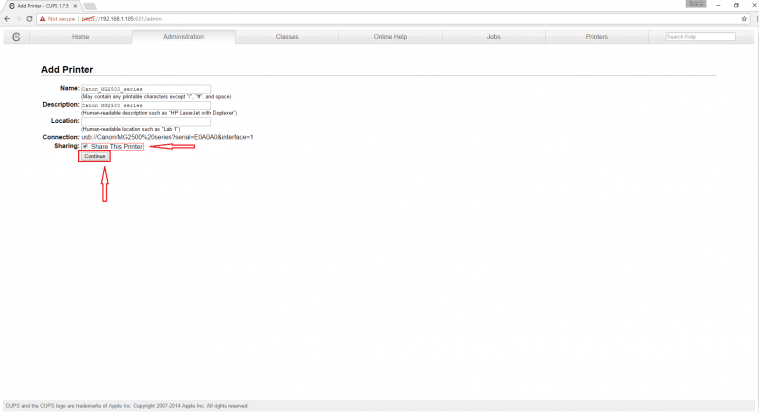
7. Now, this is the last screen you need to deal with before the printer is successfully added.
On this screen you can set the name and description to whatever you want.
It is helpful to set the location if you have multiple printers in your house that you need to deal with.
Also, make sure you enable “Share This Printer“, otherwise other computers will not be able to access it.
Once you are happy with the settings, feel free to click the “Continue” button.
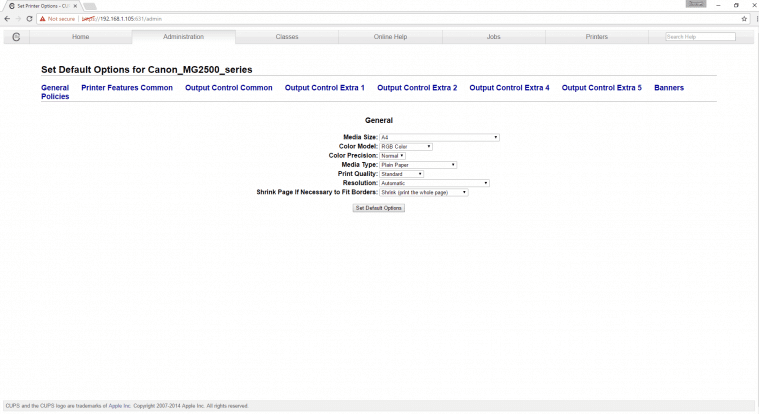
8. The final screen that you will be presented with after setting up your printer is pictured right below.
This screen allows you to change a few of the printer’s specific settings. Such as the page print size, the print quality, and various other options.
Now we will go over how to add our newly setup Raspberry Pi print server to Windows.
It should be a relatively easy process thanks to setting up SAMBA earlier in the tutorial.
Adding a Raspberry Pi Print Server to Windows
1. Adding a CUPS printer to Windows can be a bit of work, mainly because you need to select the driver for Windows to be able to connect to and understand the printer.
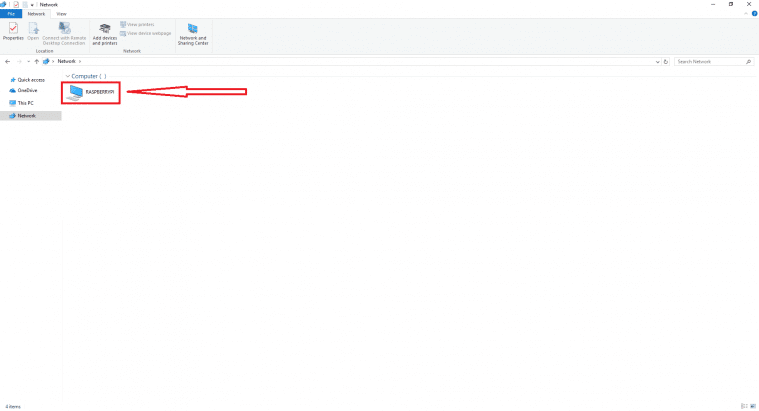
To get started, first go to the network page in Windows, one of the fastest ways to get to this is to load up “My Computer” or “This PC” and click on “network” in the sidebar.
Once there you should have a screen that looks like the one below with your Raspberry Pi’s hostname there, in my case it is RASPBERRYPI.
Double click on your Raspberry Pi’s share, it may ask for a username and password.
If just pressing enter doesn’t work, try entering pi as the username.
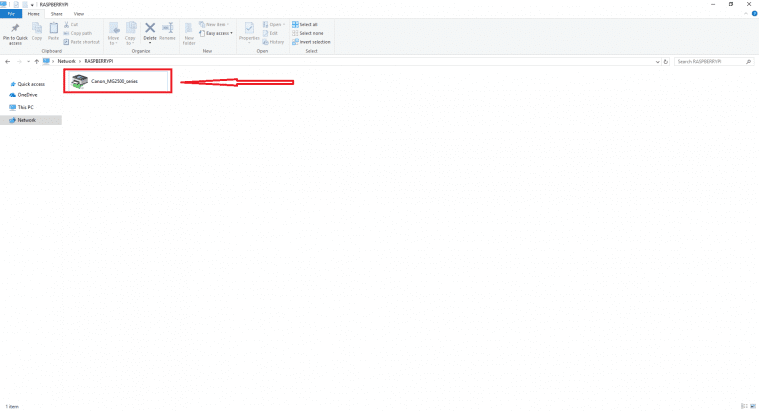
2. You should now be greeted with a screen displaying the printers available on your Raspberry Pi print server.
Double click on the printer you want to have connected to your computer.
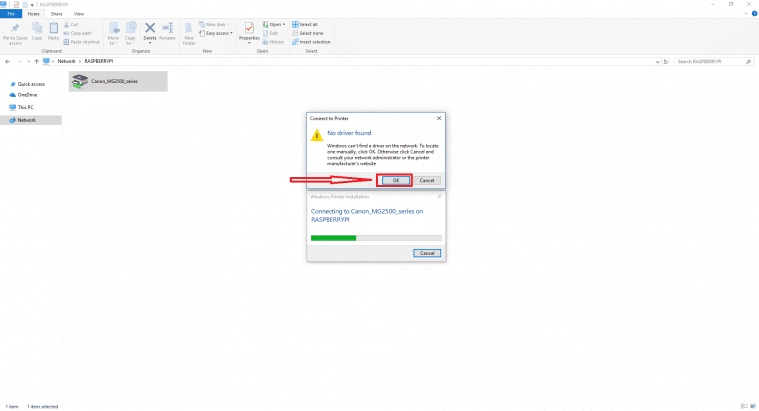
3. Upon double clicking this, you will likely be greeted with the warning message below.
Just click the “OK” button to continue with the tutorial.
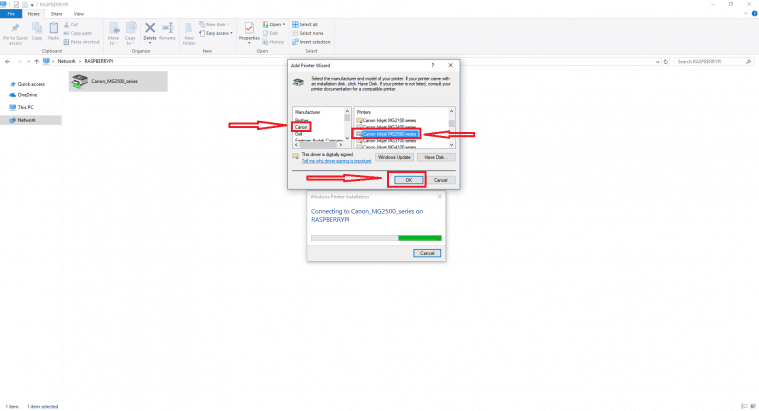
4. Now you will need to find your printer within this list, on the left is a list of all the brands, and on the right, is a list of all the printers for that brand that Windows has drivers for.
If you don’t find your printer on here, then try looking up your printer’s model online and download the appropriate drivers for it.
In my case, I had to look for the Canon MG2500 series as shown below.
Once you have selected your printer, click the “Ok” button to continue.
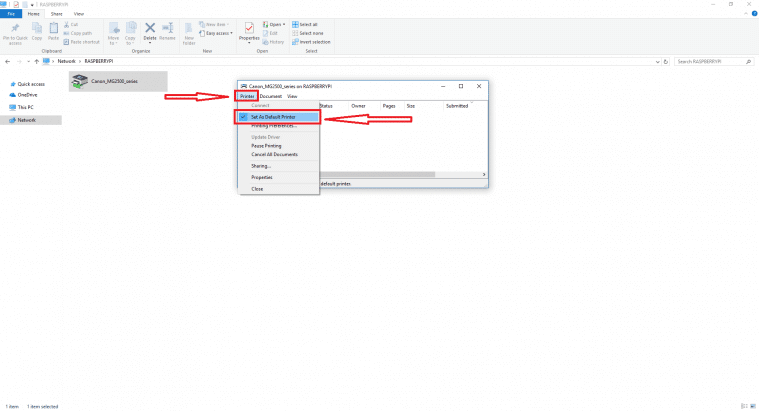
5. This process will now load up a connection with your printer.
If you want to make this the default printer for the computer, then click “Printer” -> “Set as Default Printer“.
6. The printer should now be successfully added to your computer and be available for any program to use.
You can ensure the printer is correctly set up by printing a file.
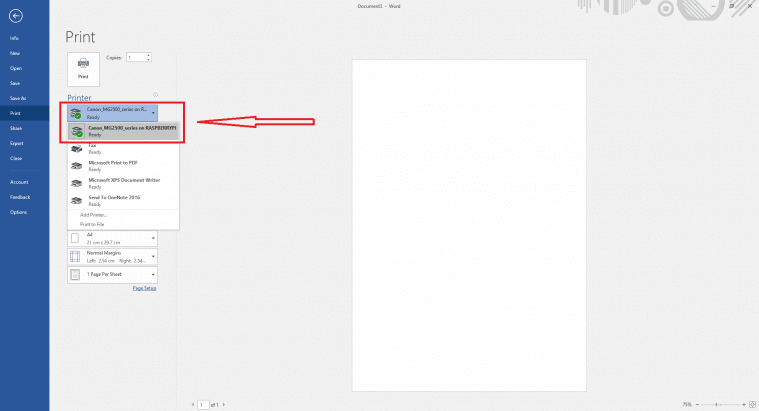
If you have any issues with the file printing, ensure that you have selected the correct printer driver in both CUPS and Windows.
Make sure your printer is also switched on, some printers like the Canon MG2500 series don’t automatically turn back on when a file is sent to it to be printed.
You can extend your Raspberry Pi print server further by adding Apple AirPrint support to it.
Conclusion
I hope that this tutorial has shown you how to set up a Raspberry Pi print server and that you haven’t run into any issues.
If you have some feedback, tips or have come across any issues that you would like to share, then please don’t hesitate to leave a comment below.


I’m trying to set up a PiZeroW to print to a Brother laser printer (HL-2035).
When I print to it, the job shows up on the queue, and then reports itself complete, and the ‘data ready’ light shows on the printer, but nothing actually prints.
The printer is fairly old, but it’s ok printing from macOS, so I’m guessing it’s a setting somewhere in the print driver (or Stretch?) settings. From prehistoric experience trying to get printers working in RSX-11 I’ve tried sending LOTS of data in case it just needed a full page buffer, but to no avail.
I’d welcome any advice you can give.
Very useful guide. A couple of additional points I noticed.
First, if you don’t have a linux/arm printer driver (as I didn’t for my Brother HL-1110) then you won’t be able to print locally on the pi. You also won’t be able to print remotely by the default (bonjour) option from Mac OS
However, you will be able to print remotely over Samba from Windows, since it uses its own driver. Also, if you install the printer using the “windows” option on Mac, and obtain a native Mac driver, that should work too.
The second gotcha I encountered was it took me a while to realise I needed to add a user to samba (with smbpasswd -a) before I could connect from Mac.
I haven’t been able to find the Answer to this question anywhere. Is it possible to have this kind of print server look at a folder and automatically print files that are delivered to that folder?
Help, I have setup a print server with success and on a separate box set up a WiFi access box with success. Question can I merge both into one box? thanks for the support.
Hey Ron,
It should be possible, there is no real conflicting software or confiugrations but I haven’t tried this myself so I can’t say it will work for certain.
Cheers
I have the Pi setup and the printer added along with a good test print. when I try to connect to the Pi print server from a Win10 system I see the PI but the printer will not popup when I dbl click, after it times out Winows want to scan for an solution which it never does.
Good guide! It worked perfectly when printing from a pc but my mac keeps giving me an error: “File “/usr/lib/cups/filter/brlpdwrapperdcp195c” not available: No such file or directory”. Any ideas?
Great guide. Am I out of luck if my printer is not on CUPS? I have a Canon mf216n (imageclass). I looked around and I did find a set of debian drivers for it, but they are not for the ARM architecture…
As a workaround, I am currently using your guide to turn my RasPi into a wifi bridge(wish me luck), but I would rather the print server option. I think if I can get the printer to use the RasPi’s wireless I could get the other PCs on my network to print from it…
If that doesn’t work, would the Windows IoT be an option? Or maybe having the x86 emulator, would it accept drivers too, or just apps?
Thanks,
Alex
Hello, I followed your tutorial and I am able to print. But I a specific problem: I need to make some settings to the printer in windows, but the settings are not saved. It seems that I am not allowed to saved the setting, some kind a policy restrictions.
Can you help me?
Greetings Christian
My guess would be it has something to do with these lines in the SAMBA config file…
# Un-comment the following and create the profiles directory to store# users profiles (see the "logon path" option above)
# (you need to configure Samba to act as a domain controller too.)
# The path below should be writable by all users so that their
# profile directory may be created the first time they log on
;[profiles]
; comment = Users profiles
; path = /home/samba/profiles
; guest ok = no
; browseable = no
; create mask = 0600
; directory mask = 0700
I should qualify that with saying I have only just got my Pi, so am by no means any sort of expert and may be completely wrong!
Hi Gus,
You have no idea how helpful this was. I have been trying to add my old networked laser printer for days. Tried everything I could from other posts and documents with no avail.
Following your instructions and it worked first time.
Thanks,
SAul
Gus, this was very helpful. I did have one minor issue with step 4 in the ‘Adding a Raspberry Pi Print Server to Windows’ section. I had to click ‘Windows Update’ before being able to locate the proper driver.
I get this message from admin when I press add printer 🙁
“Upgrade Required
You must access this page using the URL
https://..."I tried this:
openssl req -new -x509 \-keyout /etc/cups/ssl/server.key \
-out /etc/cups/ssl/server.crt -days 3650 -nodes
Then I added “DefaultEncryption Never” to
/etc/cups/cupsd.conf/etc/init.d/cupsys restartWorks, but probably not a safe thing to do.
After creating the certificate
openssl req -new -x509 \-keyout /etc/cups/ssl/server.key \
-out /etc/cups/ssl/server.crt -days 3650 -nodes
add these lines to
/etc/cups/cupsd.confDefaultEncryption RequiredServerCertificate /etc/cups/ssl/server.crt
And it works for me. Just upgraded years old raspbian.
In Step 4 under Setting up SAMBA for the Pi Print Server I am getting the following error line:
sudo /etc/init.d/samba: command not found.
I was able to get SAMBA to load and I verifed/modifed the required for Step 3
Any ideas? First time using this and little knowledge of programming etc,
Thank you
Interesting, that error indicates that it isn’t installed correctly or not at all. If you run
sudo apt-get install sambaagain does it say all the packages are installed?Did ad you say and now everything is working great, thank you for the help and the great tutorial
I would like to know if there’s a possibility to create a scanner server alongside this one, for the 3 in 1 printers.
Hi Omar, I’m exploring this too and it seems adding the scan server is harder. First get the print server going then look at scanning.
If the multi unit scanner in question is able to scan to an SMB share than it should (dangerous word!) work. I have a Samsung multi-function unit that functions in this manner.
The best write up guide out there!!!! Great work. Is it possible to get CUPS configured within raspberry to authenticate and integrate with windows Active Directory. Any assistance/suggestions will be highly appreciated.
I got all the way to the driver selection in File Explorer, and then I keep getting an error when selecting a driver, whether I pick a similar one from the list or I point it to the file I downloaded myself. It just keeps giving me a “Windows couldn’t connect to the printer. Check the printer name and try again. If this is a network printer, make sure that the printer is turned on, and that the printer address is correct” error. Any thoughts?
Did you ever sort this out? I’m having the same problem…
I am experiencing a similar problem. I am on ubuntu.
I had to reinstall and re-select a Linux driver for my old printer. I found the link to the driver and installation instructions via openprinting.org. Only then was I able to print directly from my Pi and have it share the printer over my LAN.
Don’t forget to reboot your Pi after adding it with CUPS. Also, if your working with an old HP, you may also have to install multiple versions if you unplugged the printer.
I didnt manage to get samba share working but I adding printer through ipp worked fine
https://wiki.archlinux.org/index.php/CUPS/Printer_sharing#Sharing_via_IPP
Would like to do this running a PI Zero headless once setup is done. Are there problems with corrupting the SD card if power is simply switched off when the printer in not in in use?
How would you set this up to print from a Chromebook?
@Gus:
Very nice write-up, Gus. Very well articulated. Super idea for all those cheap USB only printers on the market.
@Ian Huntly:
The simple grace in Gus’ article is that once the new network capable printer is on the LAN, connecting to it from a Mac or Windows is just like any other printer. Go to printer settings on your Mac, add the correct make/model of printer and use its network address or share name as it’s location.
Lovely tutorial – thank you.
Presumably, it is even easier to implement on a Mac. Do you know where I can get this info, please?
Cheers
Ian
I was sent this way via Recantha’s blog.
An extension for this project would be using a transistor across the power button on the printer to allow remote control of the power, and mounting the Pi on the back of the printer.
Keep the projects coming
Greg