In this tutorial, we will show you how you can share files from your Raspberry Pi using the Network File System (NFS) protocol.
The Network File System (NFS) protocol was initially developed by Sun Microsystems back in 1983. It was designed as a method for allowing a client computer to access files over a network.
Thanks to the NFS protocol being an open standard that’s defined in RFC, anyone can implement it easily. It has become well used for network administrators setting up a NAS.
Throughout this tutorial, we will walk you through the process of installing the required packages to get the NFS protocol running on your Raspberry Pi.
On top of that, we will show you how to share directories using the NFS protocol.
Lastly, we will show you how to then connect to your Raspberry Pi’s NFS share from both Windows and Mac OS X operating systems.
If you’re ready to get started, then you can find the full tutorial right below.
Equipment
Below is all the equipment that you will need for setting up NFS on your Raspberry Pi.
Recommended
- Raspberry Pi Amazon
- Micro SD Card Amazon (8GB+)
- Ethernet Cable Amazon or Wi-Fi Amazon
- External Hard drive Amazon
Optional
Note: The USB ports on the Raspberry Pi might not be enough to power an external drive so you might need to invest in a powered USB hub.
Setting up Network File System (NFS) On your Raspberry Pi
1. The first thing we must do before we proceed with setting up the Network File System (NFS) protocol on our Raspberry Pi is ensuring all packages are up to date.
To do that on the Raspberry Pi OS operating system, run the following command.
sudo apt update
sudo apt upgradeCopy
2. With the Raspberry Pi up to date, we can go ahead and install the packages that we will be relying on for the NFS share.
In this guide, we will require the use of the “nfs-kernel-server” package. This package builds the foundation of serving files over the NFS protocol from our Raspberry Pi.
The “nfs-kernel-server” package handles the server side of the NFS protocol and allows us to share drives easily.
To install these packages, we need by running the following command.
sudo apt install nfs-kernel-server -yCopy3. Now that we have installed the NFS server-side software, we can now proceed to set up an NFS share on the Raspberry Pi.
For this guide, we will be just making a directory within the “/mnt/” directory called “nfsshare“.
If you have already mounted a drive or want to share a different directory make sure you replace “/mnt/nfsshare” in the next few sections of the tutorial with the directory you wish to use.
sudo mkdir /mnt/nfsshareCopy4. The next thing we need to do is assign the correct rights to the folder we want to share on the network.
To do this, we will be using the following three commands. Each of these commands has a particular purpose.
The first command gives ownership of all the files and folders contained within the directory to the “pi” user and the “pi” group.
The second line searches for all directories within our “/mnt/nfsshare” folder and runs the chmod command to give each directory “755” (Read/Write/Execute for Owner, Read/Execute for Group and Other) permissions.
The third line does a similar thing, but instead searches for all files within the directory and applies “644” (Read/Write for Owner, Read for Group and Other) permissions to the file.
For a better understanding of permissions, be sure to check out the Linux permissions tutorial.
sudo chown -R pi:pi /mnt/nfsshare
sudo find /mnt/nfsshare/ -type d -exec chmod 755 {} \;
sudo find /mnt/nfsshare/ -type f -exec chmod 644 {} \;Copy
5. Next, we will need to retrieve both the “gid” (Group id) and “uid” (User id) for the user that you want to use for accessing the files. You can do this by running the command below.
For this tutorial, we will be just using the “pi” user, but you can utilize this for any user you want.
id piCopy6. From the previous command, you should get a result as we have shown below.
Make a note of the gid and uid values as you will need these for a step later on.
uid=1000(pi) gid=1000(pi) Copy7. Now that we have everything we need and have prepared a folder to share. We need to go ahead and modify the “exports” file by running the command below.
The Raspberry Pi NFS server software that we installed earlier reads from this file to know what directories to share out over the NFS protocol.
sudo nano /etc/exportsCopy8. Here is where things get a little bit more complicated.
If you want to share the folder so that anyone can gain access to the folder and read and write to it, you can insert the following line without any worry.
We will break down this line further so you can understand what it does, you can, however, read the documentation on the NFS “exports” file.
Make sure that you replace the “anonuid” with the “uid” value you retrieved in step 6, and replace the “anongid” with the “gid” value you also retrieved in step 6.
/mnt/nfsshare *(rw,all_squash,insecure,async,no_subtree_check,anonuid=1000,anongid=1000)Below is our breakdown of the line so that you get an understanding of what it is doing.
/mnt/nfsshareThis part of the line defines the directory that we want to share. In our case, this is the “/mnt/nfsshare” folder that we created earlier.
*(NTFS Options)This asterisk defines that all connecting IP addresses should be allowed to access this share. You can change this to allow specific IP’s or an IP range by changing the “*” to the IP.
To allow all IP’s from “192.168.0.0” to “192.168.0.256“, we can replace the asterisk with “192.168.0.0/24“.
All the options contained within the brackets are applied just for that IP address, you can define multiple different IP’s each with their own set of options.
(rw,all_squash,insecure,async,no_subtree_check,anonuid=1000,anongid=1000)rw– This option allows both read and write requests on the NFS volume.all_squash– This option will map all uids and gids to the anonymous user.insecure– This option allows clients with an NFS implementation that doesn’t use a reserved NFS port.async– This option allows the NFS server to break the NFS protocol to improve performance at the cost of data potentially becoming corrupted if the server crashes.no_subtree_check– This disables subtree checking, while it comes at a cost to security it can improve the reliability of the NFS server. You can read more about this on the exports documentation page we linked earlier.anonuid– This is the UID to utilize for a user that is connecting anonymously.anongid– This is the GID to use for a user that is connecting anonymously.
9. Once you have entered the line, you can then proceed to save the file by pressing CTRL + X then Y followed by ENTER.
10. Now for our newly added folder to be accessible through the NFS protocol, we must run the “exportfs” package by running the command below.
This application updates the current table of exports available to the NFS server.
sudo exportfs -raCopy11. In addition to running the “exportfs” package we must also restart the NFS Kernel server module.
We can restart this service by using the following command in the terminal.
sudo systemctl restart nfs-kernel-serverCopy12. The last thing we need to do is retrieve our Raspberry Pi’s local IP address by running the hostname command below.
You will need to ensure your Pi is connected to network by either setting up the Wi-Fi or using an ethernet cable.
We need this IP address so that we can successfully connect to the Raspberry Pi NFS server.
hostname -IConnecting to your Raspberry Pi’s NFS Share on Windows
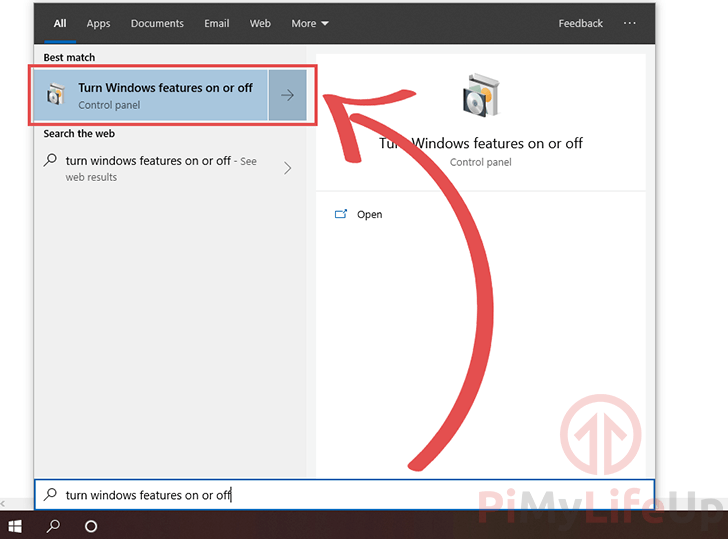
1. To interact with NFS shares on Windows, we need first to enable the NFS client. By default, this feature is disabled on Windows installations.
To do this, you must search for “turn windows features on or off” within Windows and click the “Turn Windows features on or off” option that appears as shown below.
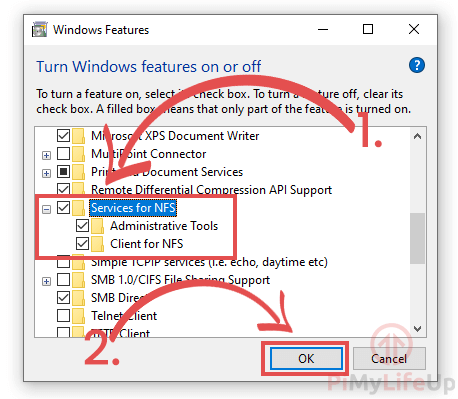
2. Within this menu, search for the “Services for NFS” (1.) folder and click the checkbox to enable all available features.
Once done, click the “OK” button (2.) to finalize the settings. Your windows installation will proceed to set up everything that is required to connect with an NFS share.
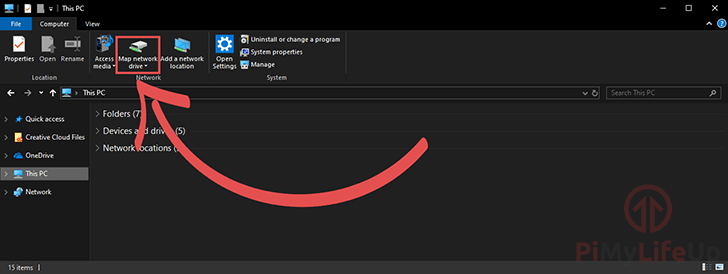
3. Now open up file explorer, and you should be able to see the “Map network drive” option.
Click this option to continue the process of connecting your Raspberry Pi’s NFS share to your computer.
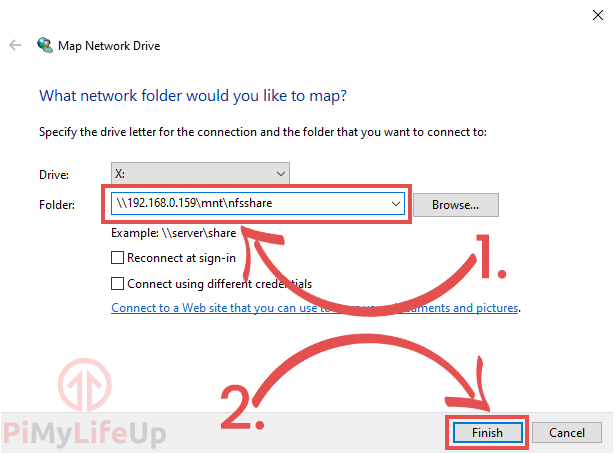
4. On this screen, you need to enter your Raspberry Pi’s IP address followed by the folder we mounted to the NFS Share (1.).
For example, with our Raspberry Pi’s IP address being “192.168.0.159” and the folder we set up is at “\mnt\nfsshare“. The “folder” that we will be “\\192.168.0.159\mnt\nfsshare“.
Once entered, click the “Finish” button (2.) to finalize the connection.
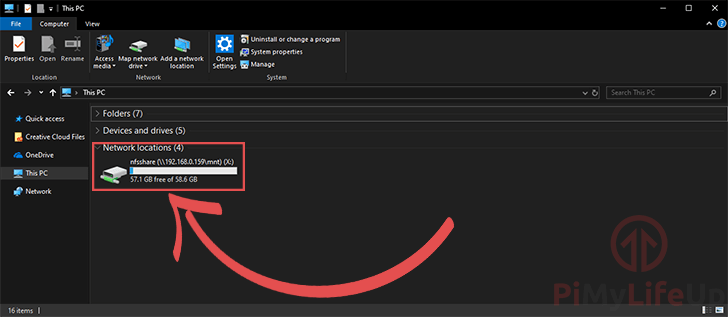
5. You should now be able to see your shared Raspberry Pi NFS folder under “Network Locations” or “Network” on your Windows device.
Connecting to your Pi’s NFS Share on Mac OS X
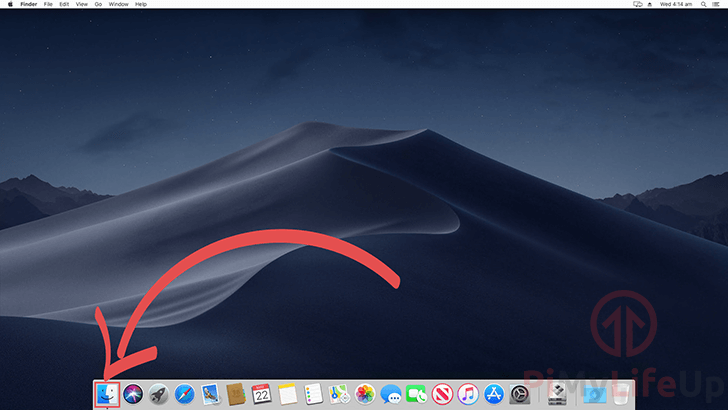
1. Now it’s time to connect to your Raspberry Pi’s NFS Share on MAC OS X, and you will have to start by opening up the Finder application.
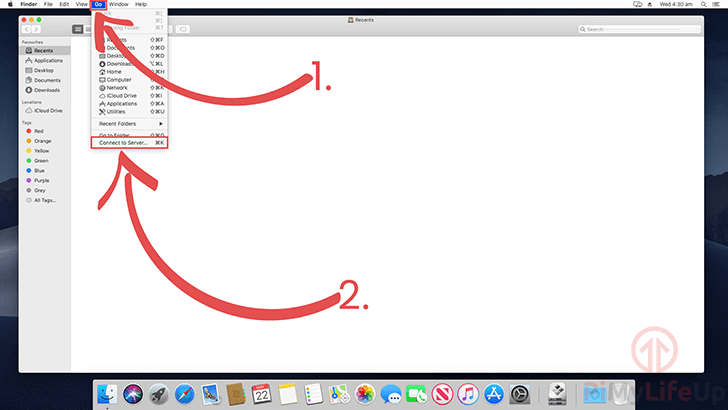
2. With the “Finder” application open, click “Go” (1.) in the toolbar at the top of the screen and then click the “Connect to Server...” (2.) option.
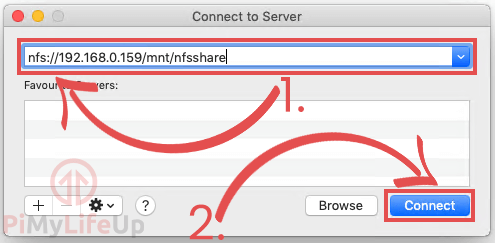
3. Next, you will be required to enter the address that you want to connect to (1.).
The address that you need to enter into this is a combination of the “nfs:\\” protocol, followed by your Raspberry Pi’s IP address. Lastly, it ends with the directory that you are trying to access.
For example, with the IP “192.168.0.159” and the folder we shared on the Pi being “\mnt\nfsshare” the address we would enter is “nfs:\\192.168.0.159\mnt\nfsshare“
Once done, click the “Connect” button (2.) to link the shared volume.
4. If a connection is successful, you will see a new window that shows you the inside of the folder that you shared using the NFS Protocol on your Raspberry Pi.
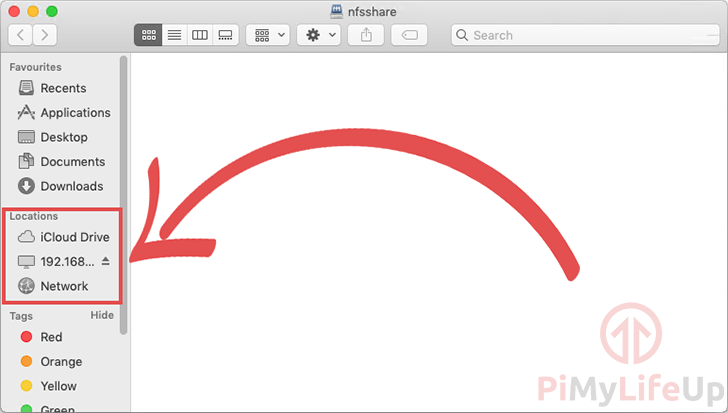
You can also find the folder again by looking in the “Locations” section in the Finder sidebar.
Conclusion
By now you should have your Raspberry Pi NFS server setup and accessible on the network. Hopefully, you will be able to easily connect to it using a Windows PC or a Mac OS X computer.
Be sure to also check out our guide on connecting to an NFS server on your Raspberry Pi.
If you have any feedback, tips, or anything else, then please don’t hesitate to leave a comment below.


Great writeup. I had been playing with NAS shares using samba, but NFS looks more clean and clear to implement. Moreover, it can be used as NFS shared datastores with my virtualized lab. Thank you!
This is a great tutorial. But after Step 10, you need to restart the server for the changes to take effect:
sudo systemctl restart nfs-kernel-server
Hi David,
Thank you for the heads up about that. I have updated the tutorial to include that step.
Kind regards,
Emmet
this doesnt appear to work on the windows side of things, nor do i have the feature nfs windows enable box…does this work on win10 home edition?
Hi Bubba,
Unfortunately, it looks like NFS is not supported in the home edition of Windows 10.
Cheers,
Emmet
Can I use these instructions for a Pi4, running LibreElec ?
Hi Andrew,
Sadly LibreElec doesn’t provide enough OS to follow these instructions. As it bills itself, it basically provides just enough of Linux to be able to run Kodi.
You can’t install any additional packages to the OS as its not setup for that.
Cheers,
Emmet
Thank you server side worked fine!