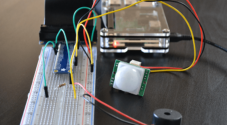
In this guide, you will learn how to set up Porcupine on your Raspberry Pi to enable wake word detection.

Porcupine is a wake word detection engine developed by the team at Picovoice.
Hotword/Wake word detection is what is used to listen for a keyword and then prepare a program for potentially more actions.
Both Google Assistant and Alexa make use of these. For example, when you say “Alexa“, it wakes up the device and tells it to listen for your command.
The tough part of a hotword detection engine is to utilize it as little processing power while continually listening for that keyword.
In our tutorial, we show you how to implement the wake word section of this using Porcupine. So that when you say a specific word, you can make an action happen.
Porcupine is designed to be highly accurate while managing to be lightweight, a perfect combination for our Raspberry Pi.
One of the biggest downsides to Porcupine is that it will not allow you to create hot words for the Raspberry Pi without an enterprise license.
Instead you will have to rely on the inbuilt wake words such as “americano“, “blueberry“, “bumblebee“, “grapefruit“, “grasshopper“, “picovoice“, “porcupine“, and “terminator“.
Equipment
Below is the full list of equipment that you will need to complete this tutorial on installing Porcupine on the Raspberry Pi.
Recommended
- Raspberry Pi Amazon
- Micro SD Card Amazon
- Ethernet Cable Amazon or Wi-Fi Amazon
- Power Supply Amazon
- USB Microphone Amazon
- Speakers Amazon
Optional
We tested this tutorial on a Raspberry Pi 4 running the latest version of Raspberry Pi OS Lite edition (Buster release).
Preparing your Raspberry Pi’s Audio Config for Porcupine
In this section, we will be setting up the audio configuration on your Raspberry Pi. Doing this will help the Porcupine wake worddetection pick the right devices to utilize.
1. Let us start by retrieving the card and device numbers for our microphone.
To be able to do this, we need to make use of the following command.
arecord -lFrom this command, you will get a response, as we have below. Make sure you make a note of the card number and device number for your microphone.
**** List of CAPTURE Hardware Devices ****
card 2: Microphone [Yeti Stereo Microphone], device 0: USB Audio [USB Audio]
  Subdevices: 1/1
  Subdevice #0: subdevice #0
2. While not needed for this tutorial, we should also retrieve the device and card numbers for the audio output.
To retrieve these numbers for your audio outputs, enter the following command.
aplay -lBelow is a sample of the output that you will get from this command. Make a note of your card and device numbers for your desired output.
**** List of PLAYBACK Hardware Devices ****
card 0: b1 [bcm2835 HDMI 1], device 0: bcm2835 HDMI 1 [bcm2835 HDMI 1]
  Subdevices: 4/4
  Subdevice #0: subdevice #0
  Subdevice #1: subdevice #1
  Subdevice #2: subdevice #2
  Subdevice #3: subdevice #3
card 1: Headphones [bcm2835 Headphones], device 0: bcm2835 Headphones [bcm2835 Headphones]
  Subdevices: 4/4
  Subdevice #0: subdevice #0
  Subdevice #1: subdevice #1
  Subdevice #2: subdevice #2
  Subdevice #3: subdevice #3
Please note that the Raspberry Pi’s 3.5mm-jack will be labeled as Analog, bcm2835 ALSA, or bcm385 Headphones.
The HDMI output should be identified as bcm2835 IEC958/HDMI.
3. Once you have all the values on hand, we can go and modify the ALSA configuration file.
Run the following command to begin creating the .asoundrc file in the Pi user’s home directory.
nano /home/pi/.asoundrc4. Within this file, we need to enter the following lines. These lines are what will set up our audio driver and help it know what devices it should be interacting with.
Within this code, make sure that you replace <card number> and <device number> with the values you recieved in step 1 and step 2.
pcm.!default {
  type asym
  capture.pcm "mic"
  playback.pcm "speaker"
}
pcm.mic {
  type plug
  slave {
    pcm "hw:<card number>,<device number>"
  }
}
pcm.speaker {
  type plug
  slave {
    pcm "hw:<card number>,<device number>"
  }
}
5. Once you have finished entering the lines, save by pressing CTRL + X then Y and finally ENTER.
Installing the Porcupine Wake Word Detection Libraries
In this section, we will be showing you how to install the Porcupine Python libraries on to your Raspberry Pi and verify that it is working.
1. Before installing Porcupine to our Raspberry Pi, we need to ensure everything is up to date.
To update the operating system, run the following two commands.
sudo apt update
sudo apt full-upgrade
2. Next, let’s install the packages that we require to run the Porcupine software.
These packages mainly include Python and the port audio libraries.
Install the packages we need by running the following command.
sudo apt install python3 python3-pip python3-all-dev python3-pyaudio portaudio19-dev libsndfile13. Let us now use the Python package manager to download the porcupine libraries.
Run the following command to install the library.
sudo pip3 install pvporcupinePlease note that this process can take some time as there are numerous packages that the software relies on.
4. Let us now test that the Porcupine wake word engine is working by running the following command.
pvporcupine_mic --keywords porcupineRunning this command will run the Porcupine engine. Now all you need to do is say the word “porcupine“.
Once it detects that this keyword has been said, you will see the text below appear in the command line.
detected keywordThis response indicates that the Porcupine software has successfully listened to your microphone and has detected the keyword.
Using Porcupine within Python
In this section, we will be showing you how you can use the Porcupine hotword detection library within Python on your Raspberry Pi.
As you will quickly see, this is a reasonably straightforward library to use, and you will be able to implement wake word detections with just a few lines of code.
If you want to learn more after you have finished this guide, be sure to check out our Python guides.
1. Let us start this off by creating a new Python within our home directory called “pimylifeup_voicedetector.py“.
Begin writing this script by running the command below.
nano pimylifeup_voicedetector.py2. Within this file, enter the following lines of code.
We will explain what each part of the code does as we enter it.
A. The first thing we should add to this file is the “shebang”.
#!/usr/bin/env python3This line helps tell the operating system that it needs to use the Python 3 interpreter to interpret our script.
B. To start this code, we need to import the packages that we will be relying on.
Each of these packages is important to our wake word detection script that we will be running on our Raspberry Pi.
import struct
import pyaudio
import pvporcupine
The first package we import, struct is used to unpack our audio input into something Porcupine expects.
Our second import, pyaudio, allows us to create an audio stream from the microphone connected to our Raspberry Pi that we can feed into the Porcupine detection engine.
The final import is one of our most important ones. The pvporcupine library allows us to interact with the Porcupine software to listen for hotword detections in real-time.
C. Our next step is to create some variables to store handles for Porcupine, PyAudio, and our audio stream created by PyAudio.
porcupine = None
pa = None
audio_stream = None
We do this so that we can cleanly shut down everything if something goes wrong with the script or is terminated.
D. Next, we need to start the following section with the try statement.
try:All the following sections will need to be slightly indented. A try statement allows us to cleanly bail out if something causes the script to terminate or crash.
E. With all our imports in place, we can now create a porcupine to the Porcupine library.
porcupine = pvporcupine.create(keywords=["picovoice", "blueberry"])This .create() function creates a handle to the Porcupine wake word detection libraries that we can feed our audio into.
Within this call, we can specify the keywords that we want to be listening for.
As we are stuck with the ones provided by Picovoice, it will need to be one of the following: “americano“, “blueberry“, “bumblebee“, “grapefruit“, “grasshopper“, “picovoice“, “porcupine“, and “terminator“.
For our example, we will be specifying the keywords, “picovoice” and “blueberry“.
Now is a good time to note that Porcupine is fully capable of listening for multiple keywords.
If you wanted to listen for all of the possible keywords, you can use keywords=pvporcupine.KEYWORDS instead.
F. On our next line, we need to use pyaudio to create a handle that will allow us to interact with the PortAudio.
pa = pyaudio.PyAudio()We store the handle provided by the PyAudio library in our pa variable and use it to listen in to the microphone.
G. We immediately put the handle provided by PyAudio to use by opening an audio stream.
    audio_stream = pa.open(
                    rate=porcupine.sample_rate,
                    channels=1,
                    format=pyaudio.paInt16,
                    input=True,
                    frames_per_buffer=porcupine.frame_length)
To create this audio stream, we feed in some information provided to us by the Porcupine library.
We sate the sample rate to the one provided to us from our Porcupine handle.
We also set the amount of number frames per buffer to the amount that the Porcupine software expects. This value is typically 512 frames.
In addition to this, there is a couple of other things we pass into the audio stream we are opening. We force the channels to 1, set it so that we are expecting input, and set the audio format to a “short” (INT16).
H. Now that we have prepared both our audio stream and created a handle to the Porcupine wake word detection library we need to start an infinite loop.
while True:All we need to create an infinite loop within Python is to use a while loop, followed by True. As the value is forever true, the loop will run until the script has been forcefully terminated.
Remember that the following sections will all need to be indented as they will belong to our loop.
I. Every time we loop, we will need to read in some data from our audio stream.
        pcm = audio_stream.read(porcupine.frame_length)
        pcm = struct.unpack_from("h" * porcupine.frame_length, pcm)
We use the audio stream we created earlier to read in input from our microphone, specifying the frame length provided from Porcupine.
After we have received the audio data back, we then use the unpack_from function to unpack the audio data into what the wake word detection engine expects.
We store these resulting values into our pcm variable.
J. At this stage, we can get the Porcupine wake word detection to process the audio stream we just grabbed.
keyword_index = porcupine.process(pcm)We need to utilize the .process() function from our Porcupine handle and pass in our audio data stored in the pcm variable.
If there are multiple keywords defined, this function will return the index of the detected keyword. This index is based on the order of the array or input file, with the first keyword being index 0.
If you only have one keyword defined, then this function will return True if detected.
If no keyword has been detected, then the Porcupine process function will return -1.
We store this value into our keyword_index variable.
K. Next, we can finally check to see whether our keyword was detected.
        if keyword_index >= 0:
            print("Hotword Detected")
If the wake word processor has returned a greater or equal value to 0, we can consider that our hotword was detected.
In our example, if the right conditions have been met, we print the text “Hotword Detected“.
L. Now that we have finished up the brains of our code, we need to end it with the finally: statement.
finally:By using “finally” after the “try” we will be able to run a few things that clean up all the handles that we created.
These statements should be fired even if something within the try causes the Python script to crash.
M. The first thing we will do within our finally statement is clean up the Porcupine library.
This part is extra important as the Porcupine library does not rely upon the garbage collector.
    if porcupine is not None:
        porcupine.delete()
You will see that before we clean up Porcupine, we first make sure that its variable porcupine is still not set to None.
If it is set to None it will mean that the handle was never created, and running the .delete() function will cause another crash.
N. Next, we need to make sure we close our audio stream.
    if audio_stream is not None:
        audio_stream.close()
Like with our porcupine handle, we need to make sure that audio_stream is still not set to its default value.
If something has been set, we call the .close() function on the stream to clean it up and stop the connection with the microphone.
O. The last thing we need to do is check our PyAudio handle.
    if pa is not None:
            pa.terminate()
Again, we only try to clean up the handle if it has had a value assigned to it. In this case, we need to use PyAudios .terminate() function to clean it up.
3. If you have entered everything correctly, you should end up with the following code.
#!/usr/bin/env python3
import struct
import pyaudio
import pvporcupine

porcupine = None
pa = None
audio_stream = None

try:
    porcupine = pvporcupine.create(keywords=["picovoice", "blueberry"])

    pa = pyaudio.PyAudio()

    audio_stream = pa.open(
                    rate=porcupine.sample_rate,
                    channels=1,
                    format=pyaudio.paInt16,
                    input=True,
                    frames_per_buffer=porcupine.frame_length)

    while True:
        pcm = audio_stream.read(porcupine.frame_length)
        pcm = struct.unpack_from("h" * porcupine.frame_length, pcm)

        keyword_index = porcupine.process(pcm)

        if keyword_index >= 0:
            print("Hotword Detected")
finally:
    if porcupine is not None:
        porcupine.delete()

    if audio_stream is not None:
        audio_stream.close()

    if pa is not None:
            pa.terminate()
4. If all the code looks correct, you can save the file by pressing, CTRL + X, followed by Y, then ENTER.
5. With the script written, we can now test it to see that it is working.
To do this, all we need to do is use python3 followed by our script name pimylifeup_voicedetector.py
python3 pimylifeup_voicedetector.py5. With the script running every time you mention one of the defined wake words, you should see the following text appear.
Hotword DetectedIf you followed our tutorial exactly, these keywords should be “picovoice” or “blueberry“.
Hopefully, at this stage of the tutorial, you will now have a solid understanding of how to use the Porcupine wake word engine on your Raspberry Pi.
If you have run into any issues with this guide, feel free to leave a comment below.
Be sure to check out some of the other cool Raspberry Pi projects that we have on show.


This tutorial worked perfectly and really helped me out- thank you.