In this guide, we will be walking you through the process of using a microphone with the Raspberry Pi.
One of the components that most people will notice is missing from a Raspberry Pi is the lack of any analog inputs.
To make use of a microphone with the Raspberry Pi, you will need to do one of two things.
Purchase a USB microphone or a USB soundcard. A USB microphone is likely a cheaper, easier way to get a microphone working with your Raspberry Pi.
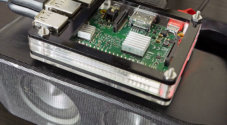
You could alternatively purchase a HAT that extends the Raspberry Pi’s audio capabilities by adding an analog input. Sometimes this option can provide you with better audio quality, but it entirely depends on the microphone you are using.
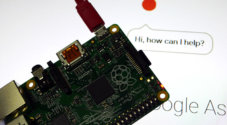
There are various projects that a microphone comes in handy with, such as setting up your Raspberry Pi as an Alexa or Google assistant.
There are a couple of different reasons that the Raspberry Pi does not feature any support for a microphone in its hardware.
- Limited space on the board. An additional 3.5mm jack takes up quite a large amount of space on the board that can be used for other things.
- A price limit. The Raspberry Pi is aimed at being an affordable board; reducing components helps keep the price down.
Equipment List
Below is a list of equipment that you will need to get a microphone working with the Raspberry Pi.
Recommended
- Raspberry Pi Amazon
- Micro SD Card Amazon
- Power Supply Amazon
- Ethernet Cable Amazon or Wi-Fi Amazon
- USB Microphone Amazon or USB Sound Card Amazon
Optional
- Raspberry Pi Case Amazon
We last tested out this tutorial on setting up a microphone using a Raspberry Pi 5 running the latest release of Raspberry Pi OS Trixie.
Connecting a Microphone to the Raspberry Pi
There are three different ways you can connect a microphone to your Raspberry Pi.
Most methods are plug-and-play, but we will quickly run over the various ways you can connect a microphone.
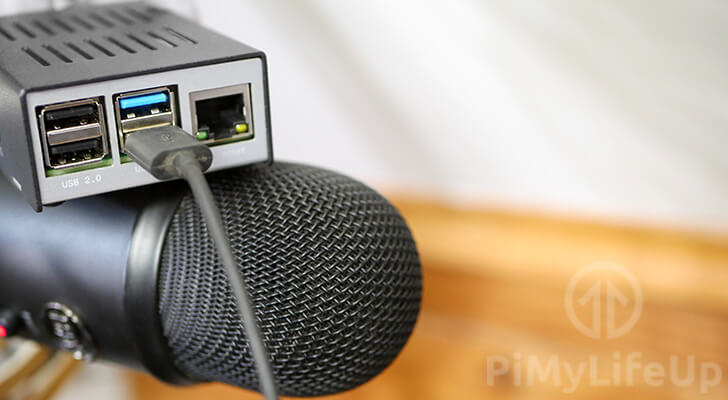
USB Microphone
USB Microphones are the easiest way of getting a microphone working with your Raspberry Pi.
One of the most significant advantages of using a USB microphone is that it is plug and play.
The Raspbian operating system will automatically detect the microphone when its plugged in.
In some cases, you will need to modify the .asoundrc file to help the Alsa sound driver understand which device it should be using.
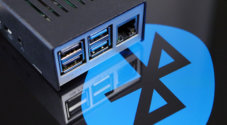
Bluetooth Microphone
Connecting a Bluetooth microphone makes things a little bit more complicated. For this to work, you will need to be either using a Raspberry Pi 3 or newer or be making use of a USB Bluetooth receiver.
To connect your microphone to your Raspberry Pi, you can follow our guide on dealing with Bluetooth devices.
Once you have paired the microphone, you should be able to use it just like your USB microphone.
3.5mm Microphones
While the Raspberry Pi does not feature any 3.5mm jacks for connecting an analog microphone, there are ways to work around this.
USB Soundcard
One of the cheapest ways of connecting your microphone to a Raspberry Pi is to make use of a USB soundcard.
What a USB soundcard does is convert the analog 3.5mm connection to a digital signal that can be sent over the USB connection.
These are super straightforward to use and are plug-and-play. The Raspbian operating system should be able to work automatically
Configuring Alsa on your Raspberry Pi for your Microphone
Before we begin this section, make sure that you have your microphone plugged into your Raspberry Pi. Whether that be through a USB soundcard, a HAT, or by using a USB microphone.
1. Let’s go ahead and update our operating system by running the following two commands.
Before we set up our microphone with our Raspberry Pi, we should ensure all our packages are up to date.
You can ensure your system is up to do by running the commands below within the terminal.
sudo apt update
sudo apt upgradeCopy
2. With the operating system up to date, let’s go ahead and identify our microphone, as seen by the Alsa driver.
To see all the available recording devices, we need to run the following command.
arecord -lCopy3. From this command, you should see something like below appear in the terminal.
The two things you need to pay attention to are the “card” and “device” numbers. Based on our example, our card would be “1” and our device “0“.
Once you have identified your microphone’s device numbers, proceed to the next step. If nothing appears, then make sure you have plugged your device in properly.
**** List of CAPTURE Hardware Devices ****
card 1: Microphone [Yeti Stereo Microphone], device 0: USB Audio [USB Audio]
  Subdevices: 1/1
  Subdevice #0: subdevice #0
4. With our device and card numbers now handy, let’s go ahead and create a configuration file for Alsa.
This configuration file will help the Alsa driver understand what device it should be using for capturing audio on our Raspberry Pi.
Begin modifying the file by running the following command.
nano ~/.asoundrcCopy5. Within this file, enter the following text.
These lines define the default capture device and its settings. By providing our device and card numbers, the Raspberry Pi can easily select the correct microphone to capture audio.
Make sure that you replace “[card number]” and “[device number]” with the values you retrieved in step 3 of this section.
pcm.!default {
  type asym
  capture.pcm "mic"
}
pcm.mic {
  type plug
  slave {
    pcm "hw:[card number],[device number]"
  }
}
6. Once done, save the file by pressing CTRL + X, followed by Y, then ENTER.
Recording with your Microphone on your Raspberry Pi
With your microphone connected to your Raspberry Pi, you can now use it to record audio or integrate it into your own projects.
This section will be exploring how we can use the “arecord” tool to record audio from your microphone.
1. To make a recording on your Raspberry Pi using the attached microphone, make use of the following command.
This command will make a recording using the attached microphone and save it as a wav file called “out.wav“.
arecord --format=S16_LE --rate=16000 --file-type=wav out.wavIf you receive an error while running this command, make sure that your microphone is properly plugged in. Also, make sure you have configured everything correctly by verifying the contents of the .asoundrc file.
2. Once you have finished making your recording, you can exit the tool by pressing CTRL + C.
3. You can verify that your microphone made a successful recording by playing it back.
To playback the recording that you just made run the command below. If you can hear your recording, then you have successfully made a recording using your microphone.
aplay out.waveControlling your Microphone Gain on the Raspberry Pi
If you find you are struggling to hear noise recorded by your microphone on your Raspberry Pi, the easiest solution is to increase the gain. There are a few ways you can do this, and one of those is through the software that is running on your Raspberry Pi.
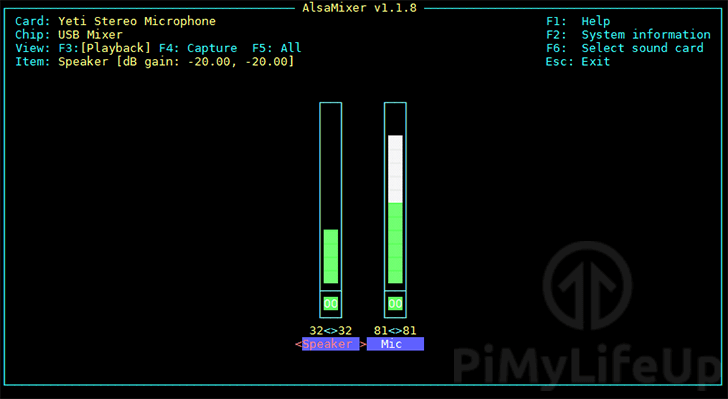
1. To increase or decrease the gain of the microphone connected to our Raspberry Pi we will be using a command line tool called “alsamixer”.
You can launch this tool by running the command below within the terminal.
alsamixer2. Using this tool, you can use the arrow keys to increase and decrease the gain.
If your microphone is unavailable, press F6 to select it.
3. Once you have finished changing the gain for your microphone, you can exit the program by pressing the ESC key.
Conclusion
At this point, you should understand how to set up and use your microphone with a Raspberry Pi.
By far the easiest method is to use a USB microphone, as they are typically plug-and-play; you don’t have to worry about setting up a sound card or dealing with Bluetooth issues.
If you have issues with getting your microphone working or have feedback, feel free to drop a comment below.
Once you have your microphone working, we recommend exploring our many Raspberry Pi projects to see how you can best use it.

Please, am working on speech to text command using raspberry pi zero. I got my USB mic connected but anytime I run my python code on it, it gives ALSA lib pcm error in which I don’t understand anything about it.
The code:
Hi,
Sadly I’m not entirely sure why that would be occuring, ALSA can finnicky so hopefully someone else may have a suggestion for you.
Cheers,
Emmet
Can you be more specific about what to put into this line?
pcm “hw:[card number],[device number]”
I get the following info from the arecord -l command
*** List of CAPTURE Hardware Devices ****
card 2: webcam [webcam], device 0: USB Audio [USB Audio]
Subdevices: 1/1
Subdevice #0: subdevice #0
Do I put in [2] or [card 2: webcam] or something else?
Hi Tachy,
You strictly will want the identifying numbers.
With the data you have shown there you can see that the card number is
2(card 2) and that the device number is0(device 0).So you would use the following.
I hope this helps you out.
Cheers,
Emmet
Thanks, this worked perfectly. My USB microphone is in my webcam, and I was surprised at th sound quality.