In this tutorial, we will show you how to use your Raspberry Pi to send a Wake-on-LAN (WoL) packet to any connected device.
Wake-On-LAN is a functionality that allows you to wake a device by sending a particular packet over the network.
While the Raspberry Pi does not support receiving Wake-on-LAN packets, it is more than capable of sending them.
There are various ways you can utilize this functionality. In our network, we have a Raspberry Pi set up to power back on a NAS after a power outage has occurred. While both are plugged into a UPS, it allows the more power-hungry NAS to safely shut down and be powered back on when everything is safe.
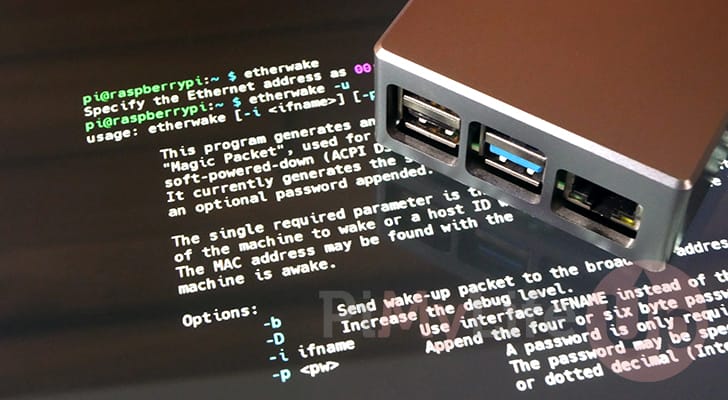
To send Wake-on-LAN packets from your Pi, we will be using a piece of software called etherwake.
Etherwake allows your Raspberry Pi to act as a Wake- on-LAN server and send packets to other devices.
Equipment
Below is a list of equipment we used when setting up our Raspberry Pi as a Wake-on-LAN server.
Recommended
Optional
This tutorial was last tested on a Raspberry Pi 400 running the latest version of Raspberry Pi OS Bullseye.
Preparing your Devices to Accept Wake-on-LAN
Before you begin, you will want to set up your other devices so they can wake when sent a Wake-on-LAN packet from your Raspberry Pi.
These steps will significantly differ from device to device, so we will not cover this in this guide. The best way to set up Wake-on-LAN is through your device’s BIOS. This will allow you to boot the device even if it has been powered off.
Once you have Wake-on-LAN enabled on your target device, you must also know its MAC address so that you can send the message to it.
Most routers will reveal these MAC addresses if you browse their device list.
Setting your Raspberry Pi up as a Wake-on-LAN Server
The following steps will walk you through setting up your Raspberry Pi to work as a Wake-on-LAN Server. We will achieve this by installing a free piece of software called Etherwake.
Installing Etherwake to the Raspberry Pi
To run your Raspberry Pi as a Wake-on-LAN server, we will be relying on the etherwake software. The next few steps will be incredibly straightforward as this software is available through the package repository.
1. Before installing Etherwake to our Raspberry Pi, we must update the package list and the packages themselves.
Update your Raspberry Pi’s operating system by using the following two commands.
sudo apt update
sudo apt upgrade -yCopy
2. Once the update completes, we can install the Etherwake software using the following command.
sudo apt install etherwakeCopyUsing Etherwake on your Raspberry Pi to Wake-on-LAN
3. Once you have etherwake installed on your Raspberry Pi you can put it to use and send Wake-on-LAN packets.
For this to work however, you will need to know the MAC address of the device you want to wake. A MAC address is used to identify network adapters, so your Wi-Fi and Ethernet for example will have different MAC addresses.
You may continue to the next step once you have a MAC address ready.
4. To send a Wake-on-LAN packet from your Raspberry Pi, you only need to use “etherwake” followed by the “-b” option, and finally, the MAC address.
The “-b” option tells etherwake to broadcast the Wake-on-LAN packet to the specified address.
sudo etherwake MACADDRESSCopy5. Now that you know how to etherwake, you can SSH into your Raspberry Pi to wake up various devices on your network.
Just ensure that any device you want to wake has its “Wake-on-LAN” functionality enabled. Not all devices will support this.
Keeping a Device Awake Using Your Raspberry Pi Wake-on-LAN Server
It is possible to use your Raspberry Pi’s Wake-on-LAN server to keep a device awake.
We achieve this by writing a short script that pings a specified IP Address and, once it drops off, sends a Wake-on-LAN packet using the etherwake software we installed to our Raspberry Pi.
Preparing your Raspberry Pi
1. Since we will be writing our script in Python, we must start by ensuring the interpreter is installed on the system.
Install Python by using the following command on your Raspberry Pi.
sudo apt install pythonCopyWriting a Wake-on-LAN Script on your Raspberry Pi
2. Once installed, let us write a Python script called “wake_on_lan_server.py” by using the following command.
By using the tilde (~) symbol in front of the filename, we will save this into your users home directory.
nano ~/wake_on_lan_server.pyCopy3. Now, within this file, enter the following lines of code. We will explain each section as we go so you can understand how it works.
import subprocess, timeWith this first line we import two packages that we will be utilizing within the script.
subprocess– This package will allow us to run programs outside of Python. Using this package, we can use the Etherwake software on our Raspberry Pi to send Wake-On-LAN packets to your devices.time– The time package will allow us to pause the script between loops to prevent it from flooding the device.
def _main():We now define our “_main()” function. When the script is run, this function will be called and will contain our main loop.
while True:Next, let us define an infinite loop by using “while” followed by “True“.
is_alive = subprocess.call(['ping', '-c', '1', "<IPADDRESS>"], stdout=subprocess.DEVNULL, stderr=subprocess.STDOUT) == 0Next, on every loop, we want to call the “ping” command and store the result in the “is_alive” variable. Ensure that you replace “<IPADDRESS>” with the machine’s IP you want to awake.
We control the number of pings that will be attempted by using the “-c” option.
if not is_alive:We now create a new conditional block where we check whether the “is_alive” variable is not true. After this point you could extend the script further by checking additional things such as the status of a UPS before you send the wake command.
            print("Sending Wake Command")
            subprocess.Popen('/usr/sbin/etherwake -b ' + "<MACADDRESS>", shell=True, stdout=subprocess.PIPE)
If the system is not responding to a ping, we start by printing the text “Sending Wake Command” to the command line. We then get the Raspberry Pi to send a Wake-on-LAN request using Etherwake to your MAC address.
Ensure you replace “<MACADDRESS>” with the MAC address of the device you want to wake.
time.sleep(10)Before the Python script loops again, we will put it to sleep for 10 seconds. To speed up how often your Raspberry Pi pings a host, decrease this number
if __name__ == '__main__':
    _main()
The final bit of code we need in our script is what will run the “_main()” function when the Python script is run.
4. The final version of your Wake-on-LAN script should look like the one we have below. If you have issues running the script, ensure the indentation is correct.
import subprocess, time

def _main():
    while True:

        is_alive = subprocess.call(['ping', '-c', '1', "<IPADDRESS>"], stdout=subprocess.DEVNULL, stderr=subprocess.STDOUT) == 0

        if not is_alive:
            subprocess.Popen('/usr/sbin/etherwake -b ' + "<MACADDRESS>", shell=True, stdout=subprocess.PIPE)

        time.sleep(10)

if __name__ == '__main__':
    _main()
Copy
5. Once you are happy with the script, save and quit by pressing CTRL + X, followed by Y, then the ENTER key.
Testing the Script
6. With our simple the script now written, we should test it out to ensure everything works properly.
Running the script is as straightforward as using the following command within the terminal.
sudo python3 ~/wake_on_lan_server.pyCopy7. Now, if you power off the device you want your Raspberry Pi to send a wake-on-LAN signal, you should eventually see the text “Sending Wake Command” appear in the terminal.
If your receiving device has been configured correctly, it will hopefully power on.
Creating a Wake-on-LAN Service for your Raspberry Pi
8. With your little Wake-on-LAN server script written, you will likely want it to start when your Raspberry Pi boots.
To do this, you will need to create a service file. In this case, it will be named “wake-on-lan-server“.
sudo nano /etc/systemd/system/wake-on-lan-server.serviceCopy9. Within this file, type in the following lines.
Ensure that while typing this you replace “<USERNAME>” with the name of your user. The rest of the file should be able to remain the same.
[Unit]
Description=UPS Tracker

[Service]
User=root
Group=root
ExecStart=/usr/bin/python3 /home/<USERNAME>/wake_on_lan_server.py
Restart=on-failure

[Install]
WantedBy=multi-user.targetCopy
10. Once you have entered all of the lines, you can save and quit by pressing CTRL + X, followed by Y, then ENTER.
11. With the service created we now will want to enable it so our Wake-on-LAN server script will start when our Raspberry Pi does.
All you need to do to enable a service is to run the following command.
sudo systemctl enable wake-on-lan-serverCopy12. Next, you will want to start the service by running the command below.
sudo systemctl start wake-on-lan-serverCopy13. At this point, your wake-on-lan server should now be fully up and running.
If the device you are monitoring powers off, it should automatically send a Wake-on-LAN packet within 10 seconds.
Conclusion
At this point in the tutorial, you should now understand how to use your Raspberry Pi to send Wake-on-LAN signals to other devices on your network.
To achieve this, we utilized a piece of software called Etherwake on your Raspberry Pi. We hope you have found this software straightforward to utilize.
Please comment below if you have any issues getting this tutorial to work.
If you found the guide helpful, be sure to check out our many other Raspberry Pi projects.


Sorry, I am not a developer but I tried my best to follow your instructions, but got errors:
1. shouldn’t the
~/wake_on_lan_server.pyfile be made executable with “sudo chmod +x"?2. my attempt to run the script in step 6 resulted in (with Python 3.12.3):
3. my test if “
main” instead of “_main” is the solution I got:Hi Claus,
Sorry to hear that you had issues with this tutorial.
On the note of point 1, giving global execution privileges isn’t necessarily required for this file as etherwake requires you to execute it as a superuser. A superuser will have execute privileges on this file
On steps 2 and three, it looks like a few issues crept across when I simplified the script from what I use locally. I have corrected both issues in the tutorial.
The main() function was updated to “_main()”, and the “param” variable was replaced with the “-c” call it should of been. On my local copy I had been setting “param” based on whether you were using Windows or not (Windows uses -n instead of -c to specify the number of pings to send)
Please let me know if you are still running into issues.
Kind regards,
Emmet
Great! Thanks for the comprehensive article. But I don’t understand.. Can I send this WoL packed from abroad? To connect to my Rasberry Pi and make it wake my Berlin PC while I am in France??
Hi Davo,
Yes, if you can remotely connect to your Raspberry Pi, you can then use that to send the WoL packet to your PC.
Kind Regards,
Emmet