This tutorial will walk you through the simple process of installing Pi-hole onto the Ubuntu operating system.
Pi-hole is a super easy-to-set-up network-wide ad blocker with support for several Linux operating systems, including Ubuntu.
This ad blocker works by acting as a DNS sinkhole. You configure your clients to use your Ubuntu Pi-hole server as its DNS, and it will block any request that goes to a blocked website, such as an ad server. It is an incredibly useful tool, especially when trying to block ads on devices that don’t have adblockers, such as smart TVs.
On top of being a network-wide ad blocker, the Pi-hole software can even speed up your internet browsing as it caches DNS queries. Instead of your browser having to connect to an outside server, it can return the DNS response almost instantly and begin connecting.
Pi-Hole even has a really neat and easy-to-use web interface that makes controlling what sites are blocked a breeze. It even gives you statistics so you know how many requests are being handled.
Best of all Pi-Hole, is incredibly lightweight, so you don’t need a powerful Ubuntu system to run it. You can even run Pi-Hole on the Raspberry Pi.
Installing Pi-Hole on Ubuntu is a really simple process, largely thanks to the amount of effort the team has made to create a very easy-to-run install script. If you prefer not to install Pi-Hole directly to your system, check out our easy to follow Docker guide.
Of course, ads are a crucial part of how most websites and apps are funded. If you decide to use a network-wide ad-blocker like Pi-Hole while visiting our website, please consider our Premium offering that turns off ads for logged-in users while still supporting us.
Simple Steps to Installing Pi-Hole on Ubuntu
In the following sections, we will show you how easy it is to install Pi-Hole on your Ubuntu operating system.
Most of the hard work will be handled by the install script the team provides, but we must complete a couple of simple tasks first.
Preparing your Ubuntu System for Pi-Hole
1. Before we begin installing Pi-hole, we need to ensure Ubuntu is up to date.
You can update the existing packages on your system by running the following two commands.
sudo apt update
sudo apt upgrade -yCopy
2. Your next job is to ensure the curl package is installed on your system.
We will be using curl shortly to download the Pi-hole installation script and pipe it directly into the terminal.
sudo apt install curlCopy3. We must ensure your Ubuntu system has a static IP address. You will need a static IP as you will point your other devices to your Ubuntu system to handle the DNS requests; if the IP changes, your DNS lookups will break.
The best way to set a static IP address is to use DHCP reservation, but we also have a guide on how to do this on Ubuntu directly.
Running the Install Script
4. Now that we know we have everything ready, all you need to do to start installing Pi-hole on Ubuntu is run the following command.
This command will use curl to grab the install script and pass it to the bash terminal. If you want to check the script’s contents before executing this command, you can go directly to the install website to see the script.
sudo curl -sSL https://install.pi-hole.net | bashCopyTypically, you should be careful when piping scripts directly into bash from the internet. In this case, we are using what should be a trusted website, but you should always verify the contents of a script before you run it.
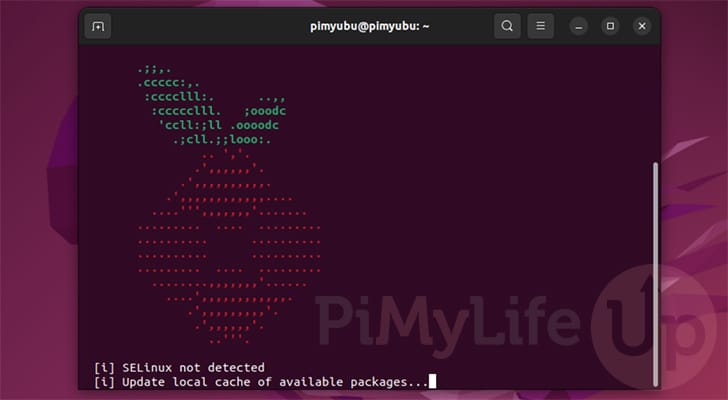
5. When you first start up the Pi-hole installer on Ubuntu, it may take a few minutes.
During the initial start-up process, the installer will grab all the files needed to install the DNS server to your device.
Welcome to the Pi-Hole Installer
6. The first screen you will be greeted with tells you what the installer will do to your Ubuntu system.
To proceed, press the ENTER key.

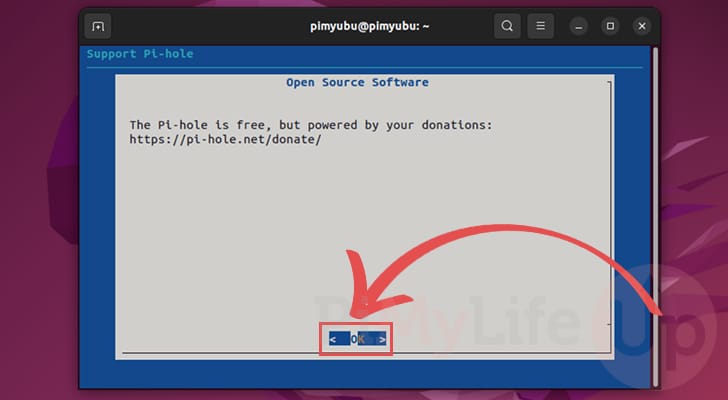
7. The following screen informs you that Pi-hole is an open-source software, and development is funded by donations.
If you feel like donating, go to the link on your screen; alternatively press the ENTER key to continue.
Set up a Static IP Address
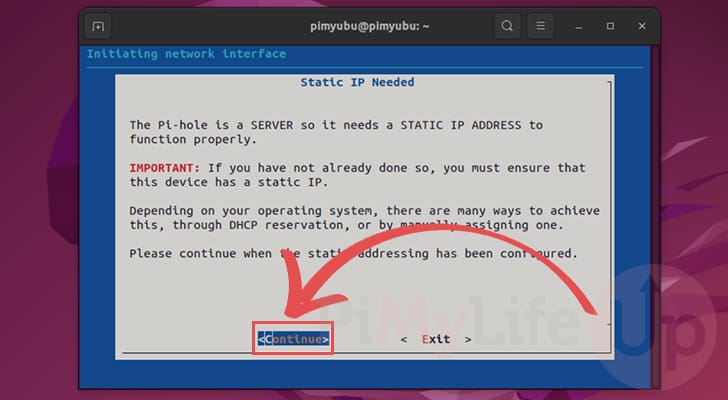
8. Pi-hole expects your Ubuntu system to have a static IP address set up. If you don’t have one, you should abort the installation and set one up before continuing.
Once you are sure you have a static IP address, use the ARROW keys to select “Continue” then press the ENTER key.
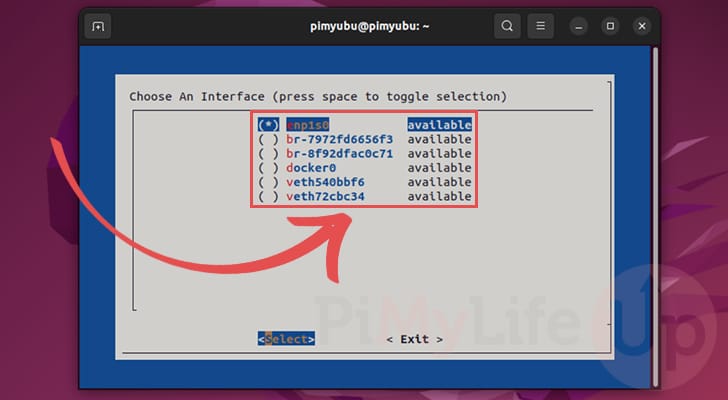
Select Network Interface
9. At this point, you can select the network interface that the Pi-hole interface should use on your system.
Typically, an ethernet interface might use a name like “eth0” or a wireless interface might use “wlan0“. To select one, highlight it using the ARROW keys, then press the SPACEBAR.
Once you are happy with your selection, press the ENTER key.
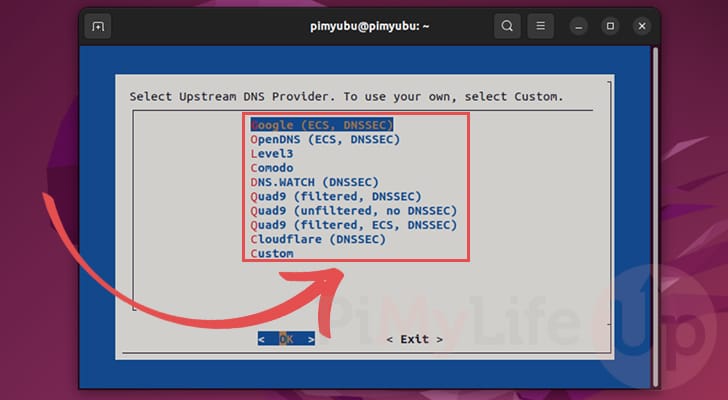
Choose Pi-Hole Upstream Provider
10. Finally, you will get a chance to select the upstream DNS provider that Pi-Hole uses. While Pi-hole will be acting as your personal DNS server it needs to get the initial DNS response from someone.
Highlight the provider you want to select, then press the ENTER key to proceed.
Add Default Blocklist
11. During the installation of Pi-hole on Ubuntu, you will be prompted asking if you want to add a third-party block list.
If you are happy to proceed with a decent base to work off of, select the “<Yes>” option and press ENTER.

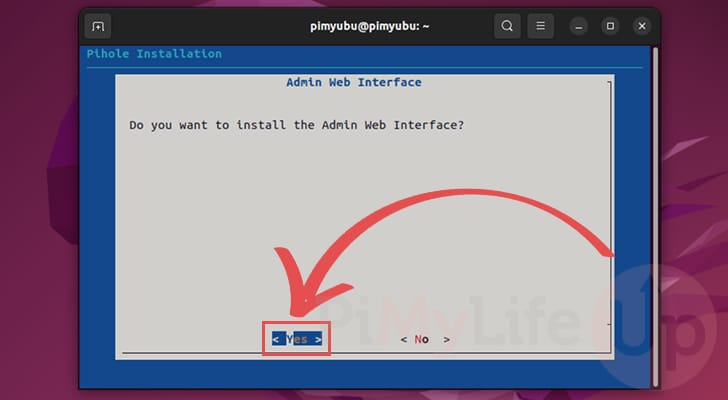
Install Pi-hole Admin Web Interface on Ubuntu
12. Next, you will be asked if you want to install Pi-hole’s admin web interface.
This interface is an excellent way of managing Pi-hole, so we highly recommend you select “<Yes>“.
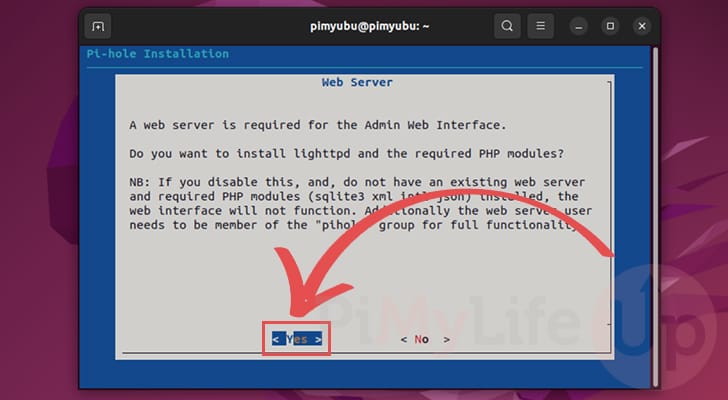
Automatically Set Up Web Server
13. For the web interface to work correctly, you must install a web server. Luckily, the Pi-hole install script can handle this entire process for us.
We highly recommend that you select the “<Yes>” option, as setting up a web server to work with the web interface can be a bit of a process.
Enabling Query Logging
14. Next, you will be asked if you want Pi-hole to log any DNS queries. This is advantageous if you want to keep track of the DNS queries being made on your device.
It is also useful if you are trying to find a particular website you want blocked.
Select “<Yes>” to enable this feature or “<No>” to turn it off. Once selected, press the ENTER key to continue.

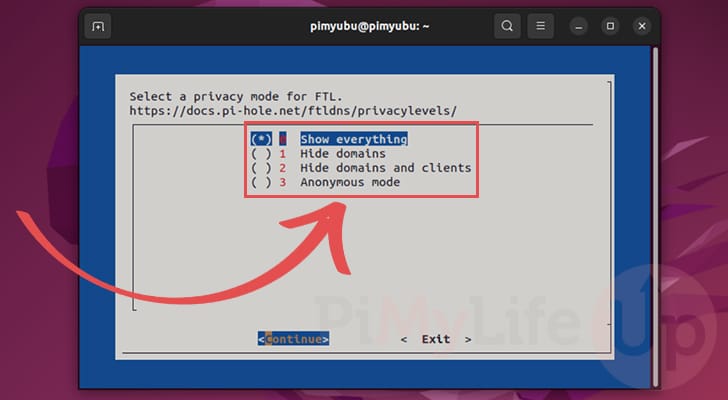
Set Pi-Hole DNS Privacy Mode
15. The final option you will want to set is the privacy for Pi-hole. These options affect the statistics shown to you through the web interface.
You can learn about the difference between these settings by going to the official documentation.
Press the ENTER key to proceed once you are happy with your selection.
Setup Finished
16. You have now successfully installed Pi-hole to your Ubuntu system.
- Here, you will find the IP addresses (1.) you should point your devices to so that they start using Pi-hole.
- Next, you will see the URL to visit to access the Pi-hole web interface (2.).
- The final important value shown here is the password (3.) you must use to access the admin interface. You can change this password later.

Letting Pi-Hole Through the Ubuntu Firewall
17. If you have the UFW firewall on your Ubuntu system, you must allow some ports for Pi-Hole to work. You will want to set up UFW on your system if you have it exposed to the internet.
Luckily, UFW is super simple to use, and you can allow all of the required ports by running the following commands.
ufw allow 80/tcp
ufw allow 53/tcp
ufw allow 53/udp
ufw allow 67/tcp
ufw allow 67/udp
ufw allow 546:547/udpCopy
18. You can now start setting up your various devices to use Pi-hole as their DNS server.
All you need to do now is configure your device’s DNS to point to your Ubuntu server, and they will start communicating with the Pi-hole DNS server.
The location of these settings differs from operating system to operating system, so we won’t be showing you how to set the DNS server in this guide.
Accessing the Pi-Hole Web interface on Ubuntu
19. You can finally access the Pi-hole web interface that is running on your Ubuntu device.
To access this interface, go to the following URL in your favorite browser. Replace “<IPADDRESS>” with the IP of your Ubuntu server.
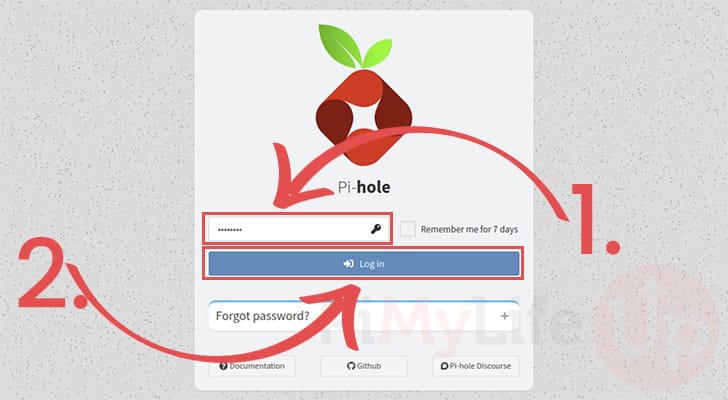
http://<IPADDRESS>/admin20. Upon going to the address above, you must enter a password to log in to the Pi-hole admin interface (1.). You will have this password from when you installed Pi-Hole on Ubuntu earlier.
After typing out your password, click the “Log In” button to continue (2.).
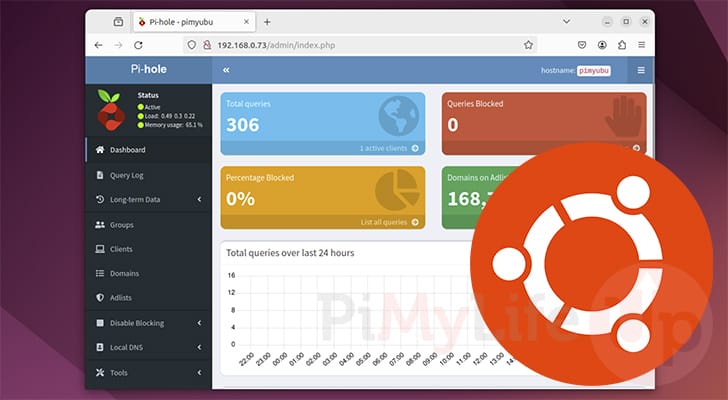
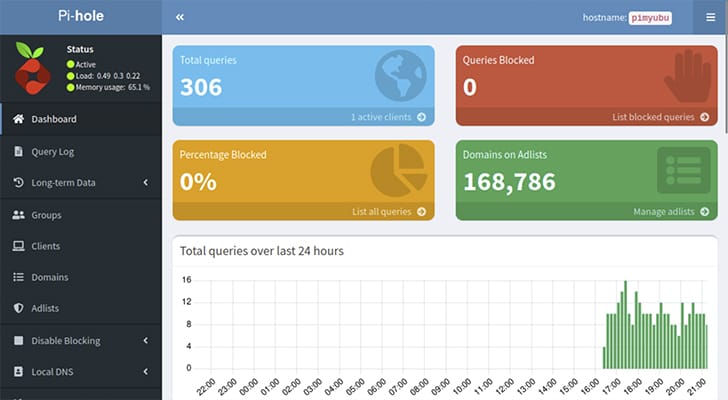
21. You can now use the Pi-hole web admin interface to manage your network-wide ad blocker.
Using this, you can block particular websites or even put some on an allowed list.
Conclusion
By this point in the tutorial, you should now have Pi-hole installed on your Ubuntu system.
Setting this up was a super simple process, and now configuring your devices to use Pi-hole is just as straightforward. All you need to do now is configure your DNS servers to point to your Ubuntu system’s IP address.
While we won’t be covering setting your device’s DNS servers in this guide, you will find that most devices make this process simple.
Please comment below if you have issues getting Pi-hole installed on your system.
If you found this tutorial helpful, we highly recommend checking out our many other Ubuntu tutorials.