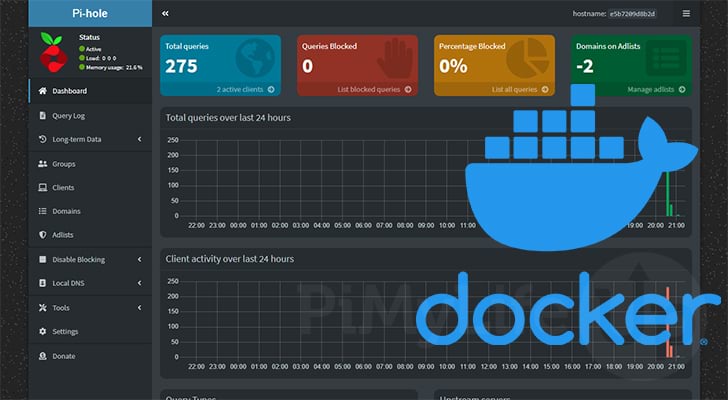
This tutorial will show you how to install and run Pi-Hole as a Docker container.
Pi-Hole is a software that act as your DNS provider to actively block internet ads and trackers. It does this by filtering the DNS requests and sending any blocked domains into a blackhole, so the request is never completed.
Another cool thing about Pi-Hole is that it can also work well to monitor your network traffic, as you can set it to log any DNS requests that the server receives.
While this software is perfect for devices like the Raspberry Pi, you can install it on any Linux machine. Or, when using Docker, you can even run Pi-Hole on a Windows device.
You can run Pi-Hole on your devices in many ways, but one of the easiest is to use Docker. The advantage of using Docker is that everything you need is set up within the container.
Please note that we tested the following steps for installing Pi-Hole through a Docker container on an Ubuntu system. However, they should work fine on any system where you can install “Docker” and “Docker Compose”.
Installing Pi-Hole using Docker Video Guide
If you prefer a video guide to a written one, follow the one we have embedded below. This video will walk you through installing and running Pi-Hole using a Docker container.
Of course, if you prefer our written content, continue on with this guide.
Preparing your System to Run Pi-Hole as a Container
These first few steps will get your Linux system set up to run Pi-Hole through a Docker container. If you already have Docker installed on your system, you can skip to the “Installing the Pi-Hole Docker Container” section.
1. If you are running a Debian-based operating system such as Ubuntu, you will need to update the package list cache before we can install the software needed to run Pi-Hole.
You can update the package list by using the following command.
sudo apt updateCopy2. The only package we need to get Pi-Hole running with Docker is the Docker runtime.
Thanks to a convenience script the Docker team provides, installing this runtime is straightforward. While you could install Docker from your package repository, it can be significantly out-of-date.
To install Docker on any supported operating system, run the command below.
curl -sSL https://get.docker.com | shCopy3. After installing Docker, it is helpful to add your current user to the “docker” group it created. Adding your user to the group is as easy as using the usermod command.
We want to add your user to this group because it makes controlling the Pi-Hole Docker container easier. We don’t have to worry about using “sudo” to interact with the containers.
sudo usermod -aG docker $USERCopy4. Because we made changes to our user’s groups you will need to log out.
You can easily log out from the terminal by running the following command.
logoutCopyAlternatively, you can just restart your machine by using the reboot command.
sudo rebootCopy5. That is all the software you need on your Linux system to run Pi-Hole within a Docker container.
Any additional software that is needed will all be stored within the container. This greatly simplifies getting Pi-Hole running on Linux-based systems such as Ubuntu.
Installing the Pi-Hole Docker Container
This section will show you the process of installing Pi-Hole as a Docker container on your Linux-based system. All we need to do within this section is to write a “docker-compose” configuration file.
This file tells Docker what containers it needs to download and what ports it needs to open.
Creating a Directory for Pi-Hole
1. Start by creating a directory where you will store the configuration file for the Pi-Hole docker container.
We will do this by using the mkdir command to create a directory called “pihole” in our user’s home directory.
sudo mkdir -p /opt/stacks/piholeCopy2. Let us move into our newly created directory by using the cd command.
cd /opt/stacks/piholeCopyWriting the Docker-Compose Configuration File
3. Our next step is writing the “compose.yaml” file. This file is where we will define the Pi-Hole docker container and the options we want passed to the container.
sudo nano compose.yamlCopy4. Within this file, you will want to enter the following lines. While filling out this file, you will need to replace some placeholders to control a couple of Pi-holes settings.
<PASSWORD>: If you fail to specify a password, the Pi-Hole Docker container will generate a random one when it starts.
Luckily, setting a password is as simple as replacing this placeholder with a secure password of your own. Try and use a mix of letters, numbers and symbols.
If you want to generate secure passwords and store them securely, we recommend you check out the NordPass password manager (Affiliate link).<TIMEZONE>: By default, the Pi-Hole docker container has been configured to use the “Chicago” time zone. It is possible, however, to adjust this to your local time zone by specifying your own TZ Identifier.
You can find a list of valid time zone values on Wikipedia. The value you want to use is in the “TZ database name” column.
For example, we live in Hobart, Australia so we would use the identifier “Australia/Hobart“.
With the default configuration of the Pi-Hole Docker container, this Compose file will set it up so that its web interface is accessible through ports 80 and 443.
If these are already in use, or you want to change them, simply change the port on the left-hand side of the colon symbol (:). In most setups, you will want to stick with these default ports.
services:
  pihole:
    container_name: pihole
    image: pihole/pihole:latest
    ports:
      - "53:53/tcp"
      - "53:53/udp"
      - "67:67/udp"
      - "80:80/tcp"
      - "443:443/tcp"
    environment:
      TZ: '<TIMEZONE>'
      FTLCONF_webserver_api_password: '<PASSWORD>'
      FTLCONF_dns_listeningMode: all
    volumes:
      - './etc-pihole:/etc/pihole'
    cap_add:
      - NET_ADMIN
    restart: unless-stoppedCopy
5. Once you have made the above changes to the file, save and quit by pressing CTRL + X, followed by Y, then the ENTER key.
Working around the Systemd-Resolve Service (Ubuntu and Fedora Only)
6. If you are using an Ubuntu or Fedora operating system to run the Pi-Hole Docker container, you may need to disable the DNS Stub listener that is built into the Systemd resolve service.
The operating system uses this service to provide network name resolution. As Pi-Hole will want to operate on the same part the resolve service does, we need to disable it.
If you are using an operating system like Debian or Raspberry Pi OS, for now, you can safely skip straight to the starting up Pi-Hole section.
To start this process, begin editing the “/etc/systemd/resolved.conf” configuration file by running the following command.
sudo nano /etc/systemd/resolved.confCopy7. Within this file, you will want to find the following line. This setting basically allows us to control whether the DNS stub listener is turned on.
#DNSStubListener=yesCopyAfter finding this line you will want to remove the hashtag (#) from the front of this line and change “yes” to “no“.
DNSStubListener=noCopy8. Once you have made this change, save and quit out of the file by pressing CTRL + X, Y, and then ENTER.
9. Our next step is to remove the existing “resolv.conf” file since it currently points your system’s network to use the now-disabled DNS stub resolver.
You can delete this file using the rm command as shown below.
sudo rm /etc/resolv.confCopy10. With the existing “resolv.conf” file removed, we will now create a symbolic link in its place pointing to the version setting in the “/run/systemd/resolve/” directory.
This version of the file is automatically updated using the DNS servers set within your Netplan.
sudo ln -s /run/systemd/resolve/resolv.conf /etc/resolv.confCopy11. The last thing we need to do is restart the “systemd-resolved” service so that all of our changes will be loaded in.
Once the service has finished restarting, Pi-hole should now be able to utilize the DNS ports on your system.
sudo systemctl restart systemd-resolvedCopyStarting the Pi-Hole Docker Container
12. We can finally start up Pi-Hole’s Docker container on our Linux system.
All you need to do now is run the following command within the terminal.
docker compose up -dCopyPlease note this process can take a couple of minutes, depending on your device’s internet connection.
Accessing the Pi-Hole Web Interface
Now that we have the Pi-Hole docker container up and running on your system, we can proceed to use its web interface.
This web interface allows you to control all aspects of Pi-Hole on your system, so you won’t have to mess around with configuration files.
1. Before we begin, you will need to know the IP address of your device so that you can access the web interface.
The easiest way to get the local IP address is to use the hostname command.
hostname -ICopy2. With your local IP address, you will want to go to the following within your web browser.
Ensure you replace “IPADDRESS” with the IP you got in the previous step.
https://IPADDRESS/adminIf you changed the port away from “443“, you need to insert the port like shown below.
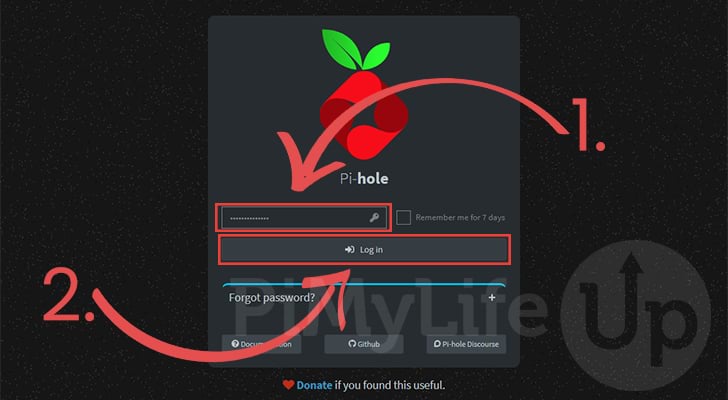
https://IPADDRESS:PORT/admin3. You should now be greeted with the login page for Pi-Hole.
To log in, you must type in the password (1.) you set when writing the Docker configuration file earlier.
With your password typed in, click the “Log In” button (2.)
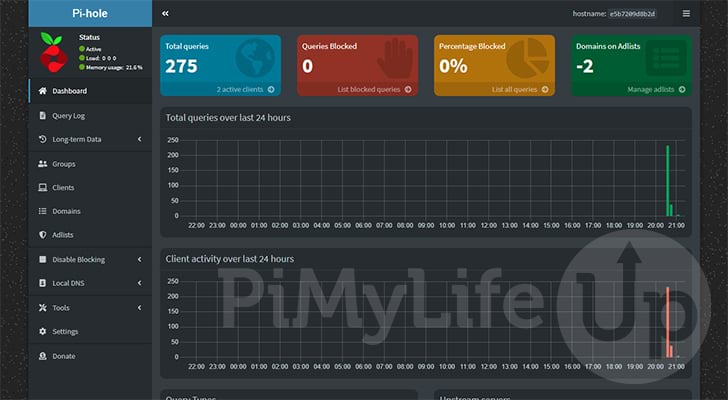
4. You now have access to the Pi-Hole dashboard running from within the Docker container.
5. With access to the dashboard, now is a good time to start changing your device’s DNS to use Pi-Hole.
We won’t be covering how exactly to do this in this guide. However, we have a guide that shows you how to change the DNS servers on Ubuntu.
When setting the DNS servers, you must use the IP belonging to the device you are running Pi-Hole on.
Updating the Pi-Hole Docker Container
Since we used Compose to set up the Pi-Hole Docker container, updating the software is straightforward.
In just a few short steps, you will upgrade to the latest available image.
1. Our first task is to change to the directory where we wrote the Compose file earlier.
You can change to this directory by running the command below.
cd /opt/stacks/piholeCopy2. After changing to this directory, we will want to tell Docker to download the latest version of the Pi-Hole image.
This is as simple as using “docker compose” followed by the “pull” command.
docker compose pullCopy3. The previous command pulls the latest image, but won’t update your already running container. Don’t worry, getting Docker to update a container to a new version is pretty simple.
Use the following command within the terminal to tell Docker to start up our Compose file. Docker will detect that Pi-Hole is already running and see that a new image is available. Upon detecting a new image, it will stop the current container and start it back up using the new one.
docker compose up -dCopyConclusion
This tutorial shows you how to run Pi-Hole within a docker container on a Linux system.
Pi-Hole is a neat software that allows you to run a network-wide ad blocker easily. It works by handling your DNS requests and blocking domain names associated with ads.
Please comment below if you have any issues getting Pi-Hole to work within Docker.
We also have numerous other tutorials showing what you can achieve with Ubuntu.


This may have happened because the port is being used by Apache.
How can I install Let’s Encrypt inside the Docker Container?
Hey,
This is not something you would do, as when the container is restarted, your installed programs will be lost.
What you would want to do is set up an additional Docker container that runs Lets Encrypt and fetches the certificates for you. Its probably a little to much to explain in a comment. If there is interest in this I can either expand this guide or build another one that walks through doing this.
Kind regards,
Emmet
Everything went swimmingly for me. Thanks so much for this tutorial!
Thanks for the guide. One item of note. If you remove /etc/resolv.conf the docker pull will fail as you no longer have dns. Instead, I left /etc/resolv.conf in place and updated it after pihole container was up and running with the following
nameserver 127.0.0.1
I am running debian 12.9 on my raspberry pi 5.
I did not have systemd-resolved service
Hi Chris,
Those steps should have been skipped entirely if you aren’t running Ubuntu or Feodra. Most other operating systems don’t implement the caching stub resolver so they can be simply skipped.
I have updated the text to try and make that a little clearer.
Kind regards,
Emmet
Even so, on Ubuntu it seems like an error to change your resolvconf configuration before you even have the pihole configured!
Hi Derek,
Not at all, as Pi-hole will attempt to bind to the same port the DNS Stub listener uses (port 53), you must do this prior to the start up of Pi-Hole.
Kind regards,
Emmet
By setting DNSStubListener=no, DNS no longer works on the system so that when you run docker compose you get an error. Is there an order of operations issue here or something I did?
$ sudo docker compose up -d
[+] Running 1/0
✘ pihole Error 0.0s
Error response from daemon: Get “https://registry-1.docker.io/v2/”: dial tcp: lookup registry-1.docker.io on 127.0.0.53:53: read udp 127.0.0.1:46240->127.0.0.53:53: read: connection refused
$ ping google.com
ping: google.com: Temporary failure in name resolution
Hi Jack,
Unfortunately I’m not able to replicate this issue on my end. Everything seems to work fine after following through the steps. Did you ensure that you restarted the “systemd-resolved” service?
Additionally, you can also print the contents of the “/etc/resolv.conf” file by using the following command to verify that it is actually being filled out.
It should be matching the contents of “/run/systemd/resolve/resolv.conf” since we are creating a symlink between these two locations.
Kind regards,
Emmet
I ran into the same issue
run the following before docker compose
sudo systemctl enable docker
sudo systemctl restart docker
In step 10, you instruct to use sudo rm /etc/resolve.conf, but in step 11, you use resolv.conf instead. So is the e on resolve necessary or not?
Hi Steve,
Thank you for letting me know about that typo. “resolv.conf” is the correct file and the “resolve.conf” was a mistype.
Kind regards,
Emmet
Hi,
Is there a way I can make this autostart on boot?
Hi JB,
It should automatically start on boot as long as the Docker runtime is started at boot (Which on a default installation will automatically be set up).
Kind regards,
Emmet
I followed this until i got to docker-compose:
$ sudo docker-compose up -d
sudo: docker-compose: command not found
It turns out the latest download uses a later version of docker compose (v2.24.7). The new command now runs but the docker-compose.yml file is for an earlier version:
$ docker compose up -d <– note new version
validating /home//pi-hole/docker-compose.yml: (root) Additional property pihole is not allowed
Suggestions?
Thanks,
Ric
Hi Ric,
Thank you for the heads up. I have updated the tutorial to ensure a newer version of Docker is installed rather than the older separate “docker-compose”.
Additionally, I believe that the Compose file should still be working.
Kind regards,
Emmet
Thanks – I got that working on my Pi 4 – I kept getting
Error response from daemon: Head “https://registry-1.docker.io/v2/pihole/pihole/manifests/latest”: dial tcp: lookup registry-1.docker.io on 192.168.2.1:53: no such host
when runnig compose
but once I changed the /etc/resolv.conf file, it worked.
I actually created a macvlan so that pihole is exposed on a different IP address than that of my pi.
Cool! I installed it, and web pages load faster, I was able to remove ublock and ghostery from all my computers. Block at 20% in 3 days. Queries blocked more than 20000.
Thanks.