In this project, we are going to set up an ownCloud server on the Raspberry Pi. This server can act as your very own personal cloud storage.
As protecting your privacy becomes harder and harder, you may be considering moving your files to a private self-hosted cloud storage. If this is the case, then this tutorial is perfect for you.
The ownCloud web interface is very similar to the many cloud storage providers that are available, such as Dropbox, Google Drive, and more. This similarity will make changing over to the self-hosted software much easier.
It is important to remember that since your data will be stored on your home network, you will end up with using more bandwidth if you upload and download files from outside your network.
This tutorial will take you through everything you need to know to get ownCloud setup and accessible.
If you are curious and want to learn more about the ownCloud software, be sure to check out the ownCloud website.

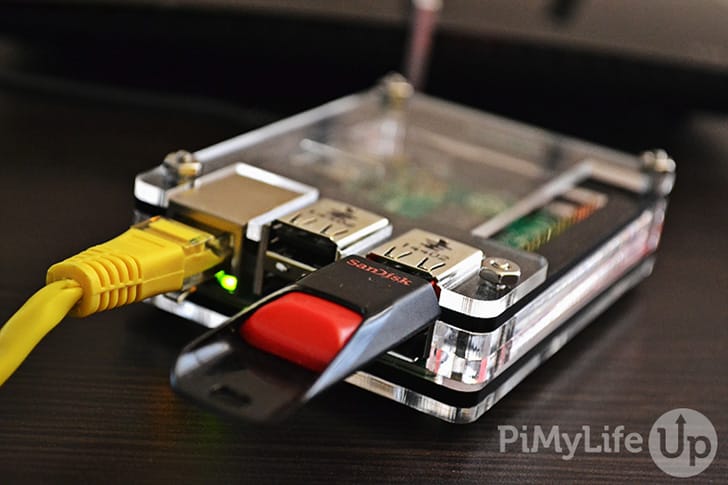
Equipment
I made use of the following equipment for this personal cloud storage setup.
Recommended
- Raspberry Pi Amazon
- Micro SD Card Amazon
- Ethernet Cable Amazon or Wi-Fi Amazon
- External Hard Drive Amazon or USB Drive Amazon
Optional
Note: It is highly likely that the USB ports on the Raspberry Pi will be unable to power an external hard drive so you may need to invest in a powered USB hub.
We last tested this tutorial on the Raspberry Pi 5 running Raspberry Pi OS Bookworm. We highly recommend that you update the to the latest operating system for the best experience.
Video
If you are a visual person and would like to see our video on how to put this tutorial together, check out the video below.
It will take you through everything you need to know get your Raspberry Pi ownCloud server up and running.
Setting up The Raspberry Pi ownCloud Server
Firstly, you will need to have a Raspberry Pi with an OS installed. If you haven’t installed Raspberry Pi OS, then check out our guide on installing Raspberry Pi OS. We recommend using the latest version for the best performance and reliability.
There are quite a few ways you can install ownCloud onto your Raspberry Pi. In this tutorial, we will be using Docker to set up ownCloud.
In our previous version of this tutorial, we used Nginx, but this method is deprecated, and we now recommend using Docker, especially since ownCloud still relies on PHP7.4.
Installing Docker
The first thing we need to do is install Docker on our Raspberry Pi. We will need this software to run the ownCloud software.
1. Firstly, in the terminal or via SSH, we will need to update the Raspberry Pi and its packages. Do this by entering the following two commands.
sudo apt update
sudo apt upgrade -yCopy
2. You will need to ensure that you have Docker on your Raspberry Pi before proceeding to the next few steps. If you already have it installed, go to step 3.
If you need to install Docker, run through our tutorial on setting up Docker on the Raspberry Pi. It will take you through all the steps to set up the software correctly.
https://pimylifeup.com/raspberry-pi-docker/Creating the Required Directories
3. We now need to create the directories for where we will store the compose file and environment variables.
You can do this by running the mkdir command. The “-p” option will create any missing directories.
sudo mkdir -p /opt/stacks/owncloudCopy4. Now change into the newly created directory by using the cd command.
cd /opt/stacks/owncloudCopySetting up the Docker Compose File
5. Before we proceed, we will need to get the IP address of the Raspberry Pi. You will need to use the IP address in the environment file and to access the ownCloud web interface.
I recommend that you set your Raspberry Pi IP to static to avoid it changing in the future.
To get the IP address of the Raspberry Pi, enter the hostname command with the option “-I“.
hostname -ICopy6. It is time to write a compose file for our ownCloud setup. This file is a set of instructions Docker will run through to set up all the relevant services with the specified options. Alongside ownCloud, we will be setting up a MySQL and a Redis server.
Create and edit this file by running the following command. We will be using the nano text editor.
sudo nano compose.yamlCopy7. In this file, copy and paste the following text. Thankfully, we do not need to make any changes to this file, as any extra configurations will be stored in an environment file.
services:
  owncloud:
    image: owncloud/server:${OWNCLOUD_VERSION}
    container_name: owncloud_server
    restart: always
    ports:
      - ${HTTP_PORT}:8080
    depends_on:
      - mariadb
      - redis
    environment:
      - OWNCLOUD_DOMAIN=${OWNCLOUD_DOMAIN}
      - OWNCLOUD_TRUSTED_DOMAINS=${OWNCLOUD_TRUSTED_DOMAINS}
      - OWNCLOUD_DB_TYPE=mysql
      - OWNCLOUD_DB_NAME=owncloud
      - OWNCLOUD_DB_USERNAME=owncloud
      - OWNCLOUD_DB_PASSWORD=owncloud
      - OWNCLOUD_DB_HOST=mariadb
      - OWNCLOUD_ADMIN_USERNAME=${ADMIN_USERNAME}
      - OWNCLOUD_ADMIN_PASSWORD=${ADMIN_PASSWORD}
      - OWNCLOUD_MYSQL_UTF8MB4=true
      - OWNCLOUD_REDIS_ENABLED=true
      - OWNCLOUD_REDIS_HOST=redis
    healthcheck:
      test: ["CMD", "/usr/bin/healthcheck"]
      interval: 30s
      timeout: 10s
      retries: 5
    volumes:
      - ${OWNCLOUD_FILES_LOCATION}:/mnt/data

  mariadb:
    image: mariadb:10.11 # minimum required ownCloud version is 10.9
    container_name: owncloud_mariadb
    restart: always
    environment:
      - MYSQL_ROOT_PASSWORD=owncloud
      - MYSQL_USER=owncloud
      - MYSQL_PASSWORD=owncloud
      - MYSQL_DATABASE=owncloud
      - MARIADB_AUTO_UPGRADE=1
    command: ["--max-allowed-packet=128M", "--innodb-log-file-size=64M"]
    healthcheck:
      test: ["CMD", "mysqladmin", "ping", "-u", "root", "--password=owncloud"]
      interval: 10s
      timeout: 5s
      retries: 5
    volumes:
      - ./mysql:/var/lib/mysql

  redis:
    image: redis:6
    container_name: owncloud_redis
    restart: always
    command: ["--databases", "1"]
    healthcheck:
      test: ["CMD", "redis-cli", "ping"]
      interval: 10s
      timeout: 5s
      retries: 5
    volumes:
      - ./redis:/dataCopy
Once you are done, save and exit by pressing CTRL + X, Y, and then ENTER.
8. It is time to write the environment file. This file will contain all the configurations we wish to set for the ownCloud software. For example, usernames, passwords, ports, and more. Docker automatically reads it and will match and replace the placeholders in the compose file with the relevant data from the environment file.
To create the environment file, enter the following command.
sudo nano .envCopy9. In this file, you will need to enter the following lines and replace each placeholder with the value you wish to use. We will explain each of these options below.
OWNCLOUD_VERSION=<VERSION>
OWNCLOUD_DOMAIN=<DOMAINORIP>:<HTTPPORT>
OWNCLOUD_TRUSTED_DOMAINS=<DOMAINORIP>
ADMIN_USERNAME=<ADMINUSERNAME>
ADMIN_PASSWORD=<ADMINPASSWORD>
HTTP_PORT=<HTTPPORT>
OWNCLOUD_FILES_LOCATION=<MOUNTPATH>Copy<VERSION>This placeholder represents the version of ownCloud you want to run on your Raspberry Pi. I recommend using thelatest, but you can always specify an older version such as10.<DOMAINORIP>Use this option to specify the allowed address for accessing the ownCloud instance. For example, if I want to use it locally, I will use the local IP, such as192.168.0.15.
If I want to access the software remotely, I can use an external IP address or domain name. You can add multiple domains and IPs by separating each of them with a comma. For example,192.168.0.15,test.pimylifeup.com. Please note, that multiple IPs and domains only applies to theOWNCLOUD_TRUSTED_DOMAINSvariable.<HTTPPORT>This is the default port that ownCloud will listen on. I recommend using a port such as8080or similar to avoid conflicts with other software.<ADMINUSERNAME>Replace this placeholder with the username you wish to use for your admin account. You will not be able to change this after the first setup.<ADMINPASSWORD>Like the username, the admin password is only used for the first setup. Afterward, you will need to change the password in the web interface.<MOUNTPATH>This is the path for storing the data of ownCloud. Using.datawill store it within/opt/stacks/ownclouddirectory. You can change this directory to wherever suits you the best.
You could set it to a mounted drive by using something like/mnt/usb1/owncloud. A mounted drive is a good option as it allows you to gain access to a lot of storage space.
OWNCLOUD_VERSION=latest
OWNCLOUD_DOMAIN=192.168.0.15:8080
OWNCLOUD_TRUSTED_DOMAINS=192.168.0.15
ADMIN_USERNAME=pimylifeup
ADMIN_PASSWORD=pimylifeup
HTTP_PORT=8080
OWNCLOUD_FILES_LOCATION=./dataCopy
Once you are done, save and exit the file by pressing CTRL + X, Y, and then ENTER.
Starting the ownCloud Server with Docker
10. To start your ownCloud server, all you need to do is run the following command.
Once initiated, Docker will download all the required software and start up each of the service with the specified options. Using the -d option will run Docker in the background.
docker compose up -dCopyFirst Start of ownCloud on the Raspberry Pi
I will briefly go through the basics of ownCloud running on the Raspberry Pi. If you want more information, I highly recommend checkout out the manuals on their website. You can find them at the ownCloud manual site here.
11. In your favorite web browser, you need to go to your Raspberry Pi’s IP address.
If you don’t know your IP address, you can run the hostname command on the Raspberry Pi.
hostname -ICopyBelow is an example of the address you will need to enter into the browser. Remember to update the IP address with the one you get from using the command above.
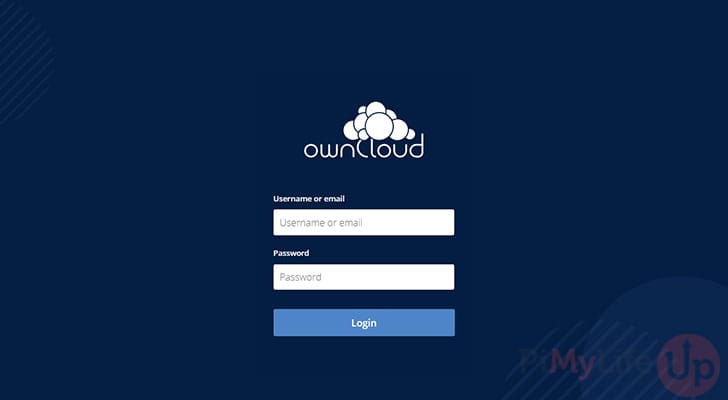
http://192.168.0.15:808012. You should now be greeted with a login page similar to the one below. Simply enter the username and password that we set in the environment file.
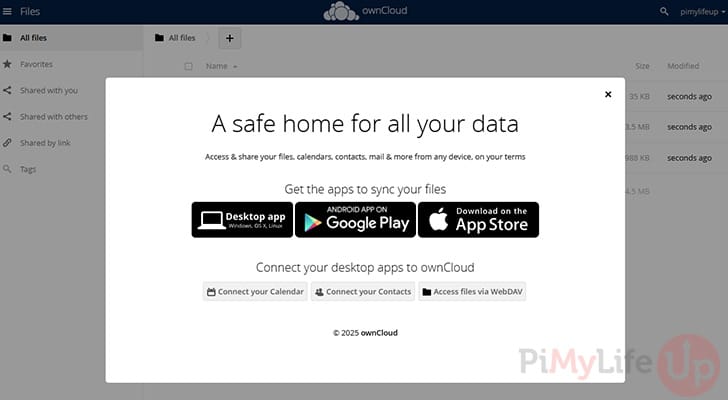
13. You will now see a page with a pop-up on how you can install the apps for desktop, Android, and iOS.
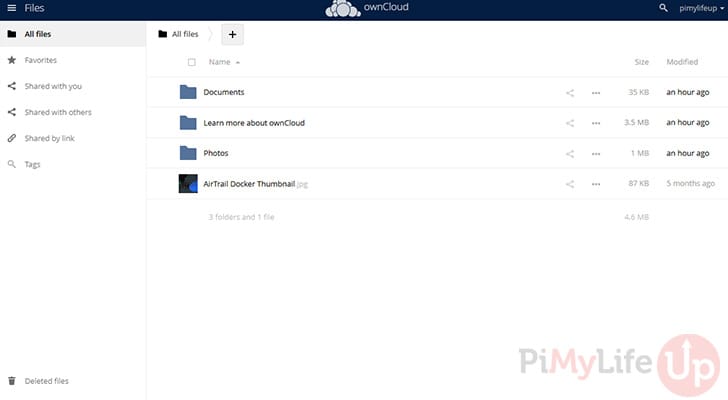
14. Lastly, test that you can upload files to your ownCloud installation by simply dragging and dropping a file into the web interface. It should upload without any issues.
15. You now have ownCloud installed and running on your Raspberry Pi. The next couple of sections cover the basics for remote access, updating software, and backing it up to somewhere secure.
Setting up Remote Access
If you want to access the server remotely, I highly recommend using a service like Cloudflare Tunnels or Tailscale. These services are relatively easy for most people to understand and setup. Alternatively, setting up a reverse proxy like Traefik, or Nginx proxy manger will also work.
Once you have chosen your method of exposing ownCloud to the internet you will simply need to specify the IP address and port of the software. Most of the software above will generate certificate for your domain name.
Updating ownCloud Docker
Using Docker makes updating your ownCloud software super easy, and only involves a few simple steps.
1. Before you update, we recommend that you backup any data in case something goes wrong with the update. Follow our backup section for more information.
2. You will need to first change to the location of your ownCloud compose file. If you followed this tutorial, use the command below.
cd /opt/stacks/owncloudCopy3. You can simply tell Docker to pull the latest versions of the software specified in the compose file.
docker compose pullCopy4. Once the latest software has been downloaded, you must issue the compose up command. This command ensures that the software running in docker is updated to the latest versions we downloaded earlier.
docker compose up -dCopyBacking up ownCloud Docker
Backing up your data is highly important as data drive failure, natural disasters, corruption, or accidental deletion can happen at any time and when you least expect it. Luckily, backing up data is relatively straightforward.
I recommend you can use rclone on the Raspberry Pi or something similar to copy and store the data in another location. You can also automate the following steps using a bash script and setting up cron.
1. You will need to first change into the location of the compose file.
cd /opt/stacks/owncloudCopy2. First, stop the docker container by running the following command
docker compose stopCopy3. The next couple of lines require you to have rclone installed, but they will simply sync the contents from the source location to the destination. For example, /opt/stacks/owncloud/data will sync to /backups/owncloud/data.
You can also setup rclone to sync to a remote location rather than local. This method is highly recommended for backing up important data.
sudo rclone sync /opt/stacks/owncloud/data /backups/owncloud/data --progress
sudo rclone sync /opt/stacks/owncloud/mysql /backups/owncloud/mysql --progressCopy
4. Once the above two commands are finished, start the docker container by running the following command.
docker compose up -dCopyAs I mentioned earlier, you can add the above commands into a bash script that you can then automate the backup sequence. I highly recommend that you schedule the backup to occur when the server is least likely to be in use.
Conclusion
I hope this tutorial has helped you set up your very own Raspberry Pi ownCloud. You should now be able to upload and store files within your own personal cloud.
If you are interested in other self-hosted projects, I also recommend taking a look at Immich on the Raspberry Pi. It is a great software for storing and viewing photos.
If you have any troubles, want to leave feedback or if I have missed anything feel free to drop us a comment below.


Great tutorial.
Finally it worked after several attempts in other sites.
The OwnCloud server works great on my network.
Only one small problem that maybe you can help me figure out.
My raspberry Pi is under second router. that mean i have the ISP router with 192.168.1.1 and it connected to another router that gets from him the internal IP of 192.168.2.1.
The Pi is connected to the second router and gets 192.168.2.9.
How can i port forward it?
Thanks
Ziv
To do this you need to forward the ports from your first router to your second router or use DMZ Mode if your router supports it to your second router. Then login to the administrator page on your second router and forward the ports to your Pi.
Thanks for the detailed instructions. I had to refer back and forth from the written and the video instructions, which helped quite a bit.
When I followed the written instructions only, I wasn’t sure if I was making the software change to the pi or to the ownCloud (cd /var/www/owncloud). I did confirm with the video.
This ownCloud is doing everything I was looking for, automatic upload from my phone camera, using the ownCloud app (99 cents, well worth it!). So by adding the ownCloud app, I did NOT have to do the Port Forwarding & External Access section (which made me nervous).
When T go to my pi’s IP address for owncloud i get the error:
Data directory (/media/usb/ocdata/) is readable by other users
Please change the permissions to 0770 so that the directory cannot be listed by other users.
How do I change the permissions to 0770
Hi,
Great project, thanks for the instructions!
When I log in to my owncloud account, it tells me there is an update 8.1.3 available. On the controlpanel there is an update function, but it can not update its version this way. Is it possible to do this from the command line and how? (without messing up my owncloudserver)
I have got a some error trusted ips. When ı want to reach my externel ip with using no.-ip it says you need to add trusted ips. But it already have added. When click the button its dupliceted my ip adress
Hey Erdem,
I had the same problem. I fixed with the following code.
sudo nano /etc/network/if-up.d/secure-rmcAdd these lines:
iptables -A INPUT -p tcp --dport 80 -j ACCEPT

iptables -A INPUT -p tcp --dport 443 -j ACCEPT

iptables -A INPUT -p tcp --dport [replace with your random external port] -j ACCEPT

iptables -A INPUT -i $IFACE -j DROP
Save and exit
sudo reboot
Hope it helps!
Hi, i’ve an issue, instead of having my owncloud page when i write the rasp pi ip adress i have the page of Apache 2 saying “it works”
Maybe i made a wrong typing somewhere, can you help please
Thanks:)
Hi Benny,
Sounds like owncloud hasn’t successfully been copied into the www folder.
I would suggest running back through step 19. You can also check to see what is in the www folder by running
ls /var/www/owncloudAt the initial own cloud set up page right after mounting drive, I get a message when i try to put in the storage path that “Can’t create or write into the data directory /media/ownclouddrive”
please advise
Hi Chris,
It sounds like the drive probably hasn’t been mounted correctly.
I would run back through the steps in the mounting & setting up a drive section. The most common mistake is putting the fstab line on two lines. (Step 7)
heres some screens.
http://imgur.com/5J9ljEihttp://imgur.com/ruXfSLII suspect it has something to do with the long string of alpha numerics that looks vastly different then your uuid….but then i am fairly new , and I’ve been know to be wrong!…..now and then:P
I can´t connect to the server outside of my local network. I have portforwarded and the port is open. When I connect to the server via the ip, not the local ip for the pi, it connects and then changes the url to the local ip of the pi. Because the pi is not on the local network it doesnt work.
Hi Simon,
I have looked into this and have updated the port forwarding section with how to get it working externally.
Hi there,
I´ve a little problem: To install ownCloud I followed all steps and ownCloud is working now fine, but only on my local home network. I´ve installed like it´s shown in another Tutorial by Pimylifeup an Dynamic-DNS Client on the raspberry pi. Every time I try to access my pi from school I get connected to the local IP-Adress of my pi at home. I type my address in Safari (the address is *********.zapto.org and I get connected with 192.168.2.119) and Safari can´t load the page because it is searching an server on my school´s network with the IP 192.168.2.119.
So what can (or should) I do?
I would be really happy if you could help me
Thanks in advance,
Emi
Hi Emi,
I have located the issue and added a solution to the tutorial above under the external & port forwarding section.
Please let me know how you go
Well, It works, I can connect to my server but It says that the ip is untrusted. I know there is this line in config.php but I dont know if i did write it correct.
It would be great if you could help me an second time, thanks in advance,
Emi
Well, almost everything works except that my IP isn’t trusted. I know there is in the tutorial how to configure that but I think that I did something wrong.
Hi Emi,
I saw your code in your previous comment. The problem is your trusted IP is in the wrong place. Take a look at my example below for the right placement!
'instanceid' => 'xxxxxxxx','passwordsalt' => 'xxxxxxxxxxxxxxxxxxxxxxxxxxxxxxxxxxxxxxxxxx',
'secret' => 'xxxxxxxxxxxxxxxxxxxx/xxxxxxxxxxxxxxxxxxxxxxx',
'trusted_domains' =>
array (
0 => '192.168.1.108',
1 => '{External IP}',
),
'datadirectory' => '/media/ownclouddrive',
'overwrite.cli.url' => 'https://{ExternalIP}',
'dbtype' => 'sqlite3',
'version' => '8.1.1.3',
'logtimezone' => 'UTC',
'installed' => true,
Hope this helps!
Thank you very much, It works totally fine!
Hey, Exact same problem with mine!
I have the same issue. I followed everything and I can only access through the local network. It appears that the port forwarding is working as it replaces my hostname:external_port with the IP address of the PI. Please help.
Hi Jeremy,
I have updated the port forwarding section of the owncloud tutorial with new instructions that should fix this problem.
I’m having issues with ownership of the data on my external hard drive. It says I don’t have permission to upload or create files here.
Hi Bell,
It sounds like that the external hard drive hasn’t been mounted properly thus the Raspberry Pi owncloud can’t use it.
I would recommended checking back through the steps in the mounting & setting up a drive section. A common mistake is placing the fstab line on two lines. (step 7)
At 4. Add the www-data user to the www-data group.
I get the following:
pi@RaspberryPi ~ $ usermod –a –G www-data www-dataUsage: usermod [options] LOGIN
what am I doing wrong?
Hi Dave,
There was a slight error to do with the – before the letters. It should now be corrected.
sudo usermod -a -G www-data www-dataDid anyone try to connect outside of the local network? Following the steps about the port forwarding (http://pimylifeup.com/raspberry-pi-port-forwarding/), I am getting server_time_out… Any suggestions ?
Hi Zn,
I have made some corrections to the port forwarding part within this Pi Owncloud tutorial. If you follow these new instructions it should now work correctly.
Gus, Great tutorial. But I am still having troubles with accessing from outside my local network. I am using dyndns. Should the following lines be
1 => 'xxx.xxx.xxx.xxx',1 => 'xxx.mydns.org',
'overwrite.cli.url' => 'https://xxx.xxx.xxx.xxx',
'overwrite.cli.url' => 'https://xxx.mydns.org',
or do they need to be my actual IP address (which is dynamic)
Hi Dave,
In this case it should be your dynamic DNS address (not the IP).
I’ve tried this and I get a web page appear. However, it sticks with the dialog about being on a untrusted domain. I did follow the instructions in the section “Port Forwarding & External Access”.
I’ve checked the config files, and they do appear correct.
Anyone got any ideas?
Hi¡
Another one, I’m getting a 502 Bad Gatway when I try to access from a browser. Any ideas?
Now Works¡
I edit: /etc/nginx/sites-available/default
upstream php-handler {
#server 127.0.0.1:9000;
server unix:/var/run/php5-fpm.sock;
}
Hi, I’m trying to access the raspberry, with my browser, and I get the error message 502 bad gateway. I have tryed Halvar’s solution and the error persists.
Could you help me?
bayel this is the fix
go to chrome go setting,proxy,advanced
For me i had a proxy on so disable it under the advanced settings!
I’m not able to switch Database/ Storage as in step 5 to my external drive. WD My Book, 3tb. When rebooting the Pi I get a line 4 in fstab is bad. And somewhere in there it says the UUID is invalid. Triple checked everything to make sure it was in correct. Anyone have any ideas?
I’m getting a 502 Bad Gatway when I try to access from a browser. Any ideas?
Nevermind, my fat fingers missed a 1 in my ip. Thanks for the tut!
Awesome tutorial, thanks. Everything was good up to the point where I create the admin account on the owncloud page in my browser. It comes up with an error saying “Can’t create or write into the data directory /media/ownclouddrive”. I included the correct uuid for my external drive in the fstab file, so I’m not sure where I’m going wrong. Any pointers?
Hi Dave,
Sounds like something is wrong with the drive mount. Is the data you added to the fstab file all on the one line ? (The website forces it to be on two lines in the tutorial but should be kept on the same line. I have added a note for that step now.)
Let me know how you go!
i have mounted an cisf folder and i am getting the same error please help
I feel that backup steps are missing. If you are going to put your data on this – you want to know that it’s not going to disappear because the usb-stick was bad or whatever.
Also – “mounting a drive” step 7 code for fstab looks like two lines – it should be in one line.
I agree. @Gus, Could we get a tutorial on how to do this with Duplicati possibly? 😀
Hi, I followed your steps and when I try to access the owncloud app, I get this error:
504 Gateway Time-out
nginx/1.2.1
I try to access it this way:
https://192.168.0.100/owncloudDo you have an idea why this error occurs?
Thanks,
Ana
Hi Ana,
Have you tried accessing using just
https://192.168.0.100/Let me know how you go!
I am receiving the same error, 504 Gateway Time-out everything appears to be correct. ( I did verify the IP)
Thanks for a wonderful tutorial.
Does anyone know how long a Hard Drive will last as a cloud server before breaking?
Franklin
I use an external 1TB USB drive and configure the Pi to use spin down.
Works great !
http://www.htpcguides.com/spin-down-and-manage-hard-drive-power-on-raspberry-pi/
Hi. Which of those 3 in that tut did you go with?