In this tutorial, we will show you how to run Nextcloud on your system using Docker Compose.
Nextcloud is a popular self-hosted alternative to cloud solutions such as Dropbox, Office 365, and Google Drive.
Using this software, you have a handy web interface to upload all your files. It even features a web-based version of LibreOffice, allowing you to edit your documents, spreadsheets, and more, all from its web interface.
There are three main methods that people use to install and run Nextcloud.
The first is to install it “bare metal” to your system, this means manually setting up a web server, PHP, and a database server. In fact, we have guides for both Ubuntu and the Raspberry Pi that cover how to do a bare metal install of Nextcloud.
The second method would be to use the Nextcloud AIO Docker container. The advantage of this is that everything you need is already set up for you. The downside is that it consumes more resources on your system because it comes with everything. Additionally, the version of Nextcloud that ships with the AIO release tends to trail from the main release.
Finally, the third and final method, which we are covering in this guide, is to set up Nextcloud using its individual Docker containers. The main advantage here is that you have more control over your setup compared to the AIO version of Nextcloud. You will also always be using the latest release.
Using Docker as a whole provides several benefits when running Nextcloud. We will quickly go over some of these benefits below.
- The first is that it is super easy to update. You can upgrade to the latest version of Nextcloud with just a couple of simple commands.
- Secondly, it makes the set-up process super straightforward. You don’t have to worry about setting up a web server and PHP, as that’s all within the container.
- Thirdly, containerizing everything means you don’t have to install software directly into your operating system. This helps, especially when using software that relies on different versions of PHP.
By the end of this tutorial, you will have Nextcloud running on your device within a Docker container.
Installing and Running Nextcloud using Docker
Over the following sections, we will be walking you through the process of installing and running Nextcloud by using a Docker container.
This process is written with Linux operating systems in mind, and you must be using the terminal. If you run this on a desktop system, you can often open the terminal by pressing CTRL + ALT + T.
We have embedded a video below that will walk you through the process of installing Nextcloud using a Docker container. In addition to the video, we also have our written steps included below.
Installing Docker to your System
1. We will need Docker to be able to run Nextcloud later on within this guide. If you already have Docker, skip to the next section.
However, if you don’t have Docker installed, we highly recommend following our Docker installation tutorial.
https://pimylifeup.com/linux-docker-install/Preparing your System for the Nextcloud Docker Container
2. Our next step is to create a directory to store our Compose file for the Nextcloud Docker container.
You can create this folder by using the mkdir command within the terminal.
sudo mkdir -p /opt/stacks/nextcloudCopy3. After creating the directory, change to it by running the command below.
cd /opt/stacks/nextcloudCopySetting up the Docker Proxy
4. To run Nextcloud through Docker while retaining SSL support, we must set up a proxy using NGINX.
Since we need to make some changes to the configuration for the default NGINX Proxy, we must write our own Docker file. First, create a directory to store this Dockerfile.
sudo mkdir proxyCopyWriting the Dockerfile
5. The first thing we want to do in our new proxy directory is begin writing the Dockerfile.
Docker will use this file to build a new image using the lines we specify within it.
sudo nano proxy/DockerfileCopy6. Within this file, you will want to type in the following lines.
The first line tells Docker the image from which we want to build this new image. In our case, we are using the NGINX Proxy container.
Next, we want to copy our custom config file over into the NGINX proxy container.
FROM nginxproxy/nginx-proxy:alpine

COPY uploadsize.conf /etc/nginx/conf.d/uploadsize.confCopy
7. Once you have added the lines above to the file, save and quit by pressing CTRL + X, Y, and then ENTER.
Writing the Upload Size Config File
8. Next, we must write the NGINX config file that our new Dockerfile will copy.
Begin writing this configuration file by typing in the command below.
sudo nano proxy/uploadsize.confCopy9. Within this file, add the following two lines.
These lines set the max body size to 10 gigabytes, allowing large uploads. We also disable the proxy buffering, so the request is immediately passed on to our Nextcloud Docker container.
client_max_body_size 10G;
proxy_request_buffering off;Copy
10. After adding the lines above, you can save and quit by pressing CTRL + X, Y, and finally the ENTER key.
Generating a Password for MySQL
11. For our Nextcloud Docker container to talk with our database server, we must come up with a password.
You can use the following command to generate a somewhat secure password.
gpg --gen-random --armor 1 24 | base64CopyYou should end up with a string looking somewhat like we have shown below. Copy this string, as you will need it for the next section.
UlFWSDBCMXF0dXlLaURieFJwbytURGUzbzJzN21FeisKWriting the Environment File
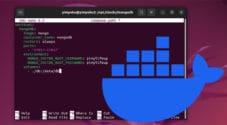
12. To save us the hassle of having to type out some details several times when writing the Docker Compose file, we will be creating a simple “.env” file.
This “.env” file will automatically be read-in when we start up the Nextcloud Docker container later on in this guide.
You can begin to write this “.env” file by running the following command within the terminal.
sudo nano .envCopy13. Now within this file, you will want to fill out the following lines. With these lines we are setting the MySQL password, the domain name you intend on using,.
<SQLPASS>: Replace this with a password for Nextcloud to talk with your SQL Server. We generated a usable, random string back in step 11 of this tutorial.<STORAGELOCATION>: This placeholder must be replaced with the full path to where you want Docker to store Nextcloud’s data.
For example, you could use “/opt/stacks/nextcloud/docker“.<HOSTNAME>: Next, you must replace this value with the domain name or hostname that you want to use.
For example, we could use “nextcloud.pimylifeup.com“. Whichever domain name you use, ensure that you already have it configured to point to a publicly accessible IP address.
If you are running this without a domain name, you can simply use something like “nextcloud.local“.<EMAIL>: Replace this value with an email address that Lets Encrypt will associate with the generated certificate. It will use this email to alert you of any issues with your certificate.
MYSQL_PASSWORD=<SQLPASS>
STORAGE_LOCATION=<STORAGELOCATION>
DOMAIN_NAME=<HOSTNAME>
LETS_ENCRYPT_EMAIL=<EMAIL>Copy
14. Once you have filled out the environment file, save and quit by pressing CTRL + X, Y, and then ENTER.
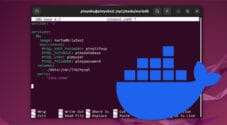
Writing a Docker Compose File for Nextcloud
15. In this section, we will be saving a Docker Compose file for Nextcloud to your system.
This software relies on quite a few different containers, so there will be numerous lines you will have to add to this file.
16. You have two choices for setting up Nextcloud using Docker.
- The first is to use a Signed Certificate from Let’s Encrypt. This will require you to have a domain name pointed to your Nextcloud server and ports 80 and 443 open on your server.
This is the best option if you want a verifiable, secure connection for your server. - The other option is to use a self-signed certificate. This certificate is signed by your own server and won’t be verifiable by any web browser unless you manually install the certificate.
The bonus of this method is that you don’t need outside access to your Nextcloud server, allowing you to add SSL support without a domain name or opening ports.
a. For those with a domain name that they are using and have opened ports 80 and 443, you will want to use the command below.
Using this command, we will use wget to grab a Docker Compose file for Nextcloud that will automatically fetch a signed certificate from Lets Encrypt for your domain name.
sudo wget https://git.pimylifeup.com/compose/nextcloud/signed/compose.yamlCopyb. Alternatively, if you are running this without a domain name, or running this purely locally, you will want to use the command below instead.
This command will download a Docker Compose file that will set up Nextcloud using a self-signed certificate. This certificate will be generated using the OMGWTFSSL container.
sudo wget https://git.pimylifeup.com/compose/nextcloud/selfsigned/compose.yamlCopyStarting Nextcloud
17. After writing your Compose file, you can start Nextcloud on your device by running the following command.
Docker will download and start all the containers specified within your compose file. This can take a few minutes to complete, so please be patient.
docker compose up -dCopyWe use the “-d” option to detach Docker from the terminal once it has downloaded and started all containers.
Accessing the Nextcloud Web Interface
18. Now that you have gotten Nextcloud up and running using Docker, you must know your IP address or domain name.
If you plan on connecting using an IP address, you can use the hostname command below to get it.
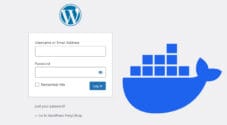
hostname -ICopy19. Once you know whether you are using a domain name or IP, go to the following address in your favourite web browser.
https://<IPADDRESS OR DOMAINNAME>/Initial Setup of your Docker Nextcloud Installation
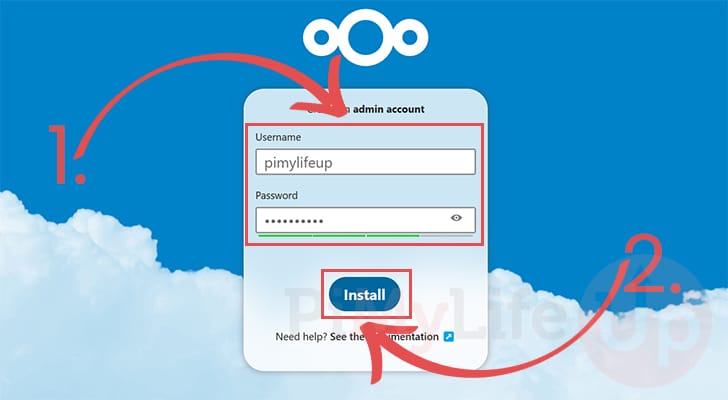
20. When you first access Nextcloud, you will be asked to create an admin account. Type in the username and password (1.) you want to use to access Nextcloud.
Once you are happy with the details you have entered, click the “Install” button (2.).
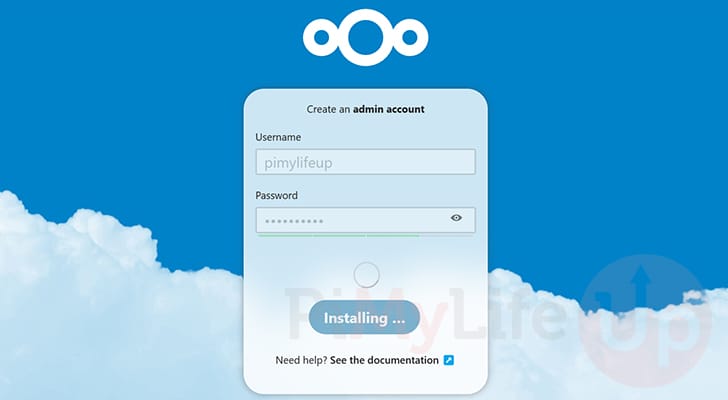
21. Nextcloud can take a few minutes to finish installing the database and setting up some initial files.
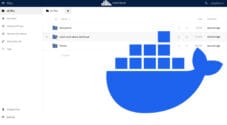
22. At this point, you finally have Nextcloud up and running on your device using a Docker container.
Updating Nextcloud using Docker Compose
One of the main advantages of using Docker Compose to install Nextcloud on your system is that it makes updating the software very easy.
The following steps will show you how to pull the latest version of Nextcloud and move your running container to the new image.
1. Before you update your Nextcloud Docker container you must change to the directory where we wrote the Compose file.
If you have followed our tutorial exactly, you should be able just to use the command below.
cd /opt/stacks/nextcloudCopy2. We now need to tell Docker to pull the latest version of all the containers within the Compose file.
docker compose pullCopy3. Finally, to get Docker to move your current running Nextcloud to the new container, you need to use the following command.
Docker will detect the new image and automatically move containers to their new versions.
docker compose up -dCopyConclusion
Hopefully, you will now have full access to Nextcloud on your device. Running this software through Docker has made setting up and running on your device simple.
Nextcloud is a powerful tool that allows you to upload and manage your files in one central location. It is packed with features that make it more than just a file server.
Please feel free to comment below if you have had any issues getting Nextcloud to run using Docker.
If you found this tutorial helpful, we highly recommend checking out our other tutorials and Linux guides.
This guild still works I just use it to install nextclould
Help, very frustrated, I followed the instructions to the letter and all I get when I attempt to login is “503 Service Temporarily Unavailable”. I have erased the drive and started over 3 times, and the results are the same. Can you suggest a fix.
Thanks
Try running
docker compose logs -fand note any errors that may appear. This will show you exactly what’s happening inside the containers and should reveal why the service is unavailable.After trying all sorts of other instructions online, I managed to install Nextcloud on my Raspberry Pi 4 with your clear instructions. Thanks for that!
Is the reverse proxy mandatory?
Do we need this if we just want to run nextcloud locally?
I just want to be able to back-up my devices when I’m in my LAN
Hi Shimmy,
From memory there is a few things that just don’t work properly within Nextcloud when it is missing an SSL certificate. Removing the proxy is fairly straightforward though if yo uwanted to test it out.
Kind regards,
Emmet
Thanks for this – just on the first step of my Docker journey and I’m enjoying your guides!
Love your tutorials, have used alot of them for recent years, and want to say “thank you” from all heart, your tutorials helped me so much!
Thank you, it is always much appreciated hearing that our work has helped people.
Kind regards,
Emmet
I must say your tutorials are sharper and more accurate than any AI or Yt videos. Bravo. Is it worth routing Nextcloud through traefik?
Hi Faust,
Really glad that our tutorials continue to be helpful!
I’ve never actually used Traefik myself and have always kind of stuck with Nginx, but I can’t see any harm with using Traefik instead.
Kind regards,
Emmet