In this tutorial, we will be walking you through installing the Nagios monitoring software to a Raspberry Pi.
Nagios is a popular open-source software that is designed to monitor systems, networks, and infrastructure.
One of the most significant advantages of Nagios is that it is relatively lightweight compared to its alternatives.
Being lightweight makes it perfect to run on your Raspberry Pi, allowing you to maximize the amount you can do on a single device.
Within this tutorial, we will be showing you how you can use Nagios to monitor devices from your Raspberry Pi.
When visiting the Nagios website, you will see that there are two versions of Nagios available.
In this guide, we will show you how to install Nagios Core, the free and open-source version of Nagios.
Equipment List
Below, we have listed the equipment that we used for these steps on installing and setting up Nagios on the Raspberry Pi.
Recommended
Optional
For this tutorial on installing Nagios, we used a Raspberry Pi 4 running the latest available version of Raspberry Pi OS.
This guide should work fine for anyone running a Debian-based operating system such as Ubuntu Server or Kali Linux.
Preparing your Raspberry Pi for Nagios
In this section, we will be preparing your Raspberry Pi to compile and run the Nagios software.
1. Before we start, let us ensure that our operating system is entirely up to date.
To update everything, we need to type in the following two commands into the terminal.
sudo apt update
sudo apt full-upgradeCopy
2. Once your Raspberry Pi has finished updating, we can now install the packages that we will be using to run Nagios.
Run the following command to install all the packages we require.
sudo apt install -y autoconf build-essential wget unzip apache2 apache2-utils libapache2-mod-php php libgd-dev snmp libnet-snmp-perl gettext libssl-dev wget bc gawk dc libmcrypt-devCopyThis command installs several packages that we need. These packages include the compiler we need to compile the Nagios software. We also install the Apache web server, which is used for Nagios’s web interface.
Downloading and Compiling Nagios
In this section, we will walk you through the few quick steps needed to compile the Nagios software on your Raspberry Pi.
1. To start, we are going to first change into the /tmp directory.
This directory is where we will download, extract, and compile the Nagios source code.
cd /tmpCopy2. Before we download Nagios, let us set a bash environment variable. This variable will hold the version of Nagios that we intend to compile on our Raspberry Pi.
With the line below, we are setting the bash variable “NAGIOS_VERSION” to “4.5.9“. You can check the latest release of Nagios by visiting their GitHub.
NAGIOS_VERSION=4.5.9Copy3. We can now download the Nagios source code to our Raspberry Pi by running the following command.
wget -O nagios.tar.gz https://github.com/NagiosEnterprises/nagioscore/archive/nagios-${NAGIOS_VERSION}.tar.gzCopyThis command will use wget to download the Nagios source code to our /tmp directory.
4. Once the archive has finished downloading, we can extract it by running the following command.
tar xzf nagios.tar.gzCopy5. Now, change into the Nagios directory and configure the software for compilation.
cd /tmp/nagioscore-nagios-${NAGIOS_VERSION}/
./configure --with-httpd-conf=/etc/apache2/sites-enabledCopy
We specify the path where we want our Apache2 configuration to be stored. This path will be utilized later in the tutorial.
6. Let us now compile Nagios by running the following command.
make allCopyThis process can take some time as it needs to compile all the Nagios code. Running this on a Raspberry Pi 4 took approximately 5 minutes.
Setting Up Nagios on the Raspberry Pi
In this section, we will be showing you how to set up Nagios on your Raspberry Pi. The next few steps will finish up the setup process for Nagios.
1. Let us make use of the make command to create the user and group Nagios needs to run.
We will also add the www-data user to the nagios group that is created by our make command.
sudo make install-groups-users
sudo usermod -a -G nagios www-dataCopy
2. Next, install the compiled binaries to our operating system by utilizing the command below.
sudo make installCopy3. We can also use the make command to install the Nagios service and set it up to start at boot.
Run the following command to install the Nagios core daemon.
sudo make install-daemoninitCopy4. Now we can run the following command to set up the external command directory.
sudo make install-commandmodeCopy5. Our next step is to copy the sample configuration file again by using the make command.
sudo make install-configCopyThese configuration files are needed for Nagios to operate. Without the config files, the software will not load.
6. Our second last step is to install the Apache configuration files.
This command will install the required configuration files to the directory we specified when we configured the makefile.
We will also use two a2enmod commands to make sure that the required Apache modules are enabled.
sudo make install-webconf
sudo a2enmod rewrite
sudo a2enmod cgiCopy
7. In our final step, we will be creating an Apache user that you will use to access the Nagios interface on your Raspberry Pi.
The following command will create a user called nagiosadmin. You will be asked to specify a password for this user.
sudo htpasswd -c /usr/local/nagios/etc/htpasswd.users nagiosadminCopyThe user must be called nagiosadmin to satisfy the default configuration of Nagios.
Starting Nagios on the Raspberry Pi
In this section, we will be walking you through how to start the Nagios software on your Raspberry Pi.
1. Our first step is to restart the Apache web server by running the following command.
sudo systemctl restart apache2CopyRestarting Apache will allow our new configuration files to be loaded in.
2. Next, enable the Nagios service and start it up by running the following two commands.
sudo systemctl enable nagios
sudo systemctl start nagiosCopy
By enabling the service, we will be allowing Nagios to start up at boot on your Raspberry Pi.
3. You can verify that Nagios has started on your Raspberry Pi by running the following command.
sudo systemctl status nagiosCopyIf everything is working as intended, you should see the following text be outputted to the terminal.
Active: active (running)CopyThis text tells us that the service is active and is currently running.
Installing the Nagios Plugins
For Nagios to work correctly, we need to install its plugins. Without it, the Nagios software will have very little functionality.
In this section, we will be showing you how to install these Nagios plugins on your Raspberry Pi.
1. First change into our /tmp directory.
cd /tmpCopy2. Now that we are in the /tmp directory, we can download the Nagios plugins by running the command below.
wget -O nagios-plugins.tar.gz https://github.com/nagios-plugins/nagios-plugins/releases/download/release-2.3.3/nagios-plugins-2.3.3.tar.gzCopy3. Now extract the plugin source code to our current directory by using the following command.
tar zxf nagios-plugins.tar.gzCopy4. Our next step is to change into our newly created directory and configure the plugins for compilation.
cd /tmp/nagios-plugins-2.3.3
./configureCopy
4. Once the configuration process has completed, we can compile the Nagios plugins by running the following command.
makeCopyDepending on your Raspberry Pi, this process can take some time. However, it should be a lot faster than compiling the base Nagios code.
5. Finish up this process by installing the Nagios plugins by running the following command.
sudo make installCopy6. To make sure Nagios loads in the new plugins, restart the software by running the command below.
sudo systemctl restart nagiosCopyConnecting to the Nagios Web Interface
Now that we have installed everything, we can now test that the Nagios web interface is online and functioning.
1. To access the Nagios web interface, you will need to know the Raspberry Pi’s IP address.
You can retrieve your Raspberry Pi’s local IP address by running the following command.
hostname -ICopy2. To connect to the Nagios web interface, you will need to go to your Pi’s IP address followed by /nagios.
http://[IPADDRESS]/nagiosWhen you try to connect, you will be asked to enter a username and password.
If you have been following this tutorial, the username should be nagiosadmin, and the password should be what you specified.
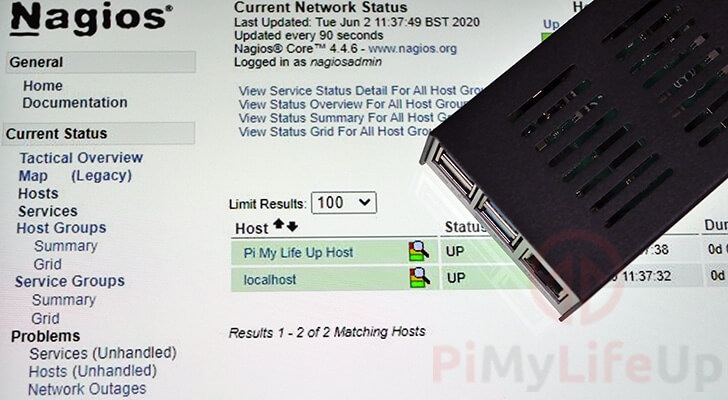
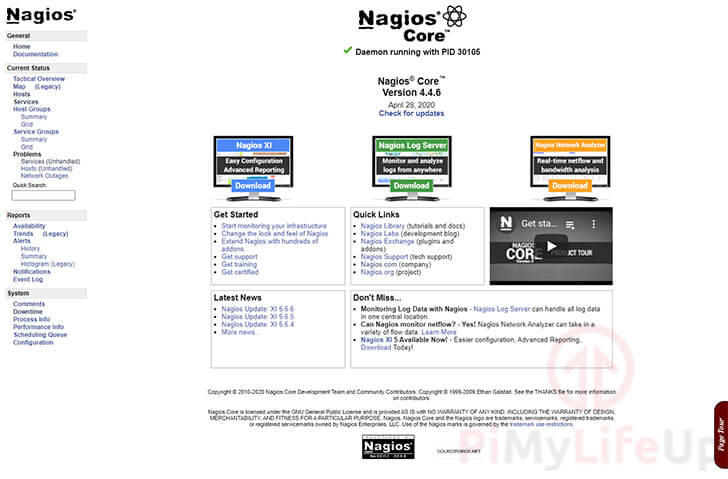
3. Upon a successful connection, you should be greeted by the Nagios core homepage, all running from your Raspberry Pi.
Adding a device to Nagios
In the next two sections, we will be showing you how you can add a device for Nagios to check. This process is relatively simple but does involve modifying a couple of configuration files.
Adding your Host to Nagios
In this section, we will be showing you how to add your host to a configuration file that Nagios will read.
To do this, we will need to create a configuration file where we will define the various details of the device we want to monitor.
1. Let us start by changing into the “objects” configuration folder for Nagios.
This folder, by default, contains some sample configuration files. These files can be useful for seeing how to configure Nagios.
cd /usr/local/nagios/etc/objectsCopy2. Let us now create a config file where we will specify our host’s configuration.
For this example, we will be calling this file pimylifeuphost.cfg, however its best to use a name that best describes your device.
sudo nano pimylifeuphost.cfgCopy3. Within this file, we need to enter the following lines.
You will need to make sure that you specify the IP address of the device you want to perform checks on.
define host {
    use                     linux-server            ; Host group to use
    host_name               Pi My Life Up Host      ; Name of this host
    alias                   pimylifeuphost          ; Alias
    address                 [YOURHOSTIPADDRESS]     ; IP Address
}
This basic configuration will allow us to at least monitor whether the device is online by sending a ping request to it.
4. Once done, save the file by pressing CTRL + X, followed by Y, then ENTER
5. Next, we need to modify our Nagios configuration so that it knows to read our new config file.
Begin modifying the config file by running the following command.
sudo nano /usr/local/nagios/etc/nagios.cfgCopy6. Within this file, find the following line and add our new config line below it.
Find
cfg_file=/usr/local/nagios/etc/objects/templates.cfgCopyAdd Below
cfg_file=/usr/local/nagios/etc/objects/pimylifeuphost.cfgCopyNow when we restart Nagios, it will know to read this file and load in our settings defined within it.
7. Save the configuration file by pressing CTRL + X, followed by Y, then ENTER
8. We can now restart the Nagios service on our Raspberry Pi by using the command below.
sudo systemctl restart nagiosCopy9. You should now be able to see your new host by going to the “Hosts” page on the Nagios dashboard.
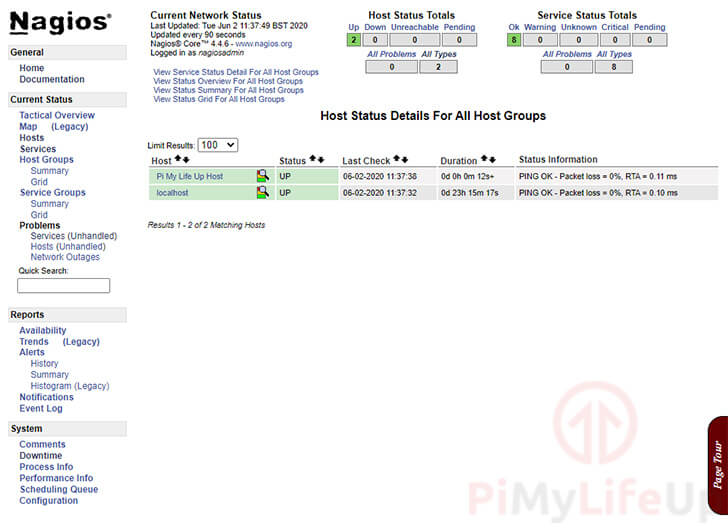
Currently, Nagios will only be doing a simple ping check to see whether the hosts are online.
In our next section, we will be showing you how you can add services to the host to check things like the status of SSH or its web interface.
Adding a Service to your Host
In this section, we will be showing you how to add a couple of additional checks to your host.
For this guide, we will be setting up two services that will use the check_http and check_ssh commands on our host.
Both commands can be used to do a fair amount, but we will be using their most basic usages for our tutorial.
1. To be able to add these new commands, we need to go and modify the host file we created earlier.
We can begin modifying this file by running the following command on our Raspberry Pi.
sudo nano /usr/local/nagios/etc/objects/pimylifeuphost.cfgCopy2. Within this file, we will need to add a new section to the bottom that defines our services.
Each service must be defined in a separate block, so for this tutorial, we will be creating two of these blocks.
define service {
    use                     local-service
    host_name               Pi My Life Up Host
    service_description     SSH
    check_command           check_ssh
}

define service {
    use                     local-service
    host_name               Pi My Life Up Host
    service_description     HTTP
    check_command           check_http
}
With these two blocks, Nagios will automatically check the status of the SSH and HTTP ports running on our specified host.
3. Once you have finished adding the new blocks, you can save the file by pressing CTRL + X, then Y, followed by the ENTER key.
4. We should now verify that our configuration changes are valid. We can do that by running the following command.
This command will tell the Nagios software to verify the contents of the configuration files.
sudo /usr/local/nagios/bin/nagios -v /usr/local/nagios/etc/nagios.cfgCopyIf everything has been entered correctly, you will see the text “Things look okay” appear in the command line.
5. We can now restart Nagios so that our changes get loaded in on our Raspberry Pi.
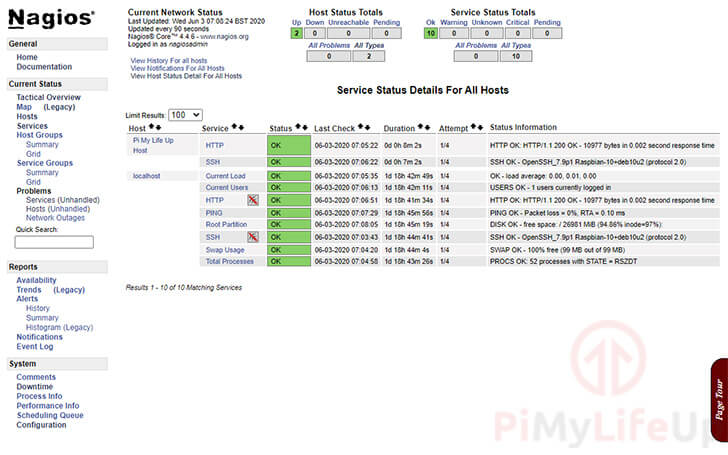
sudo systemctl restart nagiosCopy6. Now when you open the Nagios web interface, go to the “Services” menu.
Within this page, you will be able to see the status of your SSH and HTTP services of your new host.
Conclusion
Hopefully, at this stage, you will now have the Nagios software up and running on your Raspberry Pi.
You can learn more about how to use Nagios by checking out the official Nagios Core documentation.
Please leave a comment below if you have encountered any issues with installing Nagios.
If you liked this project, we recommend taking some time to explore our huge range of Raspberry Pi projects. You will be surprised by the amount you can do on the Pi.


Hi Emmet,
thank you for this good setup instruction. refers to version 4.4.6 but nowadays 4.5.9 is the latest version. slightly different url to be used:
https://github.com/NagiosEnterprises/nagioscore/releases/tag/nagios-4.5.9If you follow this and the rest of the instruction it will update you to 4.5.9
regards,
Rene
Hi Rene,
Thank you for letting us now about the version being out of date.
I have made some changes to the tutorial to use the new version, as well as make it a bit cleaner for changing to a newer release for future users.
Kind regards,
Emmet
Hi Emmet,
I love your tutorial. I’ve actually used it multiple times rebuilding my Nagios Core installation. That being said, there’s a plugin called check_dns I’ve been trying to get to work not having much luck.
I was hoping you might have some suggestions or instructions on how to add this plugin and use it in a cfg file?
It seems despite my best efforts I seem to be doing something wrong and the check_dns service always seems to fail.
Thank you for your time,
Awesome tutorial to get started with Nagios, thanks!
Thank you so much for this tutorial, it was a life saver !!!
Very clear and concise flow, everything works as its supposed to without headaches.
Hi
please add the libapache2-mod-php to the installation packages needed
Hi Phash,
Thank you for pointing that out, I have updated the tutorial with the missing package.
Cheers,
Emmet
Great tutorial man! – Have set it up on my Pi4 working really well.
Hi Emmet,
Congrats for this tutorial, clear and easy to follow.
Many thanks from France, it gives me new ideas for my brand new Raspberry Pi 4.
Regards
Jame
Very good tutorial – easy to follow and understand
Thanks for taking the time.
Great tutorial – thanks very much!
got a nice motivational boost from this tut. thank you!
i had to use some alternative commands because i’m using windows subsystem for this. use the ‘service’ command for the systemctl commands if this is your case.
however, after i configured the http and ssh services they show up as critical on the nagios services page. there is also a root partition and ssh critical status on the localhost. i will investigate, but for the ssh this looks to be a routing problem, ie the localhost is using the loopback address [wrong port too – probably because its looking for the ssh connection on the 127 address and not the actual network address]. thinking out loud; should i configure nagios to point ssh to the lan address or change the ssh config to point to my [wsl2/the rpi] lan address?
Hi Emmet,
perfect tutorial, thanks from Germany!
Rainer
Fantastic tutorial, up and running with no issues. Many thanks for your efforts
Thank you so much. I actually got this running with lighttpd with a few modifications. It would be great if you could show how to get alerting working so it can email me if there are issues.
Thanks again.
A very good tutorial! Thanks you very much!!
Hi, installed it but failed when starting the service (sudo systemctl start nagios). Got the following error message:
[SNIPPED]
Any idea??
Thanks!!
Hi Michael,
See my reply to Chris below.
The tutorial should now work correctly, was just missing a
sudo make installcommand within the tutorial.Cheers,
Emmet
Works now, thanks for your help, Emmet!
When I get to step 2 of Starting Nagios I receive and error for No such file or directory.
I checked and these directories indeed do not exist. But I’m not sure why. Is something wrong with the script?
———————————————————————————–
[SNIPPED]
Jun 07 23:38:12 pihole systemd[15472]: nagios.service: Failed to execute command: No such file or directory
Jun 07 23:38:12 pihole systemd[15472]: nagios.service: Failed at step EXEC spawning /usr/local/nagios/bin/nagios: No such file or directory
[/SNIPPED]
——————————————————————————
Hi Chris,
I went back through the tutorial and realised I forgot to include a step. I’ve now corrected the tutorial.
You can solve this yourself by changing back into the temporary directory by running the command below.
Then we can install the actual Nagios binaries.
Cheers,
Emmet
Hi Emmet
I have done so many of your projects they are fantastic. Thank you for taking the time to put them all together. This Nagios project is another excellent tutorial. Really appreciate what you do.
Steve.
There is a typo at Step 4, Install the Nagio plugins:
It says:
cd /tmp/nagious-plugins-2.3.3
It should be:
cd /tmp/nagios-plugins-2.3.3
Hi Jon,
Thank you for pointing out that typo, I have now corrected it in the tutorial.
Cheers,
Emmet
I’m finding this extremely confusing. I went to the Nagios web site (that you linked to) and couldn’t figure out whether this software was free or crazy expensive? Did you or anyone on this web site receive any kind of compensation for this article? I’m not trying to accuse you of anything, I simply can’t tell. Parts of the website refer to it as “open source” and others show you the license fees, which run into the tens of thousands of dollars. It would be great if you could clarify this in the post.
Thanks!
Hi Steve,
Nagios Core is the open source component of Nagios, it is free and does not require any payment. You can find the source code through their GitHub.
Nagios XI is their enterprise version and is what comes with a cost, we do not use the paid version in this tutorial.
I personally found their website to be quite confusing as well, a lot of it is almost designed to drive you towards Nagios XI which is a bit of a trap.
I adjusted the start of the post so that it points out that we are installing Nagios Core and not Nagios XI, as well as added a link to the Github page for that that are interested.
Cheers,
Emmet