In this project, we will be showing you how to install Zabbix to your Raspberry Pi.
Zabbix is a popular open-source monitoring software tool for a wide range of things, such as networks, servers, and virtual machines.
You can even use Zabbix to monitor your Raspberry Pi’s CPU load, network utilization, disk space consumption, and more.
For this guide on installing Zabbix to your Raspberry Pi, we will be using a clean installation of the Raspberry Pi OS.
Additionally, we will also be choosing to set this software up with NGINX as the backend web server.
Equipment List
Below is a list of the equipment we used when installing the Zabbix server to our Raspberry Pi.
Recommended
- Raspberry Pi Amazon
- Micro SD Card Amazon
- Power Supply Amazon
- Ethernet Cable Amazon or Wi-Fi Amazon
- HDMI Cable Amazon
Optional
Preparing your Raspberry Pi for Zabbix
Before we can install Zabbix to our Raspberry Pi, we need to do some prep work.
Mainly we will need to install both the NGINX and MySQL servers on our device.
1. Before we do anything, let us first run an update on our Raspberry Pi.
These commands will update the package list, then upgrade all packages that have a pending update.
sudo apt update
sudo apt full-upgradeCopy
2. With your Raspberry Pi now up to date, we will need to install the NGINX web server.
Before continuing, please follow our installing NGINX Web server tutorial.
You will need to follow both the “Setting up NGINX on the Raspberry Pi” and “Configuring NGINX for PHP” sections included within that tutorial.
3. Once you have NGINX installed, you will now need to install the MySQL database server.
The Zabbix software will use MySQL on your Raspberry Pi to store its data.
You will need to follow our guide on installing MySQL to your Raspberry Pi before continuing.
From this tutorial, please follow the “Setting up MYSQL on a Raspberry Pi” section.
Installing Zabbix to the Raspberry Pi
Now that we have done some preparation, we can finally move on to install the Zabbix software to your Raspberry Pi.
1. Our first task is to add the Zabbix server repository to our device.
We can start this process by using wget to download the Zabbix 6.2 Debian package to the Raspberry Pi.
Please note, the version we are downloading with this command is for Raspberry Pi OS Bullseye.
wget https://repo.zabbix.com/zabbix/6.2/raspbian/pool/main/z/zabbix-release/zabbix-release_6.2-2%2Bdebian11_all.debCopy2. Once the package downloaded. We can use the dpkg tool to install it.
Run the following command to install this package to your Pi.
sudo dpkg -i zabbix-release_6.2-2+debian11_all.debCopy3. As we have made changes to the repository sources, we need to rerun an update.
If we do not run this update, the operating system won’t be aware of the new Zabbix packages.
sudo apt updateCopy4. Finally, we can install the Zabbix server, its frontend interface, and its agent software.
Running the following command will get us everything we need for Zabbix to run on our Raspberry Pi.
sudo apt install zabbix-server-mysql zabbix-frontend-php zabbix-nginx-conf zabbix-sql-scripts zabbix-agentCopySetting up the Zabbix Server
Before using Zabbix on our Raspberry Pi, we still need to create its database and configure NGINX.
Configure the SQL Database for Zabbix
For Zabbix to be able to work, it needs somewhere to store its data. In our case, this means creating a new user and database on our SQL server.
1. We need to start by loading up the MySQL command-line tool.
To launch into this, you need to run the following command on your Raspberry Pi.
sudo mysql -uroot -pCopyIf prompted, enter the password for your root MySQL account. You should have set this up while following the guide we linked earlier.
2. For our first step, we will create a new SQL database called “zabbix“.
Run the following command within the MySQL CLI to create the database.
CREATE DATABASE zabbix CHARACTER SET utf8 collate utf8_bin;Copy3. Next, we need to create a user called “zabbix” that will be used to access the new database.
Before entering the following command, make sure that you replace “PASSWORDHERE” with a unique and strong password of your choosing.
CREATE USER zabbix@localhost IDENTIFIED BY '<strong>PASSWORDHERE</strong>';CopyWe will need the password that you set here later on in this guide. We lock this user so that it can only connect via the localhost by using “@localhost“.
4. Finally, with both the user and database created, we need to grant some privileges.
Grant all privileges to the “zabbix” database to the “zabbix” user by running the following command.
GRANT ALL PRIVILEGES on zabbix.* to zabbix@localhost;Copy5. We are now finally done with the database so we can quit out of the MySQL CLI.
To exit, all you need to do is type in “quit;” and press the ENTER key.
quit;Copy6. Our final task with the database is to import the tables and initial Zabbix data.
This data was downloaded to your Raspberry Pi when we installed the Zabbix packages earlier.
Run the following command to pass the SQL data directly into the MySQL CLI.
zcat /usr/share/zabbix/sql-scripts/mysql/server.sql.gz | mysql --default-character-set=utf8mb4 -uzabbix -p zabbixCopyBefore proceeding, you will need to enter the password you set for the “zabbix” user earlier in this guide.
Please note this process can take some time as it needs to insert a lot of data into the SQL database.
Modifying the Zabbix Server Configuration
We now need to modify the configuration file for the Zabbix server to set the password for the database.
Without this, Zabbix won’t know how to connect itself to our Raspberry Pi’s MySQL software.
1. Let us begin modifying the Zabbix server configuration by running the following command.
We will be using the nano text editor as it is one of the most straightforward text editors to use.
sudo nano /etc/zabbix/zabbix_server.confCopy2. Within this file, we need to find and replace the line that defines the database password.
To search for this line quickly, you can use the CTRL + W shortcut.
# DBPassword=CopyReplace that line with the following.
When typing this line in, replace “PASSWORDHERE” with the password you set up for the “zabbix” SQL user.
DBPassword=<strong>PASSWORDHERE</strong>Copy3. Once you have set your database password within this file, you can save and quit.
If you are using nano, you can save and quit by pressing CTRL + X, then Y, followed by the ENTER key.
Reconfiguring NGIXN for the Zabbix Frontend
Our final task is to configure our NGINX server to display the Zabbix frontend from your Raspberry Pi.
1. We will need to modify the default NGINX configuration to point at the Zabbix config file.
Begin editing the NGINX configuration by running the following command on your Raspberry Pi.
sudo nano /etc/nginx/nginx.confCopy2. Within this file, you will need to add an additional line.
Search for the following line. You can use CTRL + W to search the file to find this text.
include /etc/nginx/sites-enabled/*;CopyBelow this line, you need to add the following.
include /etc/zabbix/nginx.conf;CopyThis line will direct NGINX to include the Zabbix configuration file. This file was installed as a part of the Zabbix package.
3. Once you have made the changes to the file, you can save and quit by pressing CTRL + X, then Y, followed by the ENTER key.
4. The last file we need to modify is Zabbix’s own configuration file.
Begin modifying this file using the nano text editor by running the command below on your Raspberry Pi.
sudo nano /etc/zabbix/nginx.confCopy5. We only need to make a single change within this file to make it accessible.
Within this file, find the following line. This line should be somewhere near the top of the file.
# listen 80;CopyRemove the comment from this line so that it looks like what we have below.
If you have software running on this port already, you can try changing it to something else, such as 8080.
listen 80;CopyThis line tells NGINX that for this particular configuration, it should be listening on port 80. Only one piece of software can be listening on a port at one time.
6. Finally, save your changes by pressing CTRL + X, followed by Y, then the ENTER key.
7. Remove the default NGINX configuration.
We do not need this to run the Zabbix software on our Raspberry Pi, and it is more likely to cause configuration issues.
sudo rm /etc/nginx/sites-enabled/defaultCopy8. Finally, let us restart all of our services so that the configuration changes take effect.
sudo systemctl restart zabbix-server zabbix-agent nginx php8.2-fpmCopyInitial Run of the Zabbix Web Interface
Now that we have set up NGINX, MySQL, and the Zabbix server, we can finally load its web interface.
You can use any modern web browser to access your Pi’s Zabbix server. You will only need to know your Raspberry Pi’s local IP address.
1. The quickest way to get the local IP address of your Pi is to use the following command.
hostname -ICopy2. With your Pi’s IP address handy, go to the following address in your favorite web browser.
http://[IPADDRESS]Make sure you swap out [IPADDRESS] with the local IP of your Raspberry Pi.
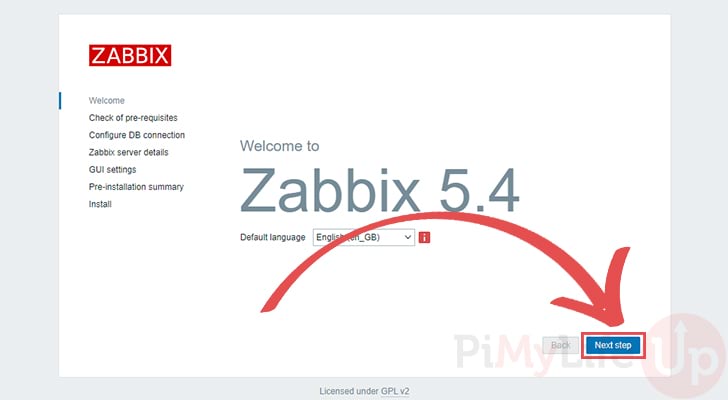
3. When you open the Zabbix web interface for the first time, you will be greeted with the following welcome screen.
To begin the setup experience, click the “Next step” button.
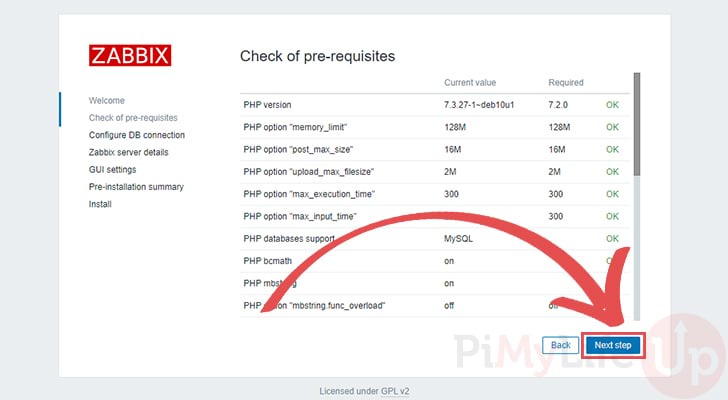
4. The next screen will have a checklist for all of Zabbix’s pre-requisites.
If you have followed our tutorial, all of these should be set to “OK“.
To proceed with setting up Zabbix on your Raspberry Pi, click the “Next step” button.
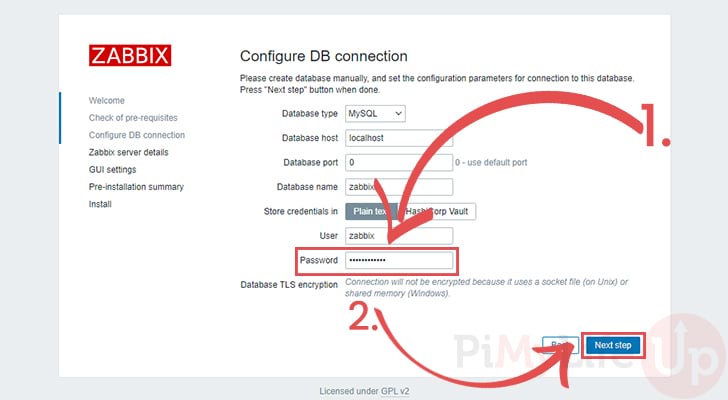
5. We now need to configure the database details for the Zabbix database we set up earlier.
Most of the default details can be left as they are. The only one you need to set is the password field (1.). Make sure to sit this textbox to the password you created when creating the zabbix MySQL user.
Once all the details are correct, click the “Next step” button to continue (2.).
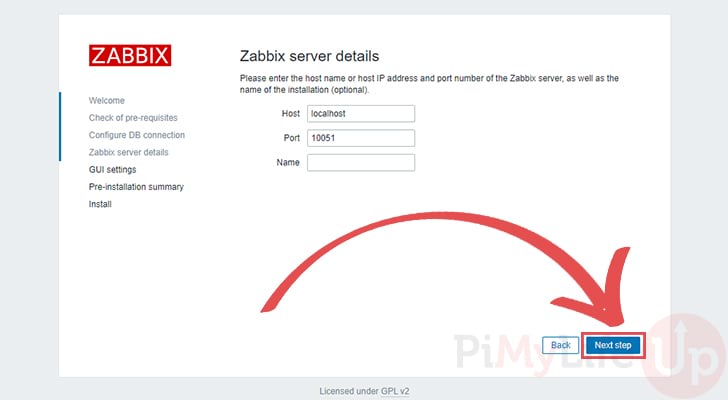
6. As we are running the Zabbix server on the Raspberry Pi itself, we don’t need to worry about this screen.
You can safely click the “Next step” button to skip this section.
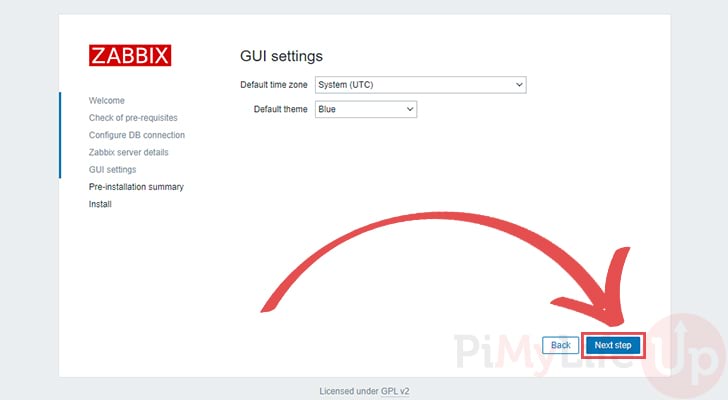
7. Using this screen, you can configure some of Zabbix’s GUI settings.
Use these options to configure the time zone or change the default theme.
Once you are happy with your settings, click the “Next step” button.
8. You will now be greeted with a summary of all the important settings you set during the installation process.
If everything looks correct, then you can click the “Next step” button.

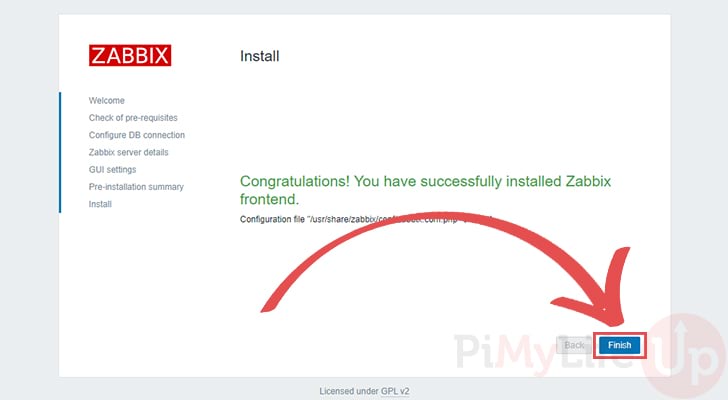
9. You have now successfully installed the Zabbix frontend on your Raspberry Pi.
You can proceed to the login screen by clicking the “Finish” button.
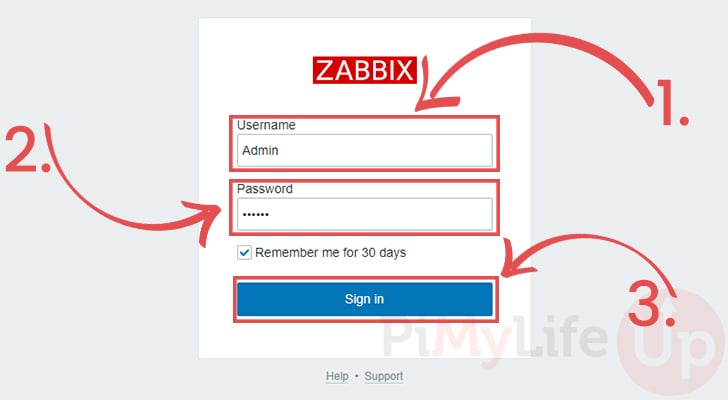
10. Finally, we can log in to the Zabbix web interface.
The default username and password for the Zabbix web interface are “Admin” and “zabbix“.
First, enter the username to login into the interface with. With Zabbix unconfigured, this should be “Admin (1.).
Next, enter the password for the user. By default, you will need to type in “zabbix” (2.).
When you are happy, you have typed in the correct username and password, click the “Sign in” button (3.).
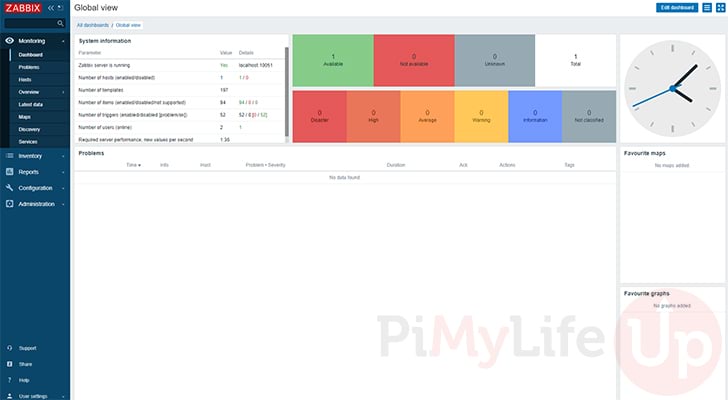
11. You will now be greeted with the Zabbix dashboard.
You can now begin to put your Zabbix installation to use and start setting up its monitoring.
Changing the Default Zabbix Web Interface Password
The first thing you will want to do after installing Zabbix is to change the default password.
Leaving passwords to their defaults can pose a considerable security risk to your Raspberry Pi. Anyone can perform a quick search to gain access to the admin account.
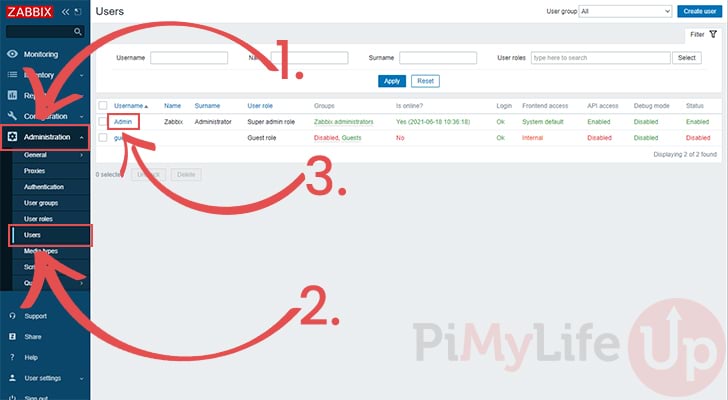
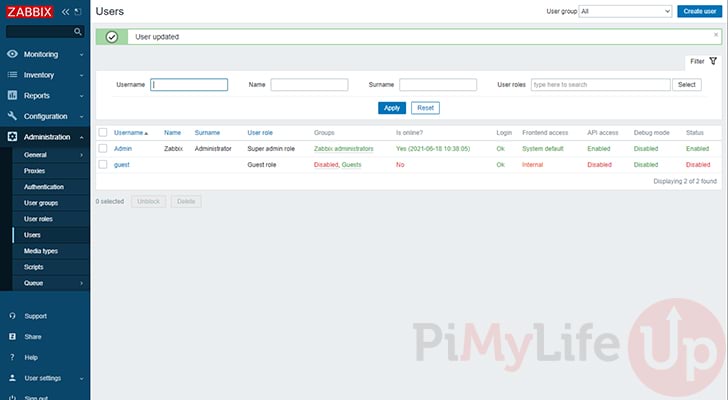
1. First, click “Administration” option in the sidebar to show some additional options (1.).
Next, look in the sidebar and click the “Users” option (2.). This screen will allow us to manage users, including the default Admin user.
Once you are on the users management screen, look for the user you want to change the password for and click it. In our case, this will be the “Admin” user (3.).
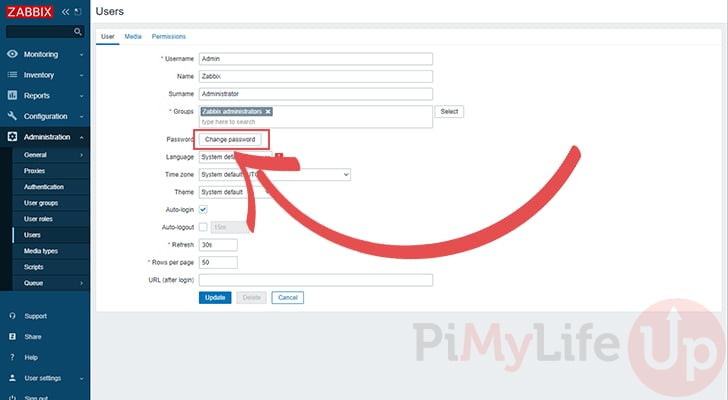
2. With a user-selected, you should see there is a “Change password” button.
You need to click this button to begin modifying a user’s password.
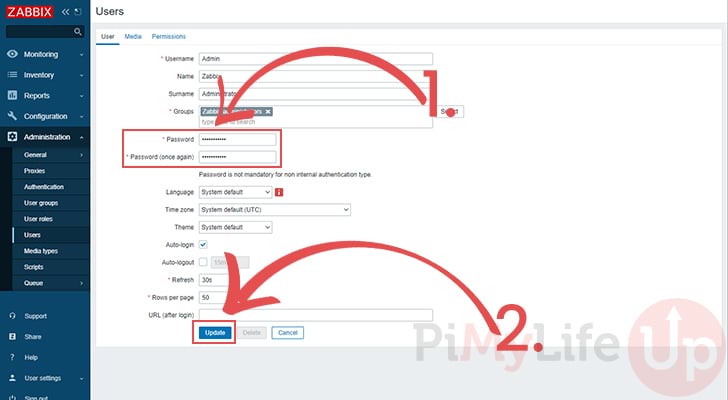
3. After clicking the “Change password” button, you should see two new textboxes.
In these textboxes type in the password that you want to assign to the selected user (1.). Make sure you set this to something hard to guess.
Once you are happy with the password, click the “Update” button (2.).
4.At the top of the screen, you should see a message saying “User updated“.
This indicates that Zabbix has successfully updated the user to use the new password.
Conclusion
You should have successfully installed the Zabbix monitoring software on your Raspberry Pi at this stage of the tutorial.
You can use Zabbix to monitor various things, including your Raspberry Pi’s CPU load and network utilization.
If you have run into any issues with getting Zabbix installed on your device, please comment below.
Be sure to check out some of our other awesome Raspberry Pi projects.


Very nice tutorial – enough comment to allow newbies like me to copy a command with some confidence :0) but swift enough to get results!
A few corrections:
Zabbix have changed the directory where the sql scripts are stored. The command would now be
zcat /usr/share/zabbix/sql-scripts/mysql/server.sql.gz …
Since the NginX install tutorial now refers to php8.2 you could update the last command of the installation here too to reflect that – but it is also a good learning experience for people who _just_ copy & paste :0)
Thanks!
Hi Hanry,
Thank you for the feedback and pointing out some of the corrections that need to be made, it’s much appreciated!
Kind regards,
Emmet
Let me start out by saying I really enjoy your tutorials.
So here’s my question
When I try this
zcat /usr/share/doc/zabbix-sql-scripts/mysql/create.sql.gz | mysql -uzabbix -p zabbix
I get a message that that directory doesn’t exist, is there another location.
Hi Blake,
Thank you for reporting that issue with the Zabbix install steps.
I have corrected the tutorial, so it points to the new directory where that install script is kept.
Cheers,
Emmet
I’m getting the following error:
The following packages have unmet dependencies:
zabbix-server-mysql : Depends: libevent-2.1-6 (>= 2.1.8-stable) but it is not installable
Depends: libsnmp30 (>= 5.7.3+dfsg) but it is not installable
Recommends: snmpd but it is not going to be installed
E: Unable to correct problems, you have held broken packages.
Hi Southpaw32,
At the moment Zabbix does not have any repositories available for Raspberry Pi OS Bullseye.
You will need to either use Raspberry Pi OS Buster or await a release from the Zabbix team.
Cheers,
Emmet
I’ve done many installation of software on the raspberry pi. This is the first time I had zero errors. Perfect guide. Thanks!
Hi,
I tried to follow your tutorial but can’t restart the ngix service. But then I noticed this on your tutorial:
include /etc/zabbix/nginx.conf
I added a semicolon at the end of it, and it worked.
Hi FS,
Thank you for pointing that out. I have fixed that within the tutorial now.
Cheers,
Emmet