In this tutorial we will be showing you how to install and run Mealie on the Raspberry Pi.
Mealie is a recipe management system that allows you to easily build a collection of recipes in one single, easy-to-use interface.
This software even allows you to quickly grab and store recipes that you have found on the internet, meaning you won’t have to worry about losing that recipe you loved.
To help understand the recipes it reads in, Mealie makes use of a machine model that was trained on the New York Times. This model helps it better identify relevant ingredients and steps.
The tool even has functionality to help plan out your meals and generate shopping lists based on what you plan on cooking.
The Raspberry Pi makes a great place to host the Mealie web service as it is relatively low powered, meaning you can safely keep it running 24/7.
Over the next few steps, we will walk you through the super simple process of installing Mealie using Docker. We use Docker as it makes setting up this software a breeze.
Before proceeding, you must be running a 64-bit operating system on your Pi. Mealie does not have any support for 32-bit systems.
Equipment
Below, you can find a list of equipment we used when setting up Mealie on our Raspberry Pi.
Recommended
Optional
This tutorial was tested on a Raspberry Pi 400 running a 64-bit version of Raspberry Pi OS Bookworm.
Installing Mealie to your Raspberry Pi
In this section, we will be showing you how to install and run Mealie on your Raspberry Pi.
At the end of this section, you will have this recipe manager running on your Pi without any issues.
Preparing your Raspberry Pi for Mealie
1. Before we can install Mealie, there are a few things we must do on our Raspberry Pi.
Our first step is to update the package list and upgrade any out-of-date packages by using the following two commands.
sudo apt update
sudo apt upgrade -yCopy
2. Your next step is to follow our guide that shows you how to install Docker onto the Raspberry Pi.
This guide will have everything set up correctly, so the next few steps should work without any hitches.
3. After following our Docker installation guide, let us create a directory where we will be storing the Docker compose file for Mealie.
A compose file is like a set of instructions for Docker. These instructions tell Docker what container to grab and how to set it up.
Create this directory using the following mkdir command in the terminal.
mkdir ~/mealieCopy4. After creating this new directory, let us change into it by using the cd command.
The next few sections will expect you to be in this directory.
cd ~/mealieCopySetting up the Mealie Docker Compose File on your Raspberry Pi
5. To install Malie on our Raspberry Pi, we will need to write a Docker compose file.
This compose file will tell Docker how we want to set up Mealie. Begin writing this file by using the command below.
nano docker-compose.ymlCopyWe use the nano text editor as it is one of the easiest editors to use within the command line.
6. Within this file, you will want to enter the following lines.
You will need to change some values in this file before it will work, but we will cover these in the next step.
version: "3.7"
services:
  mealie:
    image: ghcr.io/mealie-recipes/mealie:latest
    container_name: mealie
    ports:
        - "9925:9000"
    deploy:
      resources:
        limits:
          memory: 1000M
    depends_on:
      - postgres
    volumes:
      - mealie-data:/app/data/
    environment:
    # Set Backend ENV Variables Here
      - ALLOW_SIGNUP=true
      - PUID=1000
      - PGID=1000
      - TZ=<strong><YOURTIMEZONE></strong>
      - MAX_WORKERS=1
      - WEB_CONCURRENCY=1
      - BASE_URL=<strong><BASEURL></strong>

    # Database Settings
      - DB_ENGINE=postgres
      - POSTGRES_USER=mealie
      - POSTGRES_PASSWORD=<strong><POSTGRESPASSWORD></strong>
      - POSTGRES_SERVER=postgres
      - POSTGRES_PORT=5432
      - POSTGRES_DB=mealie
    restart: always
  postgres:
    container_name: postgres
    image: postgres:15
    restart: always
    volumes:
      - ./mealie-pgdata:/var/lib/postgresql/data
    environment:
      POSTGRES_PASSWORD: <strong><POSTGRESPASSWORD></strong>
      POSTGRES_USER: mealie

volumes:
  mealie-data:
    driver: local
  mealie-pgdata:
    driver: local
Copy
7. Now, within this Docker compose file, you will see we have left some placeholders. Let us explore what these are and what you should replace them with.
<POSTGREPASSWORD>– There are two occurrences of this placeholder. Replace these with a secure password of your choosing. It can be a completely random string.
This password is used for Mealie to interact with the Postgres database server.<BASEURL>– The base URL is used for the notification system. You need to replace this with the URL that Mealie can be accessed through.
If you plan on using a domain name, you could use something like “mealie.pimylifeup.com“. Alternatively, if you have set a static IP address on your Raspberry Pi, you could use something like “http://192.168.0.1:9000“.<YOURTIMEZONE>– You must replace this value with your time zone. This uses the tz database identifiers. For example, since I live in Tasmania, Australia I would use “Australia/Tasmania“.
Wikipedia provides a very easy-to-follow list of TZ database time zones.
8. Once you have filled everything out, save and quit by pressing CTRL + X, followed by Y, then ENTER.
Running Mealie using Docker
9. With the Docker Compose file written, starting up Mealie on our Raspberry Pi is a very simple process.
While you are within the directory we created earlier, you can start Mealie by running the command below.
docker compose up -dCopyThis startup process may take a few minutes as Docker downloads Mealie to your Raspberry Pi and then launches it.
By using the “-d” option, we are telling Docker that it should detach from the current terminal session and continue to run in the background.
Accessing the Mealie Web Interface
10. At this point, you should be able to access the Malie web interface. If you are connecting remotely, you will need to know the IP address of your Raspberry Pi.
One of the easiest ways to get the IP of your Pi is to use the hostname command.
hostname -ICopy11. Once you have your IP handy, open the following page in your favourite web browser.
Ensure you replace “<IPADDRESS>” with the IP of your Raspberry Pi.
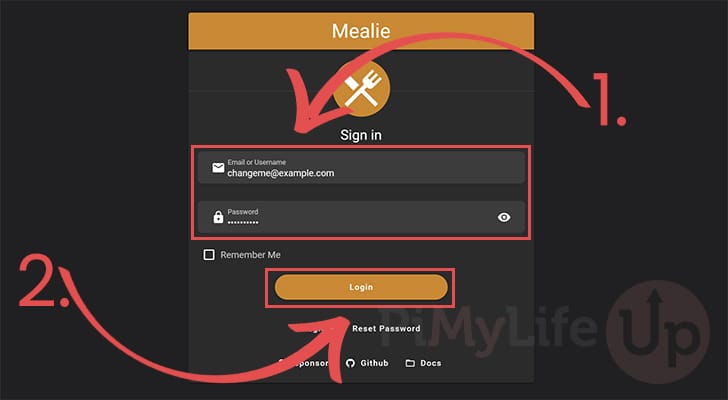
http://<IPADDRESS>:992512. Upon going to the page, you will be greeted with the Mealie login screen.
You will need to use the email “changeme@example.com” and the password “MyPassword” to log in to the web interface. We will show you how to change these shortly.
Changing your Username and Password
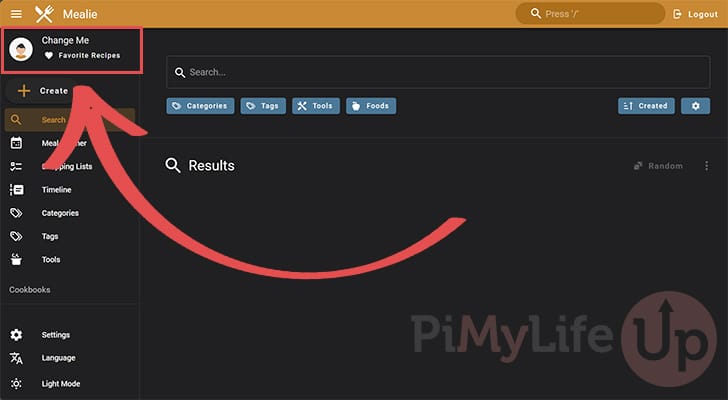
13. The first thing you should do when using Mealie on your Raspberry Pi is to change the default username and password.
To begin this process, click your profile in the top-left corner of the page. By default, this will have the text “Change Me” on it.
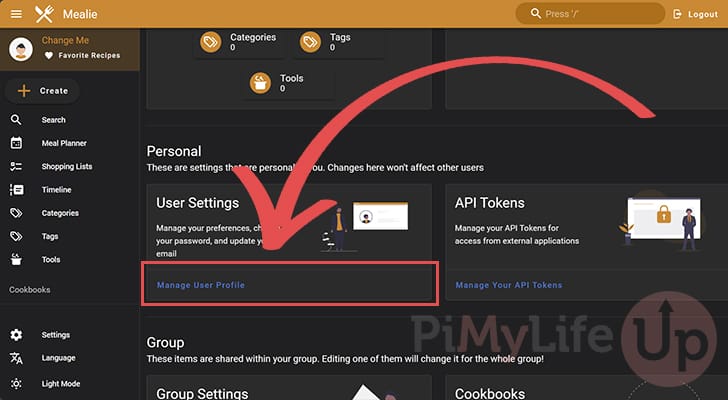
14. Next, scroll down until you see the “User Settings” option under the “Personal” header and click the “Manage User Profile” link.
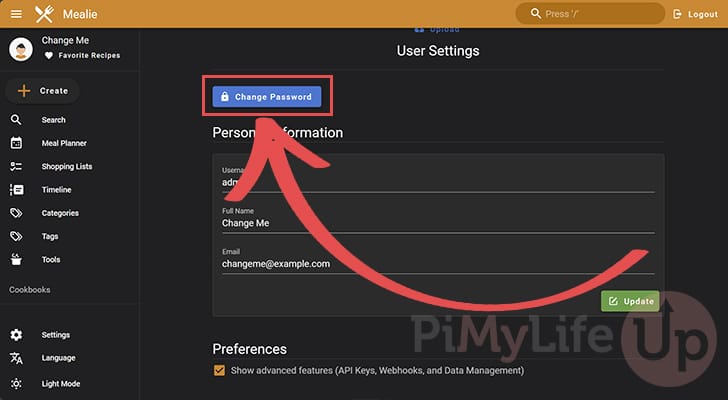
15. We are finally in the right place. Scroll down until you see the “Change Password” button and a field to change your name, username, and email.
Let us start with the password by clicking the “Change Password” button.
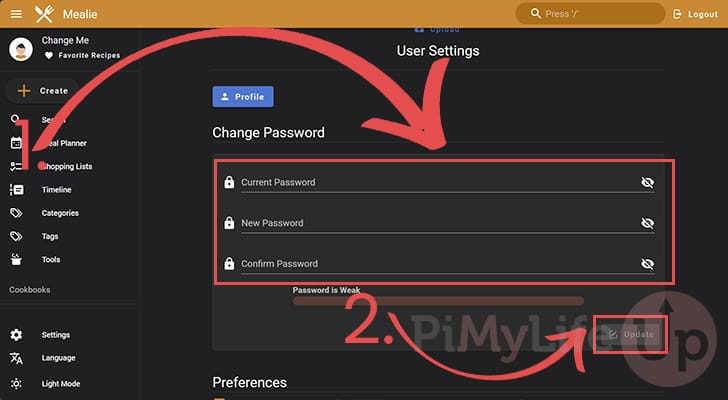
16. Use this dialog to enter a new password for your Mealie administrator (1.).
After filling out a new password, click the “Update” button to finalize the change (2.).
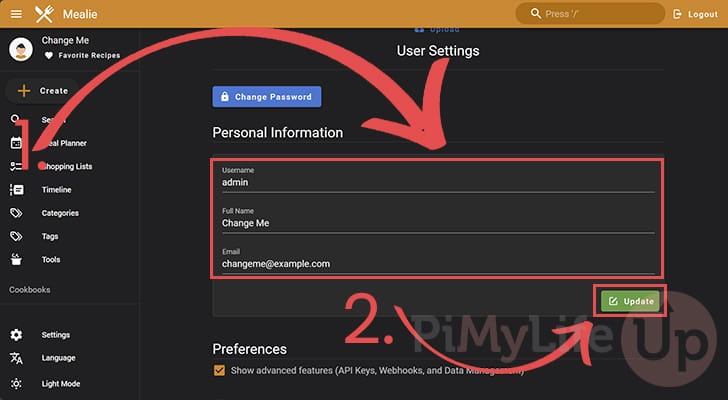
17. You will also want to change the full name and email of your admin account (1.). Fill out these details with the ones you want to utilize for your account.
Once you are happy with your changes, click the “Update” (2.) button.
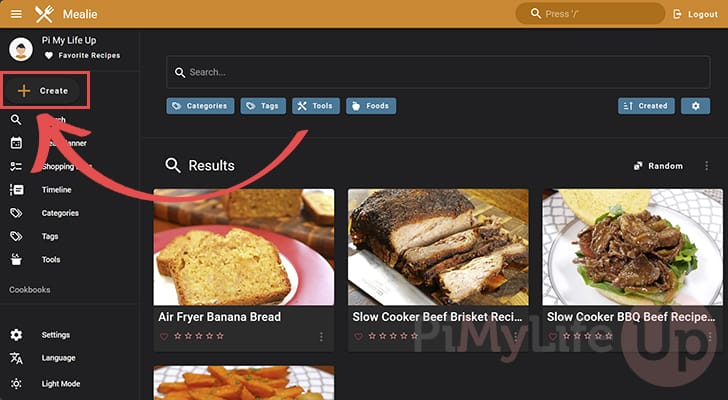
18. At this point, you now have Mealie and setup on your Raspberry Pi.
You can begin adding and creating recipes within this software by clicking the “Create” button in the sidebar.
Conclusion
Hopefully, you will now have the Mealie recipe manager up and running on your Raspberry Pi.
This is a super neat software that makes archiving and keeping track of recipes a super straightforward process.
It even has some smart functionality that helps identify ingredients within recipes to make it easier to build shopping lists and set up meal plans.
Please feel free to comment below if you have run into any problems with getting Mealie to work on your Pi.
If you found this tutorial to be useful, we highly recommend check out our many other Raspberry Pi projects.


Do you have a recommendation for a Raspberry Pi configuration to run Mealie? I’ve had bad luck with SD cards going bad, so wondering if RPi5 plus a SSD would be better.
Hi Eric,
At the moment it is really hard to go passed using a Raspberry Pi 5 with an NVME Hat + a relatively cheap NVME. The NVME drive will be infinitely more reliable than an SD Card and the Pi 5 would give you more than enough headroom to run various other services rather than just Mealie.
Kind regards,
Emmet
When I put the IP address in the browser, Site cannot be reached so not sure if it is running or something is wrong
Hi Al,
You must by running a 64-bit operating system to run Mealie. The error message you are seeing indicates you are running a 32-bit operating system.
Kind regards,
Emmet
Thanks for the guide.
Mealie does not seem to start properly for me. I am getting this error when running docker top:
Error response from daemon: Container c8dd9eb01ffad7f5f203029e4d298134dcd4c5a018a061ff9864e5adeba284dc is restarting, wait until the container is running
And docker log give this:
exec /app/run.sh: exec format error
I ran into the same issue as austin (so I forced the download of the arm64 bit version) but I am pretty sure I am running a 64 bit os
uname -mrs: Linux 6.1.21-v8+ aarch64
docker buildx ls
\_ default \_ default running v0.14.1 linux/arm/v8, linux/arm64
Any help would be appreciated 🙂
Hi Arnaud.
The “exec format error” would definitely point to attempting to run the 64-bit image on a 32-bit system.
One problem with using the name and arch commands is that they will return the architecture of the kernel and not the OS itself. Normally this isn’t an issue but Raspberry Pi OS ships with a 64-bit kernel regardless of whether you are running a 32-bit operating system.
Please try using the following command to see what is returned.
Kind regards,
Emmet
mealie stopped support arm because it was messing up their buildpipelines. They even pulled older releases as far as I can tell.
When trying to pull the referenced release above, 1.1.0, or 1.2.0, it always returns the same error about linux/v8/arm missing from the manifest.
Hi Austin,
Mealie only supports 64-bit operating systems meaning you must be running a 64-bit operating system on a Raspberry Pi 3 or newer to follow this guide.
Kind regards,
Emmet
The default email/pw supplied isn’t working for me to login, did they change it up again?
Hi Jake,
I just double checked, and everything still seems to be working fine for me and the official documentation still mentions the same default username and password.
So, not entirely sure why it wouldn’t be letting you log in.
Kind regards,
Emmet