In this tutorial, we will show you how to self-host the Lychee photo management system on your Raspberry Pi.
Lychee is a free and open-source web-based photo management tool that you can easily self-host on your Raspberry Pi in minutes.
This tool gives you a very easy-to-use interface to manage photos without sacrificing looks. While it might not be as feature packed as tools like Photoprism or Immich, it is excellent for those wanting a simple photo manager.
Using this photo management tool, you can move, rename, describe, and even delete your photos in seconds. The key to this feeling better than just using your file browser is the software interface, which is designed so you can easily navigate through all of your photos.
In addition, if you have your Raspberry Pi exposed to the internet, you can easily use Lychee to share photos or entire albums with the public. If you only want a particular person to access a shared album, you can even set a password.
The Pi makes an excellent choice for hosting tools like this photo manager as it uses very little power and is affordable to keep running 24/7.
By the end of this tutorial, you will have an easy-to-use photo tool that you can access from any web browser.
Before continuing, you must have a Raspberry Pi with a 64-bit operating system installed. Lychee only provides ARM64 builds.
Equipment
Below is a list of equipment we used when setting up Lychee on our Raspberry Pi.
Recommended
Optional
This tutorial was last tested on a Raspberry Pi 5 running the latest version of Raspberry Pi OS Bookworm 64-bit.
Installing Lychee on the Raspberry Pi
In the following steps, we will walk you through the process of getting Lychee installed and running on the Raspberry Pi.
To make this whole process significantly easier, we will be using Docker. Docker allows us to install software like Lychee without worrying too much about its dependencies.
Preparing your Raspberry Pi to Run Lychee
1. Before we install and run the Lychee photo management app, we must complete a few tasks.
The first is to ensure our Raspberry Pi is up to date. We can update the package list cache and upgrade any out-of-date packages using the following two commands.
sudo apt update
sudo apt upgradeCopy
2. After updating your Raspberry Pi, your next step is to install the Docker runtime.
Follow our guide on installing Docker before continuing with this tutorial. If you already have Doker installed, skip straight to the next step.
https://pimylifeup.com/raspberry-pi-docker/3. With Docker installed, we will need to create a directory to store the Compose file for Lychee on our Raspberry Pi.
We will also set up the Lychee container to store its files within this directory.
You can create a directory at “/opt/stacks/lychee” using the mkdir command below.
sudo mkdir -p /opt/stacks/lycheeCopy4. Now that we have created a directory to store everything, we must change to it.
You can change directories on Linux by using the cd command.
cd /opt/stacks/lycheeCopyWriting a Compose File to Run Lychee on the Raspberry Pi
5. To write the Compose file for Lychee on the Raspberry Pi, you will want to use the command below. We use the nano text editor as it is one of the easiest to use.
A Compose file is like a set of instructions for Docker to follow when setting up and running software like Lychee. It is easier to manage than purely using commands.
sudo nano compose.yamlCopyIf you want a better way of managing Docker containers on your Raspberry Pi, we highly recommend checking out Dockge.
6. In this new file, type in the following lines.
While you fill out this file, ensure that you replace the following placeholders.
<ROOT_PASSWORD>: Replace this with a secure password that will be used for the database’s root user.<LYCHEE_PASSWORD>: Replace this placeholder with a password that Lychee will use to interact with the database. This password is separate from the root user.<TIMEZONE>: You must specify a time zone using the TZ Identifier. You can find a list of valid values by visiting Wikipedia and looking in the “TZ Identifier” column.
For example, my region’s valid time zone identifier is “Australia/Hobart“.<APP_URL>: This is one of the most important options to set, as it controls how URLs are handled in Lychee.
You must replace this with the path you intend on accessing Lychee through.
For example, our IP address is192.168.0.23, and Lychee is running off port90, so we used the following URL:http://192.168.0.23:90
services:
  lychee_db:
    container_name: lychee_db
    image: mariadb:10
    environment:
      - MYSQL_ROOT_PASSWORD=<ROOT_PASSWORD>
      - MYSQL_DATABASE=lychee
      - MYSQL_USER=lychee
      - MYSQL_PASSWORD=<LYCHEE_PASSWORD>
    expose:
      - 3306
    volumes:
      - mysql:/var/lib/mysql
    networks:
      - lychee
    restart: unless-stopped

  lychee:
    image: lycheeorg/lychee
    container_name: lychee
    ports:
      - 90:80
    volumes:
      - ./conf:/conf
      - ./uploads:/uploads
      - ./sym:/sym
      - ./logs:/logs
      - ./tmp:/lychee-tmp
    networks:
      - lychee
    environment:
      - PHP_TZ=<TIMEZONE>
      - TIMEZONE=<TIMEZONE>
      - APP_URL=<APP_URL>
      - DB_CONNECTION=mysql
      - DB_HOST=lychee_db
      - DB_PORT=3306
      - DB_DATABASE=lychee
      - DB_USERNAME=lychee
      - DB_PASSWORD=<LYCHEE_PASSWORD>
      - STARTUP_DELAY=30
    restart: unless-stopped
    depends_on:
      - lychee_db

networks:
  lychee:

volumes:
  mysql:Copy
7. Once you have finished filling out the Compose file, you can save and quit by pressing CTRL + X, Y, and then ENTER.
Starting up the Lychee Photo Management Tool
8. One significant advantage of using Docker is that it makes running and managing software like Lychee straightforward on your Raspberry Pi.
To start the Lychee container, you must run the following command. Docker will handle downloading the latest version of the container and then run it.
docker compose up -dCopySince we use the “-d” option, Docker will detach from the terminal once Lychee has successfully started.
Accessing the Lychee Web Interface
9. To access the Lychee web interface, you will need to know your Raspberry Pi’s IP address.
The easiest way to get the IP assigned to your Pi is to use the hostname command.
hostname -ICopy10. Once you know your IP address, you only need to go to the following address in your favorite web browser.
Ensure that you replace “<IPADDRESS>” with your IP.
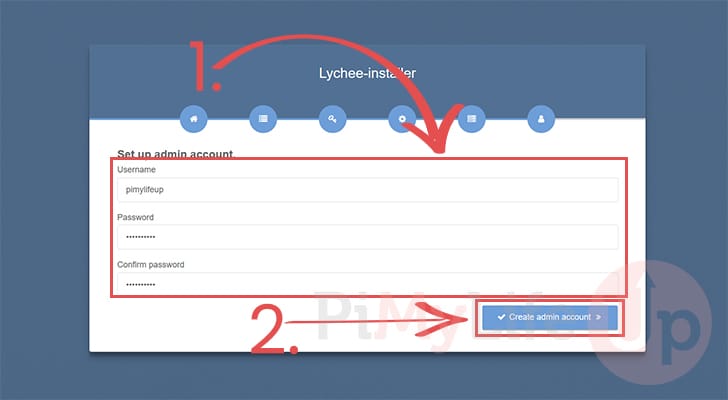
http://<IPADDRESS>:90/11. The first time you access the Lychee web interface, you will be asked to create an admin account. Fill in the username and password you want to use to access Lychee (1.).
After filling out your login details, click the “Create admin account” button (2.).
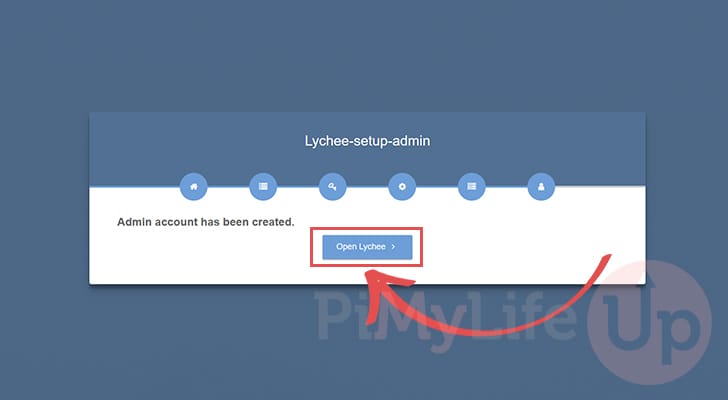
12. If everything worked correctly, you should see a message saying your admin account has been created.
To continue using your Raspberry Pi’s Lychee installation, click the “Open Lychee” button.
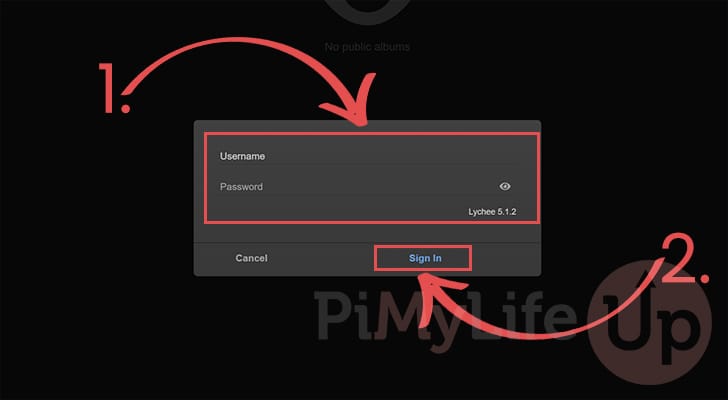
13. You can now use the account you just created to log in to the Lychee web interface (1.).
Once you have filled out your information, click the “Sign In” button (2.).
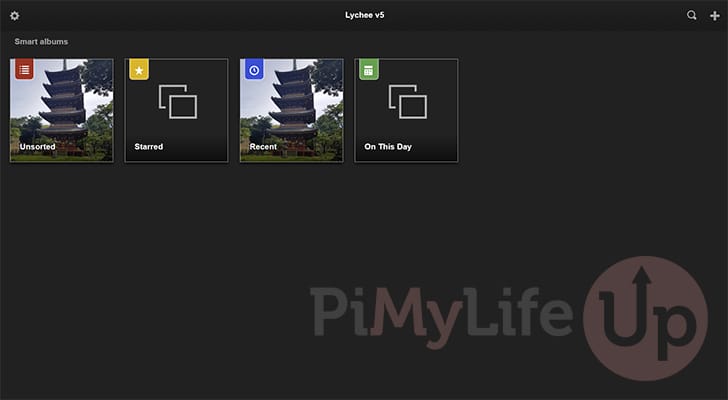
14. Below, you can see that we now have Lychee up and running on our Raspberry Pi, and we have uploaded some of our photos.
To upload photos, click the plus (+) icon in the top-right corner.
Updating Lychee on your Raspberry Pi
Lychee is updated fairly often, but luckily, Docker makes updating to the latest release a straightforward process.
All we need to do is change to the directory where we wrote the Compose file and tell it to download the newest release.
1. Your first step is to change to where we wrote the Compose file earlier in this guide.
You can change to this directory using the following command within the terminal.
cd /opt/stacks/lycheeCopy2. Once you are in the right place, we can tell Docker to pull the latest Lychee image to our Raspberry Pi.
docker compose pullCopy3. If a new version is downloaded, Lychee will automatically move over to it when we restart the container.
Luckily, using the same command we used to start Lychee in the first place will detect the new version and restart the container for us.
docker compose up -dCopyConclusion
By this point in the tutorial, you will have the Lychee photo management tool running on your Raspberry Pi.
This tool is a great way to manage your photos from one central location easily.
Please feel free to drop a comment below if you have had any problems installing this tool on your Pi.
If you found this project to be helpful, we recommend you explore our many other Raspberry Pi projects.


I’ve installed booth the lychee and the docker applications by following your instructions, which by the way are EXCELLENT! As I keep seeing my pictures ‘blurred’ on my webbrowser, I decided to restart from scratch even two times, but I stll have ‘blurred’ images in my webbrowser. Everything works fine, I can upload pictures from my PC and my Android phone, and I can access these in ‘full resolution’ om my Raspberry pi.
Anybody able to help? I’m a newbie on Raspberry Pi but working on it 😉
Hi Pierre,
That is indeed a strange problem, my first thought would be to verify that you have set the “APP_URL” value correctly. It could be the URL you have set isn’t reachable by your other devices for some reason, which is why its showing the blurred pictures rather than the actual photos?
Kind regards,
Emmet
Hi Emmet,
This is an extract from my “compose.yaml” file.
I can ping it from my PC without problems. I actually also use WinSCP to transfer files between my PC and the Raspberry Pi. So network should be totally OK.
Actually everything works fine, as I can upload pictures from my laptop, as well from my Android phone (Within my private network – I still have to set the port forwarding later). Looking in the database on the Pi I see the pictures in full resolution.
Hi Pierre,
It might be our system stripping out anything using the less than and greater than signs as the example you sent me is missing the app url an timezone.
For your reference, below is an example of what this should look like.
Kind regards,
Emmet
Hi Emmet
Thanks for this valuable info! I notice now that I left the “” in place when I filled out the various fields in ‘compose.yaml’. (Big A ;-))
I also removed the :90 for the APP_URL.
Strange thing now is that I can’t access the webserver any more.
When running docker compose up (without the -d switch) I see some strange message on the RPi
Access denied for the user ‘lychee@172.18.0.3’ (using password YES)
Can’t find how to reset that Lychee password. I might have to re-install once more…
Hi Emmet,
Short update at 14H00 Brussels time.
Started a new install from scratch. I always keep a USB stick with my ‘latest working version’ so I can revert using the SD card copier utility 😉
Re-installed docker and Lychee, and noticed that my external volume was mounted twice?? Once as HDD and once as HDD1 ??
Restarted from a scratch SSD card with scratch OS using the imager.
Re-ran the docker and Lychee installation taking in account to remove the (triangle brackets) which I omitted before (Big A ;-))
Now I have everything ‘up and running’ and the pictures appear clear in the browser. I guess this had to do with ‘access rights’ though I didn’t get any warnings about it. Further I think that the ‘double mount’ from the HDD had something to do with the earlier nginx installation on my system. This was removed by starting from a clean OS.
Thanks for you valuable help anyway! And if you’re the guy writing these superb installation guides, keep up the good work. I love what you’re doing and learn a lot from it.
Thanks again and talk to you later!