In this Raspberry Pi Dietpi tutorial, we will be taking a look at DietPi, a lightweight operating system built for single board computers (SBC).
This operating system is very similar to Raspbian lite but is even more stripped back. The size starts at 600mb which makes it 2-3x lighter than Raspbian lite.
All of our Raspberry Pi projects should still work on the Dietpi operating system. With that said, you may find some projects you may have to install more packages than what is listed.
There is plenty of tools bundled with the OS to make your life easier. For example, a software installer that is capable of installing optimized software packages for the DietPi.
Another handy tool is the DietPi-Backup which allows you to easily backup or restore the DietPi operating system.
The operating system prides itself on being optimized so that you are getting the most out of your Raspberry Pi. Here is a good comparison of DietPi and Raspbian Lite.
We only scratch the surface on what this lightweight operating system can do. If you require more information about the operating system, then I highly recommend that you head over to their official website.
Equipment
To make everything work in this Dietpi tutorial we recommend the following bits of equipment.
Recommended
- Raspberry Pi Amazon
- 8gb+ Micro SD Card Amazon
- Ethernet Cable Amazon or Wi-Fi Amazon
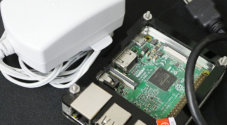
- Power Supply Amazon
Optional
Installing Raspberry Pi Dietpi
1. First, head over to the Dietpi website and download the image for your Raspberry Pi. The current image supports all models of the Raspberry Pi.

2. We now need to unzip the file, and it is in a 7z format so you will need to install either 7zip for Windows or unarchiver for Mac.
Once you have installed a compatible program, unzip the file, it should be roughly 600mb.
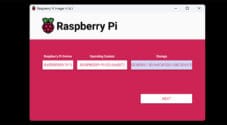
3. Next, we will need a program so we can write the image to the SD Card. Again, we will need to install some software, and I recommend using Etcher.
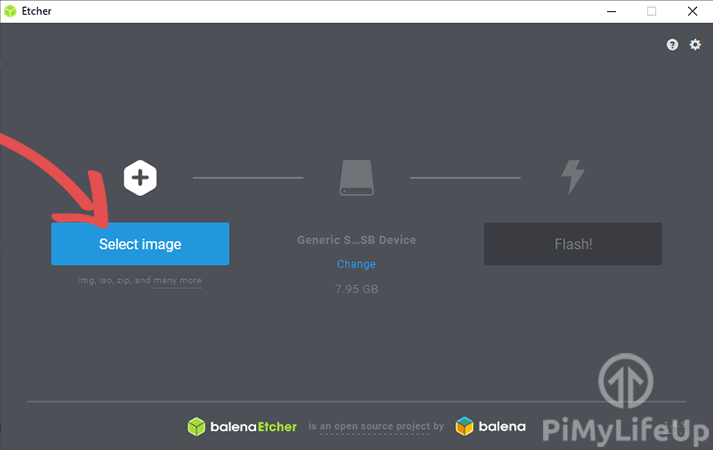
4. Once you have installed Etcher, load the program. Also, make sure you have your SD card inserted into your computer.
5. First, locate and select the DietPi image.
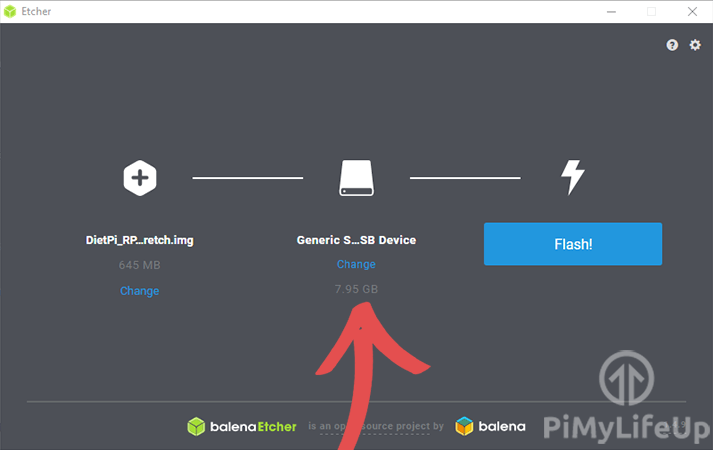
6. Next, ensure that the SD card selected is the correct one. It will wipe the drive clean, so if you choose the wrong one, you may risk losing data.
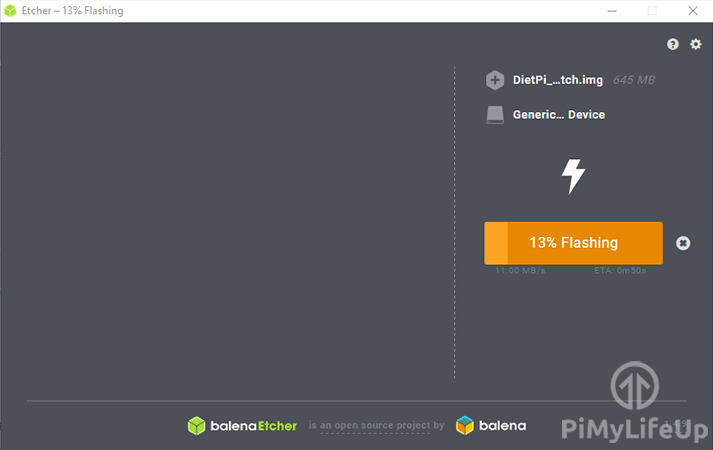
7. Once you have confirmed all the details are correct, proceed to flash the SD card. This process can take a while so sit back and relax.
8. If you’re using ethernet, then you can skip this step and go to step 12.
To setup Wifi, open the SD card folder and open the file named “dietpi.txt“
9. In this file change the following.
Find
AUTO_SETUP_NET_WIFI_ENABLED=0Change to
AUTO_SETUP_NET_WIFI_ENABLED=1Save and close the file.
10. Now, open up “dietpi-wifi.txt“
11. Update the following two lines with your WiFi details. Replace “MYSSID” with your WiFi name and replace “MyWiFiKey” with your password.
Find
aWIFI_SSID[0]="MySSID"Change To
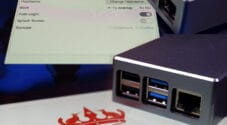
aWIFI_KEY[0]="MyWifiKey"12. Remove the SD card from the PC and insert it into the Raspberry Pi to prepare to boot for the first time. I recommend having a keyboard, mouse, and screen handy as you will likely need to configure options.
First Boot
The first boot of Dietpi is pretty straightforward. You will want it connected to a screen, so you’re able to do the initial setup.
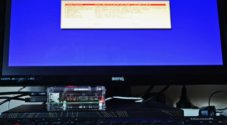
1. On first boot, the software will go through the initial setup and then reboot. For example, it will expand the file system, so it fills the entire SD card.
2. Once it has finished going through the first boot steps, you will be prompted to login. Use the default username (root) and password (dietpi).
3. Upon the first login, the Dietpi operating system will automatically update all of its packages. Once it is complete, it will restart.
4. When you login again, you will be prompted to change the default password. We highly recommend that you do this task.
You will also be asked if you want to disable the serial monitor. Disable if you don’t know what it is as you will likely not need it.
5. You will now be shown a screen full of options.
Help! – This option will provide you with links to documents and other useful information.
DietPi-Config – If you’re familiar with the raspi-config tool then this one is very much the same. You might want to go into here and update the language/regional options to your correct language. It defaults to the UK.
Search – Find software to install to the operating system.
Software Optimized – Select DietPi optimized software to install to the OS.
Software Additional – Find other software packages to install.
SSH Server – Select the SSH server software that you wish to use. The default is dropbear which is considered to be lightweight.
File Server – Specify a file server that you want to run; this is important for a network attached storage setup. The default is none.
Log System – Choose the method of how the operating system will store its log files. The default will store the logs to ram that are then cleared every hour.
Web Server Preference – Specify a web server software package that you wish to use. The default will make use of the Lighttpd software.
User Data Location – Choose the location on where you want user data to be stored. For example, a different external drive.
Uninstall – Use this option to remove installed software from your operating system.
6. Once you are finished with tweaking options and selecting software to install, scroll down to the bottom and select install. You would need to do this even if you didn’t make any changes.
You can access the screen again at any time by entering the following command.
dietpi-software7. That’s all you need to know for getting started with the Raspberry Pi DietPi operating system. Check out the section below for a little bit more information on the different features.
DietPi Tools
As I mentioned earlier, there is a ton of tools that can help you with maintaining the DietPi operating system. I will quickly go into each of the commands below.
As mentioned above, the dietpi-config tool allows you to configure system settings.
dietpi-configUse dietpi-software to install optimized software for the DietPi operating system.
dietpi-softwareUse the following command to update your version of Dietpi to the latest version available.
dietpi-updateThe command below will open up a feature-rich drive management utility.
dietpi-drive_managerMake your life easier when it comes to backing up or restoring DietPi with the command below.
dietpi-backupSync or duplicate a directory to another by using the command below.
dietpi-syncThe command below loads a lightweight file manager and explorer.
dietpi-explorerUse the command below to take control of software services. For example, start, stop, restart and so on.
dietpi-servicesThe following command can be used to tweak system-wide priority levels for software and processes.
dietpi-process_toolClean up junk from the operating system and free up valuable disk space.
dietpi-cleanerIf you run into issues, use the command below to send a bug report to Dietpi.
dietpi-bugreportSpecify how you want your Raspberry Pi to start up. Example, boot into the desktop with Kodi running.
dietpi-autostartModify the start times of specific cron job groups by using the command below.
dietpi-cronDon’t let your logs overwhelm you and have Dietpi clear all your logs.
dietpi-logclearUse this command to convert a text file into morse code.
dietpi-morsecodeAccess the frontend for the Letsencrypt integration.
dietpi-letsencryptUse the following command to change the audio settings.
dietpi-justboomI hope that this Raspberry Pi Dietpi tutorial has given you a good overview of what the operating system is and how you can install it. If you want to support the devs of DietPi they have a Patreon where you can donate money.
If you have some feedback, tips or anything else, then please don’t hesitate to leave a comment below.


Thank you, this is the best site I have seen for experienced Linux users to get running on dietpi!