This tutorial will show you how to install the self-hosted workout diary called ExerciseDiary on your Raspberry Pi.
ExerciseDiary is a self-hosted solution for keeping track of your workouts and weight using an easy-to-use web interface.
This exercise diary gives you a neat way of visualizing your workouts using a GitHub-style visualization. This visualization is a heap map that gives you an easy way of seeing days you worked out harder than others.
In addition to the workout diary, the ExerciseDiary software also tracks your weight, giving you a simple line graph to track your progress.
Best of all, ExerciseDiary is super lightweight, making it great to run on the Raspberry Pi. It won’t consume a huge amount of resources, meaning you can run this alongside anything else you might want to run.
Additionally, since the software is provided through a Docker container, we can get ExerciseDiary up and running on your Raspberry Pi in a few short steps.
Equipment
Below is a list of the equipment we used when setting up ExerciseDiary on our Raspberry Pi.
Recommended
Optional
This tutorial was last tested on a Raspberry Pi 5 running the latest version of Raspberry Pi OS Bookworm.
Installing ExerciseDiary on the Raspberry Pi
Over the following sections, we will walk you through the entire process of getting the ExerciseDiary software running on your Raspberry Pi.
We will even walk you through setting up your first exercise and adding data.
Preparing your Raspberry Pi to run ExerciseDiary
1. Before proceeding any further, let us ensure our Raspberry Pi is up to date by using the following two commands.
The first command updates the package list cache; the second will upgrade any out-of-date packages.
sudo apt update
sudo apt upgradeCopy
2. Once you have updated your Raspberry Pi, you must install Docker so we can run ExerciseDiary on our Raspberry Pi.
Follow the guide linked above before proceeding to the next step. If you have Docker installed already, skip to the next step.
https://pimylifeup.com/raspberry-pi-docker/3. Your next step is to create the directory to store the ExcerciseDiary Compose file on your Raspberry Pi. It is also the directory where the container will store any of its data.
For our guide, we will be creating a directory at “/opt/stacks/exercisediary” by using the command below
sudo mkdir -p /opt/stacks/exercisediaryCopyBy using the “-p” option, the mkdir command will create any missing directories.
4. You must change to the directory we created in the previous step.
You will be expected to be within this directory for the rest of the steps in this guide.
cd /opt/stacks/exercisediaryCopyWriting the Compose file for ExerciseDiary
5. We can now begin writing the compose file for the ExerciseDiary software on our Raspberry Pi.
To begin writing this file, use the following command in the terminal.
sudo nano compose.yamlCopy6. Within this file, you will want to fill out the following information. You can see that the ExerciseDiary container doesn’t need much configuring to work on your Raspberry Pi
You must only replace “<TIMEZONE>” with a valid TZ identifier for where you live. For example, we would use “Australia/Hobart” for our time zone.
version: "3"
services:
  exdiary:
    image: aceberg/exercisediary
    restart: unless-stopped
    ports:
    - 8851:8851
    volumes:
    - ./data:/data/ExerciseDiary
    environment:
      TZ: <strong><TIMEZONE></strong>Copy
7. Once you have finished writing the Docker Compose file, you can save and quit by pressing CTRL + X, Y, and then ENTER.
Starting the ExerciseDiary Container on the Raspberry Pi
8. With the Compose file written, we can start ExerciseDiary on our Raspberry Pi using the following command.
Docker will download the container and start up the server
docker compose up -dCopyAccessing the ExerciseDiary Web Interface
9. To access the web interface for ExerciseDiary, you will want to know the local IP address of your Raspberry Pi.
The easiest way to get this IP address is to use the following command within the terminal.
hostname -ICopy10. Once you know the IP address of your Raspberry Pi, you will want to go to the following address in your favourite web browser.
Ensure that you replace “<IPADDRESS>” with the IP of your Pi.
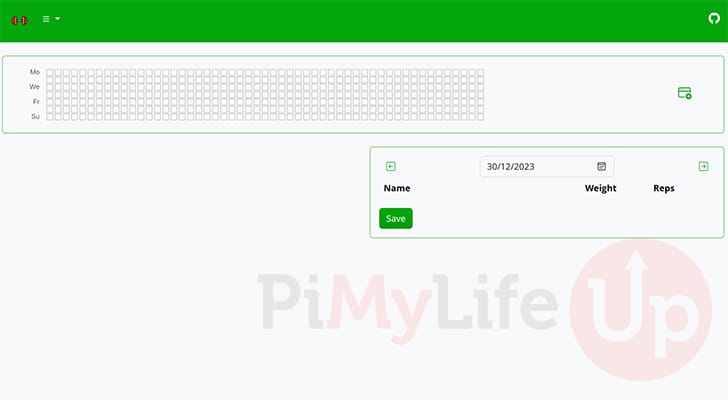
http://<IPADDRESS>:885111. Below, you can see that we now have the ExceriseDiary web interface up and running.
You can begin to log your weight and exercises within this interface.
Adding an Exercise to your Diary
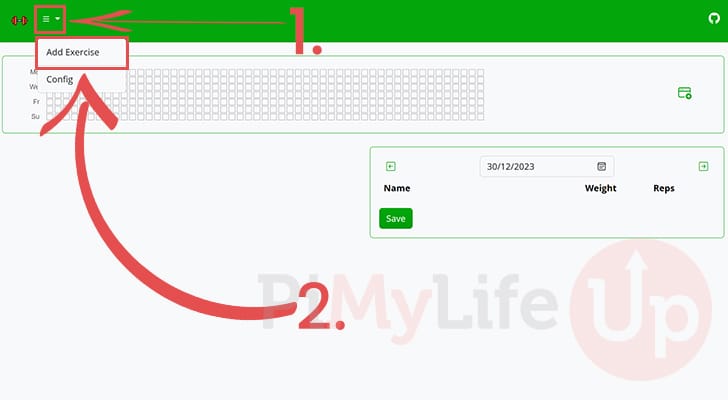
12. The first thing you will want to do after installing ExerciseDiary on your Raspberry Pi is add your exercises.
To add an exercise, click the hamburger icon (1.), and then click the “Add Exercise” option (2.).
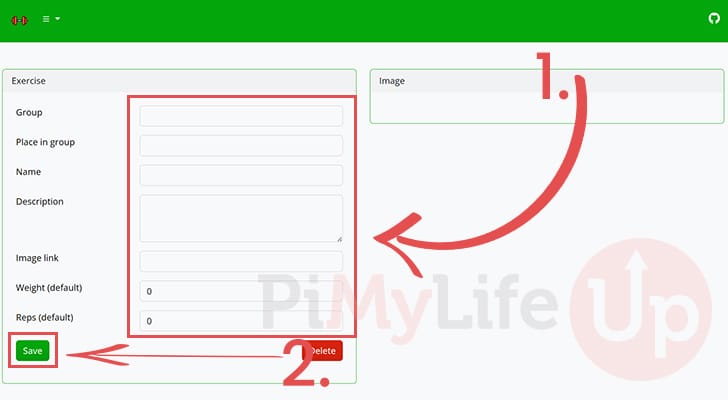
13. You will now be taken to a page where you can fill in all the information for your exercise (1.). You can even group these exercises by setting a group name.
After setting the default details of your exercise, click the “Save” button (2.).
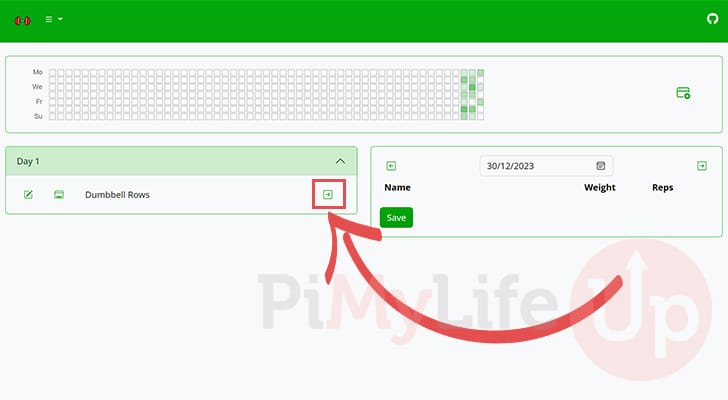
14. Once you have added an exercise, you will see it on the left-side of the screen.
To log an exercise, click the arrow button next to it.
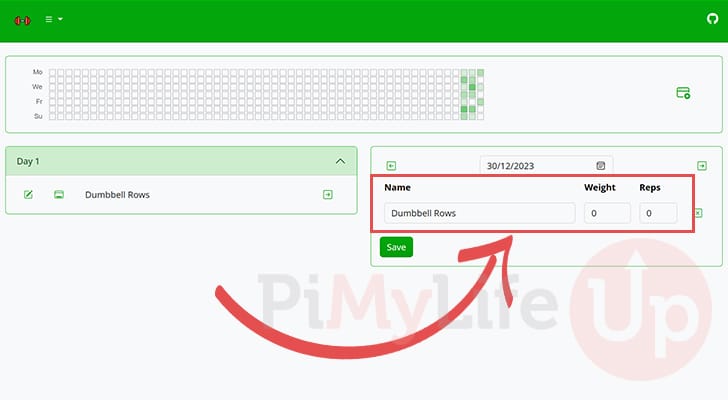
15. When you add an exercise, you can fill in additional information, such as the weight or reps.
Once you are happy with everything, click the “Save” button. Changes are not automatically saved.
Logging your Weight
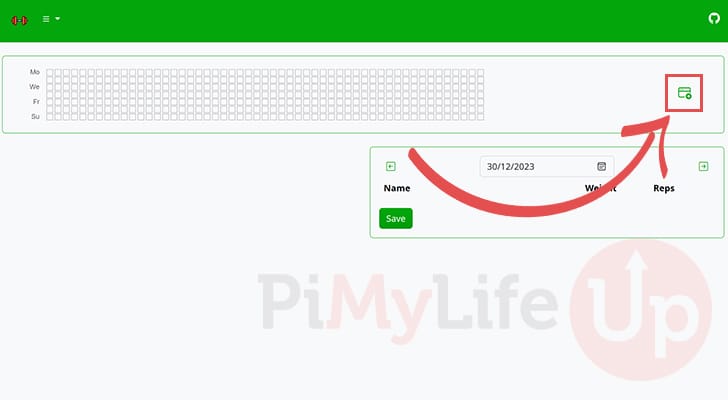
16. Besides logging your workouts, this software also lets you track your weight.
Click the calendar icon with the plus symbol to log a new weight entry.
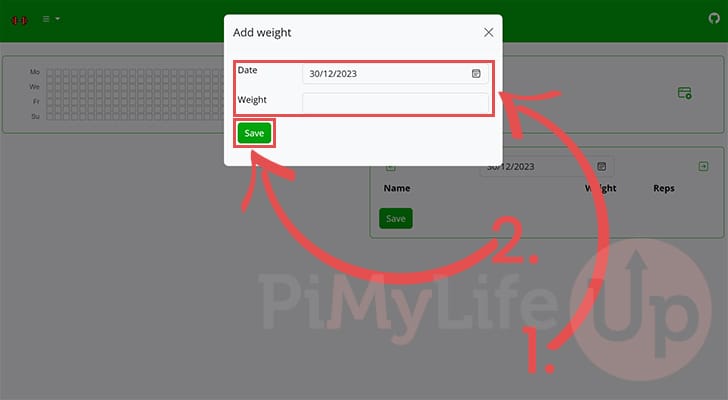
17. Using the add weight dialog, you can set your entry date and weight (1.).
After setting your weight details, click the “Save” button (2.).
Updating ExerciseDiary on your Raspberry Pi
In this section, you will learn how to update the ExerciseDiary software on your Raspberry Pi.
Luckily, since we are running this software as a container, it can be updated in a few short steps.
1. Before updating ExerciseDiary, we must change it to the directory where we wrote the compose file.
You can change to this directory by using the command below.
cd /opt/stacks/exercisediaryCopy2. Once you are in the correct directory, you will want to use Docker to pull the latest version of ExerciseDiary to your Pi.
docker compose pullCopy3. Even though Docker has downloaded the latest version of ExerciseDiary, you will need to get it to start using it.
The easiest way is to run the same command you use to start the server. Docker will automatically detect the new image and restart the container using it.
docker compose up -dCopyConclusion
At this stage, you should have the ExerciseDiary software up and running on your Raspberry Pi.
This sleek and easy-to-use web software allows you to track your workouts and weight. The heatmap allows you to easily see when you performed more or less exercises.
Please feel free to leave a comment below if you have any questions or concerns about running ExerciseDiary.
If you found this tutorial helpful, check out our many other Raspberry Pi projects.


wow thanks for the tutorial works pretty well