In this tutorial, we will be showing you how to install Mastodon on the Raspberry Pi.

Mastodon is a free and open-source software that allows you to self-host your own social network on your Raspberry Pi.
This software is a microblogging platform that is very much like Twitter However, unlike Twitter, it is possible to use Mastodon to run a private social network.
Please note that Mastodon is a relatively heavy piece of software. You will have the best experience using a Raspberry Pi 4 with at least 2GB of memory.
Additionally, you must be using a 64-bit operating system due to the newer release of PostgreSQL we will be utilizing.
Equipment
Below is the equipment we used to set up Mastodon on our Raspberry Pi.
Recommended
Optional
This tutorial was tested on a Raspberry PI 400 running the latest version of Raspberry Pi OS Buster 64-bit.
Before You Begin
Before you begin with Mastodon on your Raspberry Pi, you will need a few things for the best experience with this self-hosted social network.
- A domain name to point toward your Raspberry Pi’s IP address. Mastodon requires a domain name to operate correctly. If you try to connect through a host that hasn’t been configured, it will block the connection.
If you have a dynamic IP address, we have a guide on how to set up dynamic DNS on your Pi.
To use Mastodon locally you can also specify a domain name like “pimylifeup.local” and modify the hosts file on your system to point that domain to your Pi’s local IP. - A publicly routable IP address and not one behind a CG-NAT. You will also need the ability to port forward ports
80and443to your Raspberry Pi’s local IP. - You should also use a transactional mail service such as Sendgrid, Mailgun, or Amazon SES. While this is not required, it will help ensure emails sent by Mastodon are more likely to be recieved.
Preparing your Raspberry Pi to Run Mastodon
Before running the Mastodon software on the Raspberry Pi, we must install all the software required to run it.
In the following sections, we will walk you through setting up everything required to run Mastodon.
Installing the Software Needed for Setup
1. Before installing the software needed to run Mastodon, we should perform an update.
Update the package list cache and any out-of-date packages using the following two commands.
sudo apt update
sudo apt upgradeCopy
2. Once the update completes, we can install any software we require to set up the various pieces of software Mastodon relies on for our Raspberry Pi.
Use the command below to install almost everything we need to run Mastodon. Even though we are installing a lot of software, there are a few more we will still need to set up.
sudo apt install curl lsb-release imagemagick ffmpeg libpq-dev libxml2-dev libxslt1-dev file git-core g++ libprotobuf-dev protobuf-compiler pkg-config nodejs gcc autoconf bison build-essential libssl-dev libyaml-dev libreadline6-dev zlib1g-dev libncurses5-dev libffi-dev libgdbm-dev nginx redis-server redis-tools certbot python3-certbot-nginx libidn11-dev libicu-dev libjemalloc-devCopyCreating a User for Mastodon on your Raspberry Pi
3. With the base software installed, we can create a user that Mastodon will run under on our Raspberry Pi.
We can create this user by using the useradd command, as shown below. This user will have the name “mastodon“.
sudo useradd mastodon -mCopyBy using the “-m” option, this command will create a home directory while making the user.
Installing NodeJS
4. The Mastodon social network relies on the Node.JS runtime for its streaming functionality.
Before continuing any further, follow our guide on installing Node.JS onto the Raspberry Pi.
5. Once you have Node.JS installed on your device, you may safely continue with this tutorial.
Setting up PostgreSQL for Mastodon
6. PostgreSQL is the next piece of software we need to set up on our Raspberry Pi for Mastodon.
Mastodon will use PostgreSQL to store all of the data from your self-hosted social network.
We will need to add the official repository to install the latest version of PostgreSQL.
Start by saving the GPG key for the Postgre repository to your device by using the following command.
curl -L https://www.postgresql.org/media/keys/ACCC4CF8.asc | gpg --dearmor | sudo tee /usr/share/keyrings/postgresql-archive-keyring.gpg >/dev/nullCopy7. Now that we have added the GPG key for PostgreSQL, we can add the repository to our sources list by using the command below.
echo "deb [arch=arm64 signed-by=/usr/share/keyrings/postgresql-archive-keyring.gpg] http://apt.postgresql.org/pub/repos/apt $(lsb_release -cs)-pgdg main" | sudo tee /etc/apt/sources.list.d/postgresql.listCopy8. As we changed the available repositories, we need to update the package list cache again.
Update the package list cache by running the following command.
sudo apt updateCopy9. We can finally install PostgreSQL to our Raspberry Pi for Mastodon to utilize.
To install this database software, run the command below in the terminal.
sudo apt install postgresql postgresql-contribCopyCreating a PostgreSQL User for Mastodon on the Raspberry Pi
10. With PostgreSQL now installed on the Raspberry Pi, our next step is creating a new SQL “user” for Mastodon to use when connecting to the database.
To be able to create this user, we will need to use the following command to launch the PostgreSQL CLI.
sudo -u postgres psqlCopy11. Since PostgreSQL uses the “ident” plugin by default, we only need to ensure the user has the same name as the user created earlier.
Use the command below within the CLI to create a Postgre user named “mastodon“.
CREATE USER mastodon CREATEDB;CopyUsing “CREATEDB” at the end of the line, we are telling Postgres that this new user can create databases. This permission is required for Mastodon to properly install intself.
12. With the user now created, you can quit out of the CLI by typing in the following.
\qCopyEnabling Yarn
13. To build and run Mastodon on our Raspberry Pi, we will need to enable Yarn. Yarn is a package manager for Node.JS.
You can enable Yarn on your system by using the following two commands.
sudo corepack enable
sudo yarn set version classicCopy
Installing Ruby for Mastodon on the Raspberry Pi
14. We can finally install Ruby on your Raspberry Pi. Mastodon uses Ruby to generate its web pages and the REST API.
To install Ruby, we need to change to the Mastodon user by running the following command.
sudo su mastodonCopy15. To install and set up Ruby on our Raspberry Pi, we will use a tool called “rbenv“. This tool allows us to set up the Ruby environment for our Mastodon user easily.
Clone the code repository for the “rbenv” utility using the below command.
git clone https://github.com/rbenv/rbenv.git ~/.rbenvCopy16. We also need to clone the “ruby-build” plugin for the “rbenv” tool.
You can clone this tool by running the command below within the terminal.
git clone https://github.com/rbenv/ruby-build.git ~/.rbenv/plugins/ruby-buildCopy17. Now run the following command to adjust the “.bashrc” file. Commands within this file will be executed when the bash terminal starts.
The command we add will initialize the “rbenv” utility used to set up the Ruby environment.
echo 'eval "$(~/.rbenv/bin/rbenv init - bash)"' >> ~/.bashrcCopy18. To ensure the changes we made are available immediately, use the command below.
exec bashCopy19. We can now begin installing Ruby 3.0.4 to our Raspberry Pi by using the command below in the terminal.
Installing Ruby like this ensures we have the exact version Mastodon expects on our Raspberry Pi.
RUBY_CONFIGURE_OPTS=--with-jemalloc rbenv install 3.0.4CopyPlease note that the compilation process can take some time.
20. Once Ruby finishes installing, our next step is to declare it as the global version of Ruby to use.
To do this, you only need to use the following command.
rbenv global 3.0.4Copy21. Finally, we need to utilize the Ruby package manager to install “bundler“.
You can install this package by using “gem” as shown below.
gem install bundler --no-documentCopyInstalling Mastodon on the Raspberry Pi
Now that we have prepared everything, we need to run Mastodon on our Raspberry Pi, we can finally move on to installing this social network software.
Over the following sections, you will learn how to compile and install Mastodon on your device.
Cloning the Mastodon Repository to your Raspberry Pi
1. Before we continue, you must ensure that you are still running as the Mastodon user.
If you don’t see you shell session starting with “mastodon@” you will need to run the following command.
sudo su mastodonCopy2. Once you have switched to the “mastodon” user, you can change to the home directory using the cd command.
cd ~Copy3. Now that we are in the home directory, we can clone the Mastodon code base to our Raspberry Pi.
To clone the repository, you must use the command below.
git clone https://github.com/mastodon/mastodon.git liveCopy4. After cloning the Mastodon repository, we will want to use the cd command again to change to the “live” directory.
cd liveCopy5. We can now use the “git checkout” command to change to the latest stable “tagged” release of Mastodon.
git checkout $(git tag -l | grep -v 'rc[0-9]*$' | sort -V | tail -n 1)CopyInstalling Mastodon and its Dependancies
6. Our first step is setting the “deployment” option to “true” using the following command.
bundle config deployment 'true'Copy7. We then utilize the “bundle” tool to exclude packages that areused purely for development or test purposes.
bundle config without 'development test'Copy8. Finally, we can use the bundle command again to install all of the Ruby dependencies for Mastodon to our Raspberry Pi.
Using the “-j” option, we can tell the package manager to use as many CPU cores as we have.
bundle install -j$(nproc)Copy9. Once the Ruby packages have been installed, we can use yarn to install the Node.JS dependencies for Mastodon.
Install these dependencies by utilizing the following command.
yarn install --pure-lockfileCopyConfiguring Mastodon for your Raspberry Pi
10. We can finally begin the final process of configuring Mastodon itself on your Raspberry Pi.
To begin this process, run the following command within the command line.
RAILS_ENV=production bundle exec rake mastodon:setupCopyGeneral Settings
11. You will first be prompted to enter the domain name for your Mastodon instance. It is crucial to set this to the exact domain name you plan on using. If you connect through any other domain, the connection will be blocked.
For our example, we will be using “mastodon.pimylifeup.com“.
Your instance is identified by its domain name. Changing it afterward will break things.
Domain name:
12. Next, you will be asked if you want to run your Raspberry Pi’s Mastodon instance in single-user mode. Single-user mode means that there will only be a singular public profile.
Type in “Y” if you only want this Mastodon server for yourself.
Alternatively, press the “N” key and then the ENTER key to have multiple users.
Single user mode disables registrations and redirects the landing page to your public profile.
Do you want to enable single user mode?
13. You will be asked if you are running Mastodon as a docker container.
Since we aren’t using Docker to run Mastodon, press the “N” key and then the ENTER key.
Are you using Docker to run Mastodon?PostgreSQL Settings
14. The following prompt will ask you to set the host for PostgreSQL.
The default value is “/var/run/postgresql” so you can safely press the ENTER key.
PostgreSQL host: (/var/run/postgresql)15. Next, you will be prompted to specify the post for PostgreSQL.
Again, the default value is fine so press the ENTER key.
PostgreSQL port: (5432)16. The following option will ask you for the name of the Mastodon database.
To continue, you can safely accept the default value and press the ENTER key.
Name of PostgreSQL database: (mastodon_production)17. You will next have the chance to specify the PostgreSQL to utilize for Mastodon.
If you have been following this tutorial, you can safely use the default value and press the ENTER key.
Name of PostgreSQL user: (mastodon)18. The final setting we need to configure for PostgreSQL is its password.
Since we created our PostgreSQL user without one, it will default to using “ident” for authentication. As long as the user running Mastodon and the PostgreSQL user matches, we will be able to access the database.
Leave the field empty, and then press the ENTER key to proceed.
Password of PostgreSQL user:Redis Settings
19. Your next step is to set the host for your Redis server.
Since we installed this locally, we can use the default option by pressing the ENTER key.
Redis host: (localhost)20. We then need to set the port used when connecting to the Redis server.
As we haven’t changed the default port in this guide, press the ENTER key to use the default value.
Redis port: (6379)21. The final option we need to set is the password.
With the way we have set up Redis locally, press the ENTER key without specifying a password.
Redis password:Cloud Storage Settings
22. You will now get the chance to configure Mastodon to use cloud storage for uploaded files.
As this isn’t something we plan on covering in this guide, we will type in “N” and press ENTER.
If you want to use Cloud storage such as AWS, you will want to type “Y” and follow the prompts.
Do you want to store uploaded files on the cloud?SMTP Options
23. Next, you will be prompted whether you want to send emails from your Raspberry Pi for Mastodon. This is not recommended, as email providers such as Outlook and Gmail will likely block your server.
Instead, you should use a transactional mail service such as Sendgrid, Mailgun, or Amazon SES.
If you want to keep your setup simple and aren’t worried about the deliverability of your emails, you can type “Y” and press the ENTER key.
Otherwise, to use a transactional email service, type “N” and press ENTER.
Do you want to send e-mails from localhost? If you choose to send emails directly from your Raspberry Pi, skip to step 30.
24. You will now need to know the details of the SMTP service that you will be using.
The first detail you need to know is the IP or domain name for the SMTP server. For example, if you were using Mailgun, you would use “smtp.mailgun.org“.
SMTP Server: (smtp.mailgain.org)25. We will next need to set the port to send the SMTP message over. This port differs from service to service.
For example, using the Mailgun service, you would use port “587“.
SMTP port: (587)26. To be able to send any message over SMTP you will need a username and password.
First, you will be prompted to enter the password for your SMTP connection. Your mail transaction service provides these details.
SMTP username:27. After entering the username to use for the SMTP connection you will also need to enter the password.
SMTP password:28. We can also control the type of authentication that is used for SMTP.
The default value for this option is “plain“. Make sure you check your provider for the correct value.
SMTP authentication: (plain)29. Next you will need to specify the SMTP verify mode. If you are unsure what to pick here, you can choose the “none” option.
SMTP OpenSSL verify mode:30. You can now choose the email address that your Raspberry Pi will use to send Mastodon’s emails through.
To use your own, you need to use the following format: “NAME <EMAILADDRESS>“. For example, if we were setting this up for our website it would be written like “PiMyLifeUP <mastodon@pimylifeup.com>“.
You can also use the default value by pressing the ENTER key.
E-mail address to send e-mails "from": (Mastodon <notifications@DOMAINNAME>)31. Finally, you will be asked whether you want to test the configuration nail.
To test whether all of your settings worked, press “Y“, then press the ENTER key.
Send a test e-mail with this configuration right now? (Y/n)Finishing the Configuration
32. We can finally finish configuring Mastodon on your Raspberry Pi.
You will now be asked whether you want to save the configuration to the “.env.production” file.
To save the changes, type in “Y” and then press the ENTER key.
Save configuration?33. Mastodon will now want to set up the database and install all of its data.
Type in “y” and press ENTER to have Mastodon create its database.
Now that configuration is saved, the database schema must be loaded.
If the database already exists, this will erase its contents.
Prepare the database now?
34. The final thing you will be asked during configuration is whether you want your Raspberry PI to compile Mastodon’s CSS and JS assets.
As we need these to be compiled, type in “Y” and press the ENTER key.
The final step is compiling CSS/JS assets.
This may take a while and consume a lot of RAM.
Compile the assets now?
Creating an Admin Account
35. Before the configuration script ends, you will be asked if you want to create a Mastodon admin account.
Now is the best time to create this account, so type in “y” and press ENTER to continue.
Do you want to create an admin user straight away? 36. You will now be asked to specify a username for your admin account.
You can name this user whatever you would like. Type in the username, then press the ENTER key.
Username: (admin)37. Next, you can specify an email address to be assigned to your admin account. This email address is what you will use to login to your admin account.
Ensure this is an email address that you can be reached through as its utilized.
E-mail:38. After creating your account, it will automatically generate a password. Save this password, as you will use it to log in to your account.
You can login with the password: 9a1792ae3228847855d6d415875a1a79Obtaining an SSL Certificate for your Mastodon Server
39. At this point, we are finally done with the Mastodon user.
Return to your normal user by running the following command.
exitCopy40. To help keep your Raspberry Pi’s Mastodon connection secure, you should run it under HTTPS. For this to work, you will need to generate a certificate for your domain name.
Thanks to installing certbot earlier in this guide, we can request a certificate from Lets Encrypt by running the following command.
Ensure that you replace “YOURDOMAIN.com" with the domain name that you are using.
certbot --nginx -d YOURDOMAIN.comCopyDuring certificate generation, you will be prompted with a series of questions.
Configuring NGINX for Mastodon on your Raspberry Pi
41. Let us now copy the example Nginx config from the Mastodon directory to the “sites-available” directory.
Use the command below to perform this action.
sudo cp /home/mastodon/live/dist/nginx.conf /etc/nginx/sites-available/mastodonCopy42. We need to create a symbolic link between the mastodon config file in the “sites-available” directory and the “sites-enabled” directory.
You can create this symbolic link by using the following command.
sudo ln -s /etc/nginx/sites-available/mastodon /etc/nginx/sites-enabled/mastodonCopy43. Our next step is to edit your Raspberry Pi’s Mastodon Nginx config file so that it uses your domain name.
Begin editing the config file using the nano text editor by using the command shown below.
sudo nano /etc/nginx/sites-enabled/mastodonCopy44. Within this file, you will need to find and change the following line. There will be two occurrences of this within the file that will need to be swapped out.
These lines should be near the top of each “server {” block.
server_name example.com;Replace this with the domain name that you are using. For example, we used “mastodon.pimylifeup.com“.
server_name mastodon.pimylifeup.com;45. Our next step is to configure the Nginx file to point to the SSL certificate you got earlier
Find the following two lines within the file.
  # ssl_certificate     /etc/letsencrypt/live/example.com/fullchain.pem;
  # ssl_certificate_key /etc/letsencrypt/live/example.com/privkey.pem;
Once you have found both of these lines, you need to remove the hashtag in front of them. You also need to change “example.com” to your domain name.
For example, using our domain name of “mastodon.pimylifeup.com“, the lines would look like the following.
  ssl_certificate     /etc/letsencrypt/live/mastodon.pimylifeup.com/fullchain.pem;
ssl_certificate_key /etc/letsencrypt/live/mastodon.pimylifeup.com/privkey.pem;46. Once you have made the changes, you can save and quit by pressing CTRL + X, followed by Y, then the ENTER key.
47. As we have made changes to Nginx’s configuration, we will need to perform a reload by running the following command.
sudo systemctl reload nginxCopySetting up a Service File for Mastodon on the Raspberry Pi
48. The final task we need to do is set up a service that will manage running Mastodon on our Raspberry Pi.
Luckily, these service files come bundled with the Maston code base.
Copy the systemd services to the relevant directory using the cp command shown below.
sudo cp /home/mastodon/live/dist/mastodon-*.service /etc/systemd/system/Copy59. With the service files copied, we can now enable and start them all by using the following command.
The “--now” option tells systemd to start up Mastodon
sudo systemctl enable --now mastodon-web mastodon-sidekiq mastodon-streamingCopy60. At this point, Mastodon is now up and running on your Raspberry Pi and will be fully accessible through your chosen domain name.
Connecting to your Raspberry Pi Mastodon Server
At this point, you will have finally gotten Mastodon installed on your Raspberry Pi and will be ready to access it.
1. To access Mastodon, you must go to the domain name you configured earlier.
For our example, we will go to the following address in our web browser.
https://mastodon.pimylifeup.com/2. You should be greeted by Mastodon’s login screen. Using the form in the top-right, you can log in using the administrator account you created during setup.

3. You are now logged into your Mastodon account. You can start now start “tooting” on your profile.
Alternatively, since you are the admin, you can also head to the preferences screen and utilize the administration panel.

4. Once you are on the preferences screen, look at the left-hand sidebar to find the “Administration” option and click it.
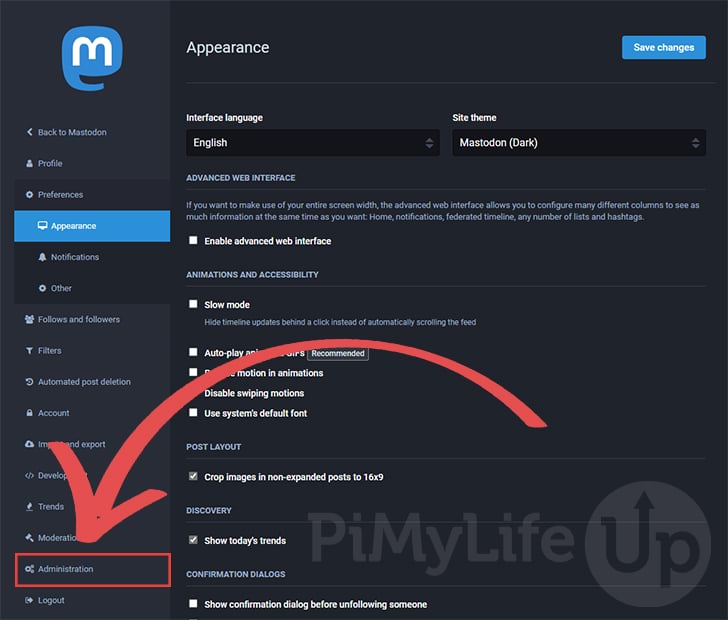
5. Within the administration screen, you can control many aspects of your self-hosted Mastodon installation.
Take your time to learn about all of the tools available within this screen, as it will help you manage your community.

Conclusion
At this point in the guide, you should hopefully have Mastodon installed and running on your Raspberry Pi.
Mastodon is a self-hosted social network that uses the microblogging style that Twitter popularised.
Please comment below if you have had issues getting Mastodon to run on your Pi.
If you liked this guide, check out our many other Raspberry Pi projects.


Mastodon requires the classic version of yarn. You need to change to ‘
sudo yarn set version classic‘https://docs.joinmastodon.org/admin/install/#yarnHi Paul,
Thank you for the heads up. I have corrected this step within the guide.
Cheers,
Emmet
Great guide.
However I’m wondering if it’s better security practice to add –disabled-login when creating the mastodon user, as suggested on the Mastodon website? That way, anyone trying to brute-force the SSH login wouldn’t have a default username to work with.
Thanks 🙂
Dan
Hi Dan,
That is definitely a good question that I can hopefully answer for you. The Mastodon website uses a slightly different command to the one we are using. They use “adduser” where as we are using “useradd”.
By default, the useradd command will create a disabled user without login capabilities unless you explicitly define a password for the user.
Cheers,
Emmet
This went well until :
Any suggestions?
Hi John,
Thank you for the heads up about this. The problem is our Node.JS tutorial was linking to an older version of Node.JS that is no longer supported for the “current” release. If you had used the older LTS release, we were linking to it would have worked fine as that is still supported by yarn.
I have corrected that tutorial so it will now always point to the latest LTS release or latest current release so the problem you ran into shouldn’t happen for anyone else.
If you follow our Node.JS on the Raspberry Pi tutorial again, everything should work fine.
Please let me know if this resolves the issues that you are running into.
Cheers,
Emmet
Emmet,
I’m hanging my head in shame!
I studied both the RPi magazine article and then found yours, which suited my purpose better. However I must have had a massive brain fart and retained the only 32 bit form the Rpi Mag article and applied it when following your instructions.
My apologies for sidetracking – when I went back to start from scratch I see the clear instructions that it is only for 64bit OS.
Duh………..
Graham
It seems that Postgres has been updated and the instructions above fail (on 32bitOS) with:
Is there a way to force a 32 bit version of Postgres to install?
Cheers
Hi Graham,
As mentioned at the top of the article, we are only focusing on supporting a 64-bit release of Raspberry Pi OS, and the version of PostgreSQL we are using only supports 64-bit OS.
However, there is no reason you can’t just install an older release of PostgreSQL as that should likely still work just you might be missing out on some of the performance enhancements of a newer release.
1. First you will want to remove the PostgreSQL repository that we added during this guide.
2. Next, you need to perform an update so that APT will no longer try getting packages from that repository.
3. Finally, install postgresql from the Raspberry Pi OS package repository.
Cheers,
Emmet
after making the mastodon user, should presumably the rest of the tutorial be done on the mastodon user? Or just at the point where you direct us to switch. Thanks for the great guide!
Hi Charles,
We direct when you should switch between the users within the guide! There are only a few steps that will need to be completed under the mastodon user.
Cheers,
Emmet
I too had the nginx issue, but the RM and restart commands did the trick.
Now having a strange issue where I can connect with another pc (via internet, using LTE/5G) and everything works fine, but subsequent connections fail.
No firewall enable that I can tell and nslookup tells me DNS is working properly. I can log in, but no friends can connect. When trying
https://[IP_ADDRESS]i get an access denied, but i assume thats intentional with nginx (can you tell i dont fully understand what everything does? 😛 )Any assistance would be appreciated!
Future N1bbl35 here – turns out there is something blocking separate sessions from the same IP or the local subnet… Example: My wife and I are unable to login at the same time. If we grab our smartphones and login over cellular data, there are no issues. Anyone aware of a restriction or limitation that might be causing this? IPTables set to allow all, and no other firewall type applications are running.
FYI, I, too, had the default nginx issue.
Hey Paul,
Did the steps I provide for Pa work for you in resolving that issue?
Cheers,
Emmet
Thanks for the tutorial! Helped a lot, worked almost perfectly apart from the last command:
sudo systemctl enable –now mastodon-web mastodon-sidekiq mastodon-streaming
When I go to my domain name, it still only loads the nginx welcome page and not Mastodon. Any tip on what could be the reason?
Another thing, I couldn’t get it to run with ruby 3.0.3 but only with 3.0.4.
Hi Pa,
Sorry to hear that you have had some issues with this tutorial. Also thnak you for letting me know that they have bumped the Ruby version to 3.0.4. I need to work out a way of automating this process so it was always the correct version within the tutorial.
On the note of you seeing the Nginx welcome page, can you try deleting the default configuration by using the following command.
Afterwards you should try restarting Nginx agian.
Cheers,
Emmet