This project will teach you how to install the Joomla content management system (CMS) onto a Raspberry Pi.
Joomla is a popular open-source content management system that allows you to publish your web content easily.
One of the most significant advantages of Joomla is its flexibility. You can use this software to manage numerous types of web content, from a traditional website to a discussion forum.
Getting Joomla to run on the Raspberry PI is a straightforward process as it is built upon PHP. Within the next couple of steps, you will install all the software you need to run Joomla and configure PHP for the CMS.
Equipment
Below is a list of the equipment we used when installing Joomla to the Raspberry Pi.
Recommended
Optional
We tested this tutorial on a Raspberry Pi 400 running Raspberry Pi OS Bullseye.
Preparing your Raspberry Pi for Joomla
Before installing Joomla, we need to prepare our Raspberry Pi for it by installing some additional software.
We will get you to install NGINX, PHP, and MySQL to your device in the following steps. Joomla requires all of these to operate.
1. The first task you need to do is install the NGINX web server to your Raspberry Pi by following our guide.
During this guide, you will learn how to install the NGINX web server and how to configure it for PHP. Complete both of these sections before returning to this guide.
Joomla is written in PHP, so we need that to execute its scripts. NGINX is used to serve the content that is generated from Joomla’s PHP scripts.
2. Once you have both NGINX and PHP installed on your Pi, you can proceed to the next step.
3. Joomla needs somewhere to store its data on your Raspberry Pi. For this, you will need to use a database server such as MySQL.
Before continuing with this guide, please follow our guide on setting up a MySQL database on your Raspberry Pi.
4. Once you have MySQL installed, we can install an additional PHP module that Joomla requires for handling internationalization by using the following command.
sudo apt install php7.4-intlCopyConfiguring NGINX and MySQL for Joomla
Now that we have NGINX, PHP and MySQL installed to our Raspberry Pi we can proceed to configure them for Joomla.
For NGINX, we need to create a virtual host that configures NGINX to behave as Joomla expects it to.
We will create a new database and user for MySQL that Joomla will use to store any data required.
Creating an NGINX Virtual Host for Joomla
A virtual host is what NGINX uses to understand how to process incoming web requests. For example, using this file, we can tell NGINX that we want PHP to process the files where Joomla is stored on our Raspberry Pi.
1. Begin writing the new virtual host using the nano text editor by running the following command on your Raspberry Pi.
sudo nano /etc/nginx/sites-available/joomla.confCopy2. Copy and paste the following text into this file.
server {
    listen 80;
    listen [::]:80;

    root /var/www/joomla;

    index index.php index.html index.htm;
    server_name _;

    client_max_body_size 100M;
    autoindex off;

    location / {
        try_files $uri $uri/ /index.php?$args;
    }

    # deny running scripts inside writable directories
    location ~* /(images|cache|media|logs|tmp)/.*.(php|pl|py|jsp|asp|sh|cgi)$ {
      return 403;
      error_page 403 /403_error.html;
    }

    location ~ .php$ {
        include snippets/fastcgi-php.conf;
        fastcgi_pass unix:/var/run/php/php7.4-fpm.sock;
        fastcgi_param SCRIPT_FILENAME $document_root$fastcgi_script_name;
        include fastcgi_params;
    }

    # caching of files
    location ~* \.(ico|pdf|flv)$ {
            expires 1y;
    }

    location ~* \.(js|css|png|jpg|jpeg|gif|swf|xml|txt)$ {
            expires 14d;
    }
}Copy
This file sets up a variety of things such as the location of our Joomla installation, how NGINX should process the files and more.
With this setup, we have configured the virtual host to run regardless of the server name. Therefore, if you use this with a particular domain name, you need to replace the underscore (_) with your domain name.
3. Once you have finished editing this file, you can quit and save by pressing CTRL + X, then Y, followed by the ENTER key.
4. As we created this file within the “sites-available” directory, we must create a symbolic link for the config into the “sites-enabled” directory.
By doing this, we can disable the virtual host by deleting the link in the “sites-enabled” directory rather than the file itself.
Create this symbolic link by using the command below on the Raspberry Pi.
sudo ln -s /etc/nginx/sites-available/joomla.conf /etc/nginx/sites-enabled/joomla.confCopy5. If you aren’t using this alongside a domain name, you will need to remove the “default” virtual host from the “sites-enabled” directory.
You can delete this file by running the following command on your device.
sudo rm /etc/nginx/sites-enabled/defaultCopyIf we don’t delete this file while using the server name as “_“, we can run into errors as the default script is already attempting to use the same ports with a wildcard server name.
6. Finally, we can now tell NGINX to reload the configuration files. This will make the web server aware of our new virtual host.
To make NGINX reload the config files, you can use the following command on your device.
sudo systemctl reload nginxCopyCreating the Database for Joomla on your Raspberry Pi
We need to create the SQL database on our Raspberry Pi for Joomla to store all of its data.
1. To create this database, we need to log in to our MySQL database server.
You can connect to your local instance by running the following command. If prompted to enter the password for the “root” user, then do so.
sudo mysql -u root -pCopyThe newer versions of MariaDB installed on the Raspberry Pi are configured to use a UNIX socket for authentication and not a password for the root user.
2. Now that we are within the MySQL command-line tool, we can now create the database. For this tutorial, we will be keeping this simple and calling the database “joomladb“.
You can create this database by using the following SQL command within the command line.
CREATE DATABASE joomladb;Copy3. After creating the database, we need to make a user that has permission to access it. This user is what Joomla will use to access the database.
With the command below, we will be creating a user called “joomlausr” that the local host can only access.
CREATE USER 'joomlausr'@'localhost' IDENTIFIED BY '<strong>[PASSWORD]</strong>';CopyWhen you enter this command, make sure that you replace “[PASSWORD]” with a secure password of your choosing.
4. Finally, we need to grant privileges to our new user so that it can access the database that we created. Currently, this user is unable to do anything on our MySQL database.
Running the following command will give our user all available privileges on the database we created. The only thing it can’t do is grant other users rights to this database.
GRANT ALL PRIVILEGES ON joomladb.* TO 'joomlausr'@'localhost';Copy5. For our changes to the privileges to take effect, we need to flush the privileges.
The MySQL server won’t know that our new user can access our new database without doing this.
FLUSH PRIVILEGES;Copy6. With that done, we can now quit out of the MySQL command line by using the following command.
Running this command within the MySQL CLI will return you to the standard terminal.
quit;CopyInstalling and Initial Setup of Joomla on the Raspberry Pi
Now that we have installed and configured NGINX and our MySQL server, we can now continue.
In this section, you will learn how to download the Joomla software to your Raspberry Pi and run through the initial setup experience.
Installing Joomla to the Raspberry Pi
1. To start, we need to create the directory where we will be storing Joomla on the Pi.
When we created the virtual host earlier, we referenced the directory “/var/www/joomla” as the root. We now need to make this directory to store Joomla.
You can now create the directory and move into it by using the following two commands in the command line.
sudo mkdir -p /var/www/joomla
cd /var/www/joomlaCopy
The “-p” option tells the mkdir command to create all directories in the pathname.
2. With the directory now created, we can now download Joomla to our Raspberry Pi.
The version that we are downloading in this guide is 4.0.3. You can check for newer versions by visiting the official website.
Use the following command to use “wget” to download this archive to our device.
sudo wget https://downloads.joomla.org/cms/joomla4/4-0-3/Joomla_4-0-3-Stable-Full_Package.tar.gzCopy3. Once Joomla finishes downloading to your Raspberry Pi, you can begin extracting the archive’s contents into the directory.
As this is a “.tar.gz” archive, we can use the following tar command to extract its contents.
sudo tar -xvf Joomla_4-0-3-Stable-Full_Package.tar.gzCopy4. As we no longer need the Joomla archive on the device, we can use the “rm” command to remove it.
Run the following command on your device to delete the archive.
sudo rm Joomla_4-0-3-Stable-Full_Package.tar.gzCopy5. Before running through the Joomla installer on our Raspberry Pi, we need to correct some permissions.
The Joomla directory and its contents need to be owned by the “www-data” user and group, as PHP will use them to read and execute the scripts in our setup.
We can correct these permissions by using the following “chown” command within the terminal.
sudo chown -R www-data:www-data /var/www/joomla*CopyRunning Through the Joomla Initial Setup Experience
With the Joomla code extracted on our Raspberry Pi, we are finally ready to run through its initial setup process.
For this section, you will need to remember the password you used when creating your MySQL user earlier in this guide.
Please note if you are using a newer version of Joomla than 4.03, there is a slight chance that these steps have changed.
1. First, you need to know the IP address of your Raspberry Pi so that you can access it through your web browser.
If you are unsure of your Pi’s IP, you can retrieve the one assigned to it by using the hostname command within the terminal.
hostname -ICopy2. In your favorite web browser, now go to your Raspberry Pi’s IP address.
Make sure when going to this address you use the “http” protocol as we haven’t set up “https“.
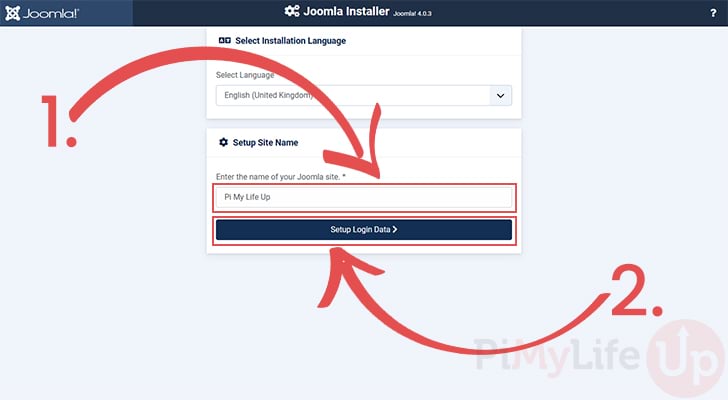
http://<strong>[YOUR RASPBERRY PIS IP ADDRESS]</strong>Copy3. When you first visit your new Joomla site, you will need to run through the initial setup experience.
Start by typing in a name for your website in the textbox (1.). For our example, we will be using the name “Pi My Life Up“.
Once you have typed in the site name, you can click the “Setup Login Data” button to continue (2.).
4. You will now need to fill out details for the superuser for your Raspberry Pi’s Joomla installation.
These details will identify your superuser and are what you will use to log in to the administration screen.
- Start by typing in a “real name” for your superuser. This value can be anything you want.
The name you specify in this textbox is primarily used for display purposes throughout the Joomla interface. - The next value you need to type out is the username for your superuser. This value is what you will use to log into your account.
It would be best to use a username that isn’t too similar to the name you set in the “real name” textbox for better obscurity. - You will also need to specify a password for your new Joomla superuser. As the superuser has access to everything within Joomla’s web interface, you should keep this as secure as possible.
Joomla also has a requirement that your password must at least be 12 characters long. - The final value you need to fill out on this page is the email address for your new superuser account.
This email is used various things within Joomla, so make sure you use a valid one where possible. - Once you are happy that everything has been entered correctly, click the “
Setup Database Connection” button.

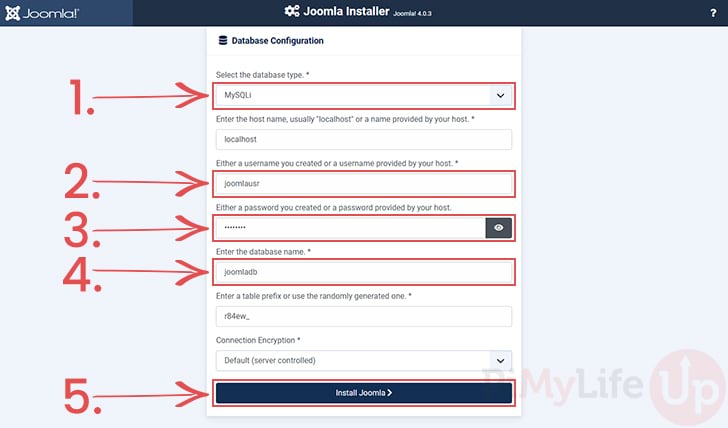
5. On the next screen, we will need to enter our Raspberry Pi’s MySQL servers details for Joomla to connect to it.
Make sure that you have the password for the SQL user we created earlier on in this guide.
- Before we proceed any further, make sure that the “
database type” is set to MySQLi by using the dropdown box. - Our next task is to type in the username for the SQL user we created earlier in this guide. Joomla will use this user to try and authenticate with our MySQL server.
In this textbox, you need to type in the name of the SQL we created, which, if you are following our guide, should be “joomlausr“. - Next, you will need to type in the password for that SQL user.
If you want to verify you have typed in the correct password, you can click the little eye symbol at the end of the textbox. - Finally, we need to enter the database name for the SQL database we created earlier.
If you have been following along with our guide, this should be “joomladb“. - Once you are confident that you have all the values entered correctly, you can click the “
Install Joomla” button at the bottom of the screen.
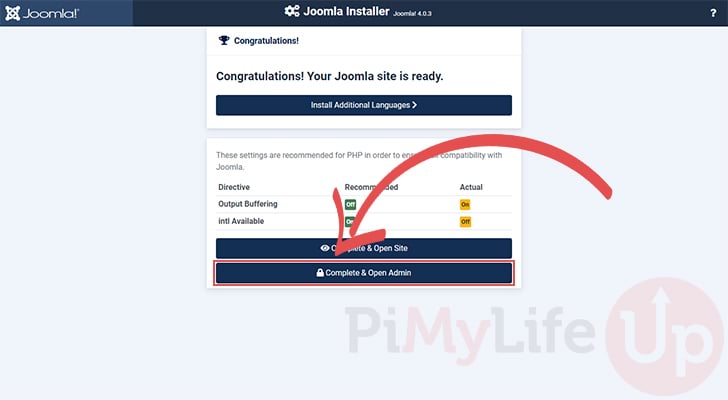
6. You have now successfully installed Joomla to your Raspberry Pi.
On this screen, you may see warnings about PHP potentially not having the most optimal settings for Joomla. We can configure this later in the guide, but Joomla should work fine for the most part.
To go to the admin screen quickly, you can click the “Complete & Open Admin” button.
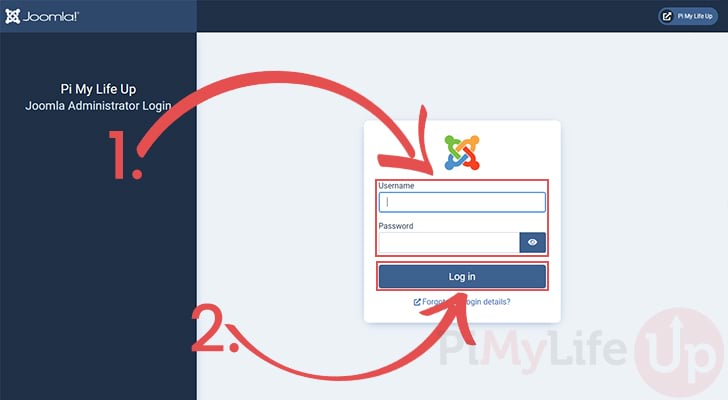
7. You will be taken to the following screen asking you to log in to the superuser that you just created.
Use the two textboxes (1.) in the middle of the screen to enter both the username and password you set for your account.
Once you have typed in your login details, click the “Log In” button to continue (2.).
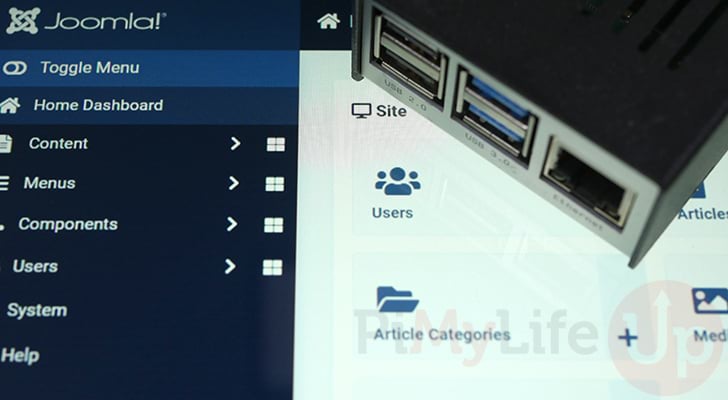
8. You now have access to the Joomla dashboard running on your Raspberry Pi.
You can use this dashboard to create and manage content on your website.

Re-configuring PHP for Joomla
We can now change PHP’s configuration to deal with the warnings that may have popped up after installing Joomla to our Raspberry Pi.
There are also some additional settings that we can tweak to improve your experience with the CMS.
1. The file we need to edit is called “php.ini” and is stored within the “/etc/php/7.4/” directory. This directory will change slightly depending on what version of PHP you have installed.
Begin editing this configuration file by using the following command. We need to use the “php.ini” file within the “fpm” sub-directory as we are using PHP-FPM.
sudo nano /etc/php/7.4/fpm/php.iniCopy2. The first thing that Joomla wants us to disable is output buffering. When using nano, you can search using the CTRL + W shortcut.
To do this you will need to search for the following line and change its value to “Off“.
output_buffering = 4096CopyReplace with the following line to disable output buffering.
output_buffering = OffCopyPlease note that if you are running other PHP software on your Raspberry Pi, it may rely on output buffering to operate. Therefore, changing this setting to “off” may break your other PHP software.
3. The next problem is the default maximum POST size can be quite constrictive when uploading large images, extensions, or posting large images.
To give Joomla extra room, we will increase the max post size from 8 Megabytes to 64 Megabytes.
post_max_size = 8MCopyReplace this line with the following to increase the max post size to 64 Megabytes.
post_max_size = 64MCopy4. We will also need to adjust the max file size for uploaded files to accept files larger than 2 Megabytes (The default). When adjusting this value, it can never be higher than the max post size.
Find the following line in the PHP configuration file and change its value from 2 Megabytes to 64 Megabytes.
upload_max_filesize = 2MCopyModify this line to look like the following, changing “2M” to “64M“.
upload_max_filesize = 64MCopy5. Once you have made these changes to the configuration file, you can save and quit by pressing CTRL + X, then Y, followed by the ENTER key.
6. For all of these changes to take effect, we need to restart the PHP-FPM service.
You can restart the service by running the following command on your device.
sudo systemctl restart php7.4-fpmCopyConclusion
At this point, you should now have the Joomla content management system installed and set up on your Raspberry Pi.
Joomla is a powerful CMS that has been actively developed for several years. It is highly versatile and can be customized to suit your needs by the use of extensions.
If you have had issues getting Joomla to run on your Raspberry Pi, please leave a comment below.
Be sure to check out some of our other great Raspberry Pi projects.