This tutorial will show you how to integrate Philips Hue with Home Assistant.
Philips Hue is an incredibly popular line of lights that can be controlled wirelessly. They are known for being high quality and easy to integrate and automate.
Integrating Philips Hue with your Home Assistant installation lets you control and receive data from any Hue light, motion sensor, or remote.
This opens you to a realm of possibilities. For example, you can turn your lights on automatically at night when you are on your way home. Or, on the flip side, you can use Home Assistant to turn off lights when no one is in a room for some time.
You could even combine this with other integrations like Plex and dim your lights when you are watching a movie or TV show.
The following sections will show you how to install and use the Philips Hue integration within your smart home server.
Setting up the Philips Hue Integration on Home Assistant
Setting up and integrating Philips Hue with Home Assistant is a simple process. We don’t need to install add-ons or add custom repositories using HACS as it is supported within the Home Assistant core.
Before you proceed any further, we are assuming that you have a Philips Hue Bridge set up. This bridge can also be the self-hosted diyHue project instead of the official hub.
Regardless of whether you are using Philips Hue or diyHue, you must know the IP address for the device, as you will need this during setup.
Adding the Philips Hue Integration to Home Assistant
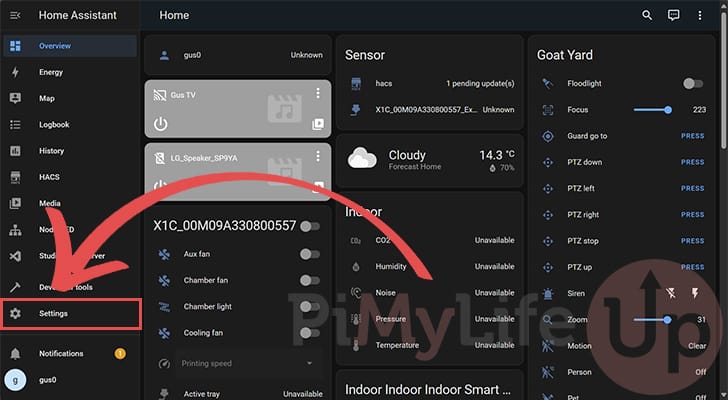
1. To install the Philips Hue Integration on Home Assistant, we must navigate to the “Settings” screen.
You can access this screen by clicking “Settings” in the sidebar.
2. Once you are within the settings page, click the “Devices & services” option.
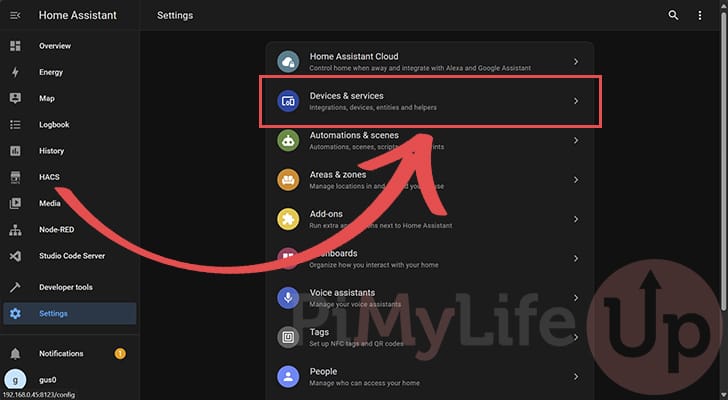
3. Now that you are on the “Devices & services” screen, click the “+ ADD INTEGRATION” button in the bottom-right corner.
4. On this next screen, use the search box and type “Philips” (1.).
As you type, you should eventually see “Philips” as an option (2.). Click this option to continue.
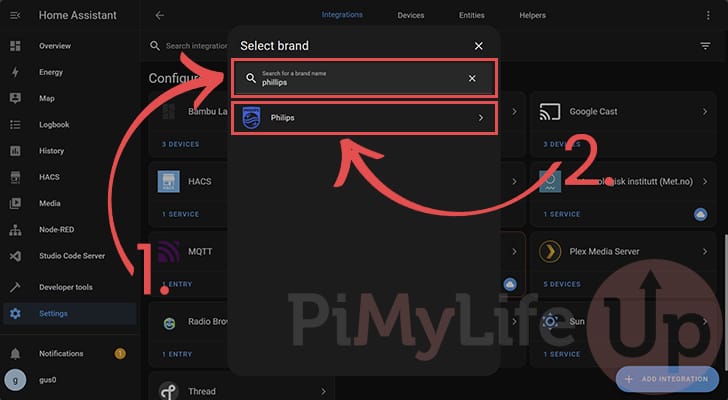
5. You will now get a list of different Philips integrations Home Assistant supports.
To continue, click the “Philips Hue” option.

Configuring the Philips Hue Integration
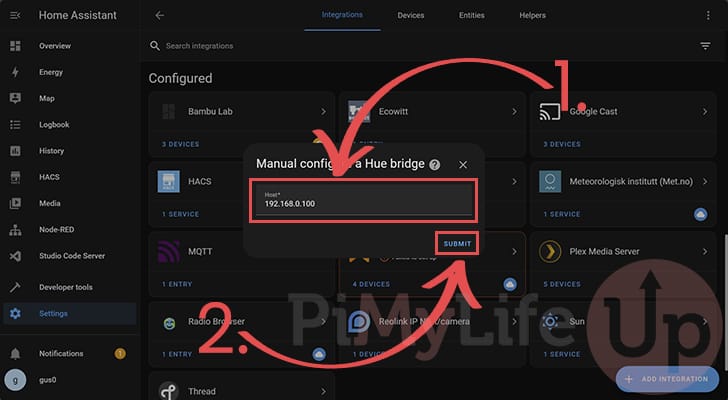
6. At this point, we can begin setting up the Philips Hue Integration with Home Assistant.
You must first type in the IP address for your Philips Hue bridge (1.).
After typing in the IP, click the “Submit” button (2.) to continue.
7. Before continuing, press the big button on your Philips Hue Bridge to begin the pairing process.
Pressing this button will put the Hue Bridge into pairing mode and allow the Home Assistant integration to connect.
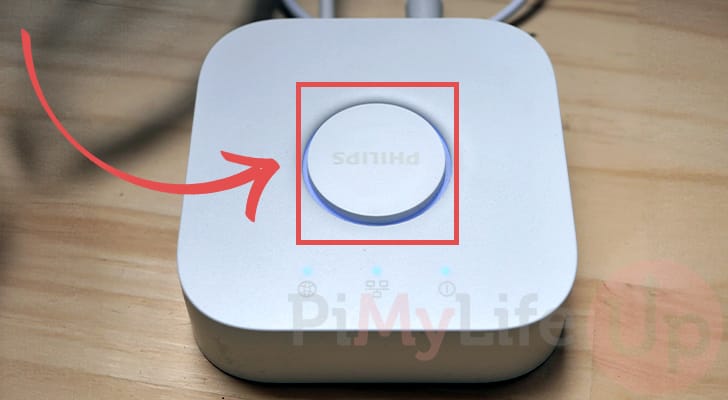
If you use diyHue instead of the Hue Bridge, you will want to use the “Link App” button within the “Link Button” menu.
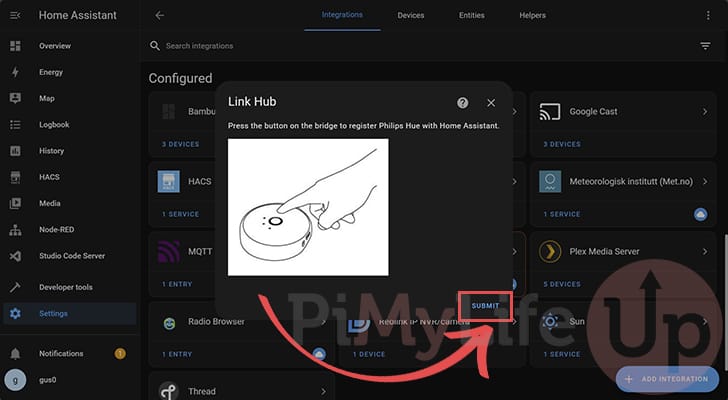
8. After pressing the pair button on your Bridge, you can click the “SUBMIT” button within Home Assistant.
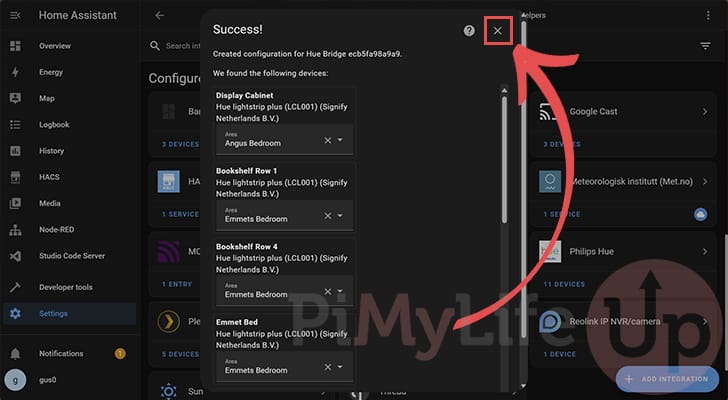
9. You will now get a list of devices Home Assistant has discovered using your Philips Hue Bridge.
This integration will allow you to get data from each of these devices and control them. For example, with a light, you can control its brightness, its color, and even set scenes.
You can click the “X” button in the top-right to return to your dashboard.
Viewing the Philips Hue Integration in Home Assistant
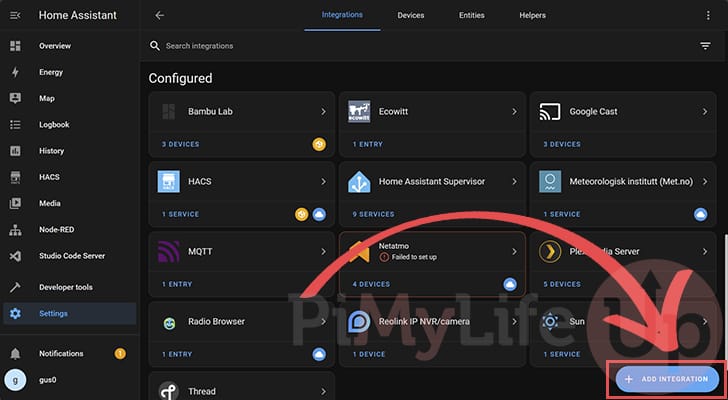
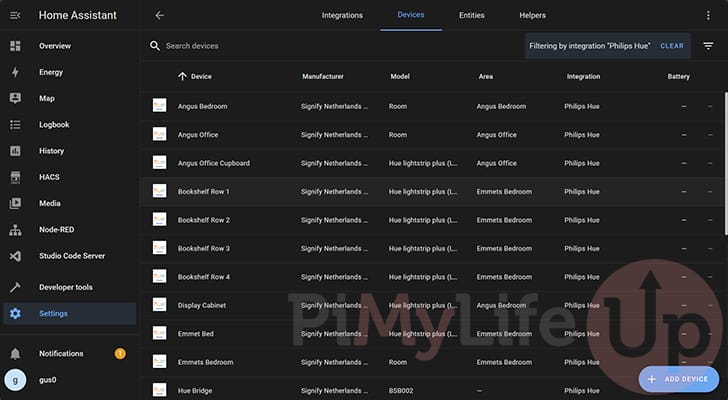
10. On the devices and services page, you should see the “Philips Hue” integration under the “Configured” heading.
Select this integration to find all the devices that this integration has detected.

11. Below, you can see the numerous lights that the Philips Hue integration has given our Home Assistant server access.
Let us select one of the devices to give you an idea of the sort of things a light integration allows.
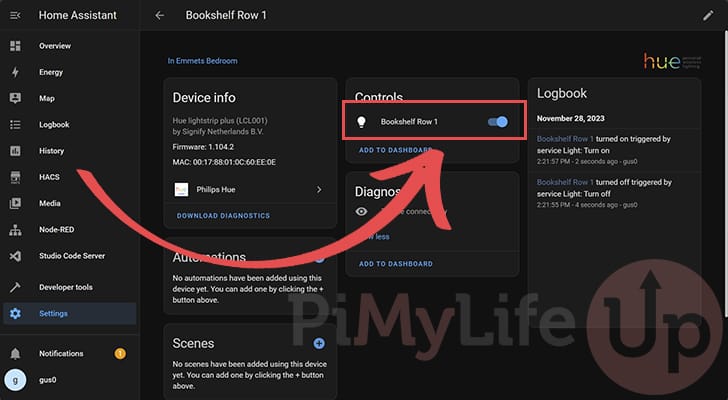
12. On this next screen, you will get more information about the device.
Under the “Controls” heading, you can see the name of the light alongside a toggle. While this toggle lets you turn the light on or off, you can click the devices name for more controls.
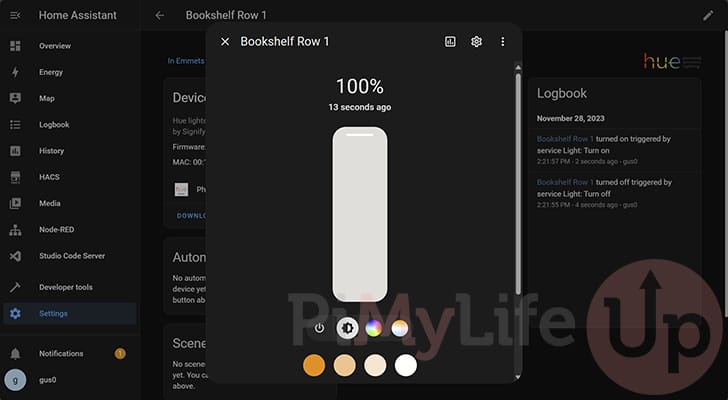
13. Clicking the light will give you more control over the Philips Hue light.
Using the dialog shown here, you can change the brightness of the light, set its color, and even set the scene it is operating in with ease.
Best of all, you can control all of these settings through automation.
Conclusion
At this stage, you should now have the Philips Hue integration set up and configured on your Home Assistant server.
This integration gives you complete control over all of your Philips Hue products. You can use this to control your lights easily through the Home Assistant Dashboard, and you can even control these through automation.
Please feel free to comment below if you have any questions about using this integration.
If you found this tutorial to be helpful, we recommend checking out our other Home Assistant tutorials.