In this guide, you will be learning how to use IFTTT with the Raspberry Pi.

IFTTT is a free web-based service that stands for “If This Then That”.
Using this service, you can trigger an event when a specific condition has been met.
A basic example of this could be that If a motion is detected, then send a notification to your phone.
In this guide, we will be showing you how to connect to IFTTT, set up a webhook within it, and how to trigger it from your Raspberry Pi.
Equipment List
Here is a list of the equipment we recommend for this tutorial on using IFTTT on the Raspberry Pi.
Recommended
Optional
Setting up an IFTTT Action
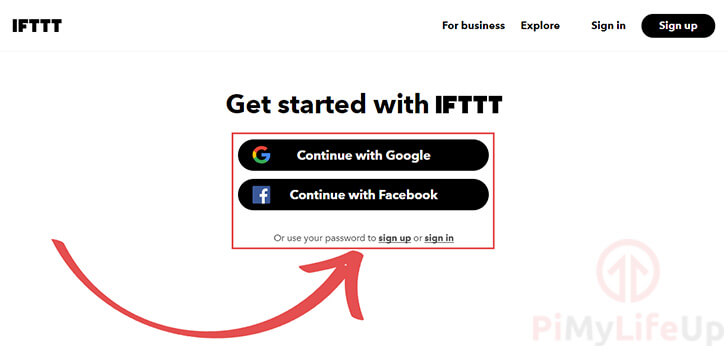
1. The first thing we need to do is set up an account for IFTTT.
Begin by going to the IFTTT website and signing up for an account.
2. With an account created, we can now create an action.
Begin by clicking your profile portrait (1.), then clicking the “Create” option (2.).

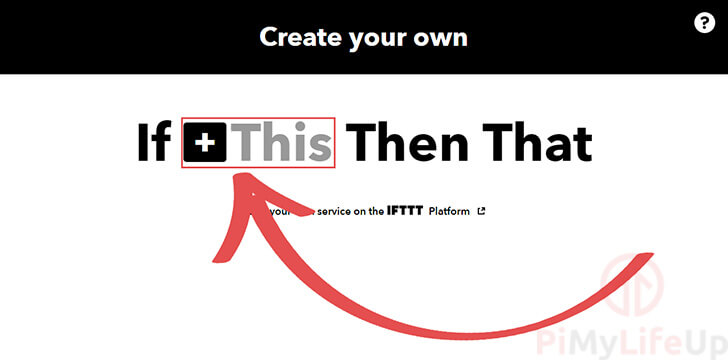
3. On this page, we need to start by selecting the trigger for our IFTTT action.
Start this process by clicking the “+This” text, as shown in the screenshot below.
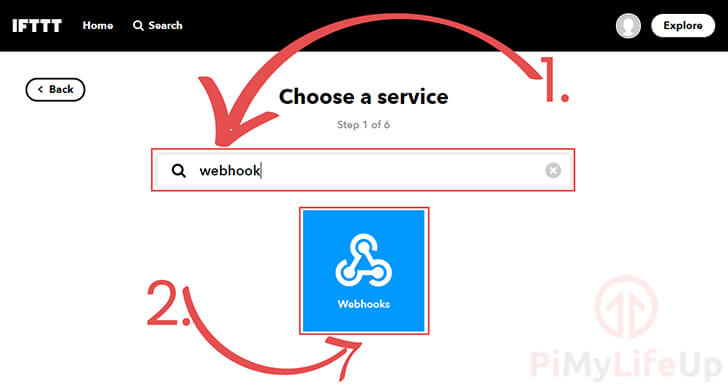
4. Now, we need to choose the service that we want to use for our trigger.
For this tutorial, we are going to show you how to make use of the webhook service.
Start by searching “webhook” in the search box (1.).
Next, we need to click the “Webhooks” button (2.).
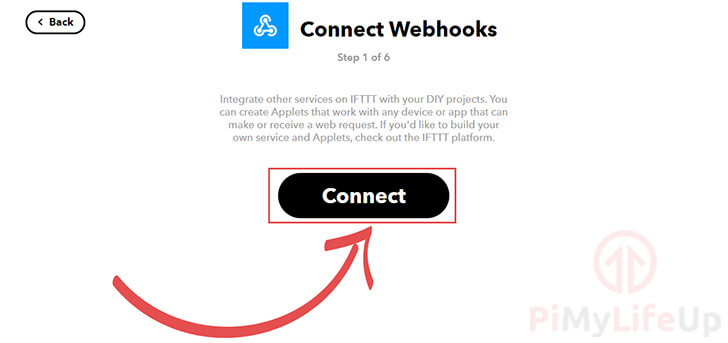
5. The next thing we need to do is click the “Connect” button.
Clicking this button will start us down the process of setting up the webhook.
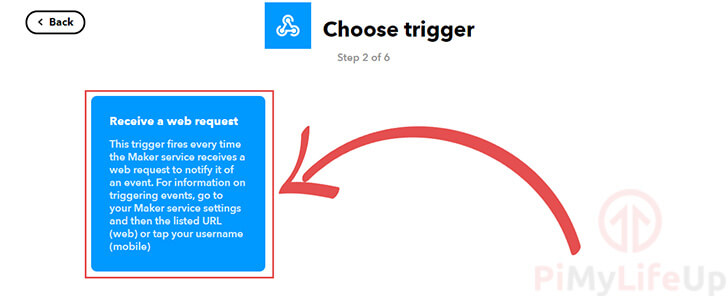
6. Now, we need to select the trigger provided by this service.
In the case of a webhook, there is only one available trigger, click it.
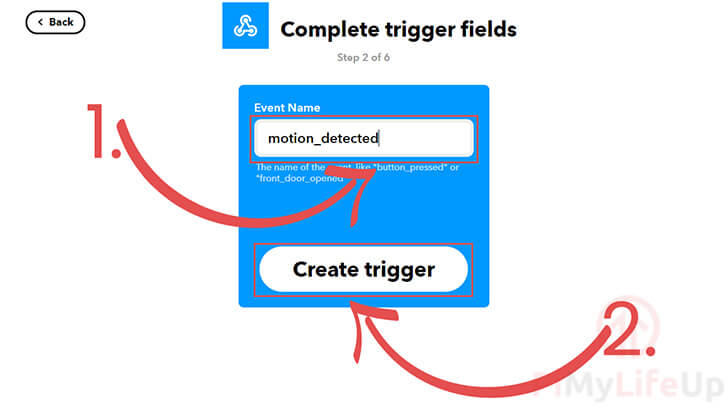
7. We need to give an event name for this trigger (1.).
This name must not contain any spaces or symbols besides the underscore (_) character. For our example event, we are using “motion_detected” as the event name.
Once done, click the “Create trigger” button (2.).
8. Let’s now select the “That” action for the IFTTT trigger.
What we select here is what will occur when the “Then” event is triggered.
We need to click the “+That” text to begin the process.

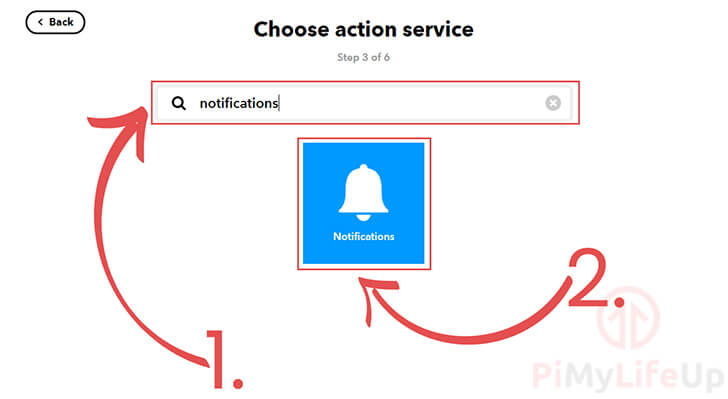
9. The next step is to select the service we want to use for our action.
For this tutorial, we will be making use of the “Notifications” service. This service sends a notification to the IFTTT app when our event is triggered.
There are various other services, but notifications are one of the easiest to setup.
We need to search up “notifications” in the search box (1.).
When the “Notifications” service pops up, click it (2.).
10. Now click the “Connect” button to connect the Notifications service to your event.

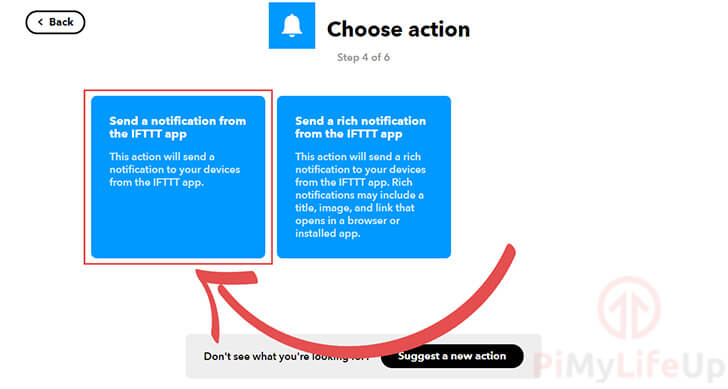
11. Now we need to select an action provided by this service.
In this case, we want to send a simple notification to the IFTTT app, so select the option on the left.
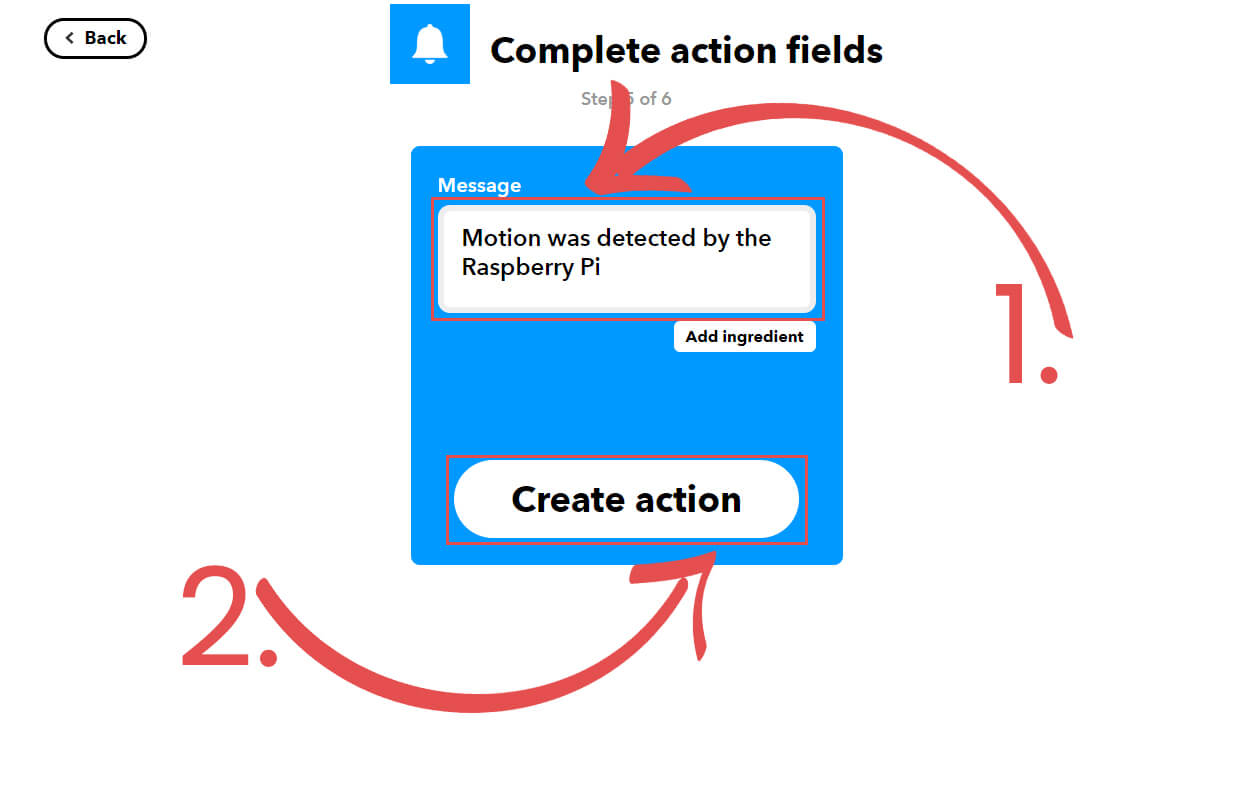
12. We need to enter the message that we want to be displayed in the notification (1.).
For our example, we are just going to use the text “Motion was detected by the Raspberry Pi“.
You can also send values to the webhook and display them by including {{Value1}}, {{Value2}} or {{Value3}} in the message, however that is not something we are touching on in this tutorial.
Once entered, click the “Create action” button (2.).
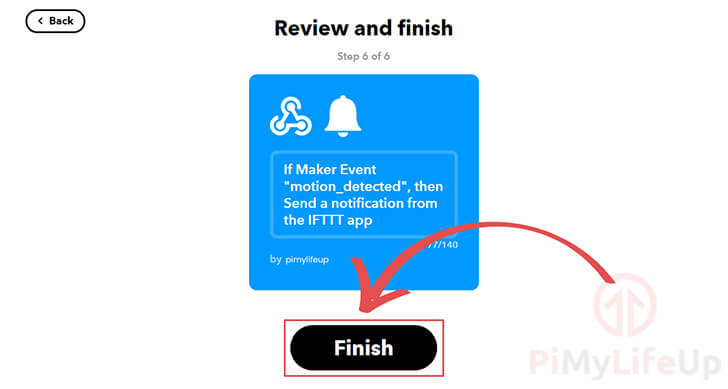
13. Now, click the “Finish” button.
14. Back on the webhooks page, click the “Documentation” button in the top right-hand corner of the screen.
Clicking this will take us to the screen where we can find the API keys we need.

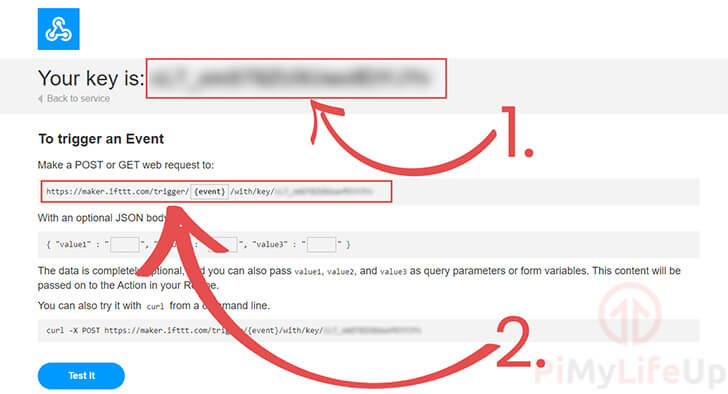
15. On this page, copy down the API key (1.)
Below you can see the URL where we will send our webhook calls to. This URL is located underneath the “To trigger an Event” title (2.).
Preparing for IFTTT on your Raspberry Pi
In this section, we will be showing you how to interact with your newly created IFTTT webhook from your Raspberry Pi.
1. As we may need to install some additional packages, let’s start by ensuring our Raspberry Pi is running the latest available software.
You can do this by running the following two commands.
sudo apt update
sudo apt upgrade
2. With the packages up to date, we can now make sure Python 3 and some of its dependencies are installed.
We will be using Python to interact with our IFTTT webhook.
To ensure Python is installed, run the following command.
sudo apt install python3 python3-pip3. Now with Python 3 installed, let’s ensure that we have access to the Python Requests library.
Run the following command to use pip to install the requests module.
sudo pip3 install requestsYou can now proceed to write a Python script that will interact with your IFFTT webhook from your Raspberry Pi.
Interacting with IFTTT from your Raspberry Pi
1. Let’s begin the process of writing our Python script by using the following command.
This first script will show you the very basics of how to use an IFTTT webhook.
nano ~/ifttt.py2. We should start this script by importing the requests library.
import requests3. Our next step is to make a post request to the webhook URL provided by IFTTT.
To make a request there are two things you will need to know.
The first is the event name that you defined for your webhook. In our example, we used the event name “motion_detected“.
The second thing you will need is the webhook API key. You should have found this earlier on in the guide when setting up your IFTTT action.
With both of these values in hand, we need to enter the following line. Make sure to replace both “{EVENT_NAME}” and “{YOURAPIKEY}” with the relevant pieces of information.
requests.post('https://maker.ifttt.com/trigger/{EVENT_NAME}/with/key/{YOURAPIKEY}')4. That is all we need to do to do to make a webhook request in Python.
Save the file by pressing CTRL + X, then Y, followed by ENTER.
5. Before we test this script, make sure that you have the IFTTT app installed onyour phone.
You can install the IFTTT app through the Google Play Store for Android or the App Store for iPhones.
Without this app, you will never receive the notification.
6. Once you have the IFTTT app installed, test the script by running the command below.
python3 ~/ifttt.pyIf everything is working correctly, you should see a notification pop up on your device.

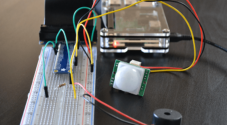
Modifying the Motion Detection Script to Send a Notification
In this section, we are going to show you how this would look if we used that same snippet within the Raspberry Pi motion detection script.
1. Let’s download the script to our Raspberry Pi by running the following command.
wget https://raw.githubusercontent.com/pimylifeup/motion_sensor/master/motion_sensor.py2. Now we can modify the file to add our new import and our post request.
Run the following command to begin editing the file.
nano motion_sensor.py3. We can now find and add some additional lines.
Find
import timeAdd Below
import requestsFind
print("GPIO pin %s is %s" % (pir_sensor, current_state))Add Below
Make sure that you replace {EVENT_NAME} and {YOURAPIKEY} with the relevant values.
requests.post('https://maker.ifttt.com/trigger/{EVENT_NAME}/with/key/{YOURAPIKEY}4. With the changes made, save the file by pressing CTRL + X, then Y, followed by ENTER.
5. Next time you run the motion detection script, it will send a notification whenever motion has been detected.
Hopefully, at this point in the tutorial, you will have an understanding of how to use IFTTT with your Raspberry Pi.
If you have run into any issues or have any feedback on this tutorial, then feel free to drop a comment below.


@Bryan: Many thanks for those two files. Most helpful!
You’re welcome @Bonzadog! If you have other ideas for monitoring wireguard traffic, let us know. Thanks.
@Bonzadog, sure. I have posted my two scripts on pastebin. Have a look and advise if you have feedback/other suggestions.
bash wg handshake monitoring script:
https://pastebin.com/J5PpASHv(Link Expired)bash TCPDUMP monitoring script:
https://pastebin.com/VuZbxRvx(Link Expired)Great tutorial! I incorporated this into a bash script on my pi, so I am notified when there is WireGuard VPN traffic detected. Thanks very much.
@bryan: good idea. Can you publish your bash etc.
Excellent. I never even new IFFFT existed until now.
I will certainly try this out.