In this tutorial, I will go through a few steps to create a dashboard card to display your robot vacuum in Home Assistant.
In a previous tutorial, I covered how to set up Roborock in Home Assistant. This tutorial explains how to display the robot on a dashboard, making it much easier to view statistics and send commands to it. You do not need a Roborock vacuum to complete this tutorial, as the frontend card supports many brands.
This tutorial uses a custom frontend card that you will need to install via the HACS store. If you are running a version of Home Assistant that does not support HACs, you will not be able to use this tutorial. I recommend checking out the HACS tutorial for more information.
We cover two topics in this tutorial. The first will take you through the installation process, and the second will take you through some basic configuration. The frontend card we install covers a wide range of robot vacuums, but I recommend checking the list before installing it.
Installing the Vacuum Custom Frontend Integration
Installing a custom vacuum card is relatively simple. However, you must ensure that your version of Home Assistant already has HACs installed.
I recommend checking out our tutorial on installing HACS if you do not already have it installed.
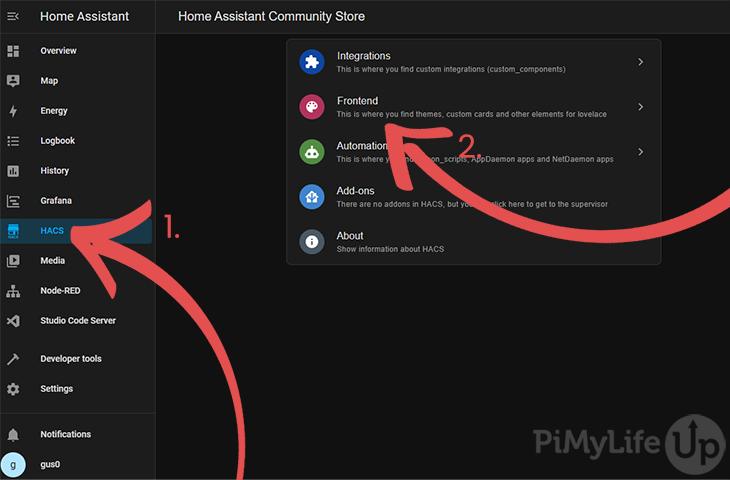
1. In the Home Assistant web UI, go to the HACS tab (1) and click Frontend (2).
2. On the frontend page, you should see highlighted new repositories, however, ignore these and click Explore & Download Repositories.

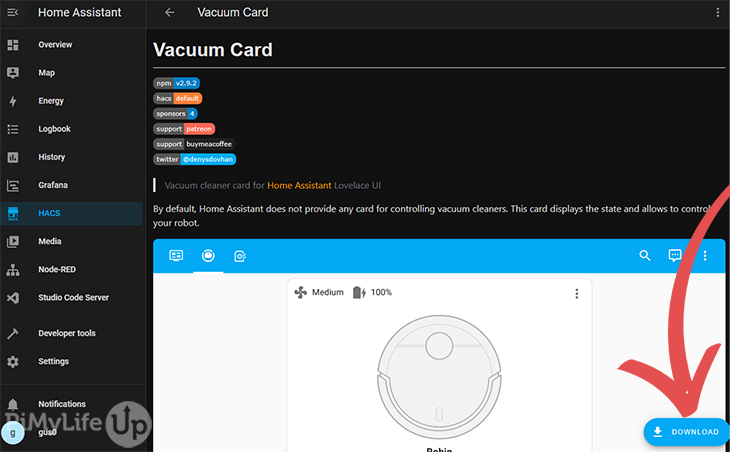
3. In the pop-up, search (1) for Vacuum, and a range of custom vacuum cards will appear. You can investigate these and choose the one that is best suited for you. However, for this tutorial, we will be installing the Vacuum Card (2).

4. You should now see a page explaining the card and its capabilities. Feel free to read through the documentation as you may find it useful. The page also details the different vacuums that it supports.
To download the frontend card, click on DOWNLOAD.
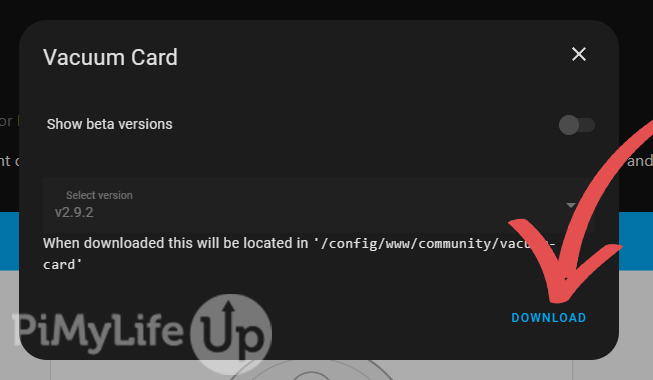
5. A pop-up will ask which version of the card you would like to use. Leave it as the default and click DOWNLOAD.
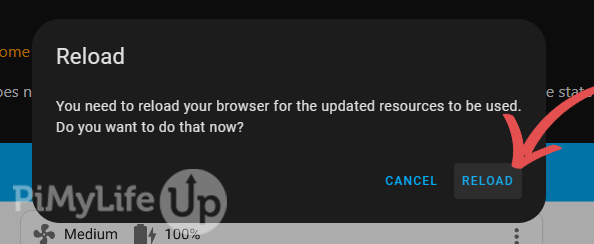
6. Once the frontend card has been downloaded, you will be prompted to reload your browser. Click RELOAD.
Basic Configuration
Now that the frontend card is installed, it is time to add it to a dashboard and do some simple configuration changes.
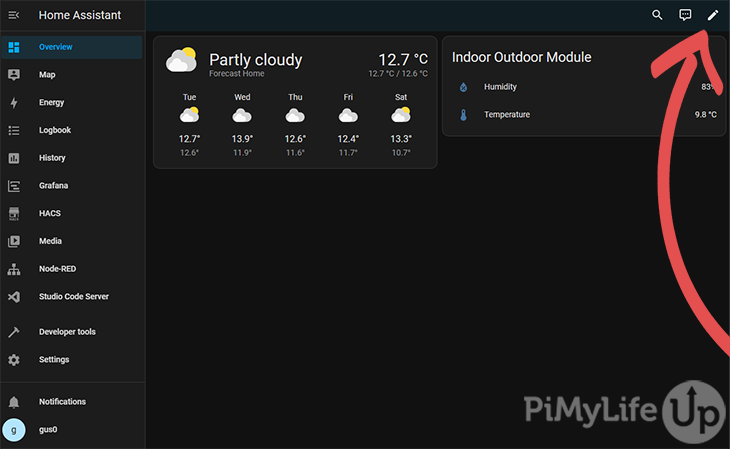
7. On the dashboard where you want to add the robot vacuum cleaner, click on the pencil icon in the top right corner.
8. You are now in edit mode for the dashboard. Click on ADD CARD in the bottom right corner.

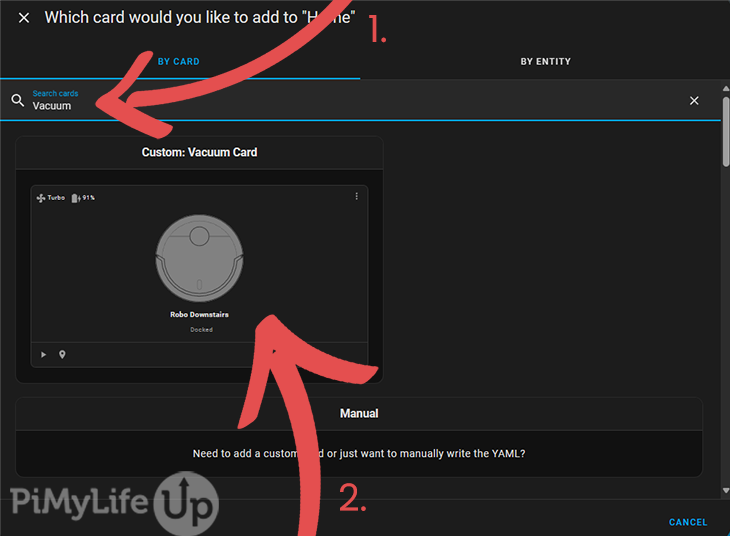
9. In the pop-up screen, search for Vacuum in the search box (1) and click on Custom: Vacuum Card (2).
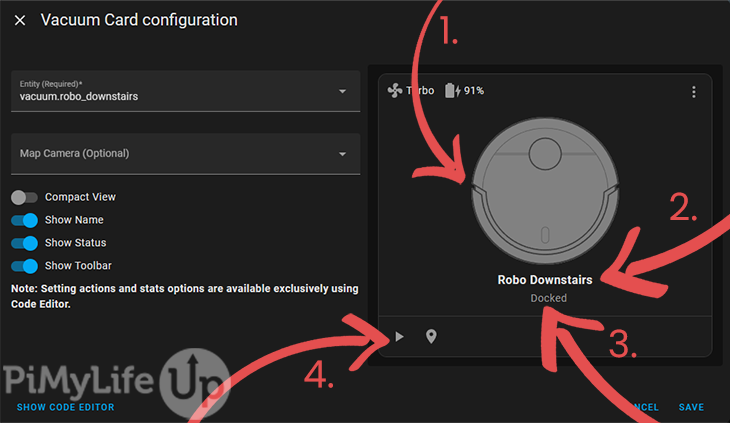
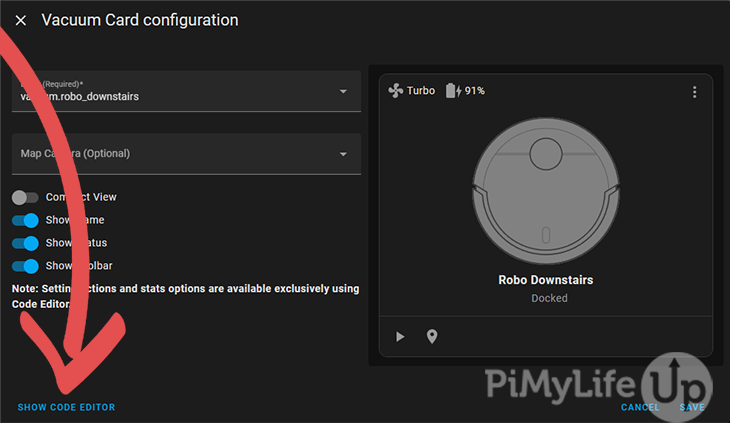
10. You will now see a screen with various basic settings. Toggle these on or off, depending on what you prefer. I briefly explain each setting below.
Entity: This is the entity of the robot vacuum cleaner. In our case, we have picked our downstairs robot.
Map Camera (1): You can change this to display the map from the robot vacuum cleaner. If one is available, you can set this to the camera instead. If neither a map nor a camera is picked, a cool animated graphic will display instead.
Compact View: If this setting is set, it will remove the graphic, camera, or map from the card.
Show Name (2): Allows you toggle the robot’s name on or off.
Show Status (3): Using this setting allows you to control whether the status will display or not.
Show Toolbar (4): Toggles the toolbar at the bottom of the card.
Unfortunately, some of the GUI options did not work at the time of writing this tutorial. You can instead set them using YAML via the code editor. We will touch on using YAML further down the page.
type: custom:vacuum-card
entity: vacuum.robo_upstairs
show_name: false
compact_view: true
show_status: false
show_toolbar: falseCopy
11. Click SHOW CODE EDITOR within the configuration card to edit the YAML for the frontend card.
12. You should now see a code editor that contains YAML with some basic configuration for the vacuum card.
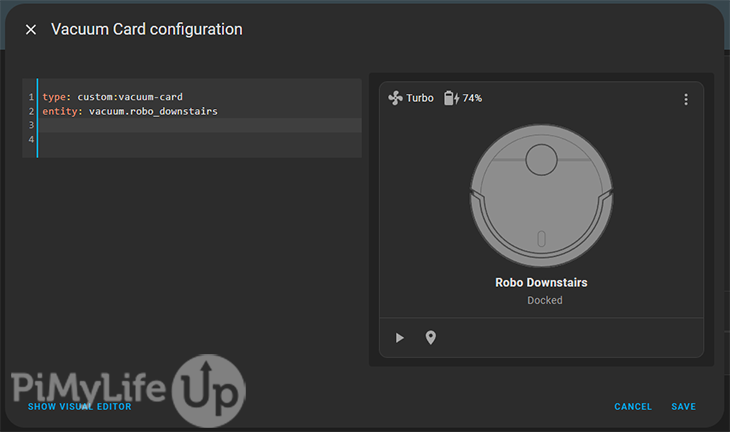
In the code editor, you can do much more in-depth customization than with the GUI (Graphical User Interface) version. However, you will need to do some research on the many different settings by visiting the project’s GitHub page.
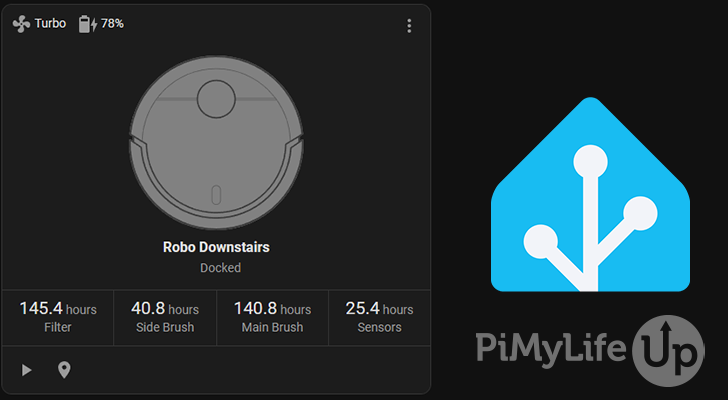
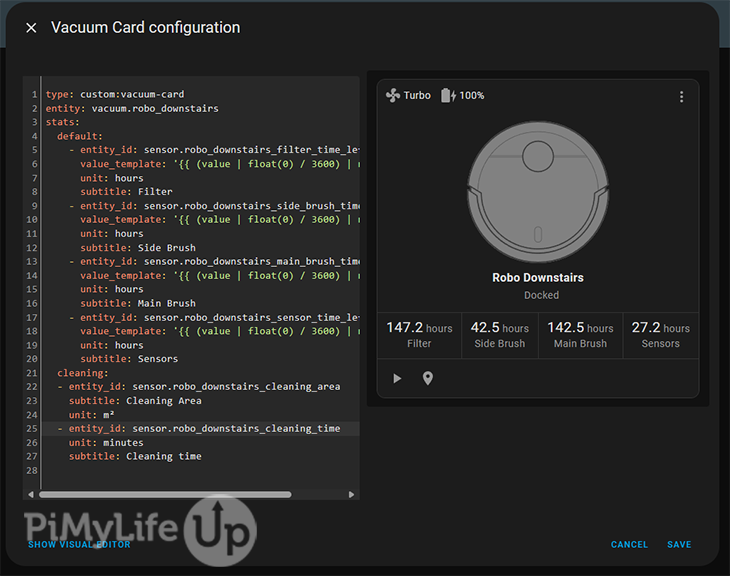
In the example below, I have set the card to display some of the robots’ statistics. For example, it shows how long each item has before it should be checked or replaced. Also, while it is cleaning, it will tell me how large the cleaning area is and how long it has left to clean.
The config below uses entities from my Roborock vacuum cleaner. You will likely need to change each entity_id to reference the correct vacuum cleaner.
type: custom:vacuum-card
entity: vacuum.robo_downstairs
stats:
  default:
    - entity_id: sensor.robo_downstairs_filter_time_left
      value_template: '{{ (value | float(0) / 3600) | round(1) }}'
      unit: hours
      subtitle: Filter
    - entity_id: sensor.robo_downstairs_side_brush_time_left
      value_template: '{{ (value | float(0) / 3600) | round(1) }}'
      unit: hours
      subtitle: Side Brush
    - entity_id: sensor.robo_downstairs_main_brush_time_left
      value_template: '{{ (value | float(0) / 3600) | round(1) }}'
      unit: hours
      subtitle: Main Brush
    - entity_id: sensor.robo_downstairs_sensor_time_left
      value_template: '{{ (value | float(0) / 3600) | round(1) }}'
      unit: hours
      subtitle: Sensors
  cleaning:
    - entity_id: sensor.robo_downstairs_cleaning_area
      subtitle: Cleaning Area
      unit: m²
    - entity_id: sensor.robo_downstairs_cleaning_time
      unit: minutes
      subtitle: Cleaning timeCopy
Below is an example of how the card will look using the configuration above.
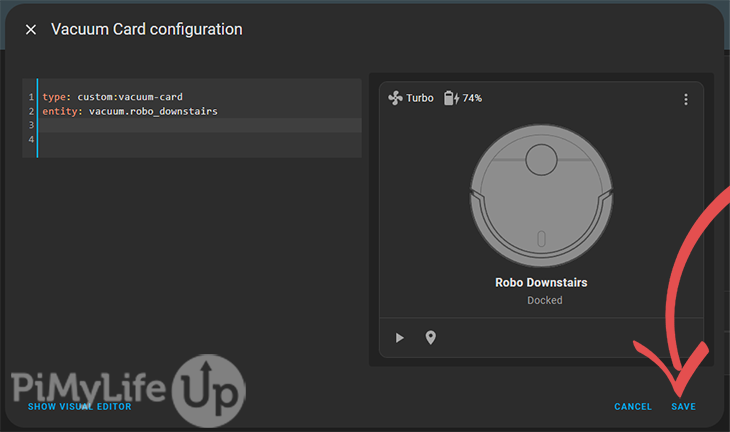
13. Once you are done, click on SAVE in the bottom right of the pop-up.
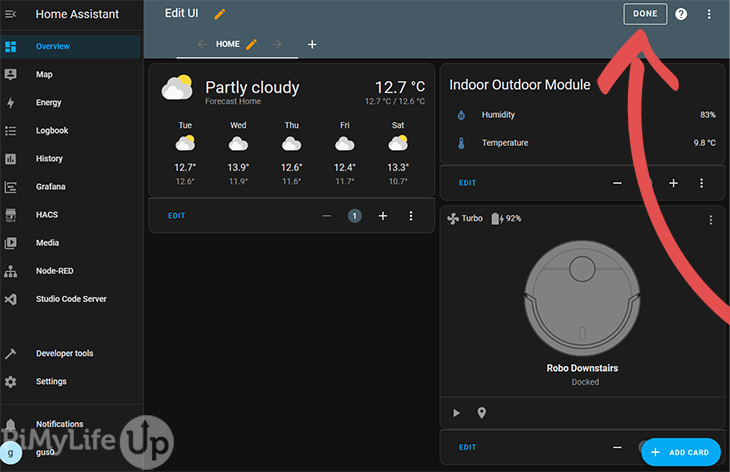
14. To exit editing the dashboard, click DONE at the top of the screen.
Conclusion
I hope you now have a decent way to display your robot vacuum cleaner in Home Assistant. If you do not like the frontend card we used in the tutorial, feel free to check out some of the others that are available.
There are numerous possibilities with Home Assistant. For more inspiration, check out our various Home Assistant projects and tutorials.
If you have some feedback or suggestions, please leave a comment below.