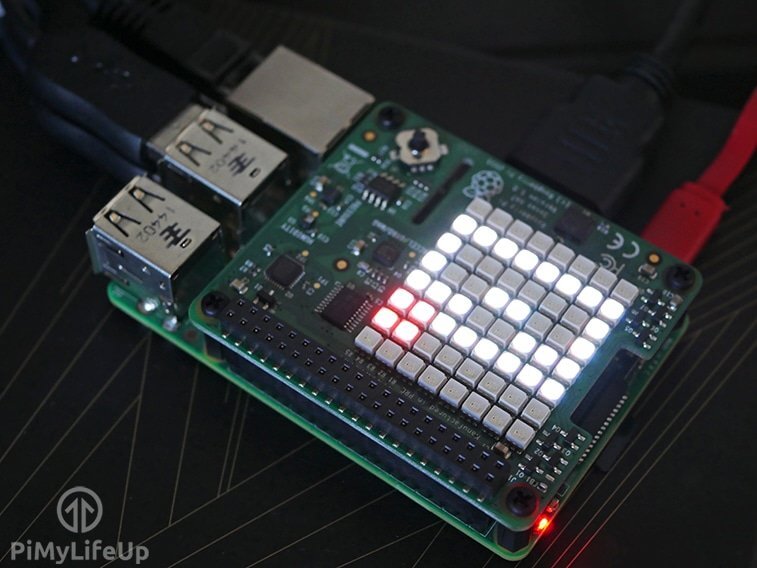
In this tutorial, we will be setting up a Raspberry Pi email notifier that makes use of the Sense Hat, and it will make use of the LED Matrix to display a visual notification of the status of your email.
This email notifier is an excellent project to use alongside the Sense HAT weather station tutorial if you plan to utilize your Sense HAT inside your house.
This project will utilize an IMAP client to make a remote connection to your email server, make sure the email provider that you use fully supports IMAP otherwise this tutorial will not work.
We will be writing our script to handle almost everything purely in Python, and this script allows the project to be quite versatile if you ever decide to increase the project’s functionality in the future. It’s also a great way to learn more Python while building something that is both cool and fun.
Equipment List
You can find all the pieces of equipment that are required for this project right below.
Recommended
Optional
- Raspberry Pi Case Amazon
Getting started with the Sense HAT
Before you get started with this tutorial, make sure that you have correctly placed the Sense HAT over the GPIO pins on the Raspberry Pi. It’s an incredibly easy installation and shouldn’t require any extra fiddling once installed correctly.
1. Before we get started, we need to update the Raspberry Pi so that it is running the latest software. This update can be done by running the following commands. This tutorial makes use of Raspbian so if you haven’t got it installed then the guide on installing Raspbian is incredibly handy.
sudo apt update
sudo apt upgrade
2. Now that the Raspberry Pi is up to date we need to move on to installing the Sense Hat software. This software package has all the libraries that we will need to interact with.
sudo apt install sense-hat
sudo reboot
3. Now that we have the software installed we now need to write a quick script to ensure that the Sense HAT is working correctly.
To create the file and open the nano file editor, enter the following command.
sudo nano ~/sensehat_test.py4. Now enter the next few lines into the file editor. We will briefly explain each line of the code as well.
from sense_hat import SenseHatThis line is incredibly important as it imports the SenseHat module from the sense_hat library. It allows us to be able to interact with the Sense Hat via Python which would have been extremely hard otherwise.
sense = SenseHat()Now this line creates a link to our SenseHat library and initializes itself so we can start using it in our program.
sense.show_message("Hello World")This line is to prove that everything has started correctly. It simply sends a message to the Sense Hat that will be displayed on the RGB lights.
Once you’re done entering the lines above simply enter CTRL + X then Y then ENTER to save the file.
5. Now we need to test the program by entering the following command.
sudo python ~/sensehat_test.pyIf everything is working correctly, then the text “Hello Word” should scroll across the Sense HAT’s LED matrix. If it doesn’t then check the command line for an error and if there isn’t one then check the GPIO pin connections.
If you’re finding that it still isn’t working, then try restarting the Pi by running the following command.
sudo rebootSetting up the Raspberry Pi Email Notifier
For our python script, we will be utilizing the imapclient python package to handle all connections to the mail server, but first, we must remove the default version of PIP.
1. The version of PIP provided with the Raspbian operating system seems to run into issues with installing the imapclient, so we will first remove it and install a new version by running the following commands.
sudo apt remove python-pip
sudo wget https://bootstrap.pypa.io/get-pip.py
sudo python get-pip.py
sudo apt install python-pip
2. Now we can successfully install the imapclient package, run the following two commands in the terminal.
sudo apt install build-essential libssl-dev libffi-dev python-dev
sudo pip install imapclient
3. Since we are utilizing a few images for this tutorial, we will start off by making a directory to contain everything. This setup will make it much neater and easier to deal with then just dumping everything in the home directory.
Let’s create the directory and enter it with the following commands.
sudo mkdir ~/emailnotifier
cd ~/emailnotifier
4. Now let’s download and extract the images that we will be utilizing in this tutorial. We will use these images to display a visual notification of your emails. You can edit these if you want, taking note each image must be 8×8 pixels as each pixel represents an LED on the 8×8 LED Matrix.
Run the following command to download and extract the images into our emailnotifier directory.
curl -L https://files.pimylifeup.com/sensehatemailnotifier/email_images.tar.gz | sudo tar xvz5. Finally, we can get writing the script itself, create and begin editing the file by running the following command.
sudo nano emailnotifier.pyEmail Notifier Script Explanation
6. Next, we will explain each part of the script and what it will be doing. If you’re just after the finished product, then scroll a bit further down.
#!/usr/bin/python
from sense_hat import SenseHat
from imapclient import IMAPClient
import time
import sys
First, we need to import all the libraries that we plan to utilize in our script. In our case, we will be using the following libraries.
sense_hat Library
This import is the library that we utilize to interact with the Sense Hat itself, without this we wouldn’t be able to read any of the sensor data or interact with the LED matrix.
imapclient Library
This import is the library that we utilize to interact with our webmail servers, and this provides the functionality to connect to a web service over the IMAP protocol.
time Library
This import allows us to do a large variety of different time stuff, but for our simple script, we will be just using its sleep functionality. This functionality allows us to suspend the current thread for a small period of time.
sys Library
This library provides us access to some variables and functions that are managed by the interpreter itself. In the case of our script that we will be using this to terminate the script if we ever need to do so.
HOSTNAME = 'imap.gmail.com'
USERNAME = 'username'
PASSWORD = 'password'
MAILBOX = 'Inbox'
NEWMAIL_OFFSET = 0
MAIL_CHECK_FREQ = 20
Here we define the variables that we plan to utilize within our python script. These are crucial to the way the whole program works and helps make it easy to tweak the script.
Make sure you change each of these settings to match your relevant user and email service.
HOSTNAME – This is the variable that will store the address to the IMAP server that we will be connecting to, if you are using GMAIL then imap.google.com should work if you are using Outlook (Hotmail) then use imap-mail.outlook.com.
If you’re unsure if your service provides the IMAP protocol to connect to, then try googling your service provider and IMAP.
USERNAME – Set this to your email/username for the email provider you intend on using, as an example if I were utilizing Gmail, I would use an email such as example@gmail.com as the username.
PASSWORD – Set this to the password for the user you specified for the USERNAME variable.
MAILBOX – This is the mailbox that you want to check for new emails. This setting is useful if you’re going to check a specific folder and not your whole Inbox. Leave this set to Inbox if you don’t want to scan a specific folder.
NEWMAIL_OFFSET – This is probably one of the more important ones to remember as it’s the value you will tweak the most, if you are like me and never have an empty Inbox then changing this value will help. Basically, you set this variable to the number of emails you want the script to consider it as empty.
For example, if you have 200 unread emails but only want the emails after that considered as new, then set the value to 200.
MAIL_CHECK_FREQ – Set this to how frequently you want to check for new emails, this value is in seconds. The value of 20 is probably the best value as it’s not too often but ensures that most new emails will be picked up quickly.
sense = SenseHat()
sense.load_image("hello.png")
The first line here creates a link to the SenseHat library and initializes itself so we can start making calls to it. The second makes a call to the SenseHat library to load in our image named “Hello.png” and displays it to the 8×8 LED Matrix.
try:
      server = IMAPClient(HOSTNAME, use_uid=True, ssl=True)
      server.login(USERNAME, PASSWORD)
except:
      connected = False
      sense.load_image("error.png")
else:
      connected = True
      sense.load_image("done.png")
      select_info = server.select_folder(MAILBOX)
This block of code does several things, the most important part, however, is the “try:” segment of the code, as this section is what starts the connection to the email servers.
This will create a new IMAPClient object with our email server’s hostname, will we enforce using unique ID’s and enforce using SSL for connections.
After that, we make the login connection to the server with your provided username and password. Thanks to this being encased in a try statement, if the connection fails we handle it in the “except:” clause.
In this clause, we set our connected variable to False and load in our error image. Otherwise, if there is no error, we set the connected variable to True and load in our done image to the LED matrix. We then also get the imapclient to select our specified MAILBOX folder.
try:
      while connected:
            folder_status = server.folder_status(MAILBOX, 'UNSEEN')
            newmails = int(folder_status['UNSEEN'])
            if newmails > NEWMAIL_OFFSET:
                  newmails -= NEWMAIL_OFFSET
                  sense.show_message(str(newmails))
                  if newmails == 1:
                        sense.load_image("mail.png")
                  elif newmails > 1 and newmails < 15 :
                        sense.load_image("mailFew.png")
                  elif newmails > 14:
                        sense.load_image("mailLot.png")
            else:
                  sense.load_image("nomail.png")
            time.sleep(MAIL_CHECK_FREQ)
except KeyboardInterrupt:
      pass
sense.clear()
Our next and final block of code, runs within a try, while loop. The try statement is there to handle breaking out of the while loop if Ctrl + C is ever pressed. The while loop is designed so we can continually run our mail checking. It will only run however if a successful connection to the mail server has been established.
We then make a call to check the status of the mailbox, and this will return us the amount of unseen/unread emails for that specific mailbox.
Next, we check to make sure the number of new emails is greater than our offset. We can change newmails to equal only the amount of new emails after the offset.
Once we have done that, we now make a call to the Sense Hat library to display the number of new emails on the Raspberry Pi Sense HAT’s LED matrix.
Next, we check if there is only one new email if so, we display the mailbox with a green box in the top hand corner. If there is more than one email but less than fourteen we then display an email with an orange box in the top hand corner. If there are more than 15 emails, we then display an email with a red box in the top hand corner.
Finally, for that set of “if” statements we have an “else” statement, this handles the case of there being no new emails.
Afterward, we put the script to sleep for the number of seconds defined in our variable, MAIL_CHECK_FREQ
Finally, we have our exception, this handles KeyboardInterrupts so that we cleanly break out of the while loop and run our final bit of code, that being our call to sense.clear() to clear out the LED Matrix.
The Finished Script
You should now have some idea on how the code operates, if you want to see the final version of the script, then you can find it right below.
#!/usr/bin/python
from sense_hat import SenseHat
from imapclient import IMAPClient
import time
import sys

HOSTNAME = 'imap.gmail.com'
USERNAME = 'username'
PASSWORD = 'password'
MAILBOX = 'Inbox'
NEWMAIL_OFFSET = 0
MAIL_CHECK_FREQ = 20

sense = SenseHat()
sense.load_image("hello.png")

try:
      server = IMAPClient(HOSTNAME, use_uid=True, ssl=True)
      server.login(USERNAME, PASSWORD)
except:
      connected = False
      sense.load_image("error.png")
else:
      connected = True
      sense.load_image("done.png")
      select_info = server.select_folder(MAILBOX)

try:
      while connected:
            folder_status = server.folder_status(MAILBOX, 'UNSEEN')
            newmails = int(folder_status['UNSEEN'])
            if newmails > NEWMAIL_OFFSET:
                  newmails -= NEWMAIL_OFFSET
                  sense.show_message(str(newmails))
                  if newmails == 1:
                        sense.load_image("mail.png")
                  elif newmails > 1 and newmails < 15 :
                        sense.load_image("mailFew.png")
                  elif newmails > 14:
                        sense.load_image("mailLot.png")
            else:
                  sense.load_image("nomail.png")
            time.sleep(MAIL_CHECK_FREQ)
except KeyboardInterrupt:
      pass
sense.clear()
7. Now we have written all that code into the file, and we can now save and exit it by pressing Ctrl + X then pressing Y and then Enter.
8. With our script finally written, we can now run it. We do this by simply typing the following command into the terminal, don’t worry about it taking control of the terminal for now. As we will be writing another script to handle running the email notifier as a service.
sudo python emailnotifier.py9. You should immediately start to see images displayed onto your Raspberry Pi’s Sense Hat LED Matrix, while it is loading it should show three different colored boxes. Once it successfully starts to read your emails, it should display the number of emails that are currently unread (after the threshold amount) and display a visual indicator afterward.
The visual indicator should give you an idea of how many unread emails there are without needing to read the text scrolling across. If there is a green box then there is only one unread email, a yellow box indicates there is more than one email unread but less than fourteen emails. Finally, a red box indicates there are more than fourteen emails that are unread.
This script should continually loop and update every 20 seconds by default unless you have changed the default MAIL_CHECK_FREQ value.
If after the original three blocks nothing is displayed and the script terminates, this indicates that the script has failed to make a successful connection to your email server, double check the values you have set for HOSTNAME, USERNAME, and PASSWORD.
If you are running behind two-factor authentication for your mailing service, you may need to generate an application password for that specific service.
10. Now you should have a fully working Raspberry Pi email notifier utilizing the Sense HAT. However, if you plan to use this on a daily basis, you won’t want to have to run the emailnotifier.py python script all the time.
To improve this, we will be writing a bash script so we can utilize our new python script as a service, this will allow us to interact with our script easily. It will enable us to start, stop, restart, and check the status of the script. It will also allow us to have the script automatically started on bootup.
Improving your Email Notifier – Start Script at Startup
1. To make sure everything will work correctly we need to install an additional package. This package is called dos2unix and will convert DOS-style line endings into something that is more Unix friendly.
To get the correct package, enter the following line into the terminal.
sudo apt install dos2unix2. We need to next setup the Python script as a service so it can start on boot. To do this, we will need to write a short script that we can later stop, start, restart and have it automatically run on boot.
Enter the following command to begin writing the script.
sudo nano /etc/init.d/emailnotifierNow in this file enter the following code. If you made any changes to the location of the email notifier script, then make sure you update this in the following code.
#!/bin/bash
### BEGIN INIT INFO
# Provides:          emailnotifier
# Required-Start:
# Required-Stop:
# Default-Start:     2 3 4 5
# Default-Stop:      0 1 6
# Short-Description: Start/stops the emailnotifier
# Description:       Start/stops the emailnotifier
### END INIT INFO

DIR=/home/pi
DAEMON=$DIR/emailnotifier/emailnotifier.py
DAEMON_NAME=emailnotifier

DAEMON_USER=root

PIDFILE=/var/run/$DAEMON_NAME.pid

. /lib/lsb/init-functions

do_start () {
    log_daemon_msg "Starting system $DAEMON_NAME daemon"
    start-stop-daemon --start --background --pidfile $PIDFILE --make-pidfile --user $DAEMON_USER --chuid $DAEMON_USER --startas $DAEMON
    log_end_msg $?
}
do_stop () {
    log_daemon_msg "Stopping system $DAEMON_NAME daemon"
    start-stop-daemon --stop --pidfile $PIDFILE --retry 10
    log_end_msg $?
}

case "$1" in
    start|stop)
        do_${1}
        ;;

    restart|reload|force-reload)
        do_stop
        do_start
        ;;

    status)
        status_of_proc "$DAEMON_NAME" "$DAEMON" && exit 0 || exit $?
        ;;
    *)

        echo "Usage: /etc/init.d/$DAEMON_NAME {start|stop|restart|status}"
        exit 1
        ;;
esac
exit 0
3. Once you have copied all that code into the file, you can now save and exit by pressing Ctrl + X then Y and lastly Enter.
4. Now that is done there are a few other things that we will need to do. To begin, first, run the dos2unix program on the file we just saved. This program will make sure the line endings are correct and help prevent any future headaches. Simply run the following command to complete this step.
sudo dos2unix /etc/init.d/emailnotifier5. We next need to make sure the permissions are correct for the Python script otherwise the init.d bash script will fail. To make sure it has the correct permissions, enter the following line.
sudo chmod 755 /home/pi/emailnotifier/emailnotifier.py6. We will also need to edit the permissions of the email notifier bash script so that it can execute correctly. We can do that by entering the following command.
sudo chmod +x /etc/init.d/emailnotifier7. Lastly, create a symbolic link between the bash script and the rc.d folder. You can simply do this by entering the following line into the terminal.
sudo update-rc.d emailnotifier defaults8. That should be everything now set up correctly. You should now be able to interact with the new bash file just like any other service on the Raspberry Pi. To test it out simply start up the email notifier by running the following command.
sudo service emailnotifier start9. The email notifier should now automatically startup on boot. You can also start, stop and reload the service by entering the relevant command into the terminal.
Below is a list of commands you can call to interact with the emailnotifier service.
The following command will start up the service that keeps track of your emailnotifier.py file.
sudo service emailnotifier startThe stop command stops the emailnotifier service and kills the process that is running our emailnotifier.py.
sudo service emailnotifier stopReload will reload the emailnotifier service by killing the process and restarting it.
sudo service emailnotifier reloadThe last command you can use retrieves the status of the emailnotifier service and our emailnotifier.py script.
sudo service emailnotifier statusHopefully, by now you should have the Raspberry Pi email notifier up and running without any issues. If you have run into some problems, have feedback or anything else that’s related to this tutorial then feel free to leave a comment below.


Hello, I ran into some troubles when starting the service, which responds upon asking for the status as: [FAIL] and is not running … failed!
Can you please help me?
really cool! I had a questions.is there a way to implement this to light up when you receive a specific email title? i.e I get order notifications from shopify that always have the title [My store name] Order. If so could you help me out here? would be greatly appreciated!
Thank you for your work on these projects. I read and enjoy them all.