In this tutorial, we will be showing you how to install and run NTFY on your Raspberry Pi.
NTFY is a push notification server that allows you to easily send push notifications to your phone or through its web app.
Being a self-hosted solution, you won’t have to rely on other services for everything to function. Of course, this means you must either port forward or use a service like Tailscale to use NTFY outside of your local connection.
Setting up NTFY on the Raspberry Pi is a relatively straightforward process, and the team provides both ARM7 and ARM64 builds that will run on our Pi.
Equipment
Below is a list of the equipment we used when setting up and running NTFY on our Raspberry Pi.
Recommended
Optional
We last tested this tutorial on a Raspberry Pi 400 running a 64-bit release of Raspberry Pi OS Bookworm.
Installing NTFY on the Raspberry Pi
Over the following sections, we will be showing you how to install the NTFY push notification server onto your Raspberry Pi.
These steps involve adding the official package repository, installing the server, and configuring it.
Preparing your Raspberry Pi for NTFY
1. The first thing we must do is update the package lists and upgrade any out-of-date packages.
You can perform both tasks by using the following two commands.
sudo apt update
sudo apt upgrade -yCopy
2. We need to ensure that the curl package is available on our system before we proceed. We will be using curl to save the GPG key to our Raspberry Pi and also to test the NTFY server.
To install curl, you must use the following command in the terminal.
sudo apt install curlCopyAdding the NTFY Package Repository
3. Before adding the NTFY package repository, we must grab the GPG key and save it into our keyring.
The GPG key allows the package manager to verify the packages are, in fact, coming from the repository. It helps reduce the chance of downloading a fake package.
curl -fsSL https://archive.heckel.io/apt/pubkey.txt | sudo gpg --dearmor -o /etc/apt/keyrings/archive.heckel.io.gpgCopy4. With the GPG key for NTFY saved to our Raspberry Pi, we can now add the repository to our sources.
This command differs slightly depending on whether you run a 32-bit or 64-bit operating system.
For 64-bit Operating Systems
echo "deb [arch=arm64 signed-by=/etc/apt/keyrings/archive.heckel.io.gpg] https://archive.heckel.io/apt debian main" | sudo tee /etc/apt/sources.list.d/archive.heckel.io.listCopyFor 32-Bit Operating Systems
echo "deb [arch=armhf signed-by=/etc/apt/keyrings/archive.heckel.io.gpg] https://archive.heckel.io/apt debian main" | sudo tee /etc/apt/sources.list.d/archive.heckel.io.listCopy5. As we have changed the available package repositories, we must run the following command.
This command will fetch the latest package lists from each package source.
sudo apt updateCopyInstalling NTFY to your Raspberry Pi from the Package Repository
6. We are finally at the point where we can install the NTFY push notification server to our Raspberry Pi.
Installing this software is now as straightforward as running the command below.
sudo apt install ntfyCopyConfiguring NFTY
7. To make things a bit easier, we will back up the original NTFY config.
We will create a new file config file from scratch for NTFY on our Raspberry Pi. However, it is good to have the old one if you ever need to find out what other settings are available to you.
Create a backup of the config file by using the mv command, as shown below.
sudo mv /etc/ntfy/server.yml /etc/ntfy/server.bkupCopy8. Once you have moved the old server config out of the way, we can now begin writing our own.
Create a new “server.yml” file by using the following command.
sudo nano /etc/ntfy/server.ymlCopya. The first line we need to add to this config file is the one that defines the base URL.
The value here depends on how you plan on setting up NTFY on your Raspberry Pi.
For example, if you are using a domain name, you would use something like: “https://notify.pimylifeup.com“.
Otherwise, if you use a static IP address, you would instead use a base URL such as “http://192.168.0.132“.
Once you have determined what value will work best for your setup, replace “<YOURDOMAIN>” with the value.
base-url: "<YOURDOMAIN>"Copyb. Next, we must specify the port that we want the NTFY server to listen on.
If nothing else is running on your Raspberry Pi, you can safely stick with port “80“. Otherwise, please change this to a different port and make a note of it.
listen-http: ":80"Copyc. We must also specify a place for NTFY to store its cache database file. This is an SQLite database that will automatically be created when the push notification server starts.
cache-file: "/var/cache/ntfy/cache.db"Copyd. The next thing we will specify is the directory where NTFY will store any attachments. This is needed if you want to send a push notification that contains an image or another sort of attachment.
attachment-cache-dir: "/var/cache/ntfy/attachments"Copy9. Below is an example of how the final configuration should look like. Of course, yours will have your values within the config file and not our placeholders.
base-url: "<YOURDOMAIN>"
listen-http: ":80"
cache-file: "/var/cache/ntfy/cache.db"
attachment-cache-dir: "/var/cache/ntfy/attachments"Copy
10. You can save these changes to the file by pressing CTRL + X, followed by Y, then the ENTER key.
Starting the NTFY Server on the Raspberry Pi
11. With NTFY now configured, we can start up the NTFY server by using the following command.
This command uses systemctl to start the NTFY service.
sudo systemctl start ntfyCopy12. Now that you have NTFY up and running, you will want to enable the service.
By enabling the service, the NTFY push notification server will start when your Raspberry Pi does.
sudo systemctl enable ntfyCopyTesting the NTFY Push Notifications
13. By default, NTFY doesn’t require any authentication to send notifications through its web interface.
To send a push notification to a particular topic, all you need to use is the following. If you plan on allowing NTFY to keep working this way, it is recommended to make sure your topic names are not easy to guess.
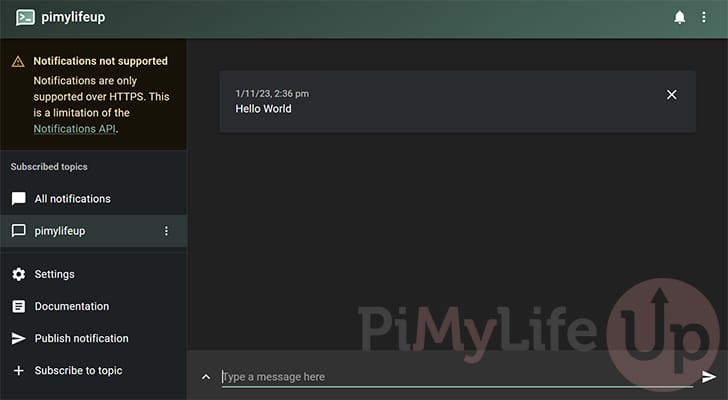
curl http://<DOMAIN OR IP>/<TOPICNAME> -d "<YOURTEXTHERE>"CopyFor example, if you wanted to send the message “Hello World” to the topic “pimylifeup” you would use the following command.
curl http://192.168.0.134:8080/pimylifeup -d "Hello World"Copy14. You can now test that your Raspberry Pi NTFY server received your new message by going to the following URL.
By going to the URL, you will see all messages sent to NTFY and what would have been pushed out to any users subscribed to that topic.
http://<DOMAIN OR IP>/<TOPICNAME>15. You now have NTFY up and running on your Raspberry Pi.
You can expand this functionality further by adding HTTPS support. HTTPS is required for the browser push notification to function.
Adding HTTPS to your NTFY Setup
In this section, we will explore how you can add HTTPS support to your NTFY installation on your Raspberry Pi.
There are two ways we can achieve this. One is to use the inbuilt HTTPS support, and the other is to use a reverse proxy. In this section, we will go down the reverse proxy route using Caddy.
If you don’t have a domain name, you will have to use a self-signed certificate. These certificates may cause issues with using NTFY as your device can’t verify the connection.
Installing Caddy
1. Before we install Caddy to our Raspberry Pi, we must first update the package list.
If you followed the previous steps relatively recently, you can skip this step.
sudo apt updateCopy2. Installing Caddy is as easy as using the following command.
This command will grab the Caddy web server from the official Raspberry Pi OS repository.
sudo apt install caddyCopy3. With Caddy installed, let us clear out the default file. We do this so we can easily add our own set of instructions.
sudo truncate /etc/caddy/Caddyfile -s 0CopyCreating the CaddyFile for NTFY
4. Now, you can start writing the Caddyfile by using the following command. We use the nano text editor as it relatively straightforward to use.
sudo nano /etc/caddy/CaddyfileCopy5. Depending on how you plan on using NTFY on your Raspberry Pi, these steps will differ slightly.
- a – Use this if you have a domain name.
- b – A method if you want to use your IP and have port 80 and 443 free.
- c – The final method is if you need to run NTFY on a non-standard port.
a. If you have a domain name you are using and already have it pointed to your Raspberry Pi, then you can use the following format.
You must replace “DOMAINNAMEHERE” with the domain name you plan on using. Caddy will automatically generate the required certificate when it starts up.
DOMAINNAMEHERE

reverse_proxy:9090
b. If you aren’t using a domain name and are instead relying on an IP, there is an alternative method we can use.
With this method, we are assuming you have port 80 and port 443 free to be used. With this block, you must replace “<YOURIPADDRESS>” with either the local IP or external IP for your
https://<YOURIPADDRESS> {
    reverse_proxy:9090
}
c. This final configuration is useful when running NTFY on your Raspberry Pi under a different port.
With this configuration, you must replace “YOURIPADDRESS” with your IP.
Additionally, you must replace “PORT” with the port you want NTFY to operate on. An example of a port to use is “8443“.
{
    auto_https disable_redirects
}

https://<YOURIUPADDRESS>:<PORT> {
    reverse_proxy:9090
}
6. After making changes to this file, you can save and quit. If you are using nano, you can press CTRL + X, followed by Y, then the ENTER key.
Modifying NTFY For Proxies
7. Now, we will need to modify NTFY itself so that it uses the “9090” port and is configured to use proxies.
Open the NTFY configuration file by using the following command.
sudo nano /etc/ntfy/server.ymlCopy8. Within this file, we must start by updating the “listen-http” option.
listen-http: ":80"CopyOnce found, update it so that it looks like the following. We are changing this so NTFY will bind to port 9090 on our Raspberry Pi and will be locked to the localhost.
We want all traffic to run through our proxy to interact with NTFY.
listen-http: "localhost:9090"Copy9. Next, you must add the following line to the bottom of the file. This changes the way
behind-proxy: true
Copy
10. After making these changes, save and quit by pressing CTRL + X, followed by Y, then ENTER.
Starting Caddy and NTFY on your Raspberry Pi
11. We are finally at the point where we can get Caddy and NTFY up and running.
Let us start this process by restarting the NTFY service using the following command.
sudo systemctl restart ntfyCopy12. If that has restarted successfully, our next step is to restart Caddy by running the command below.
sudo systemctl restart caddyCopyPlease note if you run into an error after running this command, try restarting your Raspberry Pi.
Testing your New Changes
13. Let us try again sending a new push notification to our NTFY server using the following command.
Ensure you fill out the details with those of your server. If you are using a self-signed certificate, you may need to use the “-k” option for this to work.
curl https://<strong><DOMAIN OR IP></strong>/<strong><TOPICNAME></strong> -d "<YOURTEXTHERE>"CopyFor example, if you wanted to send the message “Hello World” to the topic “pimylifeup“, you would use the following command.
curl http://192.168.0.134:8443/pimylifeup -d "Hello World"CopyConclusion
Hopefully, at this point in the tutorial, you will have NTFY up and running on your Raspberry Pi.
This is a neat software that allows you to set up and run your own push notification server easily. You won’t be reliant on a third-party server for everything to work.
If you have any questions about running NTFY on a Raspberry Pi, please leave a comment below.
Be sure to check out our many other Raspberry Pi projects if you want to get more out of your system.


Cool tutorial. Thank you. On my Raspberry I didn’t have the /etc/apt/keyrings directory so I had to make it with:
sudo mkdir /etc/apt/keyrings | sudo chmod 644 /etc/apt/keyrings
Straightforward enough but just in case anybody else gets stuck.