In this tutorial, we will be showing you how you can play games through Xbox Cloud Gaming on your Raspberry Pi.
Xbox Cloud Gaming (xcloud) is a service provided by Microsoft that allows you to stream various video games from their servers to another device.
In our case, we will be streaming these games to your Raspberry Pi from the Xbox Cloud Gaming service.
Please note to use this service, you will require an Xbox Game Pass Ultimate subscription.
The plus side of this streaming service requiring Xbox Game Pass is that it does give you access to a treasure trove of video games as part of the subscription.
Thanks to the Chromium web browser, getting Xbox Cloud Gaming streaming to your Raspberry Pi is a relatively straightforward process.
We should warn you that you will need to put up with some input latency, but most games are still very playable, especially if it doesn’t require tight input.
This project will even walk you through the steps of turning your Raspberry Pi into a pure Xbox Cloud Gaming machine with the “lite” flavor of the operating system.
Xbox Cloud Gaming isn’t the only game streaming service that works on your Pi. You can also use Google’s Stadia gaming service to stream games to your Pi. Or stream your games from your device using Parsec or Steam Link.
Please note to use this game streaming service, you will need to make sure that you live in a country where Xbox Cloud Gaming is supported.


Equipment
Below is a list of the equipment that we used when using Xbox Cloud Gaming on the Raspberry Pi.
Recommended
- Raspberry Pi Amazon
- Micro SD Card Amazon
- Power Supply Amazon
- Ethernet Cable Amazon (Recommended) or Wi-Fi Amazon
- Xbox Controller Amazon
- Xbox Game Pass Ultimate Subscription Xbox
- USB Keyboard Amazon
- USB Mouse Amazon
- HDMI Cable Amazon
Optional
This tutorial was tested on a Raspberry Pi 400 running the latest version of Raspberry Pi OS Buster (Both the full and lite versions).
Preparing your Raspberry Pi for Xbox Cloud Gaming
Before you can use Xbox Cloud Gaming on your Raspberry Pi, you will need to do a couple of initial tasks.
Within this section, you will update your Pi and install the Chromium web browser that we will use to access the cloud gaming service.
These steps have been written so that they will also work on Raspberry Pi OS Lite. However, we will have to do extra work later to get Xbox Cloud Gaming working on the “Lite” version.
1. Before we proceed, we need to make sure we have the latest software running on our Raspberry Pi. Updating the software will ensure we get the best experience with the Xbox Cloud Gaming service.
Perform an update of all existing software by running the following two commands on your Pi.
sudo apt update
sudo apt upgrade -y
2. Once the update completes, we can install any additional software we need for Xbox Cloud Gaming on our Raspberry Pi.
Our primary tool will be the Chromium web browser which you can install with the command below.
sudo apt install chromium-browser xserver-xorg x11-xserver-utils xinit openbox bluealsa unclutterIf you are using Raspberry Pi OS Lite, we are installing the minimal number of programs we need to launch Chromium.
3. Your next step is to connect a controller to your Raspberry Pi. The vast majority of games provided through the Xbox Cloud Gaming require you to use a controller.
While there is some support for additional controllers, the official Xbox controller is the best one. In addition, you can check out their official documentation on what controllers have been tested with the cloud gaming service.
4. If you are using an Xbox controller, make sure you follow our guide on connecting an Xbox controller to the Raspberry Pi.
Alternatively, we also have a guide that shows you how to connect a PlayStation controller to the Raspberry Pi.
5. If you are using Raspberry Pi OS Lite, be sure to skip to our section titled “Xbox Cloud Gaming with Raspberry Pi OS Lite“.
Xbox Cloud Gaming on Raspberry Pi OS Desktop
For those using Raspberry Pi OS Desktop, streaming games from the Xbox Cloud Gaming service is a straightforward process.
Using the desktop version of Raspberry Pi OS is useful when you don’t want to dedicate your device to Xbox Cloud Gaming. Accessing Chromium and accessing XCloud is as easy as clicking an icon and typing in a URL.
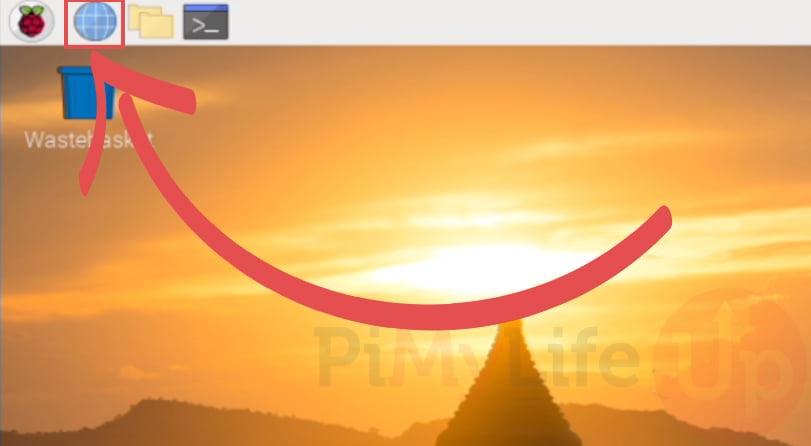
1. On the desktop of your Raspberry Pi, you will need to open up the Chromium web browser.
You can open this by clicking the globe icon on the taskbar at the top of the screen.
2. With the web browser opened, you need to go to the Xbox Cloud Gaming website.
You can get to this by using the following URL in the address bar of Chromium.
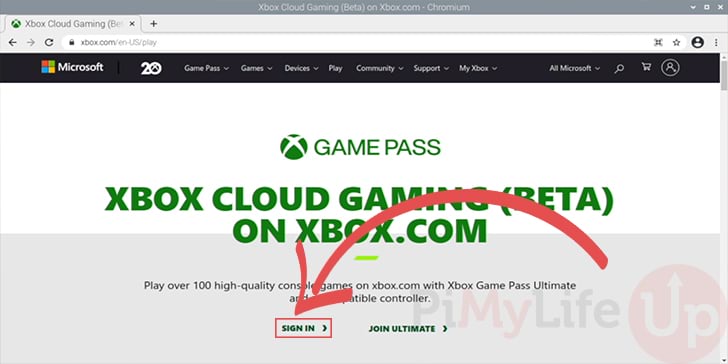
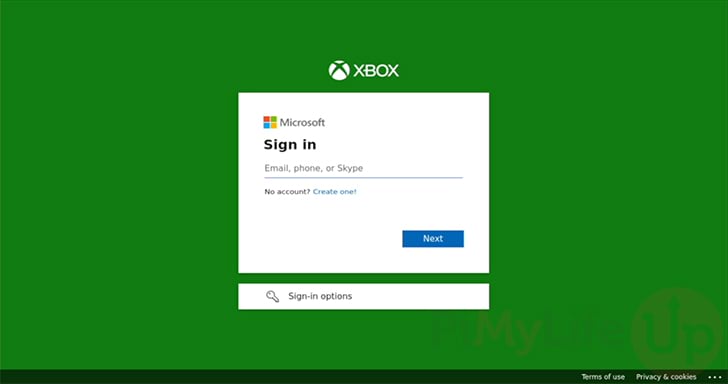
https://xbox.com/play3. If you haven’t been on this page on your Raspberry Pi before, you will need to log in to your Xbox account.
To get to the login page, you can click the “Sign in” text located on the screen.
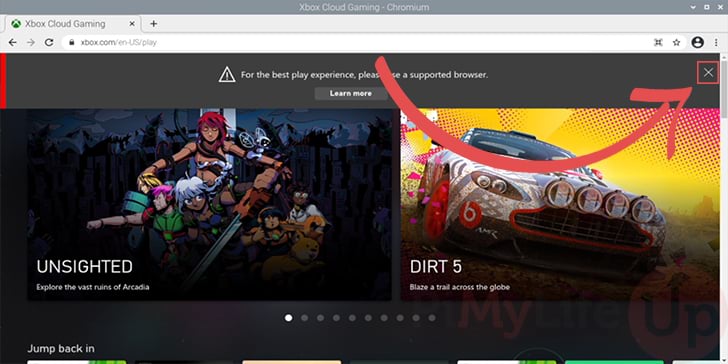
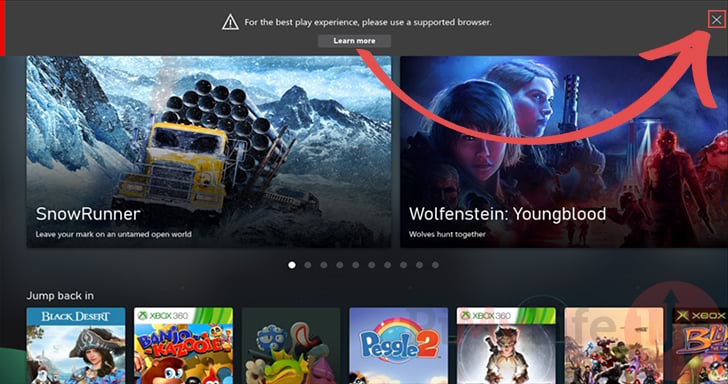
4. Upon logging in, you may be greeted with a warning message about the browser not being supported.
Don’t worry about this message as we are using the Chromium web browser the XCloud service will work on our Raspberry Pi.
You can dismiss this message by clicking the “X” symbol in the window’s top right corner.
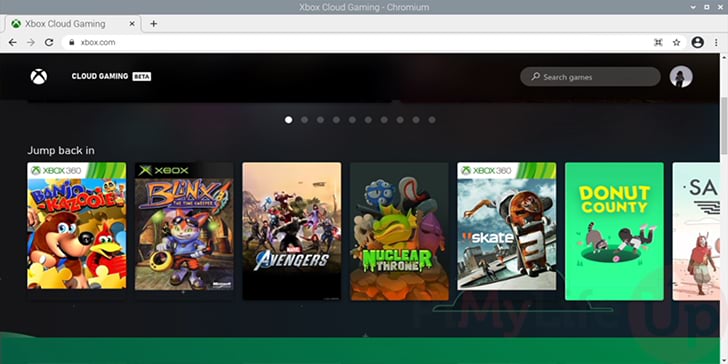
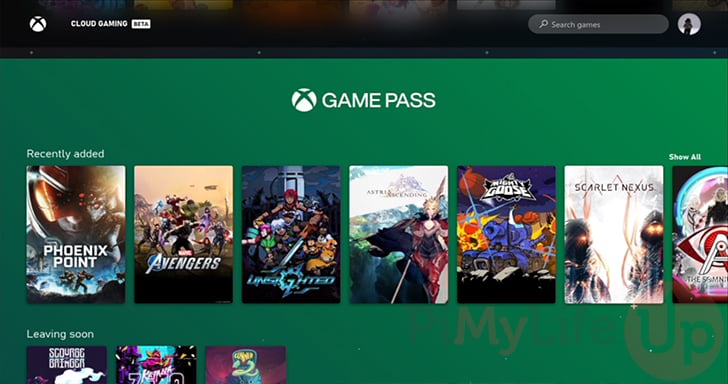
5. You can start streaming games from Xbox Cloud Gaming to your Raspberry Pi by clicking them.
It is possible to navigate this menu using whatever controller that you have connected to your Raspberry Pi.
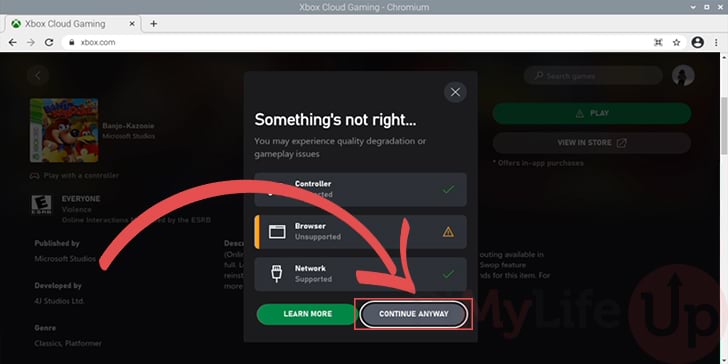
6. When you stream a game from XCloud, the website will warn you that your experience may not be the best.
You can continue streaming your chosen game to your Raspberry Pi by clicking the “CONTINUE ANYWAY” button.
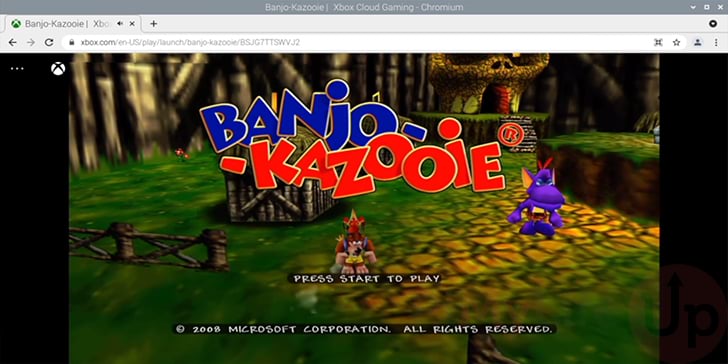
7. At this point, you have successfully got the Xbox Cloud Gaming service running on your Raspberry Pi.
You can now use your controller to enjoy the video game to its fullest.
Xbox Cloud Gaming with Raspberry Pi OS Lite
If you are using Raspberry Pi OS Lite on your device, running the Xbox Cloud Gaming service requires several extra steps.
By the end of these steps, you will have configured your Pi to auto-login, launch a window manager, and start the Chromium on your device.
If you have never used Raspberry Pi OS lite before, be sure to check out our guide on setting up a headless Raspberry Pi, as it will help you get started.
Enabling Auto-Login on your Raspberry Pi
The following steps are crucial if you want Xbox Cloud Gaming to be available when you power on your Raspberry Pi.
If you skip these steps you will be asked to login to the “pi” user before gaining access to the web browser.
1. To enable our Raspberry Pi to boot directly to the console without requiring you to login we need to use the “Raspberry Pi Configuration tool“
You can launch this tool by using the command below on your device.
sudo raspi-configYou can navigate these menus by using the ARROW keys. When you have an option highlighted, you can select it by pressing the ENTER key.
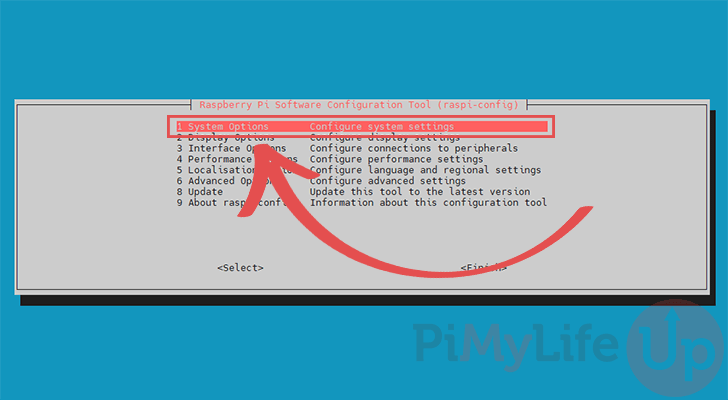
2. First, with the raspi-config tool opened, we need to go into the “System Options” menu.
As this will be the first available option, press the ENTER key to select it.
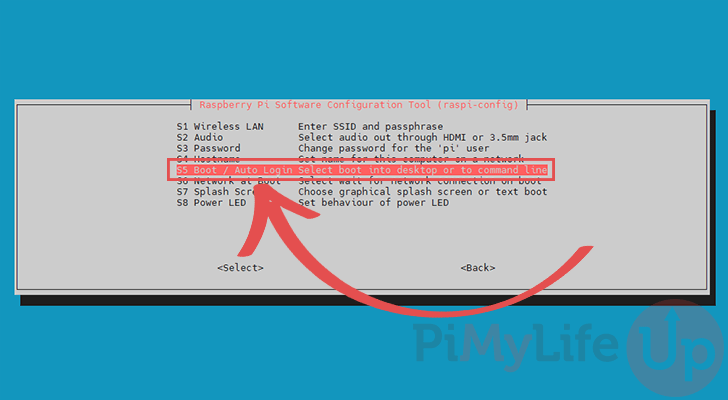
3. Within the “System Options” menu, we need to go to the “Boot / Auto Login” option.
This option is what will allow us to tell the operating system to autologin to the terminal.
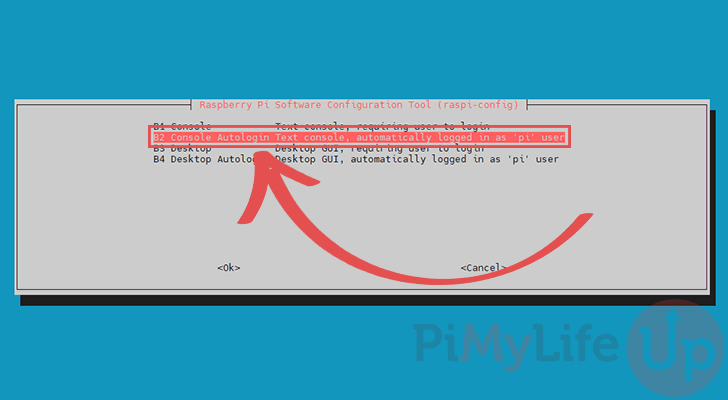
4. Next, you need to select the “Console Autologin” option.
The Raspberry Pi will boot directly into the console as the “pi” user by choosing this option.
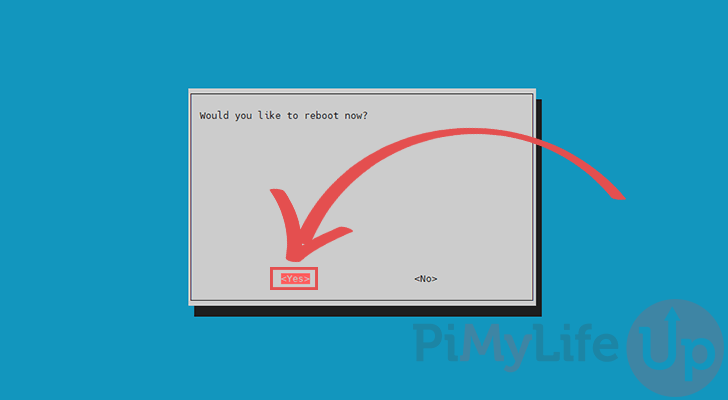
5. After choosing this option, you can quit out of the Raspberry Pi Configuration Tool by pressing the ESC key.
When you are prompted if you want to reboot your device, select the “<Yes>” option, then press the ENTER key.
Getting Chromium to Start when X-Server Starts
Now that the Raspberry Pi is configured to boot to the console, we must modify the “autostart” file to launch the Chromium web browser.
We also need to add a line to the “.bashrc” file so that the window manager that Chromium requires to run is started at boot.
1. Let us start this process by modifying the “autostart” file within the “/etc/xdg/openbox” directory.
To modify this file, we will be using the nano text editor.
sudo nano /etc/xdg/openbox/autostart2. To the bottom of this file, add the following lines of text.
xset s off
xset s noblank
xset -dpms

unclutter &

sed -i 's/"exited_cleanly":false/"exited_cleanly":true/' ~/.config/chromium/'Local State'
sed -i 's/"exited_cleanly":false/"exited_cleanly":true/; s/"exit_type":"[^"]\+"/"exit_type":"Normal"/' ~/.config/chromium/Default/Preferences
chromium-browser --disable-infobars --enable-features=OverlayScrollbar --kiosk 'https://xbox.com/play'
The first three lines issue commands to stop the screensaver from being enabled.
We then use the unclutter program to hide the mouse when it is not in use rather than disabling it completely. This is useful as we will need to use the mouse repeatedly such as to login.
Finally, we launch Chromium in kiosk mode on our Raspberry Pi, launching directly into the Xbox Cloud Gaming website.
3. Once you have entered these lines, save and quit by pressing CTRL + X, then Y, followed by the ENTER key.
4. The last thing we need to do is modify the bash profile for our Pi user to start up the window manager when the console is opened.
You can begin modifying this file by running the following command on your Raspberry Pi.
nano ~/.bash_profile5. To the bottom of this file, you will need to add the following line.
This line will ensure that this is the first terminal session to be started and that the “$DISPLAY” variable has been set.
If these are both available, it will start up the windows manager by using the “startx” command.
[[ -z $DISPLAY && $XDG_VTNR -eq 1 ]] && startx6. Once you have added the line to the file, save and quit by pressing CTRL + X, then Y, then finally the ENTER key.
7. Rather than waiting until our Raspberry Pi restarts to access Chromium, we can start up the window manager now.
Thanks to modifying the “autoboot” file earlier, starting up the window manager will also start Chromium.
startxMake sure that when you run this command that you are doing it directly on your Raspberry Pi. It will not work as intended if run over SSH.
Alternatively, you can restart your Raspberry Pi by running the following command on your device.
sudo rebootRunning Xbox Cloud Gaming on Raspberry Pi OS Lite
Now that we have prepared the Raspberry Pi and set up Chromium, we can start using Xbox Cloud Gaming.
When Chromium starts up on your Pi, it should take you immediately to the Xbox Cloud gaming website.
1. If you haven’t ever visited the Xbox Cloud Gaming website before, you will be required to login to your Xbox account.
You should be taken automatically to the sign-in page, as shown below. If you don’t see this screen, you can begin the login process by clicking the “Sign In” link on this page.
2. Once you have logged in, you may see a message at the top of the screen saying that the browser may not be supported.
As we are using a Chromium-based web browser, you can click the “X” symbol on the top-right of the screen to hide it.
3. You can now choose a game that you want to stream from the Xbox Cloud Gaming service to your Raspberry Pi.
Before you select a game, make sure that you have your controller connected to your Pi. You can even use the connected controller to navigate the Xbox Cloud Gaming interface.
4. When you play a game, you will be greeted with the following message warning you that the browser we are using is unsupported.
You can safely ignore this warning by clicking the “CONTINUE ANYWAY” button.

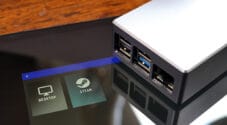
5. Below, you can see that we are playing “Phoenix Point” on our Raspberry Pi streamed directly from the Xbox Cloud Gaming service.
While the stream is starting, it may not be positioned correctly on the screen. However, once the game starts, it should end up correcting itself.

Conclusion
You should now have successfully set up Xbox Cloud Gaming on your Raspberry Pi by this point in the tutorial.
Xbox Cloud Gaming gives you access to a wealth of games thanks to it being bundled with Xbox Game Pass.
For the most part, this game streaming service performs reasonably well on the Pi. You may notice from time to time there is increased latency, but if you stick with games that don’t require precise input, this is easy to ignore.
If you have had any issues with getting XCloud running on your Raspberry Pi, please feel free to leave a comment below.
Be sure also to check out some of our other great Raspberry Pi projects, such as turning your Pi into a retro-gaming machine.


Thank you for information. I will update this comment after I try it.