In this tutorial, we will go through the steps of installing and configuring Tailscale to work with Home Assistant.
Tailscale is a VPN service that allows you to make private devices and applications accessible anywhere in the world. It creates a point-to-point connection between devices, so only those included in the network can talk to each other. Tailscale is also super easy to configure and set up on multiple devices.
Using Tailscale with Home Assistant allows you to remotely access it without making it publicly accessible. You can also use it to create a private connection to external devices that are not on the local network. It is a secure way to handle outside access to your Home Assistant installation.
You might also want to consider alternatives to Tailscale, such as Cloudflare Tunnel, Nabu Casa, DuckDNS, and more. Each option has its own set of pros and cons.
This tutorial will help you create a Tailscale Account and set up the Tailscale integration on Home Assistant.
Setting up an Account with Tailscale
Before we get started, you must create an account with Tailscale. If you already have an account, you can skip to the next section on configuring Tailscale with Home Assistant.
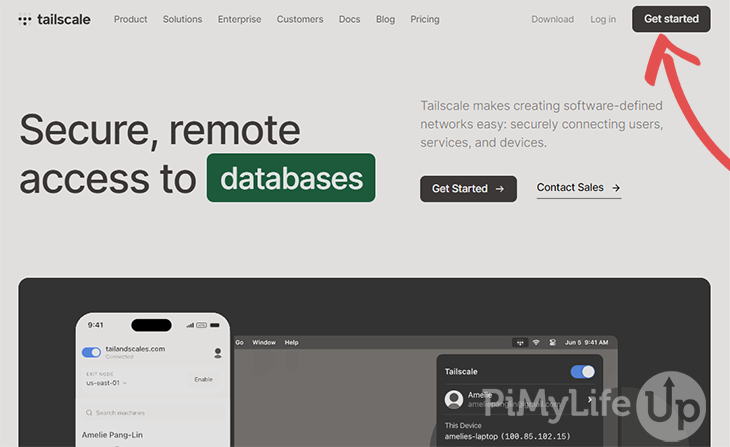
1. To begin, head to the Tailscale website and click the Get started button.
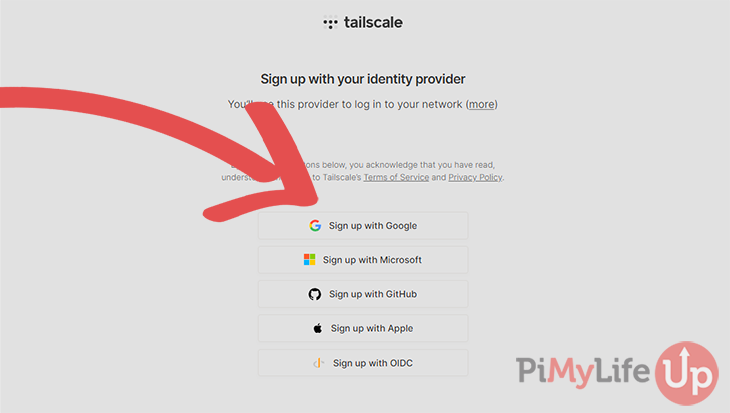
2. Now choose one of the listed providers to use with Tailscale.
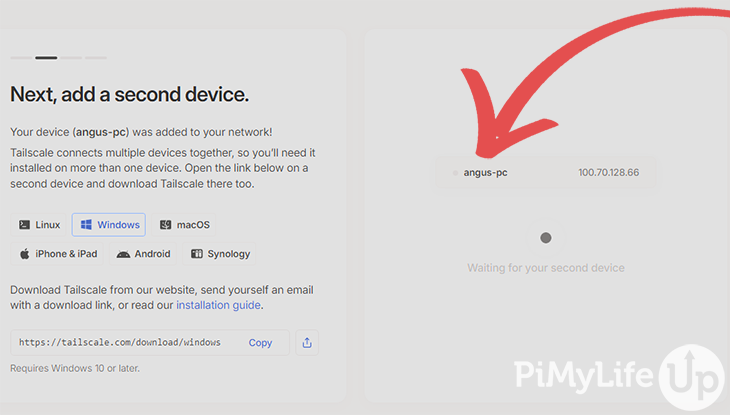
3. You will want to set up Tailscale on the device you want to connect with Home Assistant. You will need to download the Tailscale app for the correct operating system and follow the steps to connect it to your account. The process is relatively simple.
Once you have added your device, it should appear on your list of devices. For example, I added my PC, and it can now be seen in the list.
Configuring Tailscale on Home Assistant
It is now time to install the Tailscale add-on and connect it to the Tailscale network. The process is relatively straightforward.
Using a version of Home Assistant that supports add-ons, like Supervised or the Operating System, is crucial for this tutorial to work.
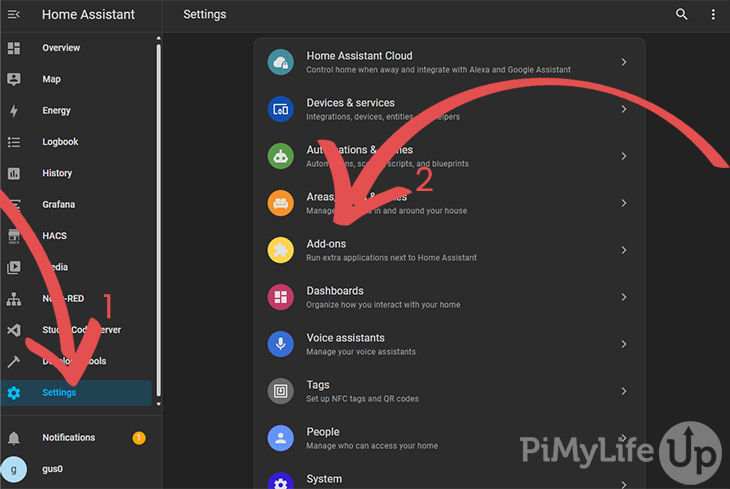
1. Load up your Home Assistant instance in your browser and navigate to the Settings page (1). On the settings page, click on Add-ons (2).
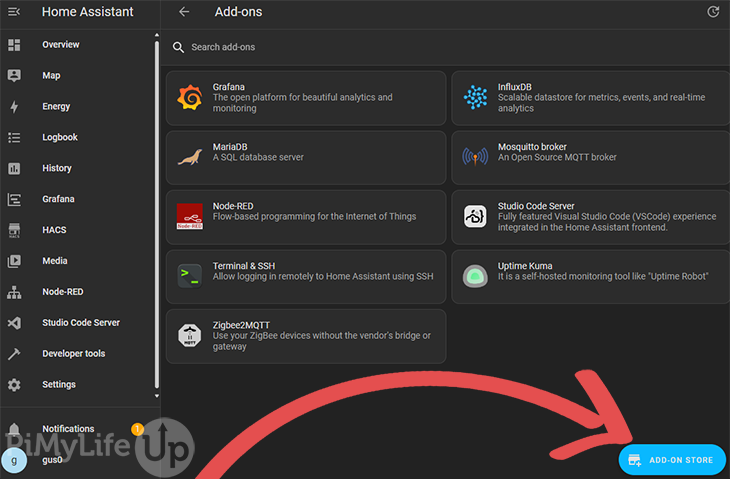
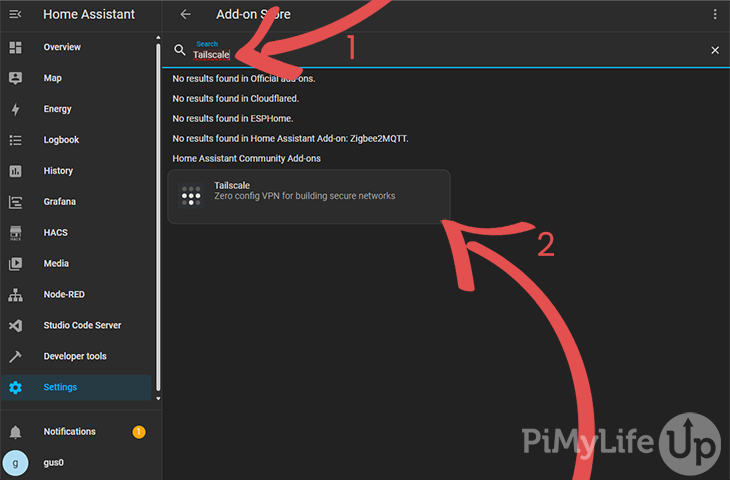
2. On the add-ons page, click the ADD-ON STORE button in the bottom right corner.
3. To quickly find the Tailscale add-on, search for it in the search box (1) near the top of the page. Then, click on the Tailscale add-on (2).
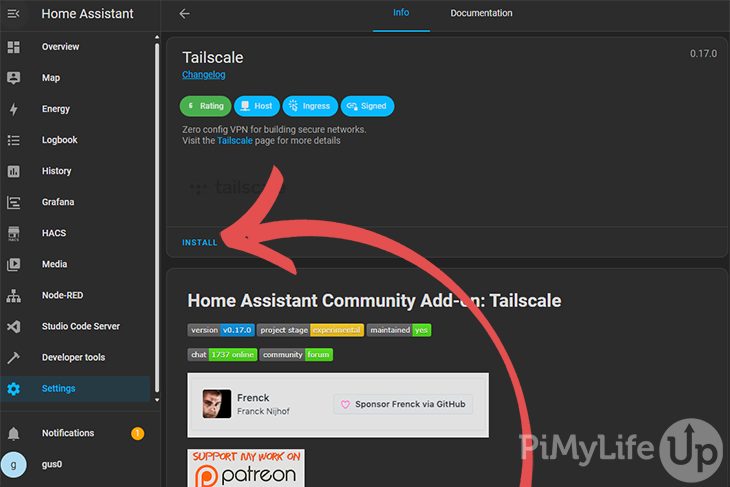
4. You should now see a page that describes the add-on. To install the add-on, click INSTALL.
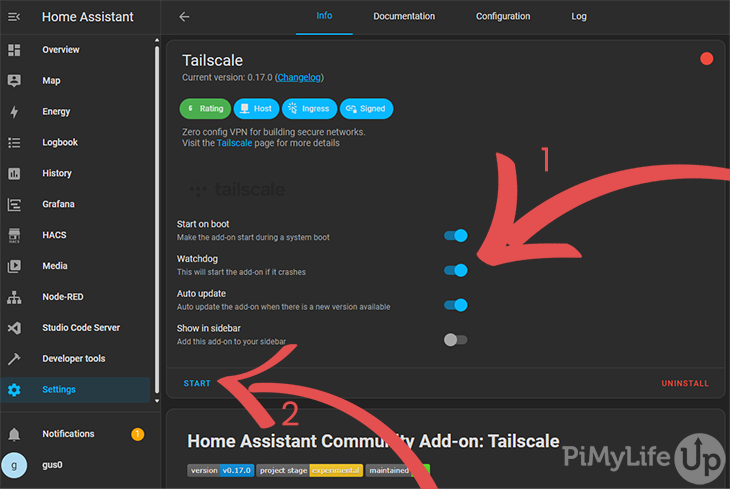
5. Before you start the add-on, you may want to turn on the start on boot, watchdog, and auto update options (1). These options will help ensure the add-on is reliable and updated with all the latest features and security fixes.
To start Tailscale, click START (2).
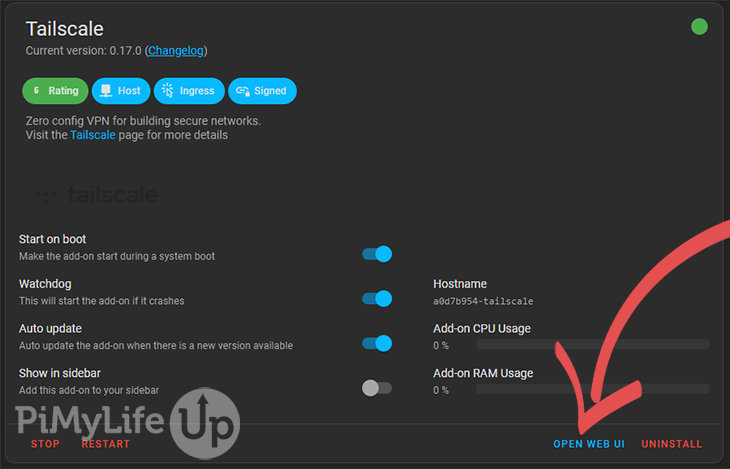
6. The add-on should start without any issues. Once you are ready, click OPEN WEB UI so we can connect Home Assistant to Tailscale.
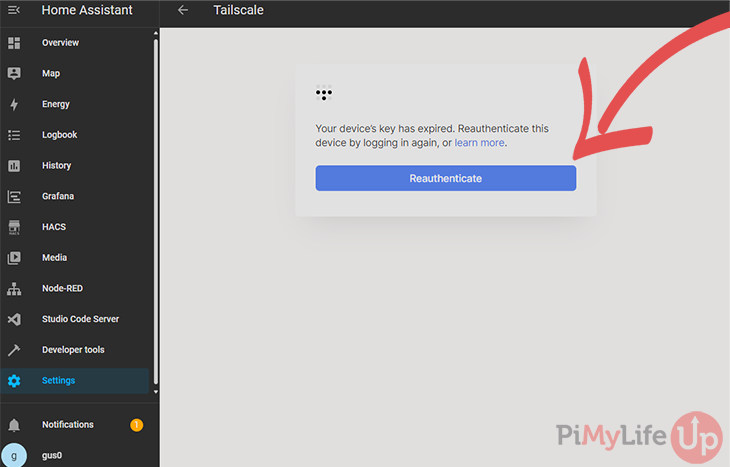
7. You may see a warning about the device’s key; click on Reauthenticate and follow the prompts to log in to Tailscale.
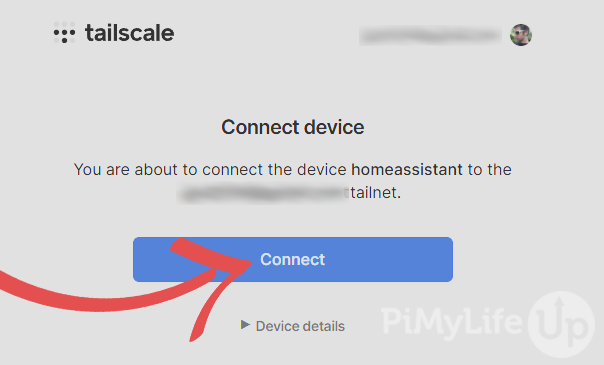
Once logged in, you will see a message asking if you want to connect the device to your Tailscale account. Click Connect to proceed.
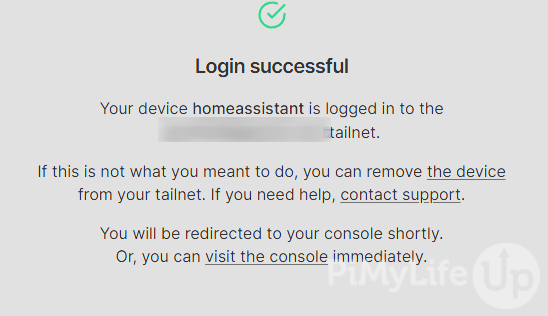
You should see a successful login message like the one in the screenshot below.
8. If you return to your Tailscale account in a different browser tab, you should see your device listed. For example, below is how it would appear if I were a new account and still in the initial setup.
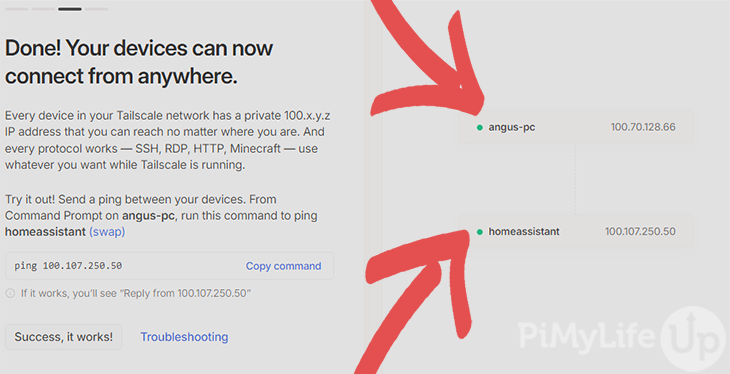
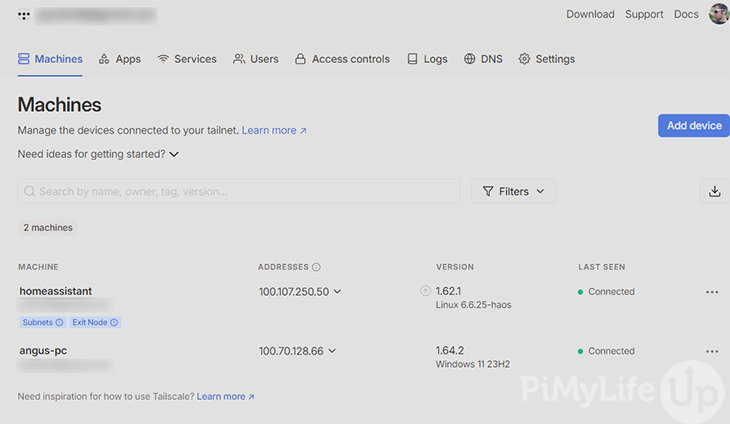
Below is a screenshot of the dashboard that contains our two devices.
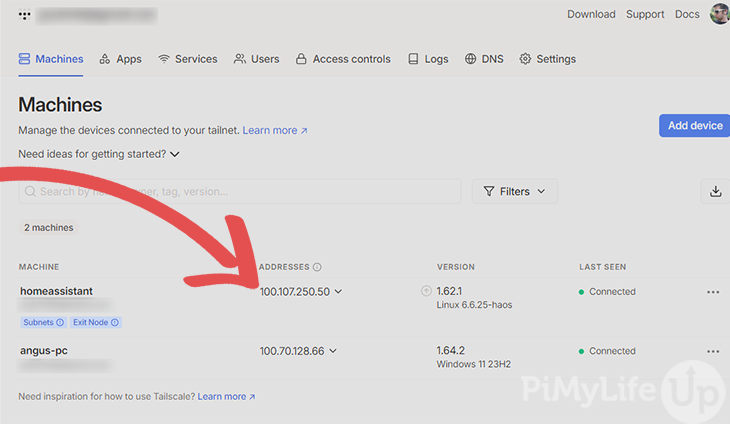
9. To connect to Home Assistant on your device, copy the Tailscale IP address within the dashboard.
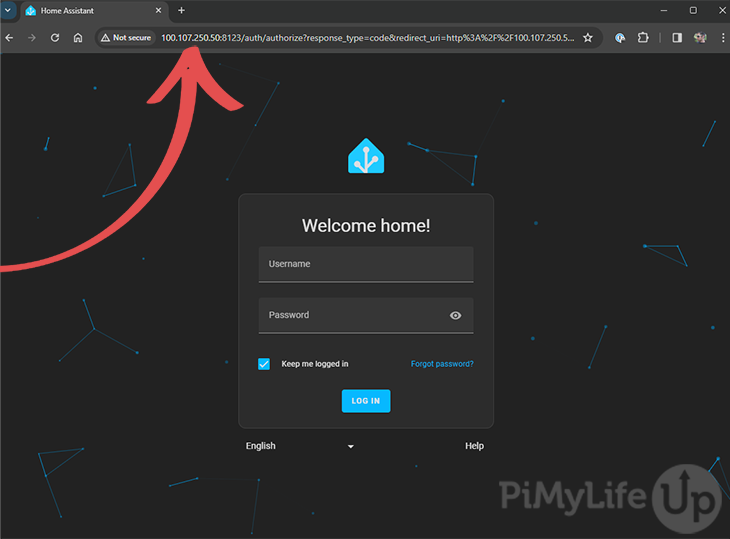
Using the IP address we copied, enter it into your favorite browser, followed by Home Assistant’s port number (8123). For example, to get to Home Assistant, I would enter http://100.107.250.50:8123.
You should see the login page for your Home Assistant setup.
Conclusion
You should now be able to access Home Assistant using the Tailscale IP address assigned to it. You must install Tailscale on every device you wish to access Home Assistant.
If you want to expand your Home Assistant setup, I recommend taking a look at our other Home Assistant projects and tutorials. We are always adding more, so be sure to check back in the future.
Please comment below if you have any feedback or if something needs to be fixed. We are always looking to improve our tutorials.