In this project, we will be showing you how to install Steam Link on your Raspberry Pi.

Steam Link is a nifty technology that allows you to stream games from one device, such as your computer or laptop, to another device, such as a Raspberry Pi.
Using Steam Link allows you to easily play all of your games on your TV without having to connect up a bulky piece of hardware. As long as you have a strong network connection between your PC and your Raspberry Pi, the software works almost flawlessly.
Best of all, unlike the NVIDIA game streaming method, this will work for any PC that you can install the Steam client on. Additionally, you aren’t restricted to using an NVIDIA graphics card as it is not relying on a vendor-specific feature.
Before you get started, we highly recommend using an Ethernet connection for your PC and Raspberry Pi. An ethernet cable ensures the best streaming experience with minimal latency.
Additionally, with the newest release of the Steam Link app, you will get the best experience when using a Raspberry Pi 5, which is capable of handling a 4K 60 frames per second stream.
While this software is still super capable of streaming games to older versions of the Pi, you will be stuck with a 1080p stream at a maximum of 60 frames per second.
Equipment List
Below is a list of equipment that we used when setting up Steam Link on our Raspberry Pi.
Please note that you will want to use an Ethernet network connection to get the best experience.
Recommended
Optional
We tested this tutorial on installing Steam Link on a Raspberry Pi 5 running Raspberry Pi OS Bookworm.
Video
In the video embedded below, we will be walking you through all of the steps needed to install and use the Steam Link software on your Raspberry Pi. This includes getting it to start up when your Pi does.
Of course, if you prefer to set this software up at your own pace, be sure to continue on and read through our written instructions.
Installing Steam Link on the Raspberry Pi
Within this section, we will be walking you through the steps to installing the Steam Link software onto your Raspberry Pi. All you need for these steps if access to the terminal on your Pi.
If you are using the desktop flavor of Raspberry Pi OS, you can use CTRL + ALT + T to open the terminal quickly.
This process is straightforward as we can install Steam Link directly from the Pi’s own package repository. The latest supported versions of the streaming software are pushed directly to the official and doesn’t require us to add a third-party repository like many other pieces of software.
Preparing your Raspberry Pi
1. Before installing the software, we should update the package list and upgrade our currently installed packages. This ensures we have a nice, updated base to run Steam Link off of and will also ensure we will be installing the latest version of the software.
All you need to do to perform these updates is to use the following commands within the terminal.
sudo apt update
sudo apt upgrade -yCopy
Installing the Steam Link package to your Raspberry Pi
2. Once your Raspberry Pi finishes updating, we can move on to installing the Steam Link package. As mentioned at the start of this section, this whole installation process is super easy as it’s available through the Raspberry Pi OS repository.
To install the “steamlink” package on to your Raspberry Pi, all you need to do is enter the following command in the terminal. Since this software is pretty small this install process should only take a few seconds to complete.
sudo apt install steamlinkCopyTesting that Steam Link is Working
3. For the next step, you will need to make sure your Raspberry Pi is hooked up to a display with, at the very least, a keyboard connected. You will need to interact with a few dialog boxes to finish up the Steam Link setup progress.
Additionally, now is an excellent time to connect up a game controller if you intend on using one. We have guides that show you how to connect an Xbox or PlayStation controller to the Raspberry Pi.
4. Once your Raspberry Pi is hooked up to a display and has a keyboard connected, you can launch Steam Link on it using the following command.
After the first run, you will be able to launch Steam Link directly from the desktop. But for now, you will need to use this command.
steamlinkCopyYour First Run of Steam Link on the Raspberry Pi
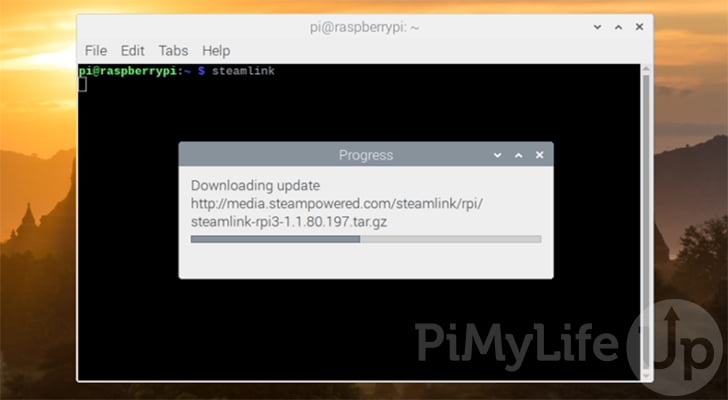
5. When your first run Steam Link on your Raspberry Pi, it will need to go through some initial setup steps to configure itself correctly for your system.
Steam Link will start by downloading the latest version of itself for the Raspberry Pi’s hardware.
This process won’t take very long to complete so don’t go anywhere just yet.
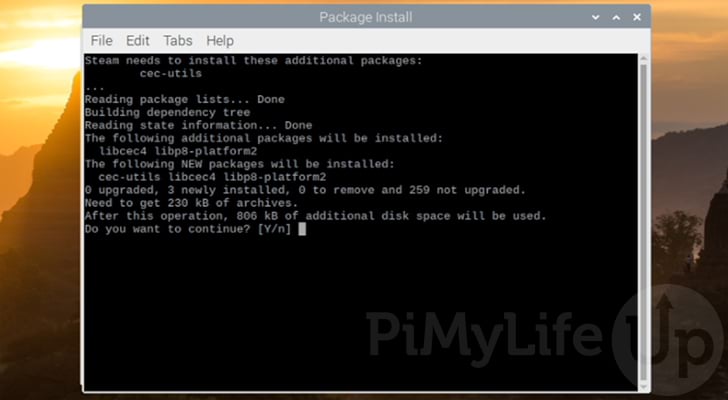
6. When prompted to install some additional packages, type in Y, then press the ENTER key to continue.
Once the script has installed any packages Steam Link needs, you should see a message saying “Press Return to Continue“. To continue, you need to press the ENTER key.
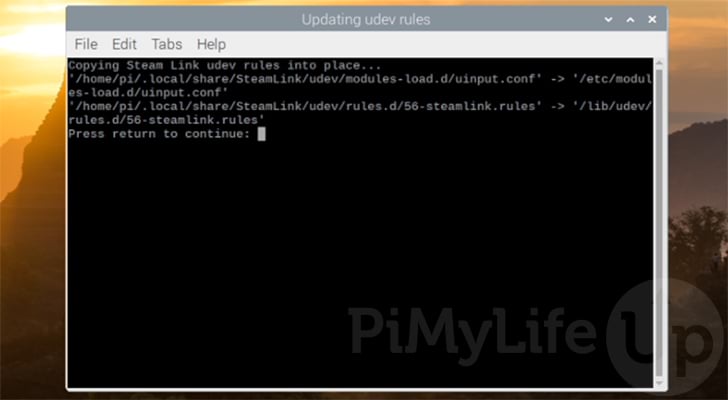
7. Steam Link will now set up some udev rules. These rules allow the software to interact with devices such as a game controller connected to your Raspberry Pi.
All you need to do to continue and finish up the installation of Steam Link on your Raspberry Pi is to press ENTER.
Connecting Your Raspberry Pi Steam Link to your Steam Client
Once Steam Link starts up on your device, we will need to connect it to a computer. These next few steps will walk you through the initial setup process of connecting your Raspberry Pi to a Steam client.
1. The first screen will welcome you to your new Steam Link installation on your Raspberry Pi.
To proceed, click the “Get Started” button in the middle of the screen.

2. If you haven’t connected a controller already, you will be given a chance to now. This screen will even help you connect wireless controllers such as the Xbox and PlayStation controllers.
If you don’t have any controllers to connect, you can click the “Skip” button located at the screen’s bottom-left.

3. Finally, we can begin connecting Steam Link on our Raspberry Pi to a computer with the Steam client running.
On this page, you should see a list of computers with Steam running on it. Find your computer and click it to begin the connection process.
If your computer does not appear, make sure that you have “Remote Play” enabled on Steam and have Steam running on your target computer. You can find this option by going to “Steam” -> “Settings” -> “Remote Play“.
Once enabled, you will need to click the “Rescan” button to refresh the page.

4. On your screen, you should now see a four-digit PIN. This code is used to authorize the connection between your Raspberry Pi and the Steam client.

You should be greeted with a dialog asking you to enter the code displayed on your screen on the computer you are trying to connect to.
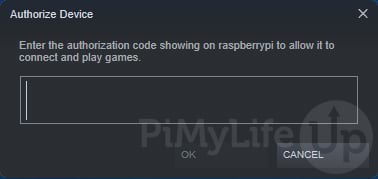
Once the code has been entered, click the “OK” button.
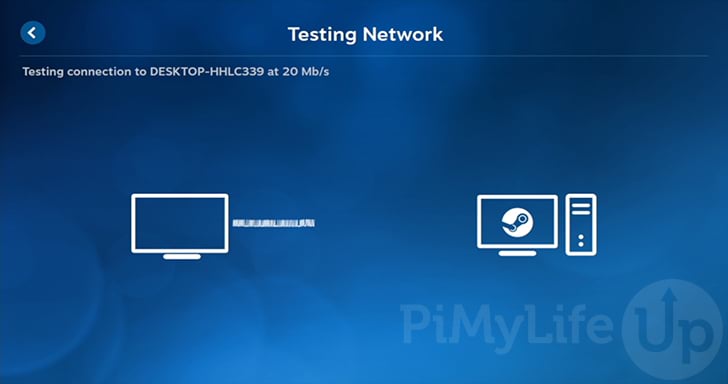
5. As this is the first time your Raspberry Pi’s Steam Link is connecting to that Steam client, it will perform a quick network test.
This network test is designed to find the best network speed to stream the video data without introducing large amounts of latency.
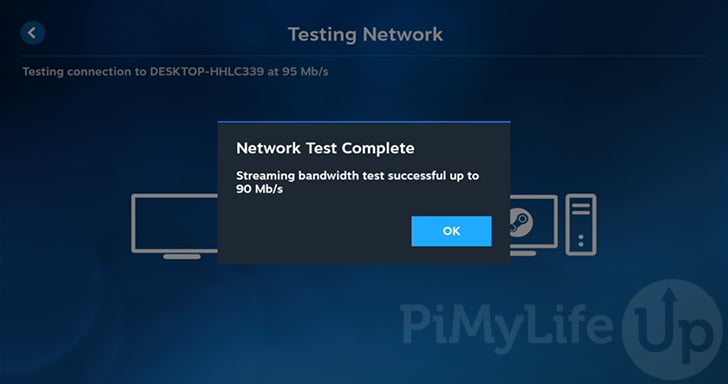
6. Once the network test completes, you will be told how much bandwidth Steam Link feels comfortable using.
You can click the “OK” button to finalize the setup of the Steam Link software on your Raspberry Pi.
7. You should now finally have finished setting up Steam Link on your Raspberry Pi.
You can begin streaming games from your computer by clicking the big “Start Playing” button. This will take you to Steam’s big picture mode and allow you to browse your game library.

Starting Steam Link at Start-Up on your Raspberry Pi
In this section, we will be showing you how you can automatically start up the Steam Link software once your Raspberry Pi powers on.
These methods differ slightly depending on the version of Raspberry Pi OS that you are using. Any new installation will likely be using LabWC. Older releases may be using either Wayfire or X11.
Setting up Steam Link to AutoStart with LabWC on the Raspberry Pi.
1. To get Steam Link to autostart on your Raspberry Pi when using an OS that uses LabWC, you will need to modify the “autostart” file.
You can begin to edit this file within the terminal by running the following command.
sudo nano /etc/xdg/labwc/autostartCopy2. To the bottom of this file, you will want to add the following two lines.
The first line will sleep the autostart script for just a second. This will help ensure that your networking is online before Steam Link starts up on your Raspberry Pi. If you still experience issues, you can try increasing this number.
The second line structs the system to start the Steam Link software.
sleep 1
steamlinkCopy
3. After making this change to the file, save and quit by pressing CTRL + X, Y, and then ENTER.
4. You can verify that Steam Link will now start when your Raspberry Pi does by restarting your device.
Restarting your Raspberry Pi is as simple as using the following command within the terminal.
sudo rebootCopyAuto Starting Steam Link when using X11 on the Raspberry Pi
1. If you are running an older version of Raspberry Pi OS, such as Bullseye or an early version of Raspberry Pi OS Bookworm, then the steps to get Steam Link to auto-start differ slightly. With these steps, we will need to modify the “autostart” file that belongs to X11.
By modifying this file, we will ensure that the Steam Link software only starts up once the desktop interface is available.
Edit this file using the nano text editor by running the following command.
sudo nano /etc/xdg/lxsession/LXDE-pi/autostartCopy2. Add the following line to the bottom of this file.
This line will ensure that Steam Link is started up as the desktop interface becomes available. In addition, the inclusion of the “@” symbol at the front ensures that the Raspberry Pi will restart the application if it crashes.
@steamlinkCopy3. Once you have added this line, save and quit by pressing CTRL + X, followed by Y, then the ENTER key.
4. To ensure this is working correctly, you can try restarting your Raspberry Pi.
Restarting your Pi is as simple as running the following command.
sudo rebootCopyConclusion
You should now have Steam Link successfully running on your Raspberry Pi. It should now be possible to stream your games directly from your PC straight to your Raspberry Pi.
Using Steam Link is one of the easiest ways to stream your games from a PC to another device, such as a Pi. It allows you to game on a screen such as your TV without connecting it to a more powerful machine.
If you are looking for an alternative that doesn’t rely on Steam, you should check out Moonlight. Moonlight acts a lot like Steam Link but uses its own server software that isn’t dependent on having a Steam account.
Please feel free to leave a comment below if you have encountered any issues with getting Steam Link to work on your Raspberry Pi.
Be sure to check out some of our other great Raspberry Pi projects, such as running retro games on your device.


Hi Gus
I have an issue with autostart using LabWC, I get a dialog “Couldn’t download archives, aborting update” when the PI is first started, once I click OK the steam link app starts fine and autorestarts without issue. I think this is being caused by the network not being up, is there anyway to delay start until the network is up?
Hi Pat,
Sorry to see that you are having issues with getting Steam Link to run at boot. My suggestion here would be to add a bit of a sleep before the steamlink command is fired.
Within the autostart file, you will want to add the follwowing above “steamlink”. This line will sleep the terminal session for 20 seconds. You might be able to tweak this number lower or higher.
Please let me know if this resolves the networking issue and I’ll add it as a part of the tutorial.
Kind regards,
Emmet
Hi Emmet
Thank you. Yes this works, but only 1 is needed not 20. My /etc/xdg/labwc/autostart now reads.
Kind regards
Patrick
Hi Patrick,
Thank you for getting back to me, and I’m glad that it resolved the issue.
I have updated the tutorial to include this.
Kind regards,
Emmet
I actually got past Steam Link telling me X11 is not supported.
press ctrl + alt + f2
then log in as your user
launch Steam Link
Just ran into this issue today and thought I’d have to reimage an older raspbian, thanks!