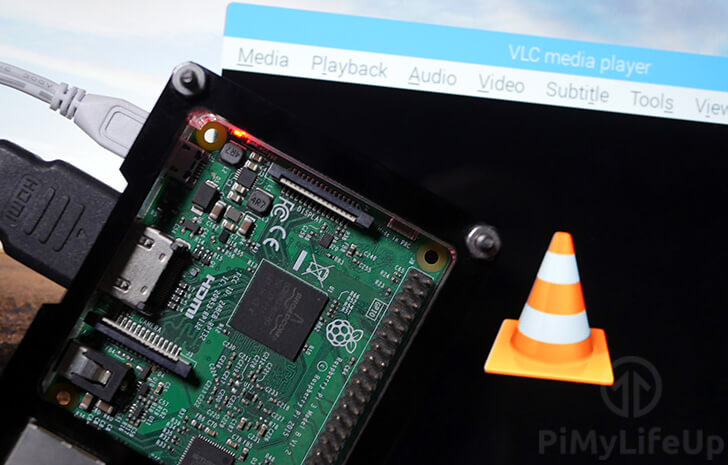
In this Raspberry Pi VLC guide, we will show you how to set up and run the popular media player, VLC on your Raspberry Pi.
For those who do not know, VLC is one of the best free and open-source media players that have been made available for almost any device.
VLC features support for the vast majority of video and audio formats and even has built-in support for streaming media from the internet.
Thanks to the inclusion of a large number of decoding and encoding libraries in the base VLC installation, you don’t have to worry about finding additional codecs.
If VLC is your preferred media player, then you will be happy that you can easily install it for the Raspbian OS. Installing VLC to a Raspberry Pi is a simple process that can be done with a single step.
For a more complete headless setup then you might want to take a look at setting up a Plex server.
Equipment List
Below is a list of equipment that I made use of for this Raspberry Pi VLC tutorial.
Recommended
- Raspberry Pi Amazon
- Micro SD Card Amazon
- Power Supply Amazon
- Ethernet Cable Amazon or Wi-Fi Amazon
- HDMI Cable Amazon
- Monitor Amazon
- USB Keyboard Amazon
- USB Mouse Amazon
Optional
- Raspberry Pi Case Amazon
Setting up VLC on the Raspberry Pi
1. Before we go ahead and install VLC, we must first ensure our Raspberry Pi is entirely up to date.
To do this, we will be running the following two commands to update both the package list and all the currently installed packages.
We will do this to ensure that we will be downloading the latest version of VLC.
sudo apt update
sudo apt upgrade
2. Next, we can now proceed to install VLC. Luckily for us, VLC is available within the Raspbian operating systems package repository.
The version of VLC served by the Raspbian package repository has all the required hardware acceleration patches for the Raspberry Pi.
With VLC being available on the package repository we can easily install VLC by running the “apt install” command.
sudo apt install -y vlc3. With that done, VLC should now be successfully installed to your Raspberry Pi. It will now be ready for whenever you want to watch something.
Running VLC from the command line
1. Running VLC from the command line on your Raspberry Pi is a straightforward process.
To launch VLC with its full interface from the command line, you can enter the command below.
vlc2. You can also use VLC to launch a file directly by running the same command but with the file path afterward.
Below is an example of how the command would look like.
vlc /home/pi/pimylifeup.mp43. If you would like to use VLC from the command line without the default interface, then you can do so by swapping out the “vlc” command with “cvlc“.
cvlcRunning the command “cvlc” is equivalent to running the standard VLC with the “-ldummy” argument. This argument tells VLC to run without its interface and to use a nonexistent “dummy” one instead.
Running VLC from the GUI
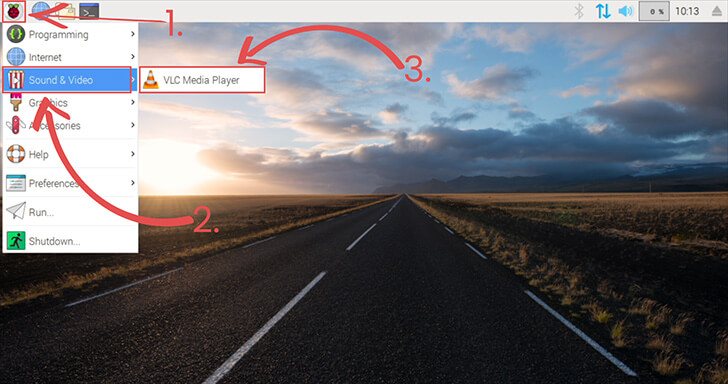
1. Running VLC from the GUI is a simple process, and can easily be found within the Raspbian taskbar.
Begin by clicking the Raspbian logo in the top right-hand corner (1.).
Next hover over the “Sound & Video” sub-menu (2.)
Finally, click “VLC Media Player” (3.)
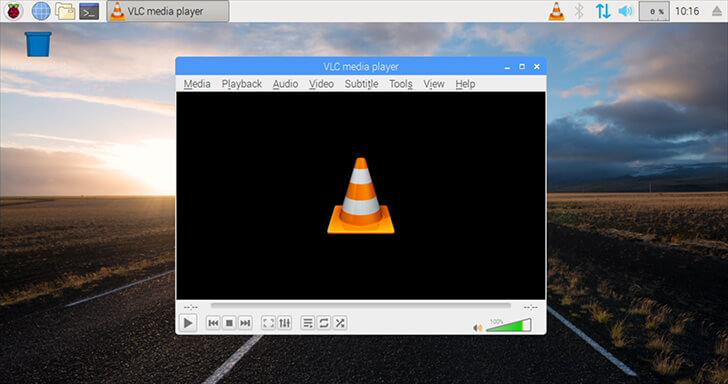
2. Upon clicking “VLC Media Player“, you will be greeted by the following screen.
Feel free to play now any video files you want on your Raspberry Pi.
VLC is an excellent software package for any media projects that you might be setting up. I hope that you do find this tutorial helpful with achieving your next Raspberry Pi project.
That’s all I have for this Raspberry Pi VLC tutorial, so I hope that I have covered everything correctly. I have any feedback, questions, or anything else, then please don’t hesitate to leave a comment below.


Rasberry Pi OS (full) now comes with VLC preinstalled. It plays all my media from my network shares just fine.
I did have to change the video output module to “OpenGL for Embedded systems” to get the controls (overlays) to show in full screen.
That’s useful to know. Thanks!
For Raspberry Pi4B I use 2 beamers. With the command W in the VLC the screen switches back to 2 separate screens. For 3D stereo I need the full screen (32: 9) How do I keep 2 images divided over 2 screens? The video is sidebyside 1920×1080. The left part should be on the left and right image on the right.
Thanks for answer.