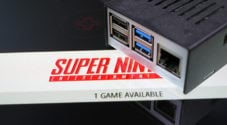
In this project, we will show you how to self-host the game library manager Retrom on your Raspberry Pi.
Retrom is a relatively new software designed to be a central place to host all your games. While this game library focuses on retro games, it still works as a good hub for your more modern games.
One of the neatest things about Retrom is that it will automatically scrape your folders for your games. As long as they are organized in a way the software expects, it will build out and fetch information about each of your retro games.
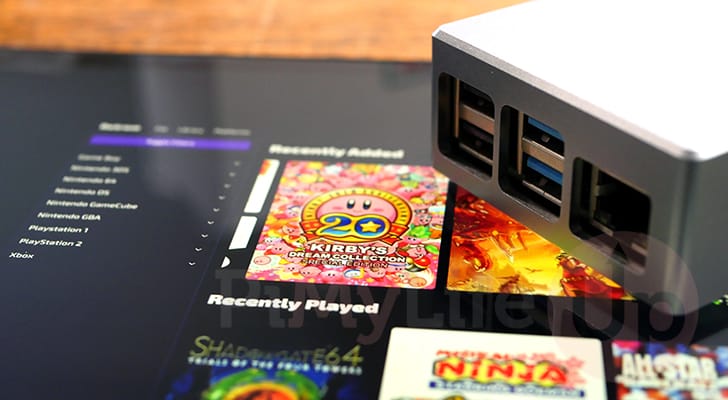
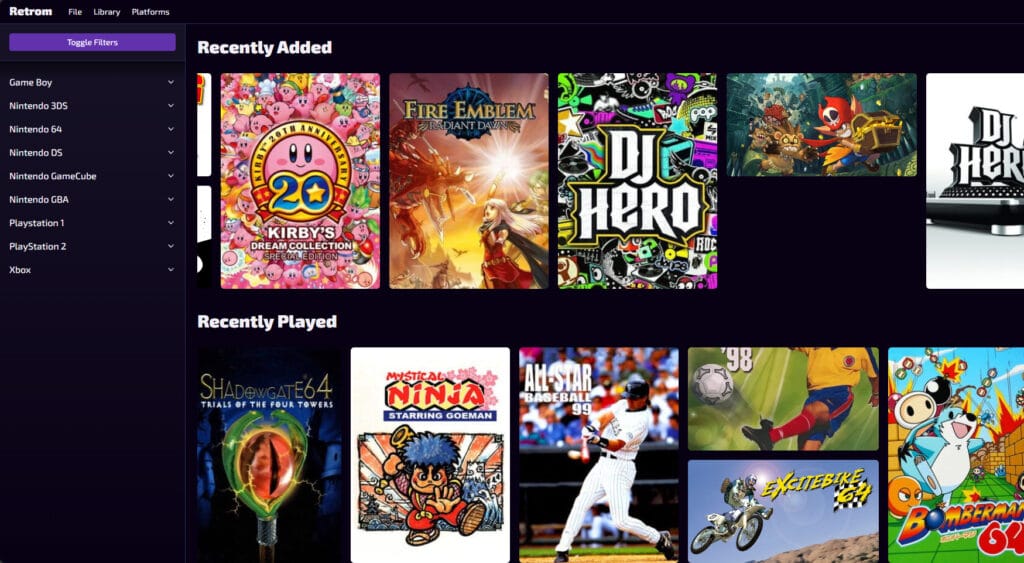
Retrom even features a sleek web interface that you can use to easily browse and manage your retro game library. You can even download your games to your local machine with just a click of a button.
This game library even supports a desktop client that lets you easily set up your local system to play retro games.
The Raspberry Pi makes an excellent device to host Retrom on as it is relatively affordable to keep running and has enough speed to handle most of Retrom’s tasks with little to no issues.
Please note that you must be running a 64-bit operating system to run Retrom. There is no official support for 32-bit systems.


Equipment
Below is a list of equipment we used when setting up Retrom on our Raspberry Pi.
Recommended
- Raspberry Pi Amazon
- Monitor Amazon
- Micro SD Card Amazon
- Power Supply Amazon
- Ethernet Cable Amazon or Wi-Fi Amazon
Optional
We last tested this on a Raspberry Pi 5 running the latest version of Raspberry Pi OS Bookworm 64-bit.
Setting up and Running Retrom on a Raspberry Pi
Over the following sections, we will walk you through the steps to set up and run Retrom on your Raspberry Pi.
As you will soon see, this software is a neat way of keeping track of and categorizing your retro game library.
Getting an IGDB API Key for Retrom
1. For Retrom to work correctly and fetch metadata for your games, you must get an API key for IGDB.
IGDB is the game database that is managed by Twitch. Our guide won’t cover how to do this, but we highly recommend following the official account creation tutorial.
The two values you will want by the end of that guide and what you require for this tutorial are the IGDB Client ID and Client Secret.
https://api-docs.igdb.com/#account-creationPreparing your Raspberry Pi
2. Once you have the IGDB API keys, your next step is installing Docker on your Raspberry Pi.
If you already have Docker installed, you can safely proceed to the next step of the guide.
https://pimylifeup.com/raspberry-pi-docker/3. With Docker installed, our next step is creating a folder to store the Retrom Compose file and its data.
You can create this folder by using the mkdir command in the terminal. We use the “/opt/stacks/” directory as a base as it will work with software like Dockge out of the box.
sudo mkdir -p /opt/stacks/retromCopy4. Now change into the directory we just created by using the cd command. The rest of this tutorial will be assuming you are in this folder.
cd /opt/stacks/retromCopyWriting the Docker Compose File for Retrom
5. With this next step, we can begin to write the Docker Compose file for Retrom. This file basically instructs Docker on how to set up Retrom on our Raspberry Pi.
We can start writing this file using Nano by running the following command.
sudo nano compose.yamlCopy6. Within this file, you will want to fill out the following information. These lines
<DBPASSWORD>: Replace this with a long and secure password. This doesn’t need to be memorable, as you will only need to be able to fill this out once more.<VOLUMES>: The most important option here is the volumes you want to mount to your Retrom Docker container on your Raspberry Pi.
These mounted volumes are how Retrom will find your games so be careful when filling this out.
On the left side (<HOSTPATH>) of this you will specify the path to where your games are located on your system. This can even be a network mount. Just make sure your games are at least separated into a folder based on the system they are for. For example, Sega Genesis games would be in a Sega Genesis folder.
On the right side, you will specify the folder name Retrom should use for this library. You need to remember this name as you will need to set this within the Retrom config file later on.
The best solution is to name the library after the console these games are from.- <HOSTPATH>:/<LIBRARYNAME>
For example, if we wanted to mount a folder full of games from “library1“, we would end up with a line similar to the one shown below.- /mnt/games/library1:/library1
services:
  retrom:
    image: ghcr.io/jmberesford/retrom-service:latest
    ports:
      - 5101:5101
      - 3000:3000
    volumes:
      - ./config:/config/
      <VOLUMES>

  retrom-db:
    container_name: retrom-db
    hostname: retrom-db
    image: postgres:16
    restart: unless-stopped
    volumes:
      - ./db:/var/lib/postgresql/data
    environment:
      POSTGRES_USER: retrom
      POSTGRES_PASSWORD: <DBPASSWORD>
      POSTGRES_DB: retromCopy
7. After filling out the Docker Compose file, save and quit out of Nano by pressing CTRL + X, Y, and then ENTER.
Creating a Config File for Retrom
8. For the Retrom game library to work on your Raspberry Pi, we must write a config file for it to read.
Before we can write this config file, we need to create a directory called “config” by using the mkdir command.
sudo mkdir ./configCopy9. With the folder created, we can begin writing the “config.json” file that the software expects.
For this task, we will be using the Nano text editor again.
sudo nano ./config/config.jsonCopy10. Within this file, you will want to enter the following lines. These lines are how Retrom reads the information it needs to work on your Raspberry Pi, such as the database server to connect to.
This file is also where you will define things such as the
<DBPASSWORD>: Replace this with the database password you set within the Docker Compose file earlier in this tutorial.<IGDBSECRET>: Here you will want to specify the IGDB Secret you created through the IGDB website.<IGDBCLIENT>: In addition to the secret, you require the IGDB client to go with the secret. These are used so Retrom can talk with the IGDB web interface.
You will also use this file to configure the directories that Retrom will scan for your games. These are controlled by a block within the “content_directories“.
We have an example already filled out in the block below to give you an idea
<LIBRARYPATH>: This placeholder is where you must specify the location of your library within the Docker container.
If you think back to the Docker Compose file, this is the path you specified on the right side of the volume. For example, “/library1” would be a valid path here.<STORAGETYPE>: You must next specify the storage type. Retrom has two types, which dictate how your directories must be structuredMultiFileGame: Each game must be in its own directory using this format. The directory name is used to identify your game.- [CONSOLE NAME] -> [GAME NAME] -> GAME FILES
SingleFileGame: This storage type assumes that your games for a specific console are located within the one directory. This format means the file name is used to identify your game.- [CONSOLE NAME] -> GAME FILES
{
  "connection": {
    "port": 5101,
    "db_url": "postgres://retrom:<DBPASSWORD>@retrom-db/retrom"
  },
  "igdb": {
    "client_secret": "<IGDBSECRET>",
    "client_id": "<IGDBCLIENT>"
  },
  "content_directories": [
    {
      "path": "/<LIBRARYPATH>",
      "storage_type": "<STORAGETYPE>"
    },
    {
      "path": "/console1",
      "storage_type": "SingleFileGame"
    }
  ]
}Copy
11. Once you have finished writing the config file for Retrom on your Raspberry Pi, you can now save and quit by pressing CTRL + X, Y, and then ENTER.
Starting up Retrom on your Raspberry Pi
12. With the Docker Compose and Config files now written for Retrom, you can start up the game library on your Raspberry Pi by running the following command in the terminal.
By using the “-d” option, we detach Docker from the terminal so that it can continue to run on the Raspberry Pi.
docker compose up -dCopyAccessing the Retrom Web Interface
13. With Retrom now installed and running, you will want to access its web interface. There is no point in having a neat library of your retro games if you can’t check it out.
For these steps you will need to know the IP address of your Raspberry Pi. If you are unsure what it is, you can always use the hostname command, as shown below.
hostname -ICopy14. Once you know your IP address, you only need to go to the following address in your favorite web browser.
Ensure that you replace “<IPADDRESS>” with the IP of your Pi.
http://<IPADDRESS>:300015. You should now have full access to the Retrom web interface. You can now browse and learn this interface to see how you can manage your retro game library.
If the program hasn’t automatically scanned your libraries, you can start a library scan by clicking “Library” and then “Update Library“.
Once Retrom has pulled in all your retro games, you will want to click “Library” again and click “Download Metdata“.
Conclusion
Since you have reached this point in the tutorial, you will have successfully managed to get Retrom running on your Raspberry Pi.
Retrom is a neat way of building a sleek library of all your retro games. It already has a ton of functionality built into it and has a strong roadmap ahead of it.
Please feel free to drop a comment below if you have had any issues with getting this software to run on your Pi
If you liked this project, we highly recommend browsing our ever-growing list of Raspberry Pi projects.