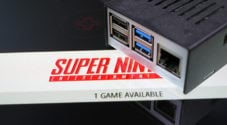
In this tutorial, we will be showing you how to install and configure Lakka for the Raspberry Pi. The tutorial will get your system running as an affordable retro gaming console in no time.
For those who do not know what Lakka is, it is a lightweight Linux distribution built on top of LibreELEC for the sole purpose of running the Retroarch software.
Lakka is built purely for turning your Raspberry Pi into a finely tuned retrogaming console. It only contains the packages and services required to run the Retroarch software allowing the Raspberry Pi’s hardware to run as fast it can.
Lakka features numerous features that make it a fantastic choice for setting your Raspberry Pi up as an emulator console.
One of these great features being its implementation of automatic joypad recognition, meaning most controllers such as the Xbox One controller will work as soon as you plug it in.
Also, it is incredibly easy to get up and running with little effort. For example, you can copy ROMs over the network by just switching on a service, Lakka handles all the hard work for you.
Equipment List
Below is all the equipment that you will need for this tutorial on setting up Lakka with the Raspberry Pi.
Recommended
- Raspberry Pi Amazon
- Micro SD Card Amazon (8GB+ Recommended)
- USB Keyboard Amazon
- USB Mouse Amazon
- HDMI Cable Amazon
Optional
- Retro USB Controllers or Joysticks Amazon
- Xbox Controller Amazon
- PlayStation Controller Amazon
- Ethernet Cable Amazon or Wi-Fi Amazon
Installing Lakka Video
Below you can watch our video showcasing all the steps we followed to installing and setting up Lakka on the Raspberry Pi.
If you would prefer to follow the tutorial step by step, you can follow our written guide below.
Preparing for Installing Lakka
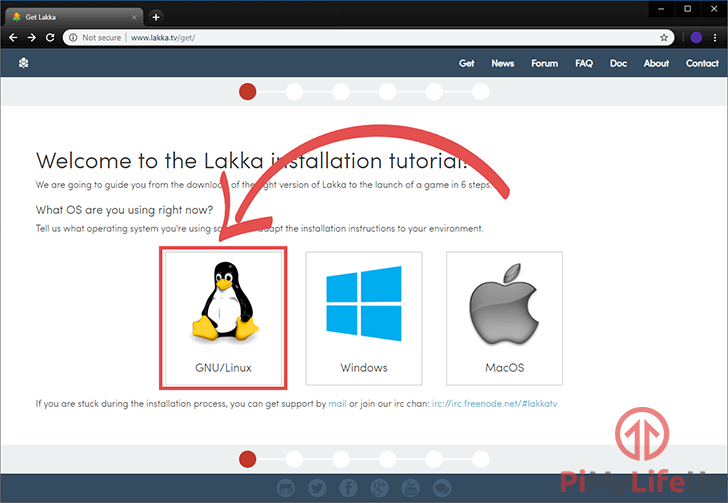
1. To begin, we must first obtain the latest version of the Lakka operating system. We can do this by going to Lakka’s official website.
2. Once you are on Lakkas website, you need to click the “GNU/Linux” button as indicated in the screenshot below.
3. The next screen will show you all the devices that Lakka official supports, in our case, we will be using the Raspberry Pi 3, but Lakka is also available for the Pi 2, Pi 1 and the Raspberry Pi Zero.
Click the correct button for the Raspberry Pi that you intend on utilizing.

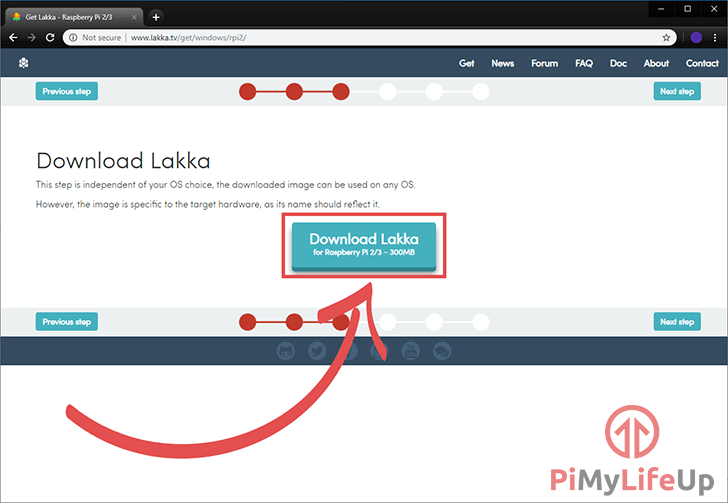
4. Finally, you will be shown a screen with the button to download Lakka to your computer. Just click the Download Lakka button to proceed.
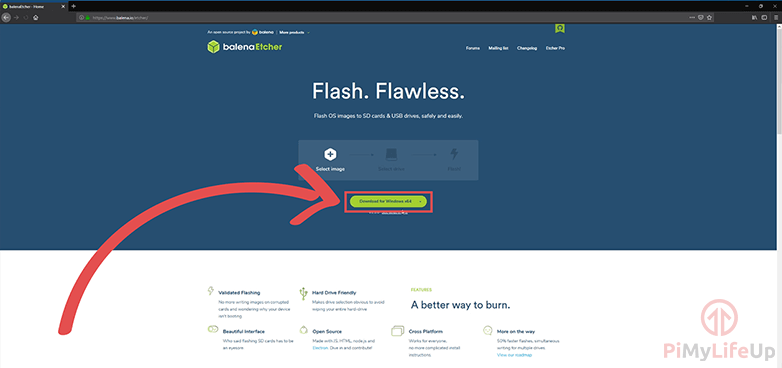
5. Now that we have downloaded Lakka we need to download a tool to write it to an SD Card. In this guide, we will be utilizing the piece of software called Etcher.
You can download the Etcher software by going to the Etchers official website and clicking the download button.
The Etcher website should automatically detect the operating system that you are using and show the correct download link for your system.
If it detects the wrong operating system, click the down arrow on the download button and select your system manually.
Installing Lakka to your Raspberry Pi’s SD Card
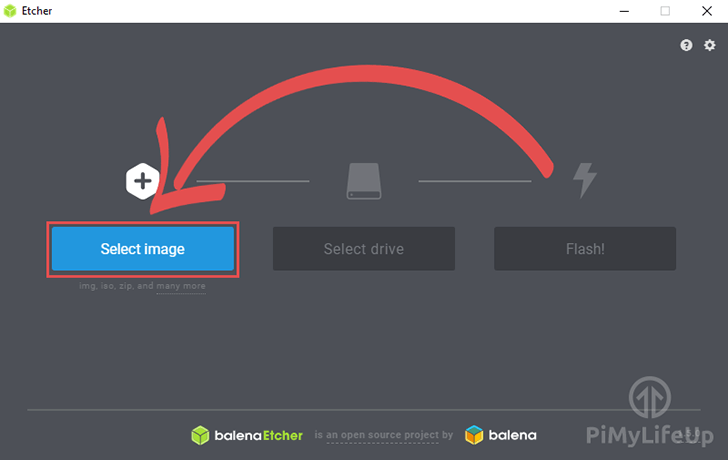
1. With the Lakka image now on your computer and with Etcher installed and running, we can proceed to write the operating system to the Raspberry Pi’s SD Card.
Begin by clicking the Select Image button as shown below.
This button will prompt you to select an image. Within the file browser locate where you downloaded the Lakka image to and select it.
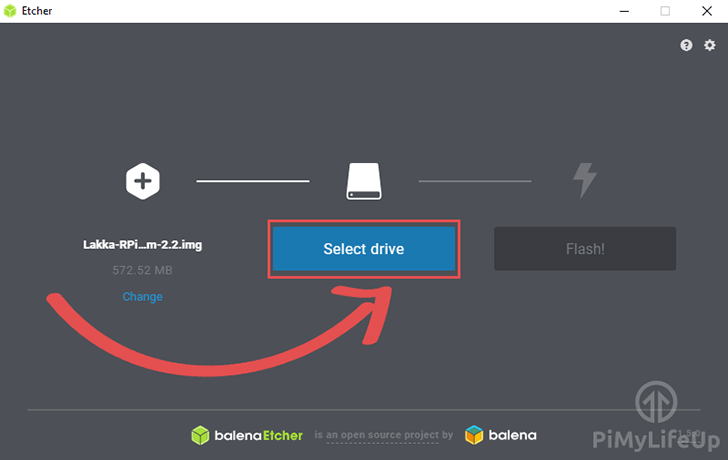
2. Once you have found and selected the Lakka image, you will now need to press the Select drive button as shown in the screenshot below.
3. You will now be asked to select the drive that you want to write the Lakka image to.
It is critical that you select the correct drive that you want to use for your Raspberry Pi as this will overwrite all data on that chosen drive. You can see our example drive in the screenshot below (1.).
Once you are confident that you have selected the correct drive that you want to write to, press the “Continue” (2.) button.

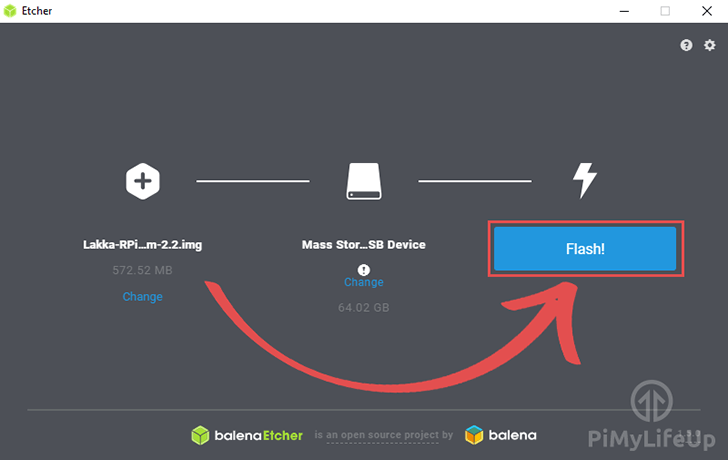
4. When you are satisfied that everything is set correctly, go ahead and click the “Flash!” button.
Clicking this will start the process of writing the Lakka image to the SD Card you want to use for the Pi.
Booting up Lakka
Once the Etcher software has finished writing Lakka to your SD card go ahead and insert it into your Raspberry Pi.
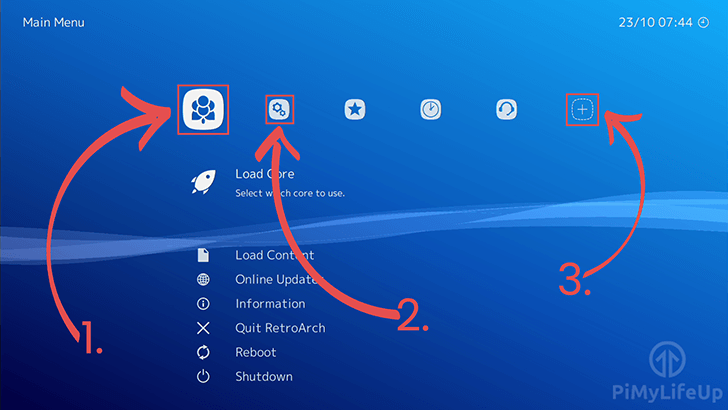
Upon starting up your Raspberry Pi Lakka setup, you will be greeted with the “Main Menu” as we have shown in the screenshot below.
There are a few things that we need to make a note of such as the various menu sections on the interface. We will reference these by the numbers displayed on the screenshot below.
1. Is the Main Menu, we will be showing you a little bit of this menu as we will use it to retrieve the local IP addresses that have been assigned to the Raspberry Pi.
We will get the IP address just in case we need it for connecting to the shared folders for copying ROMs over to the Lakka installation.
2. This is the Settings menu. This menu contains different options that we will be looking at later.
The main options that we will be interested in are the WiFi menu and the Services menu. The WiFi menu will allow us to make a Wifi connection easily.
The services menu will allow us to turn on SSH and also enable us to easily activate file sharing. These options will make the process of copying ROMs to the Lakka installation much more accessible.
3. This final menu that we will be checking out is probably the one that you will be utilizing the most after the initial setup period.
It is the Import Content menu. You will be using this to scan for the ROMs that you add to your Raspberry Pi running Lakka.
Making a WiFi Connection in Lakka
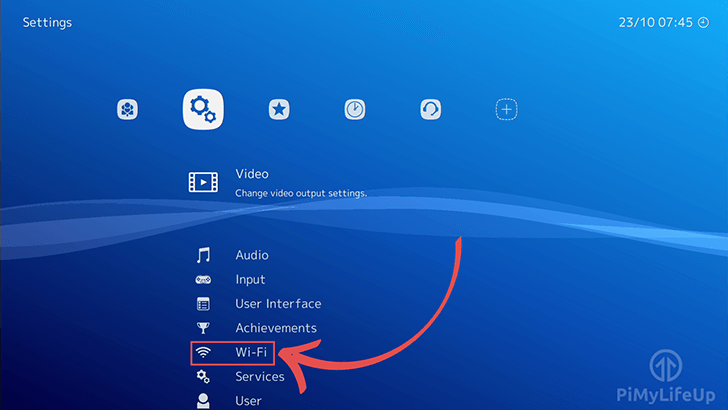
1. To connect to your Wifi from your Lakka installation, you have to start by going to the Settings menu. If you are unsure which one this is, then refer to the previous section.
While in the settings menu, go down to the option marked Wi-Fi, we have highlighted it in the screenshot below.
2. Within the Wi-Fi menu, you will be greeted by a list of all the available Wi-Fi access points that your Raspberry Pi can see.
Locate the Wi-Fi access point that belongs to your local network in this menu and select it to begin the connection process.

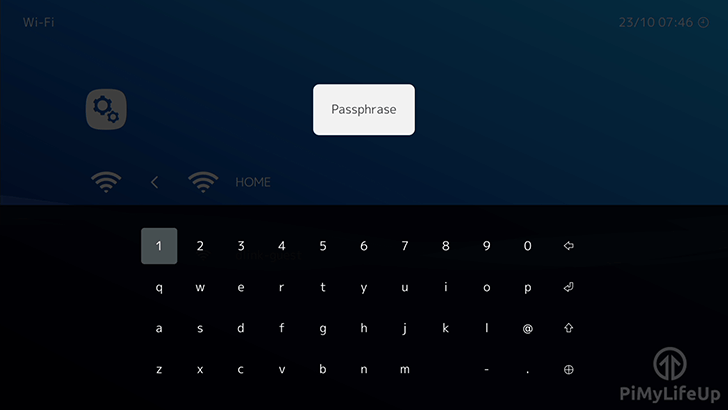
3. If your Wi-Fi access point requires a passphrase, you will now be prompted to enter it.
Lakka will also display a virtual keyboard to make the process more accessible if you are utilizing a controller.
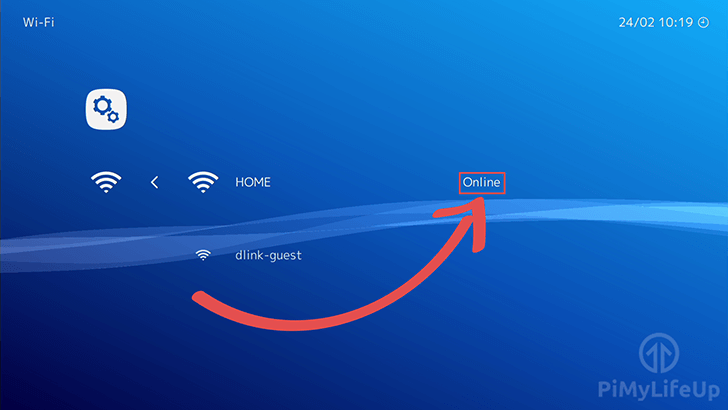
4. Once you have entered your passphrase, you will be taken back to the Wi-Fi menu.
If your Raspberry Pi has managed to make a successful connection to your Wi-Fi access point you will see the text “Online” appear next to it.
We have highlighted this in the screenshot below to give you an idea of what you are looking for.
Locating your local IP Address within Lakka
1. Now that your network is up and running, either through a wired connection or a Wi-Fi connection we can now retrieve the local IP address assigned to the Raspberry Pi.
Retrieving the local IP address will give us a fall back for accessing Lakka’s shared folders if the hostname doesn’t work for any reason.
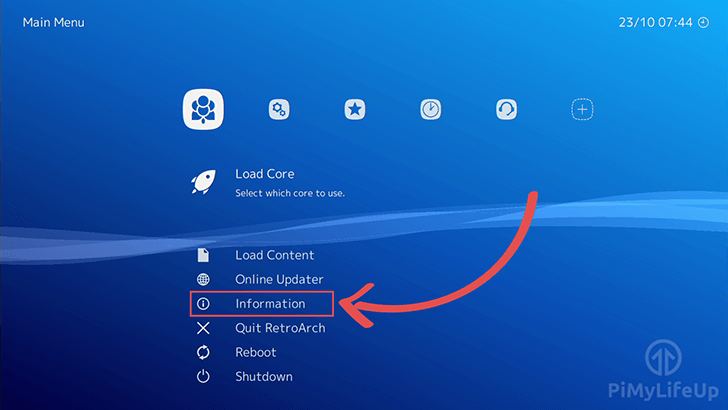
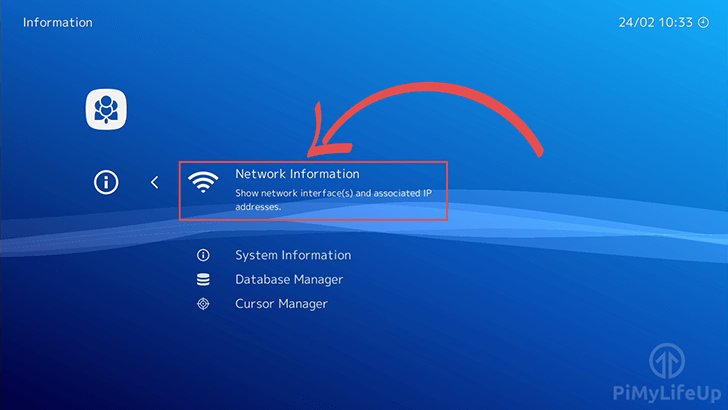
To find the IP’s within Lakka begin by returning to the Main Menu, within this menu select the Information option.
2. Within this menu select the Network Information menu.
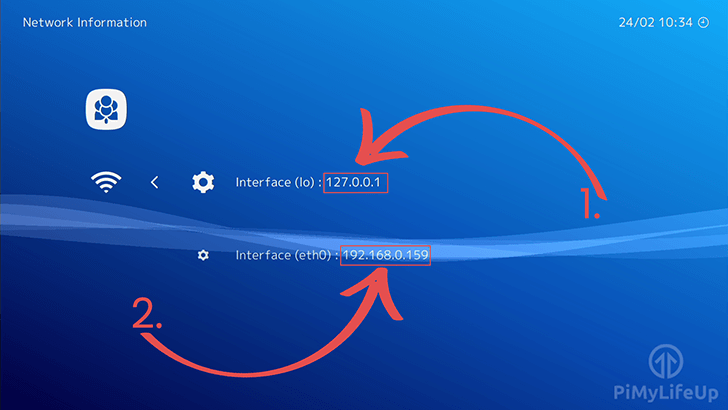
3. Within this interface, you will find all the IP addresses that have been assigned to your Raspberry Pi.
You will notice that there is one IP displayed here at all times regardless of whether you have an actual connection to a network. This IP is displayed in the screen below next to Interface (lo): (1.).
The Interface (lo) is the loopback IP for your device, meaning that the Raspberry Pi can access itself back through its network to talk with itself.
In addition to this loopback IP address, this screen also shows the IP assigned to each of your interfaces.
In our example below you can see the IP address assigned to our wired connection, Interface (eth0) as 192.168.0.159 (2.).
This is the IP address that you should use when you want to connect to your Raspberry Pi from within your local network.
Write this IP down for later use just in case you need to connect to your Raspberry Pi.
Please note that a lot of routers automatically assign you a random local IP address whenever you make a new connection to the router.
You can however in many routers set it so that it will consistently assign the device the same IP address.
4. Now that you have retrieved your local IP address we can proceed onto the next section of this Raspberry Pi Lakka tutorial. The next part is activating both SSH and Samba file sharing on your Lakka installation.
Activating SSH and Folder Sharing within Lakka
1. In this next section, we will be showing you how to turn on SSH within the Lakka interface as well as showing you how to enable its folder sharing capability.
Turning on Lakka’s inbuilt support for Samba folder sharing will make the process of copying things such as ROMs to the Raspberry Pi much simpler.
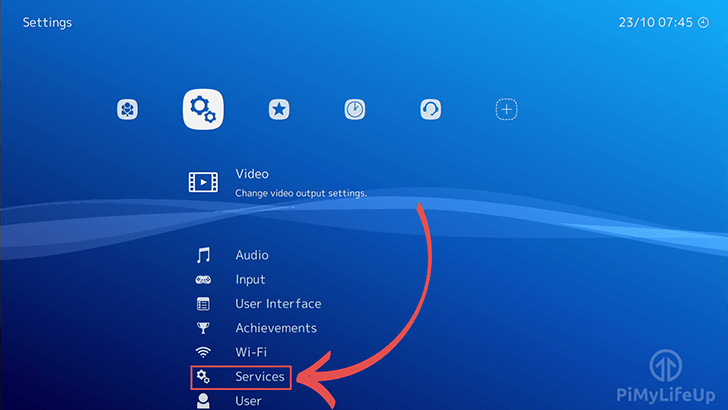
Return to the Settings menu and open up the Services submenu as we have highlighted below.
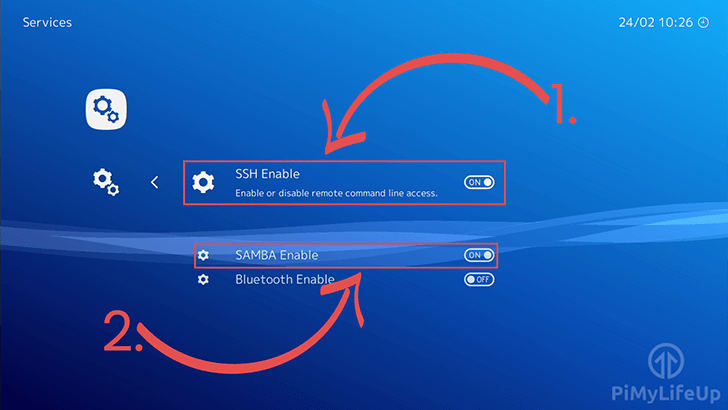
2. Within this menu, you can enable or disable the SSH and SAMBA services. For most people, it is safer to keep SSH disabled unless you intend on utilizing it.
SAMBA, however, is very useful for most users. It is the service that allows Lakka to share its folders over a network.
Enabling this will allow you to easily copy your ROMs from your computer to the Raspberry Pi easily.
Copying ROMs over to Lakka
1. In this section we will be showing you the simple process of copying over ROMs from your device to your Raspberry Pi’s Lakka installation.
If you activated Samba in the previous section then you can simply open up “File Explorer“.
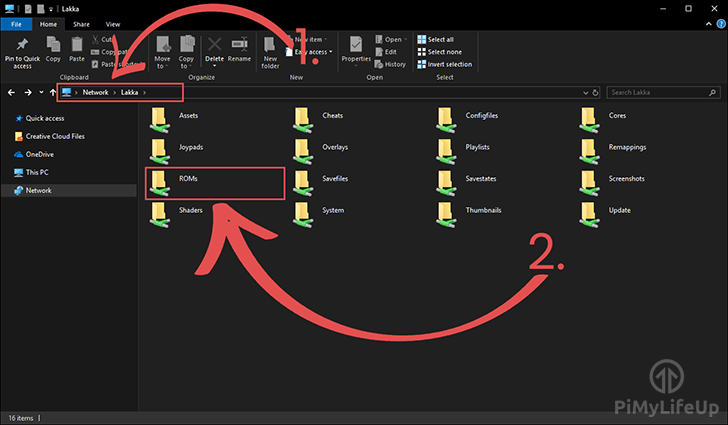
In File Explorer type into the address bar (1.) the following, “//Lakka/” and press enter. This should make a connection to your Raspberry Pi and allow you to access the shared folders.
If for some reason the connection fails you can try using the IP address you retrieved earlier instead of “Lakka” so in the address bar you would enter something like “//192.168.0.130/” instead.
Now if a successful connection has been made to your Raspberry Pi’s Lakka installation you should see a bunch of different folders.
The folder that we are most interested in is the folder called “ROMs” (2.), open up this folder.
2. Once you are in the ROMs directory you can now copy all of your ROM’s from your device to the Raspberry Pi.
Please note that it is best to keep the ROM’s sorted into folders based on the console that they are from. For example the game Doom 64 for the Nintendo 64 would be in a folder called Nintendo 64.
While Lakka’s Retroarch scanner works hard to detect what console a game is from the system isn’t perfect and can have issues detecting games from time to time.
In the next section we will explore how you import the ROMs using the Lakka interface, this is a very simple process and doesn’t take a huge amount of time.
Importing ROMs using Lakka’s interface
1. Now we are into the last important section of this guide, and that is importing the ROMs that are within your ROMs folder.
To do this, you need to go to the Import Content menu. If you can’t remember from earlier, this is the menu with the [+] sign as its symbol, it is also the last menu in the row.
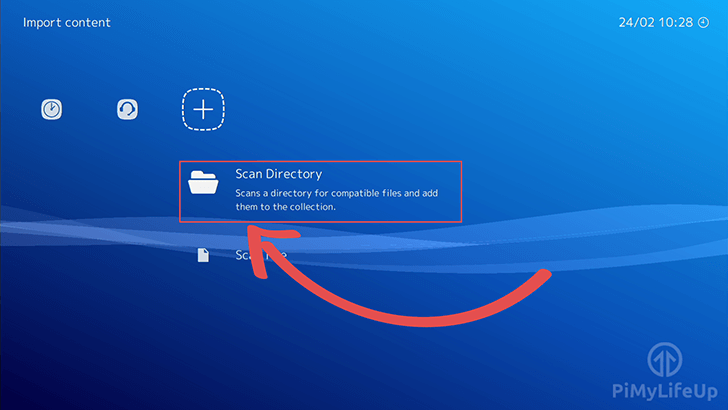
Once you are in the Import Content menu as shown below, go into the Scan Directory tool.
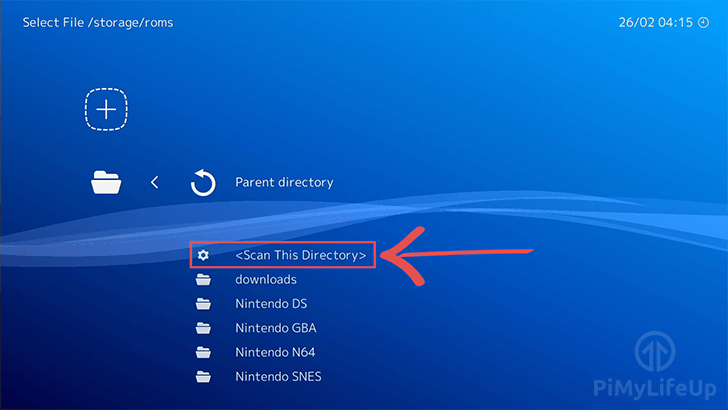
2. Now that you are within the Scan Directory tool you just need to click the <Scan this Directory> option as shown below.
Lakka will begin to immediately scan the directory and add the ROMs into its library. This process can take some time if you have an extensive collection.
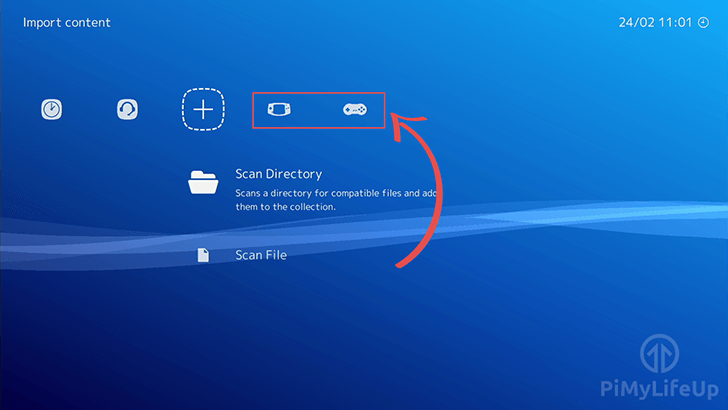
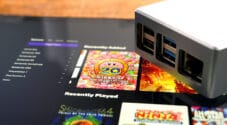
3. Once the import process has finished, you will now be able to run your ROMs. You can find them by returning to the main menu screen and looking on the far right of the menu bar.
You will see an icon is representing each console that you have ROMs for. For example, the SNES is represented by a SNES controller icon.
Once you have gotten to this point, you can now proceed to using your Raspberry Pi to run these games.
The process of running the ROMs is simple as finding it in the relevant list, opening it and selecting the “Run” option.
I hope that this Raspberry Pi Lakka tutorial has shown you everything you need to know for getting your own retro gaming console up and running.


Can games be run remotely using a remote desktop from a Windows PC?
Hi Alan,
For something like that I would highly recommend using a tool like Moonlight on your Raspberry Pi. Moonlight allows you to stream video games from your main PC while maintaining low latency and good quality.
The other alternative would be to use Steam Link on your Raspberry Pi but that kind of pigeonholes you into relying on the Steam client.
Kind regards,
Emmet
You have to use the root username and password when you connect to Lakka via Samba for the first time. (Not mentioned in this guide.)
What game is on main picture (in the background of rpi)?:-) Looks cool.
Hi Paul,
The game that we were running off Lakka on our Raspberry Pi was Metal Slug Advance!
Cheers,
Emmet