In this tutorial, we will walk you through compiling and installing EmulationStation on a Raspberry Pi.
EmulationStation is a frontend for emulators, giving you a graphical interface for accessing all of your favorite games. It even features support for controllers, which allows you to use the interface without needing a keyboard attached.
If you have used RetroPie on your Raspberry Pi, then you will have utilized EmulationStation before. It is a core part of RetroPie and is what lets you sort and configure your games.
Using EmulationStation on your Raspberry Pi you can start building your own alternative to RetroPie. Please note that EmulationStation doesn’t come with any emulators, so you need to set those up yourself.
Over the next couple of sections, you will prepare your Pi for EmulationStation then install the software by using the RetroPie setup script.
If you want a ready-to-go solution for running emulators on your device, check out our retro gaming on the Raspberry Pi guide.
For this guide to work you will need to be using a “lite” version of Raspberry Pi OS. EmulationStation may not function correctly when running on a full desktop environment.
Equipment
Below is the equipment we used for setting up and running EmulationStation on a Raspberry Pi.
Recommended
- Raspberry Pi Amazon
- Micro SD Card Amazon
- Power Supply Amazon
- Ethernet Cable Amazon or Wi-Fi Amazon
- Xbox Controller Amazon or PlayStation Controller Amazon (PS3, PS4 or PS5 Controller)
- HDMI Cable Amazon
Optional
This tutorial was tested on a Raspberry Pi 400 running Raspberry Pi OS Buster.
Preparing the Raspberry Pi for EmulationStation
Before installing EmulationStation on our device, we will need to do some initial preparatory work. This process will mainly revolve around installing all the packages we require.
1. Our first step is to perform an update to our Pi’s operating system. We can complete the update by using the following two commands.
sudo apt update
sudo apt full-upgrade
The first command will update the package list. This list is what is used to find available packages and check for updates.
The second command that we are running performs an upgrade of all installed packages with an available update.
2. With our Raspberry Pi Pi now up to date, let us install any dependencies we need to install EmulationStation.
You can install the package we need on your device by running the following command.
sudo apt-get install -y gitThe only package that we need for this to work is git. We will be using git shortly to grab the script that we need to install EmulationStation.
3. Our final step of prep work is to clone the latest version of the RetroPie-Setup script to our Raspberry Pi. This process is made super simple as we installed the “git” package earlier.
Run the following command to clone the latest version of the script to your device.
git clone --depth=1 https://github.com/RetroPie/RetroPie-Setup.gitYou might be wondering why we are downloading the RetroPie setup script. This is because it makes the process of installing EmulationStation on the Raspberry Pi very simple.
Alternatively, we would have to clone and compile several other packages such as SDL to get EmulationStation running. This script we are using handles all of this for us and is continually maintained by the RetroPie team.
We use the “--depth” option to ensure that we only grab the latest commit to the repository. This option lightens the amount we need to download to the Raspberry Pi.
Installing EmulationStation on the Raspberry Pi
Now that we have prepared our Raspberry Pi, we can install EmulationStation on the Raspberry Pi. Installing this software is a very straightforward process as we will use the RetroPie setup script.
1. Before running the setup script, we need to change into the directory that we cloned in the latest section.
To change into this directory, we can use the following cd command in the terminal.
cd RetroPie-Setup2. Once we are in the correct directory, we can now run the RetroPie setup script.
Using this script, we can install specific components of RetroPie. In our case, this means we can install EmulationStation to our Raspberry Pi.
sudo ./retropie_setup.shWhen you first run the setup script, it will install any dependencies that it might require to operate.
3. As we don’t want to install the entirety of RetroPie for this guide we must switch to the “Manage Packages” screen.
You can do this by pressing the P key, then by pressing ENTER.
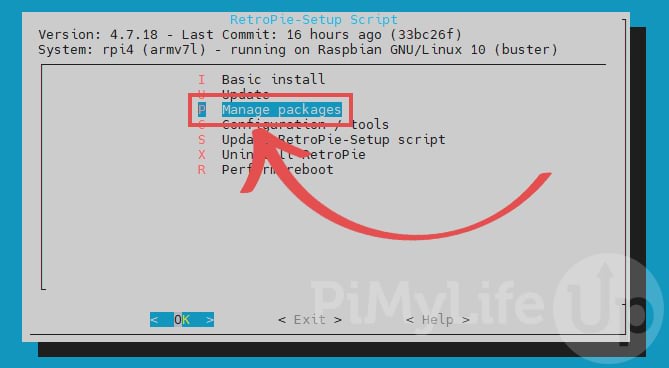
You can also navigate these menus by using the ARROW keys. However, for simplicity, we will be mentioning the shortcut keys throughout this section.
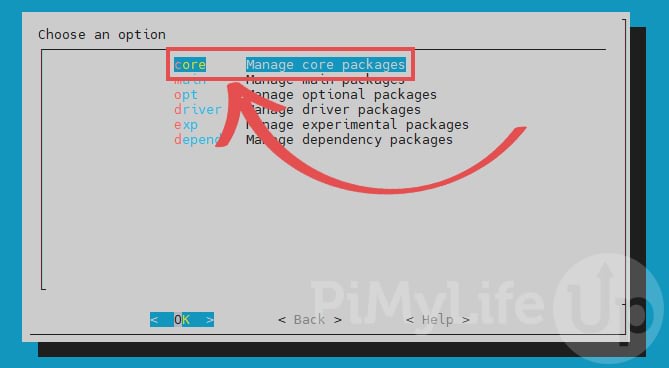
4. As EmulationStation is a core package for RetroPie, we can switch straight into the first option by pressing the ENTER key.
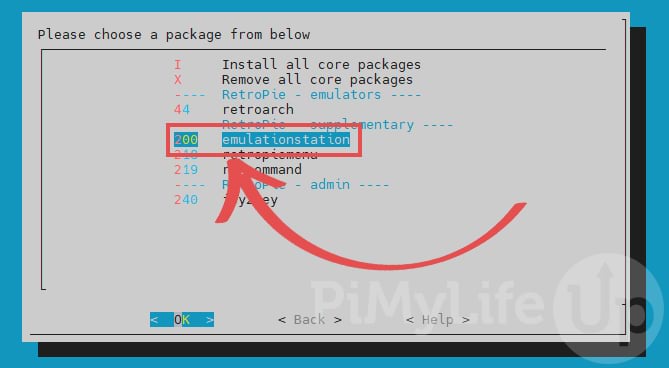
5. Within this next menu, you need to select the “emulationstation” option. You can do this by pressing 2, then the ENTER key.
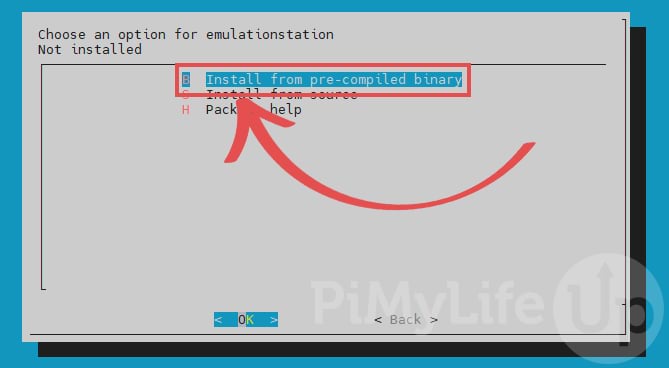
6. Now, you can either install by source code or by installing pre-compiled binary provided by the RetroPie team.
We will be using the pre-compiled binary option for this tutorial as it is far faster to install them. Select this option by pressing B, then the ENTER key.
7. You will now be asked to confirm your choice to install EmulationStation to your Raspberry Pi from the RetroPie pre-compiled binary.
Press Y on your keyboard then the ENTER key to proceed with the installation.
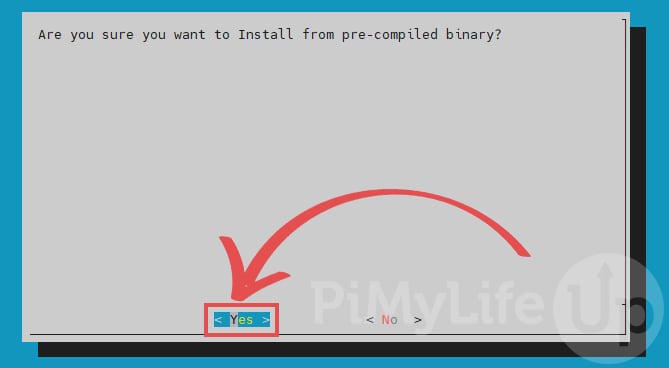
Please note that this process will take some time as a considerable number of packages need to be installed.
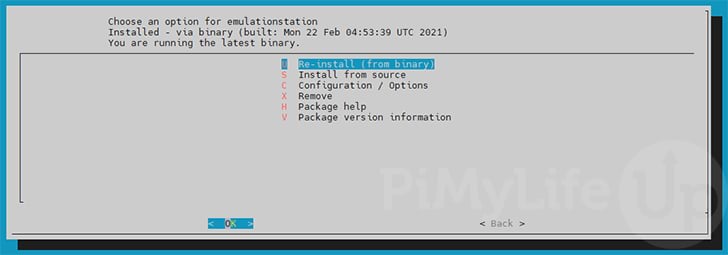
8. Once the installation process has finished, you will see the screen below.
Now that you have installed EmulationStation, you can quit by pressing the ESC key till you return to the command line.
9. With EmulationStation installed, we need to start it to generate some initial configuration files.
Run the following command to fire up the software on your Pi.
emulationstation10. Upon running EmulationStation for the first time, you will run into the following error. Don’t worry about this, as we will show you how to configure the software in the next step.
Press the ENTER key to exit back out of the software.
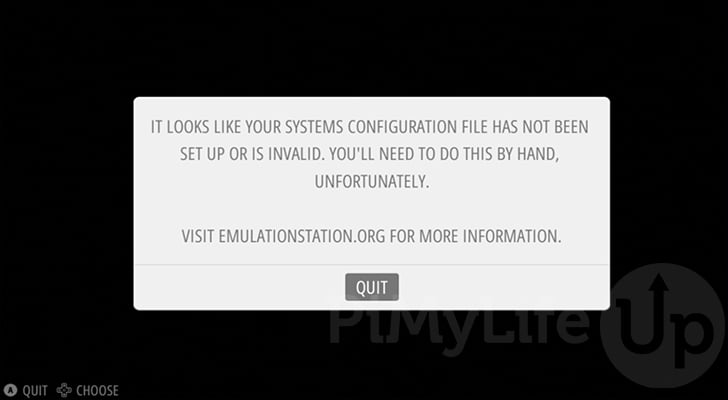
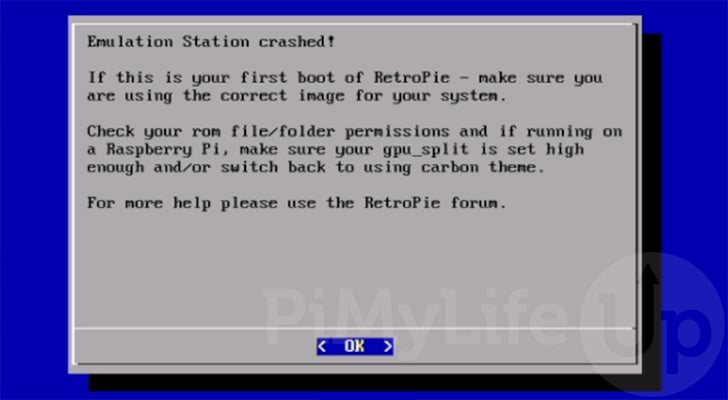
11. Upon quitting out of EmulationStation, you will run into the following error. You can safely ignore this.
This error only appears as we are using the RetroPie build of the software, and it expects several things to be appropriately configured from the get-go.
Press the ENTER key to return to the terminal.
Configuring EmulationStation
Before using EmulationStation on your Raspberry Pi, we must configure at least one system to emulate.
In this section, we will quickly check out the EmulationStation configuration file and give you an overview of how you can configure a system.
1. To begin, let us start editing one of EmulationStation’s configuration files. The file we will be editing here stores the systems you want to be included as part of the software’s interface.
To begin editing this file using the nano text editor, you can run the following command.
nano ~/.emulationstation/es_systems.cfg2. Within this file, you will find the following text has already been set. This text is a basic configuration saved when you first run EmulationStation to give you an idea of how you define a system.
<systemList>
        <system>

                <name>nes</name>

                <fullname>Nintendo Entertainment System</fullname>

                <path>~/roms/nes</path>

                <extension>.nes .NES</extension>

                <command>retroarch -L ~/cores/libretro-fceumm.so %ROM%</command>

                <platform>nes</platform>

                <theme>nes</theme>
        </system>
</systemList>
With this example file in hand, let us run through it to understand how EmulationStation handles each option.
<systemList>Everything you set within this file needs to be kept within this tag. This tag indicates a list of systems that EmulationStation will look for.
The file should always start with this tag being opened.
<system>Every system that you want to define within this file needs to be wrapped in this tag. This tag indicates the start of a new system.
You don’t close this tag until the end of your settings for that system.
<name>shortname</name>The name tag needs to contain a shortened name for your system. It is used internally by EmulationStation on your Raspberry Pi. You should typically write this value in lowercase.
This tag is required as it is used internally by the graphical frontend to identify this system within the code.
For example, if we were setting this up for a PlayStation 3 emulator, we would use “<name>ps3</name>“.
<fullname>Longer Prettier Name For Display</fullname>The fullname tag allows you to specify a longer, prettier name for your system. The name stored within this tag will be displayed within EmulationStation in things such as menus.
This tag is optional and will fall back to the value name set in the name tag when not set.
If we were to set this for a PS3 emulator, we would use this like the following “<fullname>PlayStation 3</fullname>“.
<path>~/roms/exampledirectory</path>The path tag is used by EmulationStation so that you can specify where these ROMs exist on your Raspberry Pi. The software will include all subdirectories.
EmulationStation requires this tag to be set to know where to scan for ROMs for this system.
For example, if you were to store ROMs based on the system name within a directory called “roms“, you might write this tag like “<path>~/roms/ps3</path>“.
<extension>.example .EXAMPLE .eg .EG</extension>The extension tag is used to specify the file extension names that the scraper should look for when searching the directory specified in the path tag. The file extensions are case sensitive and must include the period (.) at the start of the extension.
You can specify multiple file extensions within this tag. However, they must be separated by whitespace. This whitespace is typically a single space.
This tag is required to be set for EmulationStation to scan for your ROMs. Without this the software will not know what to look for.
For example, if our ROMs were stored as an .iso file we would use the following setting, “<extension> .iso .ISO</extension>“.
<command>emulatorcommand %ROM%</command>We can use the command tag to specify the command that the software should use to run your emulator. EmulationStation will execute this command when a ROM is selected within its interface.
When filling out this tag, you need to type in the command you want to be executed. Where you would typically write the path to your ROM, you would instead use “%ROM%“. The “%ROM%” text will be automatically replaced with the path to the game you selected.
Remember that you will need to have installed this emulator previously for EmulationStation to run it on your Raspberry Pi.
This tag is required as without it, the interface will not know how it can run your game as EmulationStation does not contain any emulators of its own.
<platform>psx</platform>Using the platform tag, you can tell your EmulationStation what platform this “system” is for. If this corresponds to a supported platform, then the software will scrape information for those ROMs.
You can find a list of platforms supported by EmulationStation’s scraper by looking at the PlatformId.cpp file.
This tag is optional, but it helps EmulationStation get more information about the ROMs on your Raspberry Pi.
<theme>themeName</theme>The final tag we will be exploring is the theme tag. This tag is used to specify a theme to load from the current theme set.
You can read the official documentation on EmulationStation themes to understand how this works.
This value is optional and will automatically full-back to the value set within the name tag.
</system>Once you have entered all the tags that make up your system, you need to ensure you have the closing system tag included.
</systemList>The final tag included in your file should be the closing element for the systemList tag. This closing tag will indicate an end to your list of systems.
3. Now that we have quickly run down through all the values, let us add the SNES as an additional system to the example configurations system list.
The following lines will define a “system” for the SNES console, filling out all the tags we referred to in the previous step.
        <system>
            <name>snes</name>

            <fullname>Super Nintendo Entertainment System</fullname>

            <path>~/roms/snes</path>

            <extension>.sfc .SFC</extension>

            <command>retroarch -L ~/cores/libretro-snes9x2010.so %ROM%</command>

            <platform>snes</platform>

            <theme>snes</theme>
        </system>
We would add this new system below the existing one generated by the software when you first started it.
4. Once you have added your system into this file, you will need to save and quit out of the file.
You can save and quit by pressing CTRL + X, then Y, followed by the ENTER key.
5. Before you rerun EmulationStation, you will need a ROM for one of the defined systems.
Once you have one, make sure you place it into the path you specified for that system in the config file.
Running EmulationStation on the Raspberry Pi
Once you have configured your system’s file and added a valid ROM, you will finally be able to start EmulationStation on your Raspberry Pi.
The following steps will walk you through the process of running EmulationStation .
1. On your Raspberry Pi, type in the following command to launch the EmulationStation software.
emulationstation2. When you first run EmulationStation on your Raspberry Pi, you should be greeted with the following welcome screen.
To continue, you need to either hold down a key on your keyboard or a button on a gamepad.
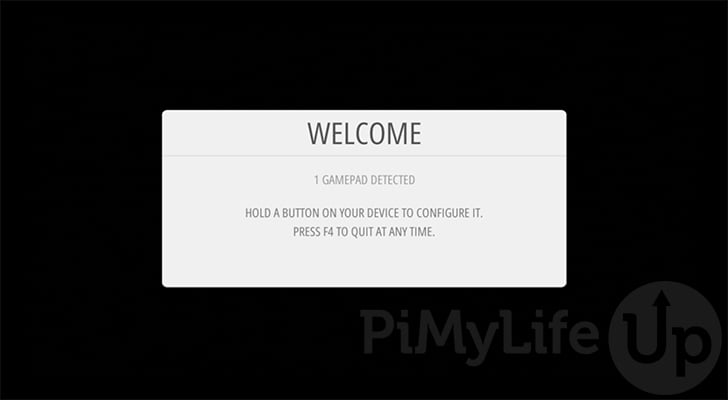
Please note if you see an error screen, you will need to make sure that you have added your system correctly and ensured a ROM is available in its directory.
3. Next, you will need to configure the controls for the software. This dialog will run through various controls. Press the button on your keyboard or gamepad that you want to be associated with that action.
EmulationStation will use these settings for navigating through its various menus.
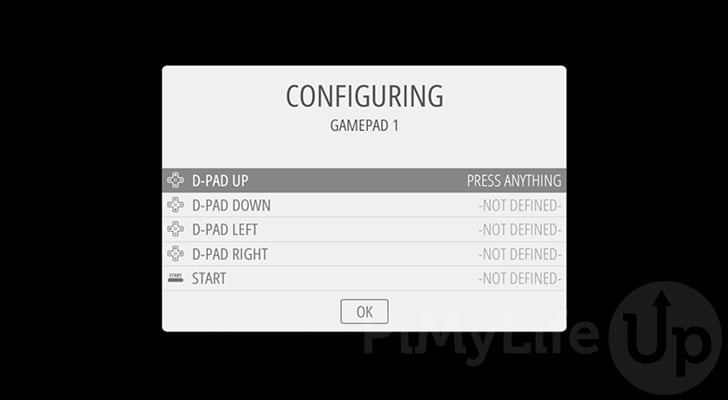
If you want to skip setting a button, all you need to do is hold down any key, and it will skip to the next option.
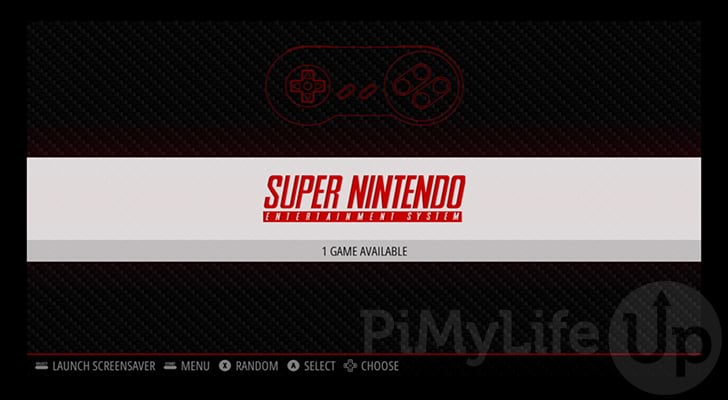
4. You have now successfully gotten EmulationStation up and running on your Raspberry Pi.
You can now continue to configure and tweak the graphical frontend to how you like it.
Conclusion
Hopefully, by this stage in the tutorial you will have installed and configured EmulationStation to your Raspberry Pi.
We use the RetroPie fork of the software as it has been more consistently updated and has a straightforward setup script that we can use to install the graphical frontend.
Be sure to check out our many other gaming Raspberry Pi projects. If you want a complete setup, you should check out Lakka or RetroPie.
Please drop a comment below if you have run into any issues getting the software up and running on your Pi.