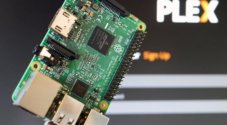
In this tutorial, we will be showing you how to install the official Plex Media Player to the Raspberry Pi.
Using the Plex Media Player, you will be able to play media files delivered from your Plex Media Server.
One of the most significant advantages of Plex is that it can transcode video files to your devices. Transcoding allows even a device like the Raspberry Pi to play a vast range of video files.
While RasPlex is often the go-to method for getting a Plex client on the Raspberry Pi, it has no support for the Raspberry Pi 4.
There are advantages to making use of the Plex Media Player over the alternatives like RasPlex and PlexKodiConnect. These advantages include access to all of the latest Plex features as soon as they are implemented.
However, the downside is that the Media Player is a lot more resource-intensive, and you will need to compile it yourself.
Please note that before you start this tutorial, you need to use a Raspberry Pi 4 for optimal performance. If you are using an older Raspberry Pi, we recommend that you use either PlexKodiConnect or RasPlex.
Warning, Plex have completely dropped support for the Plex Media Player code base. It is now in archived mode meaning no fixes will be pushed to the repository.
Equipment List
Below is the list of equipment that you will need to get your Raspberry Pi powered Plex client up and running.
Recommended
- Raspberry Pi Amazon 4
- Micro SD Card Amazon
- Power Supply Amazon
- Ethernet Cable Amazon or Wi-Fi Amazon
- HDMI Cable Amazon
- Monitor Amazon
Optional
For this tutorial on setting up the Plex Media Player, we were using a Raspberry Pi 4 running the latest available version of Raspberry Pi OS Desktop (Bullseye).
Preparing to Compile the Plex Media Player, on the Raspberry Pi
In this section we will be preparing your Raspberry Pi to compile the Plex Media Player software.
Before you begin, you need to make sure you are running a version of the Raspberry Pi OS that features a desktop interface. We recommend that you use the version that does not come with the recommended packages.
1. Warning: Plex has discontinued support for the Plex Media Player code base. The repository is archived, which means no further updates will be made. This tutorial is kept online for archive purposes only.
Our first task is to make sure all of our packages are up to date.
We can achieve this by running the following two commands.
sudo apt update
sudo apt full-upgradeCopy
2. Our next task is to ensure all the packages we need for the following sections exist on the operating system.
Run the following command to install all the required packages.
sudo apt install -y autoconf make automake build-essential gperf yasm gnutls-dev libv4l-dev checkinstall libtool libtool-bin libxslt1-dev libre2-9 libminizip1 libharfbuzz-dev libfreetype6-dev libfontconfig1-dev libx11-dev libcec-dev libxrandr-dev libvdpau-dev libva-dev mesa-common-dev libegl1-mesa-dev yasm libasound2-dev libpulse-dev libbluray-dev libdvdread-dev libcdio-paranoia-dev libsmbclient-dev libcdio-cdda-dev libjpeg-dev libluajit-5.1-dev libuchardet-dev zlib1g-dev libfribidi-dev git libgnutls28-dev libgl1-mesa-dev libgles2-mesa-dev libsdl2-dev cmake python3 python3-pip python git mpv libmpv-devCopyThere is quite a large number of packages to install, so this process may take some time.
3. Once the installation process completes, we can utilize the Python 3 package manager called “pip” to install a newer version of Meson and Ninja than is available through the package repository.
To install the Meson and Ninja Python packages, you will need to run the command below.
sudo pip3 install meson ninjaCopyCompiling MPV on the Raspberry Pi
One of the requirements to compile the Plex Media Player on your Raspberry Pi is to have the mpv libraries.
In this section, we will be walking you through the steps to get MPV compiled.
1. We first need to clone the MPV master branch to our Raspberry Pi by running the following command.
git clone https://github.com/mpv-player/mpv-build.gitCopy2. Next, we need to change into the newly cloned directory. You can change in to this directory by using the command below.
cd mpv-buildCopy3. Before we compile mpv, we will need to make some changes to its configuration options.
We can do this by adding two lines to the mpv_options file.
Run the following two commands to adjust the compilation options.
echo --enable-libmpv-shared > mpv_options
echo --disable-cplayer >> mpv_options
echo --extra-libs="-latomic" >> ffmpeg_optionsCopy
The first command adds an option telling it to compile the shared MPV libraries.
The second command disables the command line interface for MPV as we don’t need that for the Plex Media Player.
4. The last thing we are required to do is to tell the build scripts to use the release versions of MPV, FFMPEG and libplacebo.
We can achieve this by running the following three commands.
./use-mpv-release
./use-ffmpeg-release
./use-libplacebo-releaseCopy
5. Start the compilation process by using the following command within the terminal.
BUILDSYSTEM=waf ./rebuild -j$(nproc)CopyBy using $(nproc) we are telling it to use as many jobs as we have processes. For the Raspberry Pi 4, this will be four active jobs.
Please note that this process can take considerable time to complete. It has to clone and compile FFMPEG, MPV and libplacebo on your Pi.
6. Once the compilation process has completed, we can now install the libraries to our Raspberry Pi’s operating system.
To achieve this, we just need to run the command below.
sudo BUILDSYSTEM=waf ./installCopy7. Finally, run the following command so that the operating system knows there are new libraries it needs to link to.
sudo ldconfigCopyObtaining QT for the Raspberry Pi
In this section, we will be getting our last required component for the Plex client.
This component is the Qt library. This library is used to drive the graphical interface of the Plex Media Player. As we need Qt to have been compiled with the web engine library we can’t use the package available through the repository.
1. Luckily, we have provided a pre-compiled version of this package that has everything you need to compile the player.
You can download Qt to your Raspberry Pi by using one of the following wget command‘s within the terminal.
If you are using a 32-bit version of Raspberry Pi OS then run the command under step A. If you are using a 64-bit version of Raspberry Pi OS, follow step B.
A. Use the command below to download the 32-bit version of QT for the Pi.
wget https://files.pimylifeup.com/plexmediaplayer/qt5-opengl-dev-nobrcm_5.15.2_armhf.deb -O qt5-opengl-dev-nobrcm_5.15.2.debCopyB. The command below will download the 64-bit release of Qt to your Pi.
wget https://files.pimylifeup.com/plexmediaplayer/qt5-opengl-dev-nobrcm_5.15.2_arm64.deb -O qt5-opengl-dev-nobrcm_5.15.2.debCopy2. We can install the package that we just downloaded by running the following command.
As we no longer need the package after installing it, we will also be deleting it.
sudo apt install -y ./qt5-opengl-dev-nobrcm_5.15.2.deb
sudo apt --fix-broken install
rm qt5-opengl-dev-nobrcm_5.15.2.debCopy
At this point, you should now have QT and mpv installed to your Raspberry Pi.
Compiling the Plex Media Player on a Raspberry Pi
With everything now set up, we can clone and compile the Plex Media Player to our Raspberry Pi.
1. Let us start by making sure we are currently in our home directory.
We can change to the home directory by running the command below.
cd ~CopyThe tilde (~) is used as a reference to the home directory.
2. Now clone the Plex Media Player repository to your Raspberry Pi by using the command below.
git clone https://github.com/plexinc/plex-media-playerCopy3. To compile the Plex client we need to make a build directory for it.
Create this directory and change into it by running the following two commands.
mkdir ~/plex-media-player/build
cd ~/plex-media-player/buildCopy
4. We can now use CMake to configure the source code for compilation.
cmake -DCMAKE_BUILD_TYPE=Debug -DQTROOT=/opt/Qt/5.15.2/ -DCMAKE_INSTALL_PREFIX=/usr/local/ ..CopyCMake will auto-detect features that it can enable or disable for our Raspberry Pi.
5. Now let us compile the Plex Media Player by using the following command.
make -j$(nproc)CopyPlease note that on older Raspberry Pi’s, this process may take some time. Using a Raspberry Pi 4, this process only took us about 5 minutes.
6. Our final task is to install the freshly compiled binaries to our operating system.
We can achieve that by making use of the following command.
sudo make installCopyOpening the Plex Media Player
To open the Plex Media Player on your Raspberry Pi, you will need to make use of the terminal.
1. Within a terminal session on your Raspberry Pi, run the following command to open the Plex Media Player.
To avoid a potential crash that can occur, we will be disabling the Qt’s web engine sandbox by setting the “QTWEBENGINE_DISABLE_SANDBOX” environment variable to 1.
QTWEBENGINE_DISABLE_SANDBOX=1 plexmediaplayer --fullscreen --tvCopyThis command will launch the software in full-screen mode on your device.
2. You should now be able to log in to your Plex account and gain access to your Plex library.

You should now have the Plex Media Player up and running on your Raspberry Pi.
Starting the Plex Media Player on Start Up
Now that you have the Plex Media Player installed on your Raspberry Pi, you will probably also want it to start at boot on your device.
1. Before we can get started, we need to create a directory to store our configuration file.
This directory may exist already, but it doesn’t hurt to run the following command anyway.
mkdir -p /home/$USER/.config/autostartCopyThe current users name is stored within the “$USER” environment variable. If you are setting this up for a different user then replace “$USER” with their name.
2. To get the Plex Media Player to start at startup, we will need to create a special “.desktop” file within the folder we just created.
This file will be automatically interpreted when the operating system starts up the desktop interface.
Begin writing this file by running the following command on your Raspberry Pi.
nano /home/$USER/.config/autostart/plexmediaplayer.desktopCopy3. Within this file, you will need to add the following lines.
[Desktop Entry]
Type=Application
Name=Plex Media Player
Exec=env QTWEBENGINE_DISABLE_SANDBOX=1 plexmediaplayer --fullscreen --tvCopy
These lines are pretty straightforward and define the application we want auto-started. Using the “exec” option, we are telling it to run the Plex Media Player.
4. Once you have added these lines into this new file, you can save and quit by pressing CTRL + X, then Y, followed by the ENTER key.
5. Our next step is to ensure that your Raspberry Pi will boot directly to start up without requiring to be logged in.
To easily modify this setting, we can use the Raspberry Pi Configuration tool. This tool is installed by default on all versions of Raspberry Pi OS.
sudo raspi-configCopyYou can navigate this menu using the ARROW keys. When you want to select an option, you can press the ENTER key.
6. Within the config tool, change to the “System Options” menu. At the time of writing, this is the first option.
Next, you will need to select the “Boot / Auto Login” menu.
Finally, select the “Desktop Autologin” option. This option will allow your Pi to boot directly to the desktop without requiring you to login.
7. At this point, your Pi should be set to run the Plex Media Player at startup.
You can verify that this is working at startup by restarting your Raspberry Pi.
sudo rebootCopyConclusion
At this point, you should now have the Plex Media Player running on your Raspberry Pi.
The Plex Media Player is a reasonably resource-intensive player but is one of the best ways of viewing Plex content on your Pi.
As we compile the official source code, it means you will have access to the latest features as they are pushed to the official repository.
If you have any issues with getting this set up on your Pi, feel free to leave a comment below.
Also, be sure to check out some of our other Raspberry Pi media projects.


Hallo
Love your work. Just tried to install Plex Media player on Raspberry Pi 5, RaspiOS
Operating System: Debian GNU/Linux 12 (bookworm)
Kernel: Linux 6.6.47+rpt-rpi-v8
Architecture: arm64
Getting a few errors or problems when following the tutorial. So basically when I get to the end plexmediaplayer does not want to open.
Is the tutorial’s commands still valid as of 9 Sep 2024?
Hi Ivan,
Unfortunately, the open source version of the Plex Media Player has been abandoned quite some time ago and as far as I have worked out, won’t function on the newer versions of Raspberry Pi OS without some major changes.
What I have been playing around with personally is actually using Waydroid to run the official Plex android app. It’s not perfect but in my little bit of testing so far it seems to be a decent alternative. It seemed to work perfectly with 1080p, struggled a bit with 4K HDR, but I didnt have any standard 4k files sitting around to test at the time.
Kind regards,
Emmet
You guys are awesome!
I made a plex client on buster using this guide more than a year ago. Figured I’d try to update my rpi to bullseye but it broke my plex client so I figured I try to recompile it on a fresh install. Went here to check if my notes were correct and saw to my amazement you updated the guide to work on bullseye!
Used it and it worked without any hitch! 😀
But here is my question, the img of a backup becomes pretty big. What can I remove to slim the size down?
Can I just purge all “dev” related packages I installed?
How about ~/mpv-build and ~/plex-media-player?
Thanks again for your awesome work!
Hi Bedna,
I am really glad to hear that this tutorial has proved useful for you!
After installing the Plex Media Player you can safely remove both the “mpv-build” and “plex-media-player” directories as we only needed them to compile the code.
On the case of the “dev” packages you just have to be careful when removing them as it may remove things that either the Plex media player or another piece of software relies on.
Cheers,
Emmet
Hi Emmet,
As of February 13 2023, the installation is not working anymore. I’m on a RaspiOS 64bit Bullseye (8 Gb RAM) and at the : ./rebuild -j4 the installation complains about those two lines above:
echo –enable-libmpv-shared > mpv_options
echo –disable-cplayer >> mpv_options
If I ignore them (not using them), in the end, on: sudo ./install it gave me an error, I forgot which one, but couldn’t continue after that.
So please, is it possible to have an update on this tutorial please? Thank you (The hardest part is to manually insert all the packages 🙂 )
Hi Mihai,
We just made some adjustments to the tutorial, please try the updated steps to see if it fixes the issues you are facing.
Cheers,
Emmet
meson seems to be broken. If you change to “BUILDSYSTEM=waf ./rebuild -j4” and “BUILDSYSTEM=waf ./install” it will work as of 26 Jan 2023.
yes, this helped me (Feb 9 2023) – thanks!
Also, I had to execute ” sudo -E ./install ” after rebuild mpv because I was having access rights error without sudo and just with sudo (without -E) the command did not work
WOW! Thank you a lot. One of the best guide I ever followed.
Hi!
When using this guide after sudo ./install i get the following warning “The project was not configured: run “waf configure” first”.
What to do?
Hi LE,
There were issues with the previous version of this tutorial. They have been fixed with the latest update and you should now be able to install the Plex Media Player to your Raspberry Pi.
Cheers,
Emmet
I followed this tutorial quite a while back (April?) to build Plex Media Player for my two RPi4 media players, running 32-bit Buster. Today I rebuilt one of them on 64-bit Bullseye, and it’s working great – thanks so much for keeping this up-to-date and solving the Bullseye/64-bit challenge! I did run into a couple build issues with mpv, which seem to derive from recent changes – found solutions and wanted to share them:
1) At step 6 (sudo ./install), I received an error regarding waf reconfigure; a thread on mpv compile errors on recent ubuntu had the answer – run these three commands:
sudo apt-get install devscripts equivs
mk-build-deps -s sudo -i
dpkg-buildpackage -uc -us -b -j4
Then try the ./rebuilt -j$(nproc) command again.
2) And, it’ll fail again, this time because it requires Meson 0.59 or higher, and the repository version is still 0.56.2 … another thread had a workable solution here, get rid of the repo version and load it up directly into your user profile via pip3.
sudo apt-get purge meson
sudo apt-get autoremove
pip3 install –user meson
After this, you need to reload your .profile in order to find the new meson (logoff/logon makes quick work of it too). Then, resume again at /rebuild -j$(nproc) and everything goes perfect after that.
I also noted some nasty screen tearing when I had the new compositor enabled in raspi-config – turned it off (the default, I should’ve let it be!) and video is nice and smooth.
My only complaint is … damn, why did they discontinue support of this player? It’s a nice clean interface, and so easy to control by keyboard-only (and therefore by a remote). It meets about 95% of my needs, but unfortunately does not have the “Watch together …” option, which I very much need as my eldest is about to move out of the house and we want to continue family movie nights together. Any recommendations on alternatives for that? The only one I can think of at this hour would be to run the web player full-screen in Chromium (possibly in a kiosk mode to reduce risk of folks dropping out of it by accident) – but controlling that by keyboard-only (and by TV remote) doesn’t look likely, and I want to make this simple for other users in the house. I’d have them remote-play to it from their phones (a little messy but works), but “Watch together” doesn’t support remote play or casting. 🙁
Excellent tutorial, thank you!
I wanted to ask: does the simplink (controlling the player app with the TV remote via HDMI connection) work too (like with the RasPlex)?
If not – can it be solved/added?
Hi Nav,
This is not something I’ve personally tested. Since simplink is just HDMI-CEC it should work, but I haven’t tested that either with the Plex Media Player.
Cheers,
Emmet
Due to recent changes in mpv-build repo I had to add following to make compile work:
pip3 install meson
./use-libplacebo-release
I’m really looking forward to getting a reliable Plex Player running. I have a PlexMedia Server running on an RPi3B+ which is accessible to my Windows PCs on my home network. I am attempting to set up an RPi4 with the Plex Player. The RPi4 is connected to a living room TV. It seems that others have been successful but I was tackled out of the gate after updating and upgrading (Unable to locate package libre2-9):
An ideas on how to remedy? Thanks! System info below:
Hi Al,
This tutorial has been updated to work with the latest release of Raspberry Pi OS (Currently Bullseye at the time of writing). It looks like you are currently using the older “Buster” release.
You may be able to work around this by replace “libre2-9” with “libre2-5” in the package install line.
Cheers,
Emmet
HI Emmet,
This solution worked perfectly, appreciate all you work, and the project was a fun way to kill half a day while in COVID isolation.
Thanks Stuart
Hi, this is fantastic, thanks for all your hard work. The issue i am having is trying to get it to automatically run when booting up, to run:
mkdir -p /home/pi/.config/autostartI had to run
Sudo mkdir -p /home/pi/.config/autostartas i kept getting a message:mkdir: cannot create directory '/home/pi': permission deniedthen i ran
nano /home/pi/.config/autostart/plexmediaplayer.desktopand added in the lines to run Plex Media PlayerI then went back to the non superuser user name, that i log in the Pi with, and change to the boot/Auto Login option.
Rebooted the Pi and it only boots to the desktop, not Plex.
Just hoping you can give me a little help.
Hi Stuart,
This issue is likely caused by a change in Raspberry Pi OS. Originally “pi” was the default user for all new installations. However, new installations make you choose your own username.
We have adjusted the tutorial so it now users the $USER environment variable so it should create the directories in the correct user.
Let me know if the updated steps fixes your issues.
Cheers,
Emmet
Based on the comments, it looks like this guide used to be for Buster but has been updated for Bullseye… Is the old Buster guide available somewhere? You have to use Debian Buster for SteamLink to work
Hi Mcwillz,
The only change that could break the compatibility with Buster is the version of Qt we compiled. However we still have the old version on our servers that you can use instead.
In the “Obtaining QT for the Raspberry Pi” section, download the following version of Qt rather than the one mentioned in the tutorial.
Please let me know if this works.
Cheers,
Emmet
Andrew, thanks for the steps for Bullseye – I’ll look at setting up cross-compile capability on one of my PCs and give that a whirl, I do remember reading on another project that the speed of the microSD cards really slows the compile steps and compiling can be hard on the cards as well (pretty sure that was a kernel recompile, a just a _little_ more wear and time than this would take!)
At the moment I’ve got both my Pi4 media players running Buster and Plex from this project, and they’re working great. The family is VERY pleased with the upgrade from Kodi on these, much more a “it just works” setup and I think they’re finding the interface a bit more intuitive.
Hello!
Great guide and excited to try this out – however, I ran into problems at the build of the Plex Media Player. I’m on a freshly-built Raspbian OS 64-bit system, and everything in earlier steps appears to have worked properly, however when I execute:
I get the following error:
Any recommendations?
Hi Cbarn,
Sadly this tutorial does not currently work on the 64-bit release of Raspberry Pi OS. Additionally it will not work on the Bullseye release of Raspberry Pi OS.
Currently you will need to use Raspberry Pi OS Buster 32-bit as the QT Library we link to is incompatible with both 64-bit systems and changes made within the Bullseye release.
Cheers,
Emmet
It *can* work on RaspiOS 64bit Bullseye.. but you have to do a few things differently.
1) You need to compile QT 5.15.2 LTS manually from source. It’s a bit of an adventure.. follow the guide here (note: Compiling on a Rpi4 takes a long time.. like start it and go to bed and check on it in the morning long time)
2) In the install PMP section, you’ll need to edit step 4 and instead use the following:
cmake -DCMAKE_BUILD_TYPE=Debug -DQTROOT=/opt/QT/5.15.2/ -DCMAKE_INSTALL_PREFIX=/usr/local/ ..
as the DQTROOT is slightly different.
Note: you will also need to Compile QTWebEngine (it’s reccommended to do it Separately). So be prepared for a lot of compile time. If you have a bramble, or were thinking of setting one up.. this might be the time as using dist cc might speed up your compile times. Or look at cross-compiling on a more powerful PC for your rpi.
I found I had to manually compile & install fridibi and harfbuzz as well (as they were prereqs for mpv that did not download by themselves) but you may have better luck.
Followed instructions and got Plex working great. Only problem is my black OSMC remote which worked perfectly on Plex on my Pi 3, works with this install all except the stop button which does nothing. I don’t suppose you have any ideas?
Great guide — I have two questions. First will this be usable via the touchscreen on the 7″ official RPi display? And second, if I wanted to use a Rpi 3B+ for an audio-only client to play music on my stereo setup would it still be too resource constrained? Or is it only for video that the significant resource requirements come into play?
Thanks for providing this!
Hi mjoe,
I haven’t personally tried it but I can’t see why it wouldn’t work with the touchscreen display.
While you can try the RPI 3B+, from memory there are some slight incompatibles that cause issues besides performance. I would have to setup a 3B+ to verify this though.
However if it does run, I personally can’t see it having any issues playing music.
Cheers,
Emmet