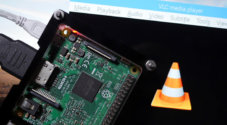
This tutorial will show you how to compile FFmpeg on your Raspberry Pi.

FFmpeg is an open-source project that consists of a considerable range of libraries.
These libraries are designed to deal with a variety of multimedia formats, whether that be an image, video, or audio format.
One of the best things about FFmpeg is that it can be compiled across a wide variety of devices, including the Raspberry Pi.
Using FFmpeg, you will be able to encode and decode a large variety of video and audio codecs.
Over the next few sections, we will show you how to install or compile FFmpeg on both a 32-bit and 64-bitt operating system.
Equipment List
Here is a list of the equipment we recommend for this tutorial on compiling FFmpeg on your Raspberry Pi.
Recommended
- Raspberry Pi Amazon 1, 2, 3 or 4
- Micro SD Card Amazon
- Power Supply Amazon
- Ethernet Cable Amazon or Wi-Fi Amazon
Optional
We tested this guide on a Raspberry Pi 4 running an up to date version of Raspberry Pi OS Bullseye.
You can obtain Raspberry Pi OS Bullseye from our downloads page or upgrade to it from an older version of Raspbian.
If you are using a newer version of Raspbian and this tutorial fails to work, please leave a comment below.
Installing the Packages Needed for FFmpeg
In this section. we will be preparing your Raspberry Pi by installing all the required libraries for compiling FFmpeg.
1. Before we begin, you should first update both the package list and the installed packages.
To update everything, all you need to do is run the following two commands.
sudo apt update
sudo apt upgradeCopy
2. Now we need to install the packages that we need to compile FFmpeg and its additional libraries.
As there are quite a few, the installation process may take some time to complete.
Run the following command to install all of the required packages to your Raspberry Pi.
sudo apt -y install autoconf automake build-essential cmake doxygen git graphviz imagemagick libasound2-dev libass-dev libavcodec-dev libavdevice-dev libavfilter-dev libavformat-dev libavutil-dev libfreetype6-dev libgmp-dev libmp3lame-dev libopencore-amrnb-dev libopencore-amrwb-dev libopus-dev librtmp-dev libsdl2-dev libsdl2-image-dev libsdl2-mixer-dev libsdl2-net-dev libsdl2-ttf-dev libsnappy-dev libsoxr-dev libssh-dev libssl-dev libtool libv4l-dev libva-dev libvdpau-dev libvo-amrwbenc-dev libvorbis-dev libwebp-dev libx264-dev libx265-dev libxcb-shape0-dev libxcb-shm0-dev libxcb-xfixes0-dev libxcb1-dev libxml2-dev lzma-dev meson nasm pkg-config python3-dev python3-pip texinfo wget yasm zlib1g-dev libdrm-devCopyCompiling the Additional Libraries on the Raspberry Pi
This section will show you how to compile the additional libraries required by FFmpeg.
1. Before we get started, let’s create a directory where we will store the code for each of these libraries.
mkdir ~/ffmpeg-librariesCopyBefore proceeding, please note that each of the following steps will take some time to complete.
2. The first library that we are going to compile is the Fraunhofer FDK AAC library.
Compiling this library will allow FFmpeg to have support for the AAC sound format.
Run the following command to download and compile the source code to your Raspberry Pi.
git clone --depth 1 https://github.com/mstorsjo/fdk-aac.git ~/ffmpeg-libraries/fdk-aac \
  && cd ~/ffmpeg-libraries/fdk-aac \
  && autoreconf -fiv \
  && ./configure \
  && make -j$(nproc) \
  && sudo make installCopy
3. The next library we are going to compile is the “dav1d” library.
This library will add support for decoding the AV1 video format into FFmpeg. This codec is considered the successor of the VP9 codec and as a competitor to the x265 codec.
Run the following command to compile and install the “dav1d” library to your Raspberry Pi.
git clone --depth 1 https://code.videolan.org/videolan/dav1d.git ~/ffmpeg-libraries/dav1d \
  && mkdir ~/ffmpeg-libraries/dav1d/build \
  && cd ~/ffmpeg-libraries/dav1d/build \
  && meson .. \
  && ninja \
  && sudo ninja installCopy
4. This library that we are going to compile next is an HEVC encoder called “kvazaar“.
Using the following command, you can clone and compile the Kvazaar library on your Raspberry Pi.
git clone --depth 1 https://github.com/ultravideo/kvazaar.git ~/ffmpeg-libraries/kvazaar \
  && cd ~/ffmpeg-libraries/kvazaar \
  && ./autogen.sh \
  && ./configure \
  && make -j$(nproc) \
  && sudo make installCopy
5. We can now compile the library that we need for FFmpeg to be able to support the VP8 and VP9 video codecs on our Raspberry Pi.
This library we are compiling is called LibVPX and is developed by Google.
The following command will clone, configure, and compile the library to our Pi.
git clone --depth 1 https://chromium.googlesource.com/webm/libvpx ~/ffmpeg-libraries/libvpx \
  && cd ~/ffmpeg-libraries/libvpx \
  && ./configure --disable-examples --disable-tools --disable-unit_tests --disable-docs \
  && make -j$(nproc) \
  && sudo make installCopy
6. We now need to compile the library called “AOM“.
This library will allow us to add support for encoding to the AP1 video codec on your Raspberry Pi. This still will differ slightly depending if you are using a 32-bit or 64-bit operating system.
If you are running a 32-bit release of Raspberry Pi OS, please follow step a. However, if you are using a 64-bit release, follow step b.
a. If you are using a 32-bit operating system on your Raspberry Pi, then you can clone and compile AOM by using the following command.
git clone --depth 1 https://aomedia.googlesource.com/aom ~/ffmpeg-libraries/aom \
  && mkdir ~/ffmpeg-libraries/aom/aom_build \
  && cd ~/ffmpeg-libraries/aom/aom_build \
  && cmake -G "Unix Makefiles" AOM_SRC -DENABLE_NASM=on -DPYTHON_EXECUTABLE="$(which python3)" -DCMAKE_C_FLAGS="-mfpu=vfp -mfloat-abi=hard" .. \
  && sed -i 's/ENABLE_NEON:BOOL=ON/ENABLE_NEON:BOOL=OFF/' CMakeCache.txt \
  && make -j$(nproc) \
  && sudo make installCopy
b. Alternatively, if you are running a 64-bit OS, you will need to utilize the following adjusted command.
git clone --depth 1 https://aomedia.googlesource.com/aom ~/ffmpeg-libraries/aom \
  && mkdir ~/ffmpeg-libraries/aom/aom_build \
  && cd ~/ffmpeg-libraries/aom/aom_build \
  && cmake -G "Unix Makefiles" AOM_SRC -DENABLE_NASM=on -DPYTHON_EXECUTABLE="$(which python3)" .. \
  && make -j$(nproc) \
  && sudo make installCopy
7. The final library we need to compile is the “zimg” library.
This library implements a range of image processing features, dealing with the basics of scaling, colorspace, and depth.
Clone and compile the code by running the command below.
git clone -b release-3.0.4 https://github.com/sekrit-twc/zimg.git ~/ffmpeg-libraries/zimg \
  && cd ~/ffmpeg-libraries/zimg \
  && sh autogen.sh \
  && ./configure \
  && make \
  && sudo make installCopy
8. Now, run the command below to update the link cache.
This command ensures we won’t run into linking issues because the compiler can’t find a library.
sudo ldconfigCopyCompiling FFmpeg on your Raspberry Pi
In this section, we will show you how to put everything together and finally compile FFmpeg.
1. We can finally compile FFmpeg on our Raspberry Pi.
During the compilation, we will be enabling all the extra libraries that we compiled and installed in the previous two sections.
We will also be enabling features that help with the Raspberry Pi’s hardware. Please note these steps will differ slightly depending if you are using a 32-bit (Follow step a) or 64-bit OS (Follow step b).
a. On your 32-bit operating system, you can utilize the following command to compile everything.
This command is reasonably large, as there is a considerable amount of features that we need to enable.
git clone --branch release/5.0 --depth 1 https://github.com/FFmpeg/FFmpeg.git ~/FFmpeg \
  && cd ~/FFmpeg \
  && ./configure \
    --extra-cflags="-I/usr/local/include" \
    --extra-ldflags="-L/usr/local/lib" \
    --extra-libs="-lpthread -lm -latomic" \
    --arch=armel \
    --enable-gmp \
    --enable-gpl \
    --enable-libaom \
    --enable-libass \
    --enable-libdav1d \
    --enable-libdrm \
    --enable-libfdk-aac \
    --enable-libfreetype \
    --enable-libkvazaar \
    --enable-libmp3lame \
    --enable-libopencore-amrnb \
    --enable-libopencore-amrwb \
    --enable-libopus \
    --enable-librtmp \
    --enable-libsnappy \
    --enable-libsoxr \
    --enable-libssh \
    --enable-libvorbis \
    --enable-libvpx \
    --enable-libzimg \
    --enable-libwebp \
    --enable-libx264 \
    --enable-libx265 \
    --enable-libxml2 \
    --enable-mmal \
    --enable-nonfree \
    --enable-version3 \
    --target-os=linux \
    --enable-pthreads \
    --enable-openssl \
    --enable-hardcoded-tables \
  && make -j$(nproc) \
  && sudo make installCopy
b. Below is the command that you will need to run if you are using a 64-bit operating system on your Raspberry Pi.
The main difference between this and the previous command is that this one doesn’t have “mmal” enabled. Additionally, the architecture is set to “arm64” rather than “armel”.
git clone --branch release/5.0 --depth 1 https://github.com/FFmpeg/FFmpeg.git ~/FFmpeg \
  && cd ~/FFmpeg \
  && ./configure \
    --extra-cflags="-I/usr/local/include" \
    --extra-ldflags="-L/usr/local/lib" \
    --extra-libs="-lpthread -lm -latomic" \
    --arch=arm64 \
    --enable-gmp \
    --enable-gpl \
    --enable-libaom \
    --enable-libass \
    --enable-libdav1d \
    --enable-libdrm \
    --enable-libfdk-aac \
    --enable-libfreetype \
    --enable-libkvazaar \
    --enable-libmp3lame \
    --enable-libopencore-amrnb \
    --enable-libopencore-amrwb \
    --enable-libopus \
    --enable-librtmp \
    --enable-libsnappy \
    --enable-libsoxr \
    --enable-libssh \
    --enable-libvorbis \
    --enable-libvpx \
    --enable-libzimg \
    --enable-libwebp \
    --enable-libx264 \
    --enable-libx265 \
    --enable-libxml2 \
    --enable-nonfree \
    --enable-version3 \
    --target-os=linux \
    --enable-pthreads \
    --enable-openssl \
    --enable-hardcoded-tables \
  && make -j$(nproc) \
  && sudo make installCopy
2. Compiling FFmpeg can take significant time on the Raspberry Pi, so be patient.
At this point in the guide, you should now have FFmpeg successfully compiled on your Raspberry Pi.
If you have run into any issues with compiling the software, feel free to drop a comment below.


Hello Emmet,
Just wanted to leave a message to thank you. I really appreciate all the explanations given to understand each step and the differences in the commands for both CPU architectures. This is a very coherent and high quality guide.
Thank you.
Thanks for the writeup. I would not enable librtmp in configure process. It disables ffmpegs own native protocols for rtmp handling, which in my experience are more stable than librtmp (when streaming).
do u know how to disable it for if it ends up been a problem?
Hi Jordan,
To stop ffmpeg being compiled with that library, just remove the following line from the step a or b of the compiling FFmpeg section.
Kind regards,
Emmet
thanks, works on my 64-bit bullseye
Thanks for this great write-up! I tried it on my Raspi 3B 1GB with 32GB SD card. First I upgraded the 32-bit OS from Buster to Bullseye staying 32-bit and after that I ran each recipe for the libraries.
On the AOM library the pi hung a couple of times I tried so I ran htop to see what was going on. Although the Pi was maxing out all four cores, it seemed to be fine and was running out of memory.
So I changed the swap file from absolute to dynamic x2 memory and that allocated enough swap space to successfully build everything flawlessly. It also considerably sped up the process.
Here are the steps I took to increase the swap file size
1. $ sudo dphys-swapfile swapoff
2. $ sudo nano /etc/dphys-swapfile
3. Edit in nano to comment out with ‘#” the line that starts with CONF_SWAPSIZE=100 (This number may be different for you) and un-comment the line below that says CONF_SWAPFACTOR=2 ans save the file
4.$ sudo dphys-swapfile setup
5.$ sudo dphys-swapfile swapon
This takes up about 1.8GB of /dev so make sure you have the space on the SD Card.
Finally a question. What about H.264/265? can we use the same procedure to build those libraries e.g x264 etc and then build FFMPEG?
Like many others, thanks for doing this. It was a very useful post.
Awesome guide. Really appreciate the effort in putting this together as well as keeping it updated over the years.
By the way, got all way to #6 to find this will NOT compile per your writeup on 64-bit buster due to:
When I fix the compiler flags, it still errors out due to many:
Any idea how to compile this under 64-bit buster?
Thanks!
Hi Colin,
Thank you for reporting this issue, I went and tested this and have made changes to the tutorial to fix compilation on 64-bit operating systems. With the step you are on, both the flags needed to be removed as well as the line that was disabling “ENABLE_NEON”.
You may have to remove the “aom” directory from your initial attempt (
sudo rm -r -f ~/ffmpeg-libraries/aom), then follow step 6 b.You should now be able to follow the tutorial from start to finish without any compilation issues under 64-bit.
In addition I adjusted it so the tutorial will now compile FFmpeg 5.0 (Latest stable release) rather than 4.4.
Please let me know if this solves the problems you are having.
Cheers,
Emmet
Faced exactly the same issues on 64-bit bullseye on RPi 3B. Removing the command-line options as suggested by Collin and removing the ENABLE_NEON flag as suggested by Emmet helped.
On a side-note, received some segmentation faults along the way, which I figured were because the pi was heating up when using “make -j$(nproc)” (which ends up using all 4 processing cores of the pi). So, just using “make” results in only single core being used and the temperatures remaining in the operable range.
Try with the option:
“` –enable-neon “`
For default this is desable in 64bit raspbian configure in ffmpeg.
Does the open-source license not permit distributing these binaries? I ask because everyone is sitting and wasting a full hour minimum yet the few binaries this produces will run on every raspberry pi in the world, to zip them and post them with the pertinent version/lib version info sure seems a LOT easier, LOL.
Hi Colin,
No there isn’t any restriction on the distribution of these binaries on the Raspberry Pi.
In fact if you don’t mind dealing with older versions of FFMpeg then it can be installed directly from the package repository by running.
Cheers,
Emmet
With Bullseye lite I was able to install FFmpeg simply using apt install.
Hi John,
That is definitely always an option and is something we recommend if you don’t need the latest version of FFmpeg.
Cheers,
Emmet
Same as the other readers, I would like to express my gratitude for this exhaustive post that addressed all the issues I have encountered while trying to compile ffmpeg on my RPi.
Thanks very much! Compiled without error on Rasp Pi4 2Gb and 32gb SD card
Thank you for the tutorial. It was very useful. However, after all this when I try to write the following command ” ffmpeg -i filename.mp4 filename.avi” , it says that ffmpeg command not found. In my raspberry pi , I am inside the ffmpeg libraries directory
Hi Kavan,
There was some issues with compiling the master versions of ffmpeg. I have adjusted the command so we only pull a stable release of the source code.
Please try deleting the ffmpeg directory we created with the following command.
Then follow the “
Compiling FFmpeg on your Raspberry Pi” section of the tutorial again.Cheers,
Emmet.
Hello Emmet,
You are extremely kind to send such a quick response. I will keep plugging away on getting FFMPEG up and running…it is a tad overwhelming to see how much “work” the poor little RaspPi has to do to get this going… I am very grateful for this post.
Thank you very much for your tutorial. During installation of kvazaar library, I got errors (Below). Is this normal?
HI Margaret,
Yes those are usual, you can safely ignore those messages.
The library should still compile correctly.
Cheers,
Emmet
Awesome – really helpful, thanks
Hi Emmet,
I ran into an issue with step 6, the building of the AOM; the make would bring my raspberry pi 3+ to a halt. The system wasn’t completely stuck in that I could occasionally get the mouse to update, but other than the mouse occasionally moving I could do nothing and was forced to reboot. I suspect that the make -j4 has a race condition and results in a deadlock. To get around this I did a plain old ‘make’ which though slower completes without issue.
Same. RPi3B
make -j$(nproc)
is where it hangs on the lossless test, how exactly did you get the workaround?
Hi Con,
Please try running either “
make” or “make -j2” instead of “make -j$(nproc).Let me know if this allows the compilation to complete successful.
Cheers,
Emmet
Thanks for the tutorial, very useful. I want to add that I kept having problems in the make phase of FFmpeg about missing __atomic_fetch_add_8 etc symbols, so I had to modify the extra-libs flag of the configure step the following way:
–extra-libs=”-lpthread -lm -latomic”
I need ffserver. How van I install it?
Hi Cesnore,
FFserver has been dropped by the FFMpeg team so we won’t be covering that here.
Cheers,
Emmet
Thanks for your tutorial. I have an error from when I try to run ffmpeg on the command line. I followed the instructions for pasting each installation. I’m running this all on a fresh Raspberry Pi 4B with newest OS installed:
ffmpeg: error while loading shared libraries: libzimg.so.2: cannot open shared object file: No such file or directory
Hi Chris,
That library should of been installed during step 7. of the “Compiling the Additional Libraries on the Raspberry Pi” Section.
Can you run the following command to see if the library is present.
ls -l /usr/local/libHi! I hope you can help me
I followed the guide on a pi4 (4gb ram) and I completed the install as the root user but I get the following error
ffmpeg: error while loading shared libraries: libzimg.so.2: cannot open shared object file: No such file or directory
Hi Ludarx,
That library should of been installed during step 7. of the “Compiling the Additional Libraries on the Raspberry Pi” Section.
Can you run the following command to see if the library is present.