In this project, we are going to set up an ownCloud server on the Raspberry Pi. This server can act as your very own personal cloud storage.

As protecting your privacy becomes harder and harder, you may be considering moving your files to a private self-hosted cloud storage. If this is the case, then this tutorial is perfect for you.
The ownCloud web interface is very similar to the many cloud storage providers that are available, such as Dropbox, Google Drive, and more. This similarity will make changing over to the self-hosted software much easier.
It is important to remember that since your data will be stored on your home network, you will end up with using more bandwidth if you upload and download files from outside your network.
This tutorial will take you through everything you need to know to get ownCloud setup and accessible.
If you are curious and want to learn more about the ownCloud software, be sure to check out the ownCloud website.


Equipment
I made use of the following equipment for this personal cloud storage setup.
Recommended
- Raspberry Pi Amazon
- Micro SD Card Amazon
- Ethernet Cable Amazon or Wi-Fi Amazon
- External Hard Drive Amazon or USB Drive Amazon
Optional
Note: It is highly likely that the USB ports on the Raspberry Pi will be unable to power an external hard drive so you may need to invest in a powered USB hub.
We last tested this tutorial on the Raspberry Pi 5 running Raspberry Pi OS Bookworm. We highly recommend that you update the to the latest operating system for the best experience.
Video
If you are a visual person and would like to see our video on how to put this tutorial together, check out the video below.
It will take you through everything you need to know get your Raspberry Pi ownCloud server up and running.
Setting up The Raspberry Pi ownCloud Server
Firstly, you will need to have a Raspberry Pi with an OS installed. If you haven’t installed Raspberry Pi OS, then check out our guide on installing Raspberry Pi OS. We recommend using the latest version for the best performance and reliability.
There are quite a few ways you can install ownCloud onto your Raspberry Pi. In this tutorial, we will be using Docker to set up ownCloud.
In our previous version of this tutorial, we used Nginx, but this method is deprecated, and we now recommend using Docker, especially since ownCloud still relies on PHP7.4.
Installing Docker
The first thing we need to do is install Docker on our Raspberry Pi. We will need this software to run the ownCloud software.
1. Firstly, in the terminal or via SSH, we will need to update the Raspberry Pi and its packages. Do this by entering the following two commands.
sudo apt update
sudo apt upgrade -yCopy
2. You will need to ensure that you have Docker on your Raspberry Pi before proceeding to the next few steps. If you already have it installed, go to step 3.
If you need to install Docker, run through our tutorial on setting up Docker on the Raspberry Pi. It will take you through all the steps to set up the software correctly.
https://pimylifeup.com/raspberry-pi-docker/Creating the Required Directories
3. We now need to create the directories for where we will store the compose file and environment variables.
You can do this by running the mkdir command. The “-p” option will create any missing directories.
sudo mkdir -p /opt/stacks/owncloudCopy4. Now change into the newly created directory by using the cd command.
cd /opt/stacks/owncloudCopySetting up the Docker Compose File
5. Before we proceed, we will need to get the IP address of the Raspberry Pi. You will need to use the IP address in the environment file and to access the ownCloud web interface.
I recommend that you set your Raspberry Pi IP to static to avoid it changing in the future.
To get the IP address of the Raspberry Pi, enter the hostname command with the option “-I“.
hostname -ICopy6. It is time to write a compose file for our ownCloud setup. This file is a set of instructions Docker will run through to set up all the relevant services with the specified options. Alongside ownCloud, we will be setting up a MySQL and a Redis server.
Create and edit this file by running the following command. We will be using the nano text editor.
sudo nano compose.yamlCopy7. In this file, copy and paste the following text. Thankfully, we do not need to make any changes to this file, as any extra configurations will be stored in an environment file.
services:
  owncloud:
    image: owncloud/server:${OWNCLOUD_VERSION}
    container_name: owncloud_server
    restart: always
    ports:
      - ${HTTP_PORT}:8080
    depends_on:
      - mariadb
      - redis
    environment:
      - OWNCLOUD_DOMAIN=${OWNCLOUD_DOMAIN}
      - OWNCLOUD_TRUSTED_DOMAINS=${OWNCLOUD_TRUSTED_DOMAINS}
      - OWNCLOUD_DB_TYPE=mysql
      - OWNCLOUD_DB_NAME=owncloud
      - OWNCLOUD_DB_USERNAME=owncloud
      - OWNCLOUD_DB_PASSWORD=owncloud
      - OWNCLOUD_DB_HOST=mariadb
      - OWNCLOUD_ADMIN_USERNAME=${ADMIN_USERNAME}
      - OWNCLOUD_ADMIN_PASSWORD=${ADMIN_PASSWORD}
      - OWNCLOUD_MYSQL_UTF8MB4=true
      - OWNCLOUD_REDIS_ENABLED=true
      - OWNCLOUD_REDIS_HOST=redis
    healthcheck:
      test: ["CMD", "/usr/bin/healthcheck"]
      interval: 30s
      timeout: 10s
      retries: 5
    volumes:
      - ${OWNCLOUD_FILES_LOCATION}:/mnt/data

  mariadb:
    image: mariadb:10.11 # minimum required ownCloud version is 10.9
    container_name: owncloud_mariadb
    restart: always
    environment:
      - MYSQL_ROOT_PASSWORD=owncloud
      - MYSQL_USER=owncloud
      - MYSQL_PASSWORD=owncloud
      - MYSQL_DATABASE=owncloud
      - MARIADB_AUTO_UPGRADE=1
    command: ["--max-allowed-packet=128M", "--innodb-log-file-size=64M"]
    healthcheck:
      test: ["CMD", "mysqladmin", "ping", "-u", "root", "--password=owncloud"]
      interval: 10s
      timeout: 5s
      retries: 5
    volumes:
      - ./mysql:/var/lib/mysql

  redis:
    image: redis:6
    container_name: owncloud_redis
    restart: always
    command: ["--databases", "1"]
    healthcheck:
      test: ["CMD", "redis-cli", "ping"]
      interval: 10s
      timeout: 5s
      retries: 5
    volumes:
      - ./redis:/dataCopy
Once you are done, save and exit by pressing CTRL + X, Y, and then ENTER.
8. It is time to write the environment file. This file will contain all the configurations we wish to set for the ownCloud software. For example, usernames, passwords, ports, and more. Docker automatically reads it and will match and replace the placeholders in the compose file with the relevant data from the environment file.
To create the environment file, enter the following command.
sudo nano .envCopy9. In this file, you will need to enter the following lines and replace each placeholder with the value you wish to use. We will explain each of these options below.
OWNCLOUD_VERSION=<VERSION>
OWNCLOUD_DOMAIN=<DOMAINORIP>:<HTTPPORT>
OWNCLOUD_TRUSTED_DOMAINS=<DOMAINORIP>
ADMIN_USERNAME=<ADMINUSERNAME>
ADMIN_PASSWORD=<ADMINPASSWORD>
HTTP_PORT=<HTTPPORT>
OWNCLOUD_FILES_LOCATION=<MOUNTPATH>Copy<VERSION>This placeholder represents the version of ownCloud you want to run on your Raspberry Pi. I recommend using thelatest, but you can always specify an older version such as10.<DOMAINORIP>Use this option to specify the allowed address for accessing the ownCloud instance. For example, if I want to use it locally, I will use the local IP, such as192.168.0.15.
If I want to access the software remotely, I can use an external IP address or domain name. You can add multiple domains and IPs by separating each of them with a comma. For example,192.168.0.15,test.pimylifeup.com. Please note, that multiple IPs and domains only applies to theOWNCLOUD_TRUSTED_DOMAINSvariable.<HTTPPORT>This is the default port that ownCloud will listen on. I recommend using a port such as8080or similar to avoid conflicts with other software.<ADMINUSERNAME>Replace this placeholder with the username you wish to use for your admin account. You will not be able to change this after the first setup.<ADMINPASSWORD>Like the username, the admin password is only used for the first setup. Afterward, you will need to change the password in the web interface.<MOUNTPATH>This is the path for storing the data of ownCloud. Using.datawill store it within/opt/stacks/ownclouddirectory. You can change this directory to wherever suits you the best.
You could set it to a mounted drive by using something like/mnt/usb1/owncloud. A mounted drive is a good option as it allows you to gain access to a lot of storage space.
OWNCLOUD_VERSION=latest
OWNCLOUD_DOMAIN=192.168.0.15:8080
OWNCLOUD_TRUSTED_DOMAINS=192.168.0.15
ADMIN_USERNAME=pimylifeup
ADMIN_PASSWORD=pimylifeup
HTTP_PORT=8080
OWNCLOUD_FILES_LOCATION=./dataCopy
Once you are done, save and exit the file by pressing CTRL + X, Y, and then ENTER.
Starting the ownCloud Server with Docker
10. To start your ownCloud server, all you need to do is run the following command.
Once initiated, Docker will download all the required software and start up each of the service with the specified options. Using the -d option will run Docker in the background.
docker compose up -dCopyFirst Start of ownCloud on the Raspberry Pi
I will briefly go through the basics of ownCloud running on the Raspberry Pi. If you want more information, I highly recommend checkout out the manuals on their website. You can find them at the ownCloud manual site here.
11. In your favorite web browser, you need to go to your Raspberry Pi’s IP address.
If you don’t know your IP address, you can run the hostname command on the Raspberry Pi.
hostname -ICopyBelow is an example of the address you will need to enter into the browser. Remember to update the IP address with the one you get from using the command above.
http://192.168.0.15:808012. You should now be greeted with a login page similar to the one below. Simply enter the username and password that we set in the environment file.
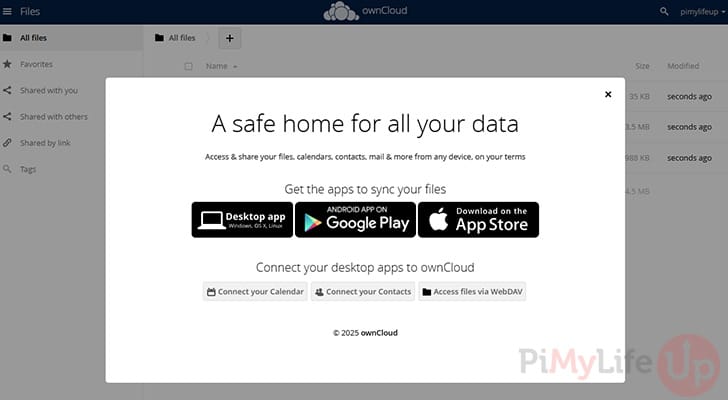
13. You will now see a page with a pop-up on how you can install the apps for desktop, Android, and iOS.
14. Lastly, test that you can upload files to your ownCloud installation by simply dragging and dropping a file into the web interface. It should upload without any issues.
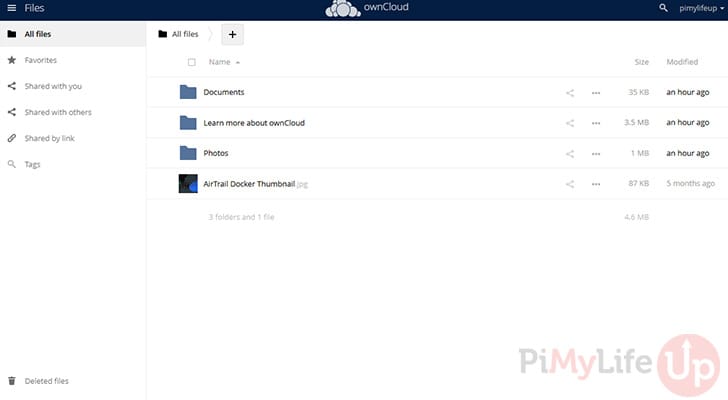
15. You now have ownCloud installed and running on your Raspberry Pi. The next couple of sections cover the basics for remote access, updating software, and backing it up to somewhere secure.
Setting up Remote Access
If you want to access the server remotely, I highly recommend using a service like Cloudflare Tunnels or Tailscale. These services are relatively easy for most people to understand and setup. Alternatively, setting up a reverse proxy like Traefik, or Nginx proxy manger will also work.
Once you have chosen your method of exposing ownCloud to the internet you will simply need to specify the IP address and port of the software. Most of the software above will generate certificate for your domain name.
Updating ownCloud Docker
Using Docker makes updating your ownCloud software super easy, and only involves a few simple steps.
1. Before you update, we recommend that you backup any data in case something goes wrong with the update. Follow our backup section for more information.
2. You will need to first change to the location of your ownCloud compose file. If you followed this tutorial, use the command below.
cd /opt/stacks/owncloudCopy3. You can simply tell Docker to pull the latest versions of the software specified in the compose file.
docker compose pullCopy4. Once the latest software has been downloaded, you must issue the compose up command. This command ensures that the software running in docker is updated to the latest versions we downloaded earlier.
docker compose up -dCopyBacking up ownCloud Docker
Backing up your data is highly important as data drive failure, natural disasters, corruption, or accidental deletion can happen at any time and when you least expect it. Luckily, backing up data is relatively straightforward.
I recommend you can use rclone on the Raspberry Pi or something similar to copy and store the data in another location. You can also automate the following steps using a bash script and setting up cron.
1. You will need to first change into the location of the compose file.
cd /opt/stacks/owncloudCopy2. First, stop the docker container by running the following command
docker compose stopCopy3. The next couple of lines require you to have rclone installed, but they will simply sync the contents from the source location to the destination. For example, /opt/stacks/owncloud/data will sync to /backups/owncloud/data.
You can also setup rclone to sync to a remote location rather than local. This method is highly recommended for backing up important data.
sudo rclone sync /opt/stacks/owncloud/data /backups/owncloud/data --progress
sudo rclone sync /opt/stacks/owncloud/mysql /backups/owncloud/mysql --progressCopy
4. Once the above two commands are finished, start the docker container by running the following command.
docker compose up -dCopyAs I mentioned earlier, you can add the above commands into a bash script that you can then automate the backup sequence. I highly recommend that you schedule the backup to occur when the server is least likely to be in use.
Conclusion
I hope this tutorial has helped you set up your very own Raspberry Pi ownCloud. You should now be able to upload and store files within your own personal cloud.
If you are interested in other self-hosted projects, I also recommend taking a look at Immich on the Raspberry Pi. It is a great software for storing and viewing photos.
If you have any troubles, want to leave feedback or if I have missed anything feel free to drop us a comment below.


Hi Emmet,
I so glad rn that you’re still active.
As given, I follow every step given and it all worked great untill the Owncloud tuning part and the external access part.Now I am no longer able to access the site from both my public IP and my local one.
Please help,
Varchas
Oh yeah!
I just fixed the local IP problem (an extra backlash :P)
But the public IP is giving an (Took too long to respond error)
so yeah, not completly fixed
Hey Emmet, Looks like I fixed the local IP error (an extra backlash :P). But the public IP’s still giving that ‘took too long to respond error’. Please look into this.
Hi Varchas,
Just checking that you have portforward port 80 and 443 to your Raspberry Pi?
If you have you may want to check whether these ports are being blocked by your ISP or router. Some block these by default to prevent unwanted access to people’s devices.
Cheers,
Emmet
In the step where we download the latest owncloud tarball this doesn‘t seem to work anymore. Firstly, the wget follows a
301redirect, that‘s okay. But the file „owncloud-latest.tar.bz2“ that gets downloaded is only 6K large and despite the name ending in .bz2 the tar command errors with „… is not a bzip2 file“.I looked around and found this URL for the latest version of owncloud:
https://download.owncloud.com/server/stable/owncloud-complete-latest.tar.bz2But it‘s huge (75.4MB) and I was wondering if this is the correct version?
Hi Stefan,
Thank you for informing us about the link being broken. I have now corrected the tutorial to point to the correct version.
The “
owncloud-complete-latest.tar.bz2” archive is the correct version, the software is a rather large package (Nextcloud is even bigger at 118mb).Cheers,
Emmet
Wow, so nice and useful post!
finally I did using your post instruction!
Hi, am trying to do this tutorial and came across a problem.
I copied and pasted the code on this page. I also noticed it looked different from the one in the video. I looked up the error and most are saying it missing a “;” somewhere. If you can help that would be great.
Hi Dan,
If you use the command “
nginx -t” in the command line it should indicate to us where the configuration error is occuring.Could you please provide the results from this command.
Cheers,
Emmet
Perfect tutorial. Thank you.
One issue I have SOLVED is(related with turkish character issue on I i character);
To pass this step below, we need to make sure that the system localisation is English in Raspberry Pi Configuration Localisation Set Locale Setting;
“Setting up Owncloud at 3. When you first open up Owncloud, you will need to do some initial setup steps.”
Otherwise in turkish localisation lowercase I is ı, not i. Therefore “Id is not a valid attribute” issue happens.
My solution is;
Set System localisation setting to English US.
This explanation was for turkish people, but it can happen in another language localisations too.
Turkish explanation; Bu dökümanda kurulum çok güzel anlatılmış, adım adım uygulayınca oluyor. Ancak web arayüzüne kadar gelindiğinde bizden admin şifresi belirleme sayfasında kutucukları doldurduktan sonra sayfayı geçemiyoruz çünkü Türkçe karakter problemi gibi bir durum sözkonusu programlamasında. Yani anladığım kadarıyla Id diye bir değişken var onu id olarak görmeye çalışıyor ama Türkçede I nın küçüğü i değil ı. Neyse, sonuç olarak ÇÖZÜMÜ ssistem lokalizasyonunu Türkçe değil İngilizce olarak değiştirin raspberry pi ayarlarından. Veya başka işletim sistemi kullanıyorsanız yine aynı şekilde.
Hi, i have problem with the web, when i go in browser to my ip it redirect me to apache2 ubuntu
Hi Michal,
As this guide on installing OwnCloud uses NGINX you can try stopping and disabling Apache2 from running on your system.
To do this you can run the following two commands.
You will then need to try restarting the NGINX service.
Hopefully that solves the issues that you are running into.
Cheers,
Emmet
Greetings Emmet.
I would like to thank you for the work you have done, thanks to you I just gave use to my raspberry Pi 1 model B !!!!
The use I mainly want to give it is to have a backup available without having to have the main machine running.
Thank you very much, I have seen that there are people who have not had the same luck as me (it is normal that there are many steps and if you do not know or know what you are doing is very easy to make a mistake
Excellent work.
A.
I’ve setup several of these over the years. I thought your guide looks good. Nothing like getting to the end and seeing this:
Error while trying to create admin user: Failed to connect to the database: An exception occurred in driver: SQLSTATE[HY000] [1045] Access denied for user ‘ownclouduser’@’localhost’ (using password: YES)
I see you didn’t answer the previous person who asked.
Hi Matt,
That error will likely indicate that you have incorrectly entered your SQL password.
It shows that the MySQL server is online but has refused the connection for your user, which is likely caused by an incorrect password.
Cheers,
Emmet
I did the proposal above. Though the certificate expired and now I cannot access the cloud anymore. How can I update or replace the certificate?
Hi Ivo,
If you are talking about LetsEncrypt you can renew that certificate by running the following command.
certbot renewIf you are using the self-signed certificate you can renew that by rerunning
step 1under the “Setting up NGINX for Owncloud and HTTPS” section.Both ways you will need to restart NGINX so that it loads in your new certifcate by running the command below.
sudo service nginx restartHopefully that helps your issue.
Cheers,
Emmet
Hello! Could you possibly explain how we could get a signed certificate instead of self-signed? The problem is that the browsers keeps giving a warning, so if we would like to share a link it gives them a warning when they use a browser and videos can only be played externally.
Thank you for this great tutorial!
Hi Sebastian,
To achieve this you will need to have a domain name that you can associate with your device.
The easiest way of getting a sign certificate is to make use of a free service such as LetsEncrypt.
Once you have generated a signed certificate you will then need to replace the following two lines in your NGINX configuration so that it points to the signed certs instead.
Hi, Emmet,
I encounter these errors:
Security & setup warnings
Some files have not passed the integrity check. Further information on how to resolve this issue can be found in our documentation. (List of invalid files… / Rescan…)
The “Strict-Transport-Security” HTTP header is not configured to at least “15552000” seconds. For enhanced security we recommend enabling HSTS as described in our security tips.
Results
=======
– core
– INVALID_HASH
– .user.ini
[[ SNIP ]]
What would you suggest?? Thank you!
Hi Vilmantas,
These are warnings and not errors. OwnCloud can be continued to be used without any issues.
The invalid hash warning can be ignored. That is only happening as we have manually modified the
.user.inifile within the guide and its not matching what OwnCloud is expecting.The “Strict-Transport-Security” warning can also be ignored. Basically this is a directive that tells a web browser that the website should only be accessed via HTTPS. It doesn’t enforce this behaviour as that is up to the web browser.
To stop the warning, update your NGINX configuration to the one we have used above as we have now inserted that line.
Cheers,
Emmet
A really great tutorial, thank you for taking the time to put it together, really straight forward!
Just had the one issue along the way, Downloading and Extracting Owncloud, Step 1.
Tried the:
[SNIPPED]
Thanks again!
Hi Dave,
Thank you for pointing out the issues you were having with downloading and the pipe (
|).We have modified our steps now so that we download the file, then use tar to extract it rather then piping it straight to it.
Cheers,
Emmet
Hey pimylifeup!
I’m so glad that you stay active in your comments section (can’t be said about a lot of other sites)
I am running into an error when trying to make an admin account on owncloud it says:
“Error while trying to create admin user: Failed to connect to the database: An exception occurred in driver: SQLSTATE[HY000] [1045] Access denied for user ‘ownclouduser’@’localhost’ (using password: YES)”
What is confusing is that I have granted all permissions to ownclouduser. And also I am not using password “YES” when making the account….
Any ideas?
Hi Ryan,
Make sure you have entered the correct details to connect to your SQL server.
That error is indicating that you are trying to connect to the SQL server using the user ownclouduser and that are you are in fact using a password to access the database.
The password error is not showing your password, just that it is trying to use a password for the database connection.
Cheers,
Emmet
SOLVED:
Check what is the password for your DB I left mine as [PASSWORD] then I filled that in the login form and that was the issue.
I get this error when I attempt to go to page
Memcache \OC\Memcache\APCu not available for local cache Is the matching PHP module installed and enabled?
Hi Gary,
Make sure that you have the APCu module installed by running the following command.
Cheers,
Emmet
Hi
are written steps are same if i choose CentOS-8-arm instead Raspbian ?
Hi Deepak,
The tutorial will differ slightly as you will need to install packages using
yumand notapt.Cheers,
Emmet
MySQL/MariaDB toggle (4.). not showing up under configure the database it says only SQLite is available. install and activate additional modules.
Hi Gary,
We have corrected the tutorial, it was missing the mysql php package.
To fix this all you need to do is run the following command.
.
Cheers,
Emmet
World backup day, so I am giving this a go. 🙂
Will it really take 16 HOURS to get the openpssl key to generate? 🙁 Guess I am waiting till tomorrow now. lol
Hi John,
Typically generating the keys is a lot faster then that.
Cheers,
Emmet
Sometimes it can take hours, sometimes it can take minutes. It’s random, like, really random and that’s why it’s so secure.
Hello,
I’m trying to set up a Pi 2 with owncloud and I do need external access to it. At minute 4:58 the IP added and the 9000 port is a standard ip or should we add the PI ip instead? Also these step is not on the list only on the movie any specific reason?
Regards
Ivo
Hi Ivo,
The video is a little out of date and needs redoing.
Please try following the written guide.
Cheers,
Emmet
hi there – is this owncloud setup valid also for iOS / Mac users? reason to ask is cause i read about NTFS format …
thx,
kony
Hi Kony,
This should work fine for people using iOS and Mac. The mention of NTFS is just for those mounting external drives that are formatted in that format.
Cheers,
Emmet
Will this work on Raspberry pi 3?
Yes, it will work on almost every Raspberry Pi. Do make sure you’re running the latest Raspbian (Buster).
I did everything as described without SSL
When finish and enter my IP – nothing happens, no owncloud mask appear
You must set up SSL; otherwise, it won’t work.
The NGINX file is set up to enforce HTTPS.