In this project, we are going to set up an ownCloud server on the Raspberry Pi. This server can act as your very own personal cloud storage.

As protecting your privacy becomes harder and harder, you may be considering moving your files to a private self-hosted cloud storage. If this is the case, then this tutorial is perfect for you.
The ownCloud web interface is very similar to the many cloud storage providers that are available, such as Dropbox, Google Drive, and more. This similarity will make changing over to the self-hosted software much easier.
It is important to remember that since your data will be stored on your home network, you will end up with using more bandwidth if you upload and download files from outside your network.
This tutorial will take you through everything you need to know to get ownCloud setup and accessible.
If you are curious and want to learn more about the ownCloud software, be sure to check out the ownCloud website.

Equipment
I made use of the following equipment for this personal cloud storage setup.
Recommended
- Raspberry Pi Amazon
- Micro SD Card Amazon
- Ethernet Cable Amazon or Wi-Fi Amazon
- External Hard Drive Amazon or USB Drive Amazon
Optional
Note: It is highly likely that the USB ports on the Raspberry Pi will be unable to power an external hard drive so you may need to invest in a powered USB hub.
We last tested this tutorial on the Raspberry Pi 5 running Raspberry Pi OS Bookworm. We highly recommend that you update the to the latest operating system for the best experience.
Video
If you are a visual person and would like to see our video on how to put this tutorial together, check out the video below.
It will take you through everything you need to know get your Raspberry Pi ownCloud server up and running.
Setting up The Raspberry Pi ownCloud Server
Firstly, you will need to have a Raspberry Pi with an OS installed. If you haven’t installed Raspberry Pi OS, then check out our guide on installing Raspberry Pi OS. We recommend using the latest version for the best performance and reliability.
There are quite a few ways you can install ownCloud onto your Raspberry Pi. In this tutorial, we will be using Docker to set up ownCloud.
In our previous version of this tutorial, we used Nginx, but this method is deprecated, and we now recommend using Docker, especially since ownCloud still relies on PHP7.4.
Installing Docker
The first thing we need to do is install Docker on our Raspberry Pi. We will need this software to run the ownCloud software.
1. Firstly, in the terminal or via SSH, we will need to update the Raspberry Pi and its packages. Do this by entering the following two commands.
sudo apt update
sudo apt upgrade -yCopy
2. You will need to ensure that you have Docker on your Raspberry Pi before proceeding to the next few steps. If you already have it installed, go to step 3.
If you need to install Docker, run through our tutorial on setting up Docker on the Raspberry Pi. It will take you through all the steps to set up the software correctly.
https://pimylifeup.com/raspberry-pi-docker/Creating the Required Directories
3. We now need to create the directories for where we will store the compose file and environment variables.
You can do this by running the mkdir command. The “-p” option will create any missing directories.
sudo mkdir -p /opt/stacks/owncloudCopy4. Now change into the newly created directory by using the cd command.
cd /opt/stacks/owncloudCopySetting up the Docker Compose File
5. Before we proceed, we will need to get the IP address of the Raspberry Pi. You will need to use the IP address in the environment file and to access the ownCloud web interface.
I recommend that you set your Raspberry Pi IP to static to avoid it changing in the future.
To get the IP address of the Raspberry Pi, enter the hostname command with the option “-I“.
hostname -ICopy6. It is time to write a compose file for our ownCloud setup. This file is a set of instructions Docker will run through to set up all the relevant services with the specified options. Alongside ownCloud, we will be setting up a MySQL and a Redis server.
Create and edit this file by running the following command. We will be using the nano text editor.
sudo nano compose.yamlCopy7. In this file, copy and paste the following text. Thankfully, we do not need to make any changes to this file, as any extra configurations will be stored in an environment file.
services:
  owncloud:
    image: owncloud/server:${OWNCLOUD_VERSION}
    container_name: owncloud_server
    restart: always
    ports:
      - ${HTTP_PORT}:8080
    depends_on:
      - mariadb
      - redis
    environment:
      - OWNCLOUD_DOMAIN=${OWNCLOUD_DOMAIN}
      - OWNCLOUD_TRUSTED_DOMAINS=${OWNCLOUD_TRUSTED_DOMAINS}
      - OWNCLOUD_DB_TYPE=mysql
      - OWNCLOUD_DB_NAME=owncloud
      - OWNCLOUD_DB_USERNAME=owncloud
      - OWNCLOUD_DB_PASSWORD=owncloud
      - OWNCLOUD_DB_HOST=mariadb
      - OWNCLOUD_ADMIN_USERNAME=${ADMIN_USERNAME}
      - OWNCLOUD_ADMIN_PASSWORD=${ADMIN_PASSWORD}
      - OWNCLOUD_MYSQL_UTF8MB4=true
      - OWNCLOUD_REDIS_ENABLED=true
      - OWNCLOUD_REDIS_HOST=redis
    healthcheck:
      test: ["CMD", "/usr/bin/healthcheck"]
      interval: 30s
      timeout: 10s
      retries: 5
    volumes:
      - ${OWNCLOUD_FILES_LOCATION}:/mnt/data

  mariadb:
    image: mariadb:10.11 # minimum required ownCloud version is 10.9
    container_name: owncloud_mariadb
    restart: always
    environment:
      - MYSQL_ROOT_PASSWORD=owncloud
      - MYSQL_USER=owncloud
      - MYSQL_PASSWORD=owncloud
      - MYSQL_DATABASE=owncloud
      - MARIADB_AUTO_UPGRADE=1
    command: ["--max-allowed-packet=128M", "--innodb-log-file-size=64M"]
    healthcheck:
      test: ["CMD", "mysqladmin", "ping", "-u", "root", "--password=owncloud"]
      interval: 10s
      timeout: 5s
      retries: 5
    volumes:
      - ./mysql:/var/lib/mysql

  redis:
    image: redis:6
    container_name: owncloud_redis
    restart: always
    command: ["--databases", "1"]
    healthcheck:
      test: ["CMD", "redis-cli", "ping"]
      interval: 10s
      timeout: 5s
      retries: 5
    volumes:
      - ./redis:/dataCopy
Once you are done, save and exit by pressing CTRL + X, Y, and then ENTER.
8. It is time to write the environment file. This file will contain all the configurations we wish to set for the ownCloud software. For example, usernames, passwords, ports, and more. Docker automatically reads it and will match and replace the placeholders in the compose file with the relevant data from the environment file.
To create the environment file, enter the following command.
sudo nano .envCopy9. In this file, you will need to enter the following lines and replace each placeholder with the value you wish to use. We will explain each of these options below.
OWNCLOUD_VERSION=<VERSION>
OWNCLOUD_DOMAIN=<DOMAINORIP>:<HTTPPORT>
OWNCLOUD_TRUSTED_DOMAINS=<DOMAINORIP>
ADMIN_USERNAME=<ADMINUSERNAME>
ADMIN_PASSWORD=<ADMINPASSWORD>
HTTP_PORT=<HTTPPORT>
OWNCLOUD_FILES_LOCATION=<MOUNTPATH>Copy<VERSION>This placeholder represents the version of ownCloud you want to run on your Raspberry Pi. I recommend using thelatest, but you can always specify an older version such as10.<DOMAINORIP>Use this option to specify the allowed address for accessing the ownCloud instance. For example, if I want to use it locally, I will use the local IP, such as192.168.0.15.
If I want to access the software remotely, I can use an external IP address or domain name. You can add multiple domains and IPs by separating each of them with a comma. For example,192.168.0.15,test.pimylifeup.com. Please note, that multiple IPs and domains only applies to theOWNCLOUD_TRUSTED_DOMAINSvariable.<HTTPPORT>This is the default port that ownCloud will listen on. I recommend using a port such as8080or similar to avoid conflicts with other software.<ADMINUSERNAME>Replace this placeholder with the username you wish to use for your admin account. You will not be able to change this after the first setup.<ADMINPASSWORD>Like the username, the admin password is only used for the first setup. Afterward, you will need to change the password in the web interface.<MOUNTPATH>This is the path for storing the data of ownCloud. Using.datawill store it within/opt/stacks/ownclouddirectory. You can change this directory to wherever suits you the best.
You could set it to a mounted drive by using something like/mnt/usb1/owncloud. A mounted drive is a good option as it allows you to gain access to a lot of storage space.
OWNCLOUD_VERSION=latest
OWNCLOUD_DOMAIN=192.168.0.15:8080
OWNCLOUD_TRUSTED_DOMAINS=192.168.0.15
ADMIN_USERNAME=pimylifeup
ADMIN_PASSWORD=pimylifeup
HTTP_PORT=8080
OWNCLOUD_FILES_LOCATION=./dataCopy
Once you are done, save and exit the file by pressing CTRL + X, Y, and then ENTER.
Starting the ownCloud Server with Docker
10. To start your ownCloud server, all you need to do is run the following command.
Once initiated, Docker will download all the required software and start up each of the service with the specified options. Using the -d option will run Docker in the background.
docker compose up -dCopyFirst Start of ownCloud on the Raspberry Pi
I will briefly go through the basics of ownCloud running on the Raspberry Pi. If you want more information, I highly recommend checkout out the manuals on their website. You can find them at the ownCloud manual site here.
11. In your favorite web browser, you need to go to your Raspberry Pi’s IP address.
If you don’t know your IP address, you can run the hostname command on the Raspberry Pi.
hostname -ICopyBelow is an example of the address you will need to enter into the browser. Remember to update the IP address with the one you get from using the command above.
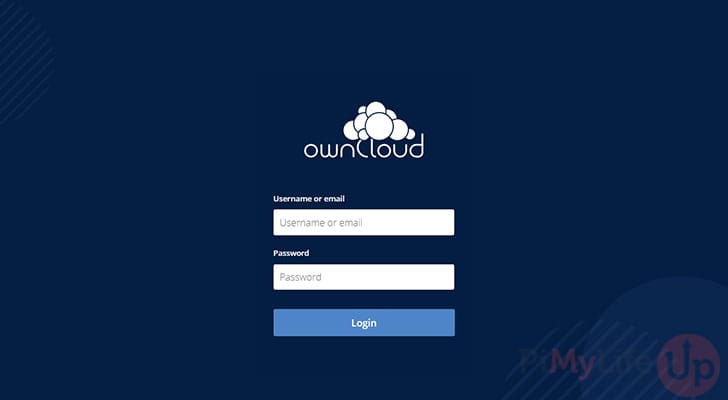
http://192.168.0.15:808012. You should now be greeted with a login page similar to the one below. Simply enter the username and password that we set in the environment file.
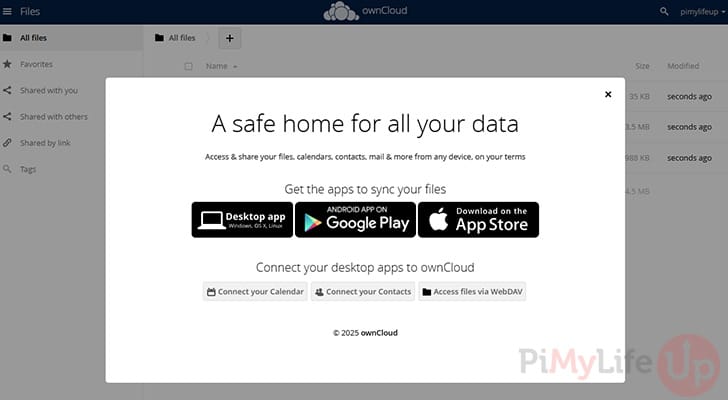
13. You will now see a page with a pop-up on how you can install the apps for desktop, Android, and iOS.
14. Lastly, test that you can upload files to your ownCloud installation by simply dragging and dropping a file into the web interface. It should upload without any issues.
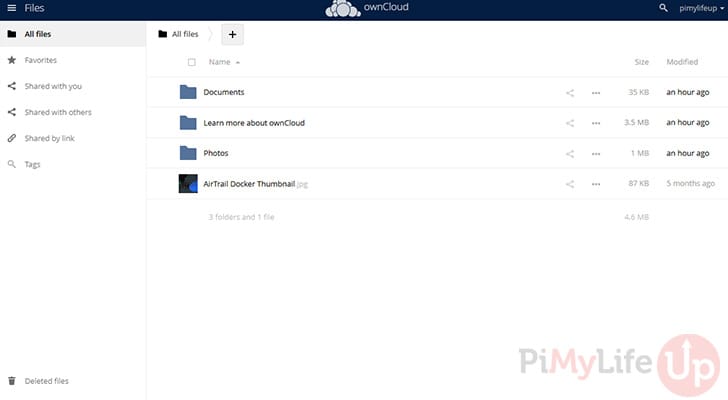
15. You now have ownCloud installed and running on your Raspberry Pi. The next couple of sections cover the basics for remote access, updating software, and backing it up to somewhere secure.
Setting up Remote Access
If you want to access the server remotely, I highly recommend using a service like Cloudflare Tunnels or Tailscale. These services are relatively easy for most people to understand and setup. Alternatively, setting up a reverse proxy like Traefik, or Nginx proxy manger will also work.
Once you have chosen your method of exposing ownCloud to the internet you will simply need to specify the IP address and port of the software. Most of the software above will generate certificate for your domain name.
Updating ownCloud Docker
Using Docker makes updating your ownCloud software super easy, and only involves a few simple steps.
1. Before you update, we recommend that you backup any data in case something goes wrong with the update. Follow our backup section for more information.
2. You will need to first change to the location of your ownCloud compose file. If you followed this tutorial, use the command below.
cd /opt/stacks/owncloudCopy3. You can simply tell Docker to pull the latest versions of the software specified in the compose file.
docker compose pullCopy4. Once the latest software has been downloaded, you must issue the compose up command. This command ensures that the software running in docker is updated to the latest versions we downloaded earlier.
docker compose up -dCopyBacking up ownCloud Docker
Backing up your data is highly important as data drive failure, natural disasters, corruption, or accidental deletion can happen at any time and when you least expect it. Luckily, backing up data is relatively straightforward.
I recommend you can use rclone on the Raspberry Pi or something similar to copy and store the data in another location. You can also automate the following steps using a bash script and setting up cron.
1. You will need to first change into the location of the compose file.
cd /opt/stacks/owncloudCopy2. First, stop the docker container by running the following command
docker compose stopCopy3. The next couple of lines require you to have rclone installed, but they will simply sync the contents from the source location to the destination. For example, /opt/stacks/owncloud/data will sync to /backups/owncloud/data.
You can also setup rclone to sync to a remote location rather than local. This method is highly recommended for backing up important data.
sudo rclone sync /opt/stacks/owncloud/data /backups/owncloud/data --progress
sudo rclone sync /opt/stacks/owncloud/mysql /backups/owncloud/mysql --progressCopy
4. Once the above two commands are finished, start the docker container by running the following command.
docker compose up -dCopyAs I mentioned earlier, you can add the above commands into a bash script that you can then automate the backup sequence. I highly recommend that you schedule the backup to occur when the server is least likely to be in use.
Conclusion
I hope this tutorial has helped you set up your very own Raspberry Pi ownCloud. You should now be able to upload and store files within your own personal cloud.
If you are interested in other self-hosted projects, I also recommend taking a look at Immich on the Raspberry Pi. It is a great software for storing and viewing photos.
If you have any troubles, want to leave feedback or if I have missed anything feel free to drop us a comment below.


Hi
I am having trouble with installing all the required packages for PHP7.
Step 5 in setting up the server results in a bunch of errors in my terminal.
Thanks
Hi keagan,
Can you please provide the errors and version of Raspbian you’re running?
Thanks for adding `-dsaparam` flag. Another point you could add, is that if you have pi hole or any other service running on port 80 the nginx installation will fail. In that case, one has to go to /etc/nginx/sites/enabled/default and change the port from 80 to another free port and run the install again.
Another nice addon would be, to explain, what all the different packages are for, that are installed and furthermore offer setup for different databases, not only sqlite.
Otherwise good tutorial 🙂
Thank You.
Thank you for your suggestions! We will look at adding these to the tutorial.
Hi,
I get this error when trying to generate a stronger encryption:
Running this command:
openssl dhparam -out /etc/nginx/dh4096.pem 4096
Results in:
Can’t open /etc/nginx/dh4096.pem for writing, Permission denied
1995431936:error:0200100D:system library:fopen:Permission denied:../crypto/bio/bss_file.c:74:fopen(‘/etc/nginx/dh4096.pem’,’w’)
1995431936:error:2006D002:BIO routines:BIO_new_file:system lib:../crypto/bio/bss_file.c:83:
Hi Jeremiah,
Try running the following command instead.
sudo openssl dhparam -out /etc/nginx/dh4096.pem 4096Cheers,
Emmet
Hey Emmet,
Thank you kindly for your help. I was successful in setting up my own personal cloud, a dream come true!
I was curious to see if I could add a second hard drive and mount it to OwnCloud the same way that it was done in Step 7 in “Mounting and Setting Up a Drive.”
Is it possible to mount a second drive by adding another second line in the fstab file or by naming another flag within the same line?
Will OwnCloud give the ability to review two different drives? I don’t see the possibility and the documentation on their website always results in a 404 error in any browser.
UUID=DC72-0315 /media/ownclouddrive auto nofail,uid=33,gid=33,umask=0027,dmask=0027,noatime 0 0
UUID=A755-3556 /media/ownclouddrive auto nofail,uid=33,gid=33,umask=0027,dmask=0027,noatime 0 0
Hi Jeremiah,
Yes it’s possible to add another drive to the fstab file. However, make sure you name directories differently otherwise it will not work.
Eg.
UUID=DC72-0315 /media/ownclouddrive auto nofail,uid=33,gid=33,umask=0027,dmask=0027,noatime 0 0UUID=A755-3556 /media/ownclouddrive2 auto nofail,uid=33,gid=33,umask=0027,dmask=0027,noatime 0 0
There is some documentation here that goes into detail how you can add another drive. The shouldn’t 404, but let me know if it does.
Hope the helps.
Cheers,
Gus
Hello, I seem to be stuck on step 21 of the first section. On my pi, the .user.ini file does not seem to exist, for when I type the command listed on step 21, nano opens up a brand new file under that filename. Any ideas?
Hi Steve,
If the file doesn’t exist it should be fine to just create a new one and add in the text that is specified.
Cheers,
Emmet
ok I have found the tip, I had just to format the HDD under windows first, and it’s ok now.
I had to reinstall to change the data directory (very easy as I had no data yet).
just a note : step 21 we must change to this directory first /var/www/owncloud
thanks for this tremendous How To!
Hi Jef,
Thank you for your feedback! We have updated the tutorial so that step 21 is now correct.
At step Port Forwarding & External Access
I followed the instruction step-by-step. But inside the
/var/www/owncloud/config/config.phpis simply the “trusted domain array” and “overwrite.cli.url” lines that I added per the instruction.I know this is a user error, please point me in the right direction. (how do i add a screenshot?)
when I trying to connect the rpi i get the owncloud page but is says:
"No database drivers (sqlite, mysql, or postgresql) installed.

PHP modules have been installed, but they are still listed as missing?
Please ask your server administrator to restart the web server.”
please help
Hi there,
Few questions.
I have successfully setup my own cloud and port forwarding and also set up dns.
I can access owncloud from raspberry pi itself using local ip but i am not able to access it from outside. I checked the port and it shows open.
Now if i log in to owncloud and check configuration in the admin tab, i see some issues like php is not set up properly n some file did not pass integrity check and also conncetion is not secure.http is always crossed.
Can you advise me where I’m missing?
Thanks
Hey all,
when I hit
my.pi.ip.addy/owncloudI get the certificate error, and after continuing, I get a “File not found” error. Any ideas?bzip2: Compressed file ends unexpectedly;
perhaps it is corrupted? *Possible* reason follows.
bzip2: Inappropriate ioctl for device
Input file = (stdin), output file = (stdout)
It is possible that the compressed file(s) have become corrupted.
You can use the -tvv option to test integrity of such files.
You can use the `bzip2recover’ program to attempt to recover
data from undamaged sections of corrupted files.
tar: Unexpected EOF in archive
tar: Unexpected EOF in archive
tar: Error is not recoverable: exiting now
What Does this mean???
Sounds like the file is corrupted, try redownloading the required file and running the command again.
thanks for the tutorial. i followed all the steps and when I am opening through local IP for configuration it loads the owncloud but as soon as I click on Finish setup it gives me error :
The
192.168.43.47page isn’t working192.168.43.47 is currently unable to handle this request.HTTP ERROR 500
Please help me to solve it.
Hi, I’ve got owncloud set up on my raspberry pi, and I am able to download content from it, but for some reason I am unable to upload anything. I’ve tried from multiple devices, on and off the network it’s hosted on, and I’ve got nothing. I can power off the pi and transfer files directly to the external drive and they show up on the server after refreshing, but that’s a pain. Any advice on the matter would be great.
I found out the hard way that it’s worth adding the utf8 (https://linux.die.net/man/8/mount) option to the fstab line if you are mounting a vfat filesystem. Without that option, any file with umlauts will cause syncs to fail.
Hi I have been struggling all weekend to get this to work, problems with permissions to write kept popping up, but also I was not able to get files to write to the connected usb drive.
I am trying to do this on a Pi Zero W, has anyone successfully done this on this model?
Hi Gus,
I notice a number of people have asked for help on upgrading their version of owncloud, but no response has been posted.
Is it possible for you to make a few notes on how this should be done.
Is it as simple as following these steps, and substituting the version version numbers?
sudo wget https://download.owncloud.org/community/owncloud-9.x.x.tar.bz2sudo tar xvf owncloud-9.x.x.tar.bz2
sudo mv owncloud/ /var/www/
Thanks for your help
can’t save to etc/nginx/sites-available/default. said no such file or directory
I have done all of these steps and worked for me, but is there any way to create Web or Android app to manage all files and folders such as listing the content of the server and make uploads and downloads?
Hi do you know why I set my owncloud up and it works perfectly, adding, deleting files ,etc, all functions are well. but after some random time period it shows “Data directory (/media/owncloud) is invalid
Please check that the data directory contains a file “.ocdata” in its root” Could you please tell me what happened and how to fix it?? Many thanks.
Will this only work on raspberry pi? Can I use this on another pi system? Such as banana pi or orange pi? It’s just the code that’s running right, and it’s not particular to raspberry pi?
Thanks!
This should work on another device such as the banana pi and orange pi. However, I haven’t tested it so you might run into issues.
Hello,
When I type in “sudo nano /etc/php5/fpm/php.ini”, the terminal is blank and at the bottom has [ New File], there is nothing to search for?
-John
I figured it out, no need to reply.
-John