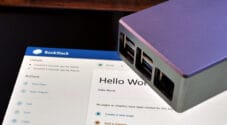
In this project, we are going to set up an ownCloud server on the Raspberry Pi. This server can act as your very own personal cloud storage.
As protecting your privacy becomes harder and harder, you may be considering moving your files to a private self-hosted cloud storage. If this is the case, then this tutorial is perfect for you.
The ownCloud web interface is very similar to the many cloud storage providers that are available, such as Dropbox, Google Drive, and more. This similarity will make changing over to the self-hosted software much easier.
It is important to remember that since your data will be stored on your home network, you will end up with using more bandwidth if you upload and download files from outside your network.
This tutorial will take you through everything you need to know to get ownCloud setup and accessible.
If you are curious and want to learn more about the ownCloud software, be sure to check out the ownCloud website.
Equipment
I made use of the following equipment for this personal cloud storage setup.
Recommended
- Raspberry Pi Amazon
- Micro SD Card Amazon
- Ethernet Cable Amazon or Wi-Fi Amazon
- External Hard Drive Amazon or USB Drive Amazon
Optional
Note: It is highly likely that the USB ports on the Raspberry Pi will be unable to power an external hard drive so you may need to invest in a powered USB hub.
We last tested this tutorial on the Raspberry Pi 5 running Raspberry Pi OS Bookworm. We highly recommend that you update the to the latest operating system for the best experience.
Video
If you are a visual person and would like to see our video on how to put this tutorial together, check out the video below.
It will take you through everything you need to know get your Raspberry Pi ownCloud server up and running.
Setting up The Raspberry Pi ownCloud Server
Firstly, you will need to have a Raspberry Pi with an OS installed. If you haven’t installed Raspberry Pi OS, then check out our guide on installing Raspberry Pi OS. We recommend using the latest version for the best performance and reliability.
There are quite a few ways you can install ownCloud onto your Raspberry Pi. In this tutorial, we will be using Docker to set up ownCloud.
In our previous version of this tutorial, we used Nginx, but this method is deprecated, and we now recommend using Docker, especially since ownCloud still relies on PHP7.4.
Installing Docker
The first thing we need to do is install Docker on our Raspberry Pi. We will need this software to run the ownCloud software.
1. Firstly, in the terminal or via SSH, we will need to update the Raspberry Pi and its packages. Do this by entering the following two commands.
sudo apt update
sudo apt upgrade -yCopy
2. You will need to ensure that you have Docker on your Raspberry Pi before proceeding to the next few steps. If you already have it installed, go to step 3.
If you need to install Docker, run through our tutorial on setting up Docker on the Raspberry Pi. It will take you through all the steps to set up the software correctly.
https://pimylifeup.com/raspberry-pi-docker/Creating the Required Directories
3. We now need to create the directories for where we will store the compose file and environment variables.
You can do this by running the mkdir command. The “-p” option will create any missing directories.
sudo mkdir -p /opt/stacks/owncloudCopy4. Now change into the newly created directory by using the cd command.
cd /opt/stacks/owncloudCopySetting up the Docker Compose File
5. Before we proceed, we will need to get the IP address of the Raspberry Pi. You will need to use the IP address in the environment file and to access the ownCloud web interface.
I recommend that you set your Raspberry Pi IP to static to avoid it changing in the future.
To get the IP address of the Raspberry Pi, enter the hostname command with the option “-I“.
hostname -ICopy6. It is time to write a compose file for our ownCloud setup. This file is a set of instructions Docker will run through to set up all the relevant services with the specified options. Alongside ownCloud, we will be setting up a MySQL and a Redis server.
Create and edit this file by running the following command. We will be using the nano text editor.
sudo nano compose.yamlCopy7. In this file, copy and paste the following text. Thankfully, we do not need to make any changes to this file, as any extra configurations will be stored in an environment file.
services:
  owncloud:
    image: owncloud/server:${OWNCLOUD_VERSION}
    container_name: owncloud_server
    restart: always
    ports:
      - ${HTTP_PORT}:8080
    depends_on:
      - mariadb
      - redis
    environment:
      - OWNCLOUD_DOMAIN=${OWNCLOUD_DOMAIN}
      - OWNCLOUD_TRUSTED_DOMAINS=${OWNCLOUD_TRUSTED_DOMAINS}
      - OWNCLOUD_DB_TYPE=mysql
      - OWNCLOUD_DB_NAME=owncloud
      - OWNCLOUD_DB_USERNAME=owncloud
      - OWNCLOUD_DB_PASSWORD=owncloud
      - OWNCLOUD_DB_HOST=mariadb
      - OWNCLOUD_ADMIN_USERNAME=${ADMIN_USERNAME}
      - OWNCLOUD_ADMIN_PASSWORD=${ADMIN_PASSWORD}
      - OWNCLOUD_MYSQL_UTF8MB4=true
      - OWNCLOUD_REDIS_ENABLED=true
      - OWNCLOUD_REDIS_HOST=redis
    healthcheck:
      test: ["CMD", "/usr/bin/healthcheck"]
      interval: 30s
      timeout: 10s
      retries: 5
    volumes:
      - ${OWNCLOUD_FILES_LOCATION}:/mnt/data

  mariadb:
    image: mariadb:10.11 # minimum required ownCloud version is 10.9
    container_name: owncloud_mariadb
    restart: always
    environment:
      - MYSQL_ROOT_PASSWORD=owncloud
      - MYSQL_USER=owncloud
      - MYSQL_PASSWORD=owncloud
      - MYSQL_DATABASE=owncloud
      - MARIADB_AUTO_UPGRADE=1
    command: ["--max-allowed-packet=128M", "--innodb-log-file-size=64M"]
    healthcheck:
      test: ["CMD", "mysqladmin", "ping", "-u", "root", "--password=owncloud"]
      interval: 10s
      timeout: 5s
      retries: 5
    volumes:
      - ./mysql:/var/lib/mysql

  redis:
    image: redis:6
    container_name: owncloud_redis
    restart: always
    command: ["--databases", "1"]
    healthcheck:
      test: ["CMD", "redis-cli", "ping"]
      interval: 10s
      timeout: 5s
      retries: 5
    volumes:
      - ./redis:/dataCopy
Once you are done, save and exit by pressing CTRL + X, Y, and then ENTER.
8. It is time to write the environment file. This file will contain all the configurations we wish to set for the ownCloud software. For example, usernames, passwords, ports, and more. Docker automatically reads it and will match and replace the placeholders in the compose file with the relevant data from the environment file.
To create the environment file, enter the following command.
sudo nano .envCopy9. In this file, you will need to enter the following lines and replace each placeholder with the value you wish to use. We will explain each of these options below.
OWNCLOUD_VERSION=<VERSION>
OWNCLOUD_DOMAIN=<DOMAINORIP>:<HTTPPORT>
OWNCLOUD_TRUSTED_DOMAINS=<DOMAINORIP>
ADMIN_USERNAME=<ADMINUSERNAME>
ADMIN_PASSWORD=<ADMINPASSWORD>
HTTP_PORT=<HTTPPORT>
OWNCLOUD_FILES_LOCATION=<MOUNTPATH>Copy<VERSION>This placeholder represents the version of ownCloud you want to run on your Raspberry Pi. I recommend using thelatest, but you can always specify an older version such as10.<DOMAINORIP>Use this option to specify the allowed address for accessing the ownCloud instance. For example, if I want to use it locally, I will use the local IP, such as192.168.0.15.
If I want to access the software remotely, I can use an external IP address or domain name. You can add multiple domains and IPs by separating each of them with a comma. For example,192.168.0.15,test.pimylifeup.com. Please note, that multiple IPs and domains only applies to theOWNCLOUD_TRUSTED_DOMAINSvariable.<HTTPPORT>This is the default port that ownCloud will listen on. I recommend using a port such as8080or similar to avoid conflicts with other software.<ADMINUSERNAME>Replace this placeholder with the username you wish to use for your admin account. You will not be able to change this after the first setup.<ADMINPASSWORD>Like the username, the admin password is only used for the first setup. Afterward, you will need to change the password in the web interface.<MOUNTPATH>This is the path for storing the data of ownCloud. Using.datawill store it within/opt/stacks/ownclouddirectory. You can change this directory to wherever suits you the best.
You could set it to a mounted drive by using something like/mnt/usb1/owncloud. A mounted drive is a good option as it allows you to gain access to a lot of storage space.
OWNCLOUD_VERSION=latest
OWNCLOUD_DOMAIN=192.168.0.15:8080
OWNCLOUD_TRUSTED_DOMAINS=192.168.0.15
ADMIN_USERNAME=pimylifeup
ADMIN_PASSWORD=pimylifeup
HTTP_PORT=8080
OWNCLOUD_FILES_LOCATION=./dataCopy
Once you are done, save and exit the file by pressing CTRL + X, Y, and then ENTER.
Starting the ownCloud Server with Docker
10. To start your ownCloud server, all you need to do is run the following command.
Once initiated, Docker will download all the required software and start up each of the service with the specified options. Using the -d option will run Docker in the background.
docker compose up -dCopyFirst Start of ownCloud on the Raspberry Pi
I will briefly go through the basics of ownCloud running on the Raspberry Pi. If you want more information, I highly recommend checkout out the manuals on their website. You can find them at the ownCloud manual site here.
11. In your favorite web browser, you need to go to your Raspberry Pi’s IP address.
If you don’t know your IP address, you can run the hostname command on the Raspberry Pi.
hostname -ICopyBelow is an example of the address you will need to enter into the browser. Remember to update the IP address with the one you get from using the command above.
http://192.168.0.15:808012. You should now be greeted with a login page similar to the one below. Simply enter the username and password that we set in the environment file.
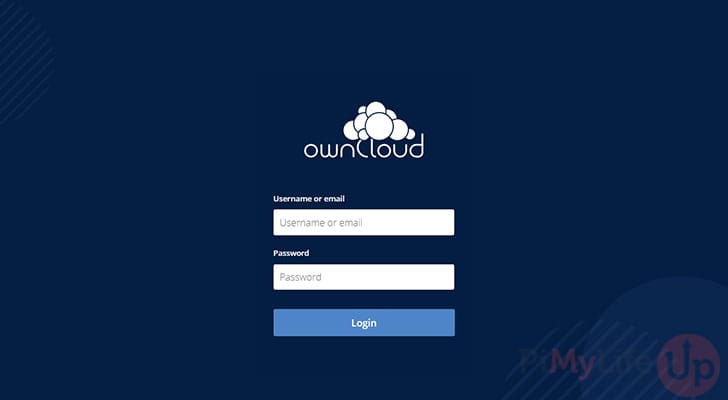
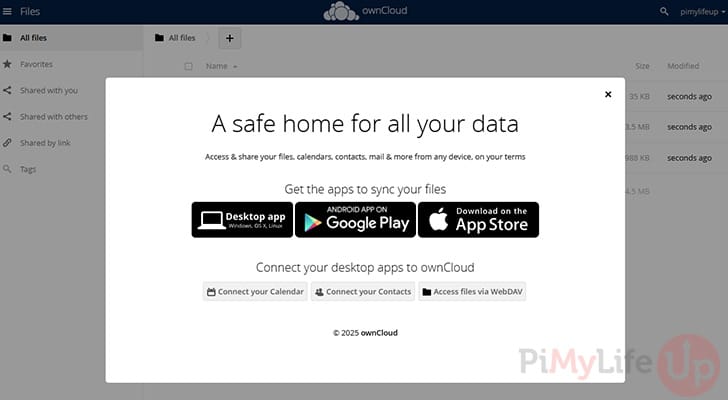
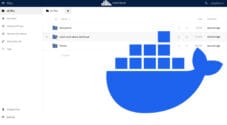
13. You will now see a page with a pop-up on how you can install the apps for desktop, Android, and iOS.
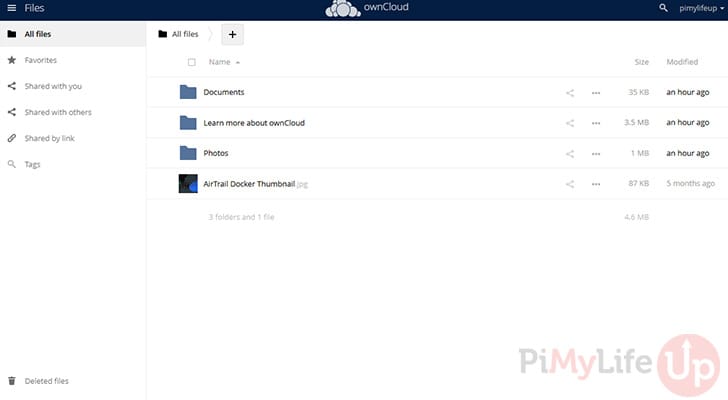
14. Lastly, test that you can upload files to your ownCloud installation by simply dragging and dropping a file into the web interface. It should upload without any issues.
15. You now have ownCloud installed and running on your Raspberry Pi. The next couple of sections cover the basics for remote access, updating software, and backing it up to somewhere secure.
Setting up Remote Access
If you want to access the server remotely, I highly recommend using a service like Cloudflare Tunnels or Tailscale. These services are relatively easy for most people to understand and setup. Alternatively, setting up a reverse proxy like Traefik, or Nginx proxy manger will also work.
Once you have chosen your method of exposing ownCloud to the internet you will simply need to specify the IP address and port of the software. Most of the software above will generate certificate for your domain name.
Updating ownCloud Docker
Using Docker makes updating your ownCloud software super easy, and only involves a few simple steps.
1. Before you update, we recommend that you backup any data in case something goes wrong with the update. Follow our backup section for more information.
2. You will need to first change to the location of your ownCloud compose file. If you followed this tutorial, use the command below.
cd /opt/stacks/owncloudCopy3. You can simply tell Docker to pull the latest versions of the software specified in the compose file.
docker compose pullCopy4. Once the latest software has been downloaded, you must issue the compose up command. This command ensures that the software running in docker is updated to the latest versions we downloaded earlier.
docker compose up -dCopyBacking up ownCloud Docker
Backing up your data is highly important as data drive failure, natural disasters, corruption, or accidental deletion can happen at any time and when you least expect it. Luckily, backing up data is relatively straightforward.
I recommend you can use rclone on the Raspberry Pi or something similar to copy and store the data in another location. You can also automate the following steps using a bash script and setting up cron.
1. You will need to first change into the location of the compose file.
cd /opt/stacks/owncloudCopy2. First, stop the docker container by running the following command
docker compose stopCopy3. The next couple of lines require you to have rclone installed, but they will simply sync the contents from the source location to the destination. For example, /opt/stacks/owncloud/data will sync to /backups/owncloud/data.
You can also setup rclone to sync to a remote location rather than local. This method is highly recommended for backing up important data.
sudo rclone sync /opt/stacks/owncloud/data /backups/owncloud/data --progress
sudo rclone sync /opt/stacks/owncloud/mysql /backups/owncloud/mysql --progressCopy
4. Once the above two commands are finished, start the docker container by running the following command.
docker compose up -dCopyAs I mentioned earlier, you can add the above commands into a bash script that you can then automate the backup sequence. I highly recommend that you schedule the backup to occur when the server is least likely to be in use.
Conclusion
I hope this tutorial has helped you set up your very own Raspberry Pi ownCloud. You should now be able to upload and store files within your own personal cloud.
If you are interested in other self-hosted projects, I also recommend taking a look at Immich on the Raspberry Pi. It is a great software for storing and viewing photos.
If you have any troubles, want to leave feedback or if I have missed anything feel free to drop us a comment below.


Hi! Could we get steps on updating the ownCloud software in relation to having used this tutorial?
Thank you.
Hi Gus,
Great tutorial !!!
Had the server running within the hour except for this error message in the Security & Setup warning section:
The “Strict-Transport-Security” HTTP header is not configured to at least “15552000” seconds. For enhanced security we recommend enabling HSTS as described in our security tips.
Can you help, please ?
Thxs a bunch,
Help please!!
Great tutorial thanks, but completely missed the step where I was to add my external drive when setting up ownCloud (/media/ownclouddrive). How can I retrospectively add it?
Thanks in advance 😀
Hello, I followed step by step this tutorial and everything went in right way!
The only problem I have is the 513mb upload limit per file eventhough I set both .htaccess and .user.ini as described. How can I solve that?
Thanks!
Hi Francesco,
Just double checking that you made the change in step 12->13 for the
/etc/php5/fpm/php.inifile? and that you restarted the Pi or the service afterwards?If so I will need to look into this and find out why you’re hitting a cap of 513mb.
I did all the steps right, but when I attempt to connect to the Raspberry Pi through the ip it says that it can’t be reached
Hi Andrew,
Check to make sure nginx is up and running by running the following.
sudo service nginx statusThe following will start it. If it fails then you may have configuration/typos in one of the files.
sudo service nginx statusHi Gus,
I followed step by step your wonderful tutorial til the mounting drive part because I wanted to point to my NAS (which I set up with your other great tutorial!).
After finishing the final steps in the web browser (creating the admin account and pointing the NAS as the main data drive), I got this error:
“Data directory (/media/NASHDD1) is readable for other users
Please change the permissions to 0770 so that the directory cannot be listed by other users.”
My Question is, what should I do? I don’t want to break anything I setup earlier on (NAS and the Plex media server). Do you have any ideas how owncloud can have access to the NAS without compromising the other services that relies on the NAS?
Many thanks for your help!
Geoff
Hi Geoff,
I’m trying to think of a workaround for this issue. The only thing I can think of is having everything run under the same user or group. I will think more on the issue and see if there is an easyish fix.
Hi Gus, Many thanks for your reply!
I think I’managed to find a solution. Please let me know if you think it is a valid one.
I’ve changed the path of my drive with a new one (a small usb stick I mounted), and I gave to the new drive the ownership to www-data in the fstab file by following your commands. I’ve been stuck for days because the server was erroring to something I didn’t have a clue what that was. Looking at the log, I managed to understand that the new drive was missing some database. I just moved the owncloud.db that was originally in the NAS to the new drive and it worked.
Then, inside owncloud, I’ve added the app “External Storage support” and I’ve linked the NAS on it, and it works great!
Now the thing I’m stuck is that I am using an invalid certificate and I can’t connect in https.But I’m sure I’ll find the solution!
Again thank you for your support,much appreciated!
Geoff
That’s a pretty good solution, I couldn’t think of a better one!
As for the invalid certificate it’s due to being self signed (Owncloud should still work with an invalid cert tho), I have been thinking about a fix for this and the best solution would be to use a service like letsencrypt to generate a free valid certificate. The only tricky thing here is that certificates only last 3 months before becoming invalid so will need to auto-renew or something. I think certificates typically are also only bound to a domain name rather than an IP but I may be wrong. This would mean running owncloud through its own domain name.
Hey gus, thank you for your reply, I’ll try letsencrypt service to see how it goes, and I’ll let you know!
Big thank you! and I can’t wait for the next great guides you’ll make for us! (specially the GPIOs ones!)
Hi thanks for the tutorial. Everything works fine but i have some prob with the PHP settings, im getting this warning on my admin page ¨php does not seem to be setup properly to query system environment variables. The test with getenv(“PATH”) only returns an empty response.
Please check the installation documentation for php configuration notes and the php configuration of your server, especially when using php-fpm.¨
And i cant sync with my phone.
Thanks for the excellent article! Best part is I can use the latest owncloud version instead of the one available in repository 7.0.4!
I only faced 1 issue… 502 gateway error while accessing the owncloud URL. It turns out it was because the upstream server PHP5-FQM was not running. /etc/init.d/php5-fqm start did the trick.
Thank you very much Gus!! I was having difficulties with port forwarding and adding the server as trusted for dns but eventually I got everything to work.
I am successful till last, thanks for this tutorial.
But unfortunately on issue, I didnt setup setup Storage at the time of first time login, I just created account with default “/var/www/owncloud/data” because i was getting error using /media/ownclouddrive. later i found the mistake in ‘fstab’ file and corrected it. Now I am not getting login page with Storage info to punch in.
I tried mannually editing the config.php file with this path but after editing its giving me Internal Server error.
Any help???
Check the /var/log/nginx/error.log to see what Internal Server error you are getting.
I know this old, but it’s new to me. I followed all the steps, but when I try to login I just get a blank screen, errors, just blank. I’ve tried two different browser, but no luck. I have the newest PI3 model B, does that make a difference?
Sorry, I get no errors, just a blank screen.
Hello,
it is possible to access the external hard drive to the pi group
thank you very much
Great tutorial, thanks.
It works perfectly
Do you have a tutorial to install Samba?
hi,
is it possible follow the guide to install it into a pine64?
thank you
I haven’t tried it but you probably can. However there might be an easier way to install it onto the pine64. I think being a 64bit processor you can install it as a package. More information: https://download.owncloud.org/download/repositories/stable/owncloud/ (Ubuntu is probably what you’re after)
Hi! First of all, many thank for your detailed guide. Is not easy to find guides like that around internet.
Second thing:I have a problem on my installation. I get 502 Bad gateway. I have googoled a lot about that problem for nginx but all solution given didn’t work for me. DO you have any suggestion about that?
Hey guys,
Has anyone found a fix yet for the “Can’t create or write into the data directory /media/ownclouddrive”? I have the /etc/fstab code all on one line as suggested and the drive is properly mounted (as in I access it via the command line and write to it on the Pi using sudo) but I am still getting the error on ownCloud after rebooting the Pi. Any help on this would be greatly appreciated.
Thanks in advance.
Hello. I’m getting an error when trying to create the SSL certificate. After I enter my email address i get the following error.
/: Is a directory
1996339296:error:02001015:system library:fopen:Is a directory:bss_file.c:398:fopen(‘/’,’w’)
1996339296:error:20074002:BIO routines:FILE_CTRL:system lib:bss_file.c:400:
Hi guys, is there any chance to run 2nd apache2 server together with owncloud? I will like to have GPIO controlled by app.
When I put the command ls -l /dev/disk/by-uuid, I don’t get the ../../sda1 at the end..
I get a ../../mmcblk0p1. Is it going to work anyway? or is there something I can do to get the sda1?
I had to connect my drive, and rerun the command, then the sda1 line appeared.
Hello
Thanks for the great tutorial I manage to make mine cloud but i need to get more space can I change the default directory with another one witch will be another disk in mine case
Thanks in advance