In this project, we are going to set up an ownCloud server on the Raspberry Pi. This server can act as your very own personal cloud storage.

As protecting your privacy becomes harder and harder, you may be considering moving your files to a private self-hosted cloud storage. If this is the case, then this tutorial is perfect for you.
The ownCloud web interface is very similar to the many cloud storage providers that are available, such as Dropbox, Google Drive, and more. This similarity will make changing over to the self-hosted software much easier.
It is important to remember that since your data will be stored on your home network, you will end up with using more bandwidth if you upload and download files from outside your network.
This tutorial will take you through everything you need to know to get ownCloud setup and accessible.
If you are curious and want to learn more about the ownCloud software, be sure to check out the ownCloud website.

Equipment
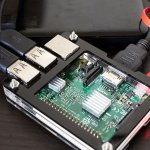
I made use of the following equipment for this personal cloud storage setup.
Recommended
- Raspberry Pi Amazon
- Micro SD Card Amazon
- Ethernet Cable Amazon or Wi-Fi Amazon
- External Hard Drive Amazon or USB Drive Amazon
Optional
Note: It is highly likely that the USB ports on the Raspberry Pi will be unable to power an external hard drive so you may need to invest in a powered USB hub.
We last tested this tutorial on the Raspberry Pi 5 running Raspberry Pi OS Bookworm. We highly recommend that you update the to the latest operating system for the best experience.
Video
If you are a visual person and would like to see our video on how to put this tutorial together, check out the video below.
It will take you through everything you need to know get your Raspberry Pi ownCloud server up and running.
Setting up The Raspberry Pi ownCloud Server
Firstly, you will need to have a Raspberry Pi with an OS installed. If you haven’t installed Raspberry Pi OS, then check out our guide on installing Raspberry Pi OS. We recommend using the latest version for the best performance and reliability.
There are quite a few ways you can install ownCloud onto your Raspberry Pi. In this tutorial, we will be using Docker to set up ownCloud.
In our previous version of this tutorial, we used Nginx, but this method is deprecated, and we now recommend using Docker, especially since ownCloud still relies on PHP7.4.
Installing Docker
The first thing we need to do is install Docker on our Raspberry Pi. We will need this software to run the ownCloud software.
1. Firstly, in the terminal or via SSH, we will need to update the Raspberry Pi and its packages. Do this by entering the following two commands.
sudo apt update
sudo apt upgrade -yCopy
2. You will need to ensure that you have Docker on your Raspberry Pi before proceeding to the next few steps. If you already have it installed, go to step 3.
If you need to install Docker, run through our tutorial on setting up Docker on the Raspberry Pi. It will take you through all the steps to set up the software correctly.
https://pimylifeup.com/raspberry-pi-docker/Creating the Required Directories
3. We now need to create the directories for where we will store the compose file and environment variables.
You can do this by running the mkdir command. The “-p” option will create any missing directories.
sudo mkdir -p /opt/stacks/owncloudCopy4. Now change into the newly created directory by using the cd command.
cd /opt/stacks/owncloudCopySetting up the Docker Compose File
5. Before we proceed, we will need to get the IP address of the Raspberry Pi. You will need to use the IP address in the environment file and to access the ownCloud web interface.
I recommend that you set your Raspberry Pi IP to static to avoid it changing in the future.
To get the IP address of the Raspberry Pi, enter the hostname command with the option “-I“.
hostname -ICopy6. It is time to write a compose file for our ownCloud setup. This file is a set of instructions Docker will run through to set up all the relevant services with the specified options. Alongside ownCloud, we will be setting up a MySQL and a Redis server.
Create and edit this file by running the following command. We will be using the nano text editor.
sudo nano compose.yamlCopy7. In this file, copy and paste the following text. Thankfully, we do not need to make any changes to this file, as any extra configurations will be stored in an environment file.
services:
  owncloud:
    image: owncloud/server:${OWNCLOUD_VERSION}
    container_name: owncloud_server
    restart: always
    ports:
      - ${HTTP_PORT}:8080
    depends_on:
      - mariadb
      - redis
    environment:
      - OWNCLOUD_DOMAIN=${OWNCLOUD_DOMAIN}
      - OWNCLOUD_TRUSTED_DOMAINS=${OWNCLOUD_TRUSTED_DOMAINS}
      - OWNCLOUD_DB_TYPE=mysql
      - OWNCLOUD_DB_NAME=owncloud
      - OWNCLOUD_DB_USERNAME=owncloud
      - OWNCLOUD_DB_PASSWORD=owncloud
      - OWNCLOUD_DB_HOST=mariadb
      - OWNCLOUD_ADMIN_USERNAME=${ADMIN_USERNAME}
      - OWNCLOUD_ADMIN_PASSWORD=${ADMIN_PASSWORD}
      - OWNCLOUD_MYSQL_UTF8MB4=true
      - OWNCLOUD_REDIS_ENABLED=true
      - OWNCLOUD_REDIS_HOST=redis
    healthcheck:
      test: ["CMD", "/usr/bin/healthcheck"]
      interval: 30s
      timeout: 10s
      retries: 5
    volumes:
      - ${OWNCLOUD_FILES_LOCATION}:/mnt/data

  mariadb:
    image: mariadb:10.11 # minimum required ownCloud version is 10.9
    container_name: owncloud_mariadb
    restart: always
    environment:
      - MYSQL_ROOT_PASSWORD=owncloud
      - MYSQL_USER=owncloud
      - MYSQL_PASSWORD=owncloud
      - MYSQL_DATABASE=owncloud
      - MARIADB_AUTO_UPGRADE=1
    command: ["--max-allowed-packet=128M", "--innodb-log-file-size=64M"]
    healthcheck:
      test: ["CMD", "mysqladmin", "ping", "-u", "root", "--password=owncloud"]
      interval: 10s
      timeout: 5s
      retries: 5
    volumes:
      - ./mysql:/var/lib/mysql

  redis:
    image: redis:6
    container_name: owncloud_redis
    restart: always
    command: ["--databases", "1"]
    healthcheck:
      test: ["CMD", "redis-cli", "ping"]
      interval: 10s
      timeout: 5s
      retries: 5
    volumes:
      - ./redis:/dataCopy
Once you are done, save and exit by pressing CTRL + X, Y, and then ENTER.
8. It is time to write the environment file. This file will contain all the configurations we wish to set for the ownCloud software. For example, usernames, passwords, ports, and more. Docker automatically reads it and will match and replace the placeholders in the compose file with the relevant data from the environment file.
To create the environment file, enter the following command.
sudo nano .envCopy9. In this file, you will need to enter the following lines and replace each placeholder with the value you wish to use. We will explain each of these options below.
OWNCLOUD_VERSION=<VERSION>
OWNCLOUD_DOMAIN=<DOMAINORIP>:<HTTPPORT>
OWNCLOUD_TRUSTED_DOMAINS=<DOMAINORIP>
ADMIN_USERNAME=<ADMINUSERNAME>
ADMIN_PASSWORD=<ADMINPASSWORD>
HTTP_PORT=<HTTPPORT>
OWNCLOUD_FILES_LOCATION=<MOUNTPATH>Copy<VERSION>This placeholder represents the version of ownCloud you want to run on your Raspberry Pi. I recommend using thelatest, but you can always specify an older version such as10.<DOMAINORIP>Use this option to specify the allowed address for accessing the ownCloud instance. For example, if I want to use it locally, I will use the local IP, such as192.168.0.15.
If I want to access the software remotely, I can use an external IP address or domain name. You can add multiple domains and IPs by separating each of them with a comma. For example,192.168.0.15,test.pimylifeup.com. Please note, that multiple IPs and domains only applies to theOWNCLOUD_TRUSTED_DOMAINSvariable.<HTTPPORT>This is the default port that ownCloud will listen on. I recommend using a port such as8080or similar to avoid conflicts with other software.<ADMINUSERNAME>Replace this placeholder with the username you wish to use for your admin account. You will not be able to change this after the first setup.<ADMINPASSWORD>Like the username, the admin password is only used for the first setup. Afterward, you will need to change the password in the web interface.<MOUNTPATH>This is the path for storing the data of ownCloud. Using.datawill store it within/opt/stacks/ownclouddirectory. You can change this directory to wherever suits you the best.
You could set it to a mounted drive by using something like/mnt/usb1/owncloud. A mounted drive is a good option as it allows you to gain access to a lot of storage space.
OWNCLOUD_VERSION=latest
OWNCLOUD_DOMAIN=192.168.0.15:8080
OWNCLOUD_TRUSTED_DOMAINS=192.168.0.15
ADMIN_USERNAME=pimylifeup
ADMIN_PASSWORD=pimylifeup
HTTP_PORT=8080
OWNCLOUD_FILES_LOCATION=./dataCopy
Once you are done, save and exit the file by pressing CTRL + X, Y, and then ENTER.
Starting the ownCloud Server with Docker
10. To start your ownCloud server, all you need to do is run the following command.
Once initiated, Docker will download all the required software and start up each of the service with the specified options. Using the -d option will run Docker in the background.
docker compose up -dCopyFirst Start of ownCloud on the Raspberry Pi
I will briefly go through the basics of ownCloud running on the Raspberry Pi. If you want more information, I highly recommend checkout out the manuals on their website. You can find them at the ownCloud manual site here.
11. In your favorite web browser, you need to go to your Raspberry Pi’s IP address.
If you don’t know your IP address, you can run the hostname command on the Raspberry Pi.
hostname -ICopyBelow is an example of the address you will need to enter into the browser. Remember to update the IP address with the one you get from using the command above.
http://192.168.0.15:808012. You should now be greeted with a login page similar to the one below. Simply enter the username and password that we set in the environment file.
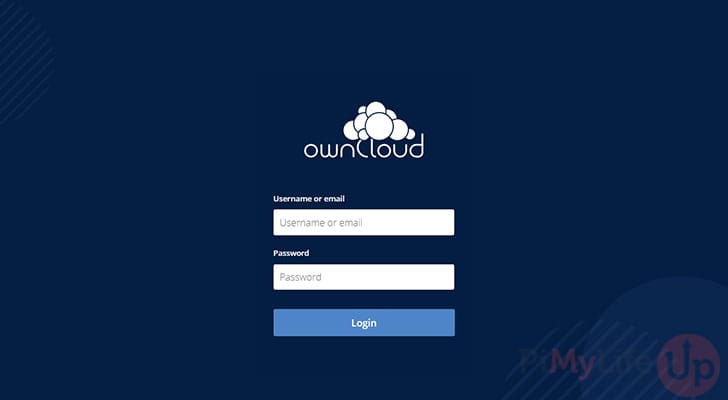
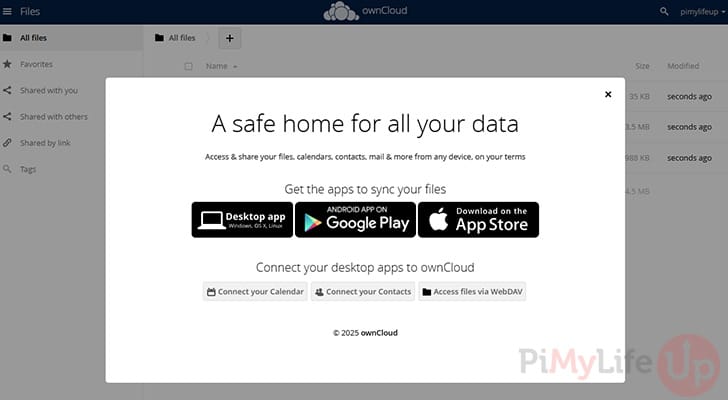
13. You will now see a page with a pop-up on how you can install the apps for desktop, Android, and iOS.
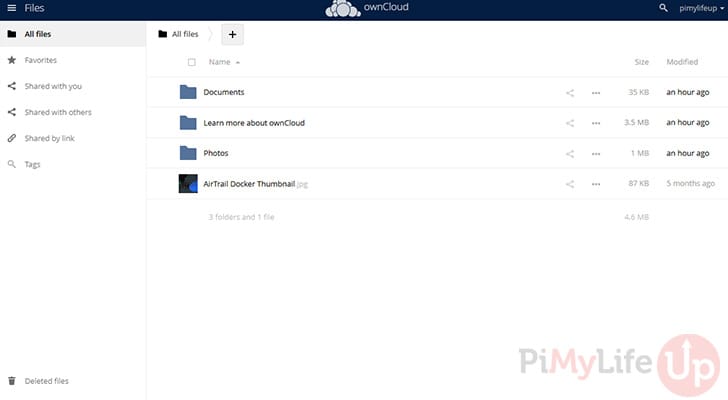
14. Lastly, test that you can upload files to your ownCloud installation by simply dragging and dropping a file into the web interface. It should upload without any issues.
15. You now have ownCloud installed and running on your Raspberry Pi. The next couple of sections cover the basics for remote access, updating software, and backing it up to somewhere secure.
Setting up Remote Access
If you want to access the server remotely, I highly recommend using a service like Cloudflare Tunnels or Tailscale. These services are relatively easy for most people to understand and setup. Alternatively, setting up a reverse proxy like Traefik, or Nginx proxy manger will also work.
Once you have chosen your method of exposing ownCloud to the internet you will simply need to specify the IP address and port of the software. Most of the software above will generate certificate for your domain name.
Updating ownCloud Docker
Using Docker makes updating your ownCloud software super easy, and only involves a few simple steps.
1. Before you update, we recommend that you backup any data in case something goes wrong with the update. Follow our backup section for more information.
2. You will need to first change to the location of your ownCloud compose file. If you followed this tutorial, use the command below.
cd /opt/stacks/owncloudCopy3. You can simply tell Docker to pull the latest versions of the software specified in the compose file.
docker compose pullCopy4. Once the latest software has been downloaded, you must issue the compose up command. This command ensures that the software running in docker is updated to the latest versions we downloaded earlier.
docker compose up -dCopyBacking up ownCloud Docker
Backing up your data is highly important as data drive failure, natural disasters, corruption, or accidental deletion can happen at any time and when you least expect it. Luckily, backing up data is relatively straightforward.
I recommend you can use rclone on the Raspberry Pi or something similar to copy and store the data in another location. You can also automate the following steps using a bash script and setting up cron.
1. You will need to first change into the location of the compose file.
cd /opt/stacks/owncloudCopy2. First, stop the docker container by running the following command
docker compose stopCopy3. The next couple of lines require you to have rclone installed, but they will simply sync the contents from the source location to the destination. For example, /opt/stacks/owncloud/data will sync to /backups/owncloud/data.
You can also setup rclone to sync to a remote location rather than local. This method is highly recommended for backing up important data.
sudo rclone sync /opt/stacks/owncloud/data /backups/owncloud/data --progress
sudo rclone sync /opt/stacks/owncloud/mysql /backups/owncloud/mysql --progressCopy
4. Once the above two commands are finished, start the docker container by running the following command.
docker compose up -dCopyAs I mentioned earlier, you can add the above commands into a bash script that you can then automate the backup sequence. I highly recommend that you schedule the backup to occur when the server is least likely to be in use.
Conclusion
I hope this tutorial has helped you set up your very own Raspberry Pi ownCloud. You should now be able to upload and store files within your own personal cloud.
If you are interested in other self-hosted projects, I also recommend taking a look at Immich on the Raspberry Pi. It is a great software for storing and viewing photos.
If you have any troubles, want to leave feedback or if I have missed anything feel free to drop us a comment below.


Hello,
how can i upgrade to a newer version of Owncloud. Everytime I try by using Owncloud itself it gives me an error. Is there another way ??
Hi Nick,
I am gonna take a look at this and a few other issues people seem to be having.
https://doc.owncloud.org/server/10.2/admin_manual/maintenance/manual_upgrade.html
follow this guide it is simple
Does it work with apache2 without ssl ????
I have Followed all the steps. when i access via raspi’s IP add
Access to the webpage was denied
403You are not authorized to access the webpage at https://192.168.137.116/. You may need to sign in.
Help please
Hello,
how can i update owncloud? There’s a newer version of owncloud this is owncloud 8.2.2 and i have owncloud 8.1.1.
thnx
This is a great walk through but when I went to enter my ip address into my web browser I get a web page error saying that the web page is unavailable. If anyone else has had this problem, please let me know and tell me how to managed to fix it. Any help would be greatly appreciated
hey
make sure you start with
https://and then your ip-addressI have a 502 Bad Gateway error when i try to acces by browser. I had checked up all configs for 3 times and its all OK!.. What i do now?
Exactly the same problem here. Did you manage to fix it?
Everything has been double checked and I still can’t get my owncloud to work outside the firewall. I type in my external IP with https:// and my listening port, but I get a HTTP 500 error. Help anyone please
I have seen this issue a few times in the comments, but it’s not answered. I went through all the installation and drive mounting steps (multiple times), but when I try and do the Basic First Setup I can’t get the ownCloud application to connect to my hard drive. When I enter “/media/ownclouddrive” I get the “can’t create or write into the data directory” error.
I figured it was a permissions thing so I ran “sudo chmod -R 777 /media/ownclouddrive” to make it completely open. OwnCloud doesn’t like that and tells me to change the permissions to 0770 so that the dir cannot be listed by others. But when I do that I get an Internal Server Error. It doesn’t give any further details. I don’t know if there is a problem with the setting for my hard drive or if there is something in the configuration of my pi. Any help is appreciated.
Great tutorial, easy to follow, and helpful. I was to create the server and mount the drive, but am not able to connect the pi. When I go to the ip address I get an error “Could not connect: Connection Refused” Any ideas, or help would be much appreciated.
I came across this error, seems as though my /etc/nginx/sites-available/default was erased somewhere in the process (or I didn’t save it correctly). I just went through step 9 and 10 again and it worked
Hey I have a problem after mounting my harddrive, after I write the blue text with the uuid and so I cant reboot. It says something like starting shell and then just stops there. When I type in startx I come to the root user and the server wont work?(I dont get any fails in the boot log) Do you have any ideas?
thanks
Hi Jacke,
Can you please double check if you copy correctly the UUID for your hard drive? I had that problem and I fixed it with the correct UUID.
It should look something like this:
UUID=7EF46D3BF46CF6B5 /media/owncloud auto uid=33,gid=33,umask=0027,dmask=0027,noatime 0 0Best,
William
Hi, thanks for this tutorial. i was able to get this working in my lab which has a static ip, great news! however my home isp has dynamic dns. i got a hostname with no-ip, and set up port forwarding but i can’t seem to be able to get it to work, either from within or outside the home. a few questions for clarification (a noob at networking):
1. For server name – do i enter the https? the www? or just the hostname without the prefixes?
2. For the port forwarding, you mention to use 443 as internal and a random for external. is that for one entry? do i set up the service port as the random and internal as 443?
3. I was under the understanding that web servers used port 80. my isp blocks port 80, so i had my no-ip host redirect to 8080. so does the port forwarding go like this,in one entry:
service/external=8080
internal=443
ip address=my pi’s address taken from ifconfig
protocol=all
Thanks
Hi Ken,
I assume all your questions relating to port forwarding. So here is my answers:
1. server name is your External IP address (simply replace the local IP you set up earlier with the external IP address) There are 2 of them in the file.
2. My set up was:
Internal port: 443External Port:
xxxxx(a random number of 5 digits)Depending on your router or gateway, it will have different input but will be similar result. Mine asked starting port and ending port for both internal and external. So I filled both starting port and ending port of internal is 443, and the others are
xxxxx.3. I would recommend you to use any random port number instead of
8080to prevent overlapping.Hope it helps!
William
thanks for the quick reply William,
i have some followup questions:
1. since my external ip is dynamic i thought i could set the server name to be my no-ip host name “xxxxxxx.net” and that it would then send traffic to whatever ip address my isp set. is that not correct? if it is possible to do that, then would i set the server name to be “xxxxxx.net” or does it need the “www” before it or the “https://” before that?
2. and 3. the no-ip host modification allows me to redirect from the default port 80. by default the redirect is 8080. are you saying that i should change 8080 to any random number of 5 digits, and then set up port forwarding to that number port? just curious, if it is not too much trouble, what is the reason for this? what is meant by “overlapping”.
once again, thanks for taking the time to create this tutorial and do all this follow up.
Thanks william,
I got the port forwarding working with your advice. I have run into a couple of snags however. Perhaps you have some tips for these as well:
Directing to my no-ip ddns domain name (lets call it:
www.example.net) brings up “400 Bad Request – The plain HTTP request was sent to HTTPS port” and the ip address and port"xx.xx.xxx.xxx:xxxxx” shows in the navigation bar. typing “https://www.example.net” stalls until it finally times out. typing “https://xx.xx.xxx.xxx:xxxxx” brings me to my ounCloud. so that was workable, but not ideal given i could not use the no-ip domain i payed for. now, though, since my ip has changed typing in “https://xx.xx.xxx.xxx:xxxxx” with the new ip i am given the following message on the ownCloud page:"You are accessing the server from an untrusted domain.Please contact your administrator. If you are an administrator of this instance, configure the "trusted_domain" setting in config/config.php. An example configuration is provided in config/config.sample.php.
Depending on your configuration, as an administrator you might also be able to use the button below to trust this domain."
-Add "www.example.net" as trusted domain -
Clicking on the add domain button does nothing.
I checked config/config.php and config/config.sample.php, and both are empty/blank files.
I set up my certificate common name to be
example.net. should that bewww.example.netorhttp://www.example.net, or something like that? same goes for server name in default in nginx.In summary:
Thank you for this great guide!
Now, I was able to access and upload files from an external network.
Before started following this guide, I got OSMC with Transmission and Samba got working. I can access my external hard drive through local network. After following this guide, OSMC is still working but I can no longer access my external hard drive.
Is there something I can modify to allow me to access my external hard drive or at least let OSMC detect it so that I can add my videos, pictures, and movies to OSMC’s library?
Thanks!
When trying to restart nginx in the last step I get:
Job for nginx.service failed. See ‘systemctl status nginx.service; and ‘journalctl -xn’ for details.
Since I got to that step and that error, I can no longer access OwnCloud either internally or externally.
How do I know it is using my external HDD for storage? When I log in or use my local OwnCloud app it says I am using X.X MB out of 8.4 GB.
My external drive is 1 TB.
Hi David,
Please visit your owncloud then check settings -> users, and change the Quota to “Unlimited”
Also make sure you selected correct path to your mounted external hard drive (/media/ownclouddrive) while you are setting up admin account.
Or you can change it in config.php:
sudo nano /var/www/owncloud/config/config.phpChange to your preferred hard drive path:
'datadirectory' => '/media/ownclouddrive',Hope it helps!
William
hi,, i have a question..
this project can to access everywhere?
Great tutorial
I am having trouble adding the external usb drive. I added it as instructed and verified it was in the specified location using ls -l /media/ownclouddrive, however when I attempt to add it on my owncloud page under the personal info tab the drop down button is unresponsive and attempting to just type in the name is not helping.
Any suggestions
I did this in the terminal and it worked:
chown -R www-data:www-data /media/ownclouddriveThanks for the advice, but no success. I did some research and the only thing I could find is that I’m missing a directory /var/www/html and a of the children directories such as the apps folder and such
when i try to do the create account with opencloud at beginning and i choose /media/ownclouddrive i get the following error
Can’t create or write into the data directory /media/owncloud drive
i have an error at the package installation stage where it fails to fetch some archives. It recommends then to run apt-get update but that doesn’t do anything.
E: Failed to fetch
http://mirrordirector.raspian.org... 404 not found[IP: x.xx.]is the server for these files no longer up? other packages were installed successfully
Having same problem. Still looking for a workaround.
I’m having an issue upon rebooting after mounting the drive. On boot I get the message: “Welcome to emergency mode! After logging in, type “journalctl -xb” to view system logs, “systemctl reboot” to reboot, “Sytemctl default” to try again to boot into default mode.
sulogin: root account is locked, starting shell
root@raspberrypi:”
So far I haven’t found a way to log in and get passed this.
Hi I had the same issue you’re probably using a Raspberry Pi 2 in that case you should mount you external hard disk with the following line:
/dev/disk/by-uuid/d4384382-fe1c-4726-b536-a8c62435db94 /media/ownclouddrive ext4 auto uid=33,gid=33,umask=0027,dmask=0027, noatime 0 0****use your own uuid of course.
Thankyou so much for specifying this. ❤
Thank you SOOOOOOOO MUCH!!
I’ve been struggling with this for hours, trying to mount the HDD in other ways, but nothing working. Then I scroll down the comments section and find this, thank you SOOO MUCH. It works now! Amazing!
Thankyou Randy you saved my day!!
I had the same issue.
My mistake was a typo. I would recommend you to double check the line of UUID.
My mistake: (“ID” instead of “UUID”)
ID=7EF46D3BF46CF6B5 /media/owncloud auto uid=33,gid=33,umask=0027,dmask=0027,noatime 0 0Correction:
UUID=7EF46D3BF46CF6B5 /media/owncloud auto uid=33,gid=33,umask=0027,dmask=0027,noatime 0 0Hope it helps!
Great tutorial, thanks.
It works perfectly in my local network but when I try to connect to the server via the ip I get the message (I’ve checked in the owncolud.log) “…dont have permission to update and create…”.
Could I have some help?