In this tutorial, we will show you how to install OneDev on your Raspberry Pi.
OneDev is a self-hosted GIT server with many of the features that you have come to expect from cloud services like GitHub, GitLab, and BitBucket.
One of this software’s key features is that it can analyze your code and allow it to be easily searchable through OneDev’s excellent web interface.
This GIT server even has built-in CI (Continuous integration) and CD (Continuous delivery), as well as the ability to publish binary packages such as Docker containers.
OneDev has many other features we won’t be covering here, but if you are interested, it is well worth checking out their GitHub page.
Best of all, with OneDev being fairly lightweight, it will work perfectly on a Raspberry Pi. All you need is a Pi with at least 2GB of memory and 64-bit support.
Equipment
Below is a list of equipment we used when setting up OneDev on our Raspberry Pi.
Recommended
Optional
This tutorial was last tested on a Raspberry Pi 5 running the latest version of Raspberry Pi OS Bookworm 64-bit.
Installing OneDev onto the Raspberry Pi
Over the following sections, we will walk you through installing the OneDev Git server onto your Raspberry Pi.
Before proceeding, you must be running a 64-bit version of Raspberry Pi OS. OneDev does not provide Docker images for 32-bit systems.
Preparing your Raspberry Pi to run OneDev
1. Before we begin, you must ensure that your Raspberry Pi is up to date by using the following two commands within the terminal.
The first command will update the package list cache. The second will upgrade any out-of-date packages.
sudo apt update
sudo apt upgrade -yCopy
2. Your next step is installing Docker on your Raspberry Pi. We will be using Docker to run OneDev as it makes getting this software running straightforward.
We highly recommend following our guide on installing Docker, as it will get everything set up how this tutorial expects it.
https://pimylifeup.com/raspberry-pi-docker/3. Once you have installed Docker, we can continue preparing our Raspberry Pi for OneDev.
Our next step is to create a directory to store a Compose file for OneDev. This will be the same directory where we will store the data for OneDev, such as its database.
To create this directory, you will want to use the mkdir command as shown below.
sudo mkdir /opt/stacks/onedevCopy4. After creating the directory, you will want to change to it.
For the rest of the tutorial, you will be expected to be within this folder.
cd /opt/stacks/onedevCopyWriting a Docker Compose File to Run OneDev on the Raspberry Pi
5. We now have our Raspberry Pi at a point where we can write the Compose file for OneDev.
A Compose file is like a set of instructions for Docker to follow when setting up a container such as OneDev. It makes managing your containers a significantly more straightforward process.
You can begin writing this Compose file using the nano text editor using the command below,
sudo nano compose.yamlCopyIf you want a great way to manage Compose files on your Raspberry Pi, we highly recommend checking out Dockge.
6. Within this file, you will want to type out the following lines.
Ensure you replace “<DATABASEPASSWORD>” with a secure password. This is the password OneDev will use to talk with the PostgreSQL server we are setting up in the same Compose file.
version: '3.8'

services:
   app:
      image: '1dev/server:latest'
      container_name: 'onedev-app'
      restart: unless-stopped
      environment:
         - hibernate_dialect=io.onedev.server.persistence.PostgreSQLDialect
         - hibernate_connection_driver_class=org.postgresql.Driver
         - hibernate_connection_url=jdbc:postgresql://onedev-db:5432/onedevb
         - hibernate_connection_username=onedevusr
         - hibernate_connection_password=<DATABASEPASSWORD>
      volumes:
         - ./data:/opt/onedev
         - /var/run/docker.sock:/var/run/docker.sock
      ports:
         - '6610:6610'
      depends_on:
         db:
            condition: service_healthy
   db:
      image: 'postgres:latest'
      container_name: 'onedev-db'
      restart: 'unless-stopped'
      environment:
         - PGUSER=onedevusr
         - POSTGRES_USER=onedevusr
         - POSTGRES_PASSWORD=<DATABASEPASSWORD>
         - POSTGRES_DB=onedevdb
      volumes:
         - ./postgresql:/var/lib/postgresql/data
      healthcheck:
         test: ["CMD-SHELL", "pg_isready -U onedevusr -d onedevdb"]
         interval: 5s
         timeout: 5s
         retries: 60Copy
7. After writing all of the above lines, you can save and quit by pressing CTRL + X, Y, and then ENTER.
Starting OneDev on your Raspberry Pi
8. Now that we have written the Compose file, all we need to do to start the OneDev server on our Raspberry Pi is to run the following command.
This process can take a few minutes to complete as it needs to download the Docker images for OneDev and PostgreSQL. After the first run, the server should start up super-fast.
docker compose up -dCopyAccessing the OneDev Web Interface
9. To access the web interface for OneDev, you will need to know the IP address of your Raspberry Pi.
You can get this IP address in various ways, but one of the easiest ways is to use the hostname command.
hostname -ICopy10. Once you know your IP address, you will want to go to the following address in your favorite web browser.
Ensure that you replace “<IPADDRESS>” with the IP of your Raspberry Pi.
http://<IPADDRES>:6610Initial Setup Experience of OneDev
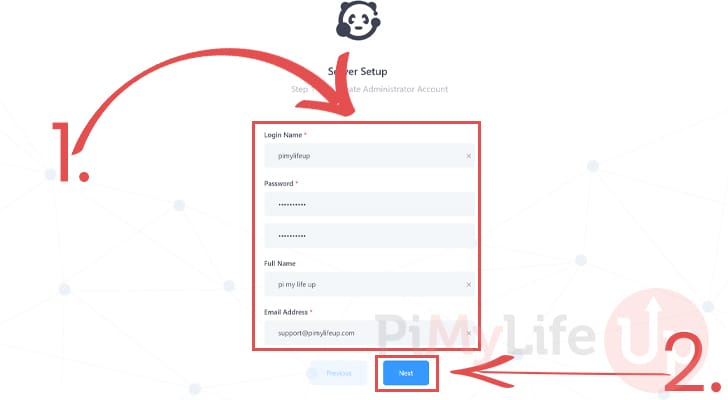
11. When you first access the OneDev web interface, you must create an admin user.
Fill out these text boxes with the details you want to use for your admin account (1.).
After completing your information, click the “Next” button (2.) to continue.
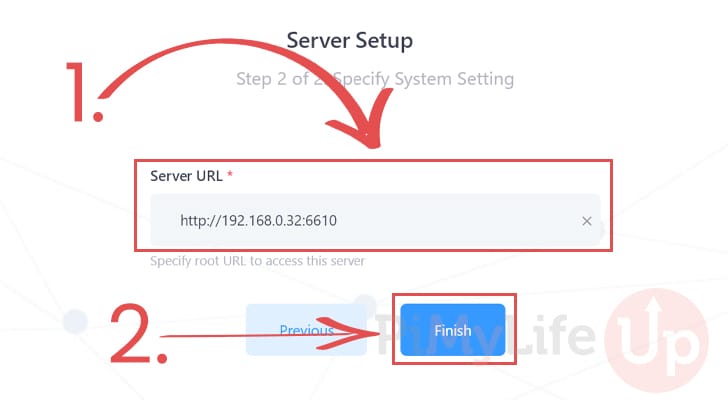
12. Next, OneDev will require you to specify the address from which OneDev is accessible.
Using this text box, you will want to type in your IP address or domain name (1.) followed by the port “6610“. Since we are connecting to our Raspberry Pi and OneDev locally, we will use “192.168.0.73:6610” as our address.
Once you are certain you have entered the correct address, click the “Finish” button to finish setting up OneDev.
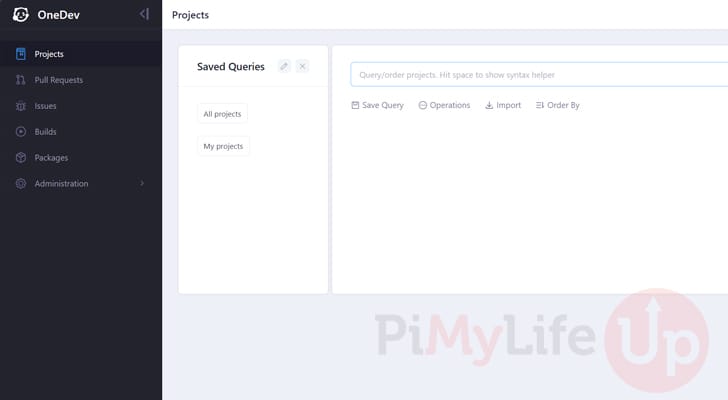
13. You can now begin using OneDev by creating your first project and pushing or porting your code to this Git server.
The interface has a fair bit going on, so it’s well worth taking your time to explore and familiarize yourself with everything.
Updating the OneDev Container on the Raspberry Pi
An advantage of using Docker to run OneDev on your Raspberry Pi is the straightforward update process.
The next couple of steps will show you how easy it is to update to the latest release.
1. First, you must change to the directory where we wrote the Compose file for OneDev.
You can change to this directory by running the following command.
cd /opt/stacks/onedevCopy2. After moving to the correct directory, you will want to tell Docker to pull the latest version of OneDev.
Getting Docker to download the latest image is as simple as using the following command.
docker compose pullCopy3. Even though Docker may have downloaded a new version of OneDev, it won’t automatically switch the running container to it.
Luckily if we use the same command we used to start OneDev, Docker will automatically detect the new image and restart our running container using the new version.
docker compose up -dCopyConclusion
By this point in the guide, you should now have the OneDev Git server running on your Raspberry Pi.
You can now use this server to host all your code with many of the features provided by cloud services like GitHub.
Please feel free to comment below if you have questions about using OneDev on your Pi.
If you found this tutorial to be helpful, we highly recommend checking out our many other Raspberry Pi projects.