In this Raspberry Pi BOINC tutorial, I take you through the steps to getting BOINC setup and processing tasks correctly.
At the time of this tutorial, BOINC (Berkeley Open Infrastructure for Network Computing) has over 400 thousand volunteers and almost a million computers processing data for a range of different projects.
In this particular tutorial, I will be installing the SETI at home project. For those who don’t know, SETI@home is a program that will enable you to help in the search for extraterrestrial intelligence. It simply downloads and analyzes radio telescope data. Once processed, it sends it back to the main server.
If you’re familiar with the BOINC program, then you will probably already know that SETI@home is the most popular project that you’re able to sign up to.
There are other projects that you can try, but some may not be available for the Raspberry Pi. Seti@home, for example, was only recently officially released for the Pi.
You can find the full list of projects you can join and their supported platforms over at the BOINC project page. This page also has information on what areas a project covers (astrophysics, physics, biochemistry) and any sponsors it may have.
Equipment
Below is the equipment that I have used in setting up the Raspberry Pi BOINC.
Recommended
- Raspberry Pi Amazon
- Micro SD Card Amazon (8gb+ recommended)
- Power Supply Amazon
- Ethernet Cable Amazon or Wi-Fi Amazon
Optional
Video
If you want to see how to setup BOINC on your Raspberry Pi visually, then check out the video below.
This video will walk you through the process of setting up and configuring BOINC on your Raspberry Pi, if you prefer a written tutorial you can follow our guide below.
Installing Raspberry Pi BOINC
Installing BOINC is a pretty straightforward process, and you shouldn’t run into any problems. I am using just basic Raspbian in this tutorial if you need to install it then be sure to check out my tutorial on how to install Raspbian.
1. Firstly, make sure everything is up to date by running the following commands:
sudo apt update
sudo apt upgradeCopy
2. Now install the BOINC package by running one of the following commands, if you want to use the easy interface go for the full GUI package, otherwise, if you intend on running BOINC headless then install just the boinc-client.
GUI
sudo apt install boincCopyCommand line (Headless)
sudo apt install boinc-clientCopy3. Installing BOINC will also install the BOINC manager which is incredibly handy. The manager will allow you to see all your projects, tasks and any statistics about them.
Installing SETI & Other Projects
Next, we’re going to set up SETI as the project we wish to process and contribute to. There are two ways we’re able to do this with the first being via the BOINC manager and the second via the command line.
BOINC Manager
Using the GUI is probably the preferable way when it comes to adding projects to your Pi. It’s straightforward to use for beginner users and is loaded with features for the more advanced user.
1. If you have the Raspbian GUI (Graphical User Interface) open, then you can simply go up to Menu->System Tools->Boinc Manager
2. On the first load, the “add project or project manager” screen should be displayed.
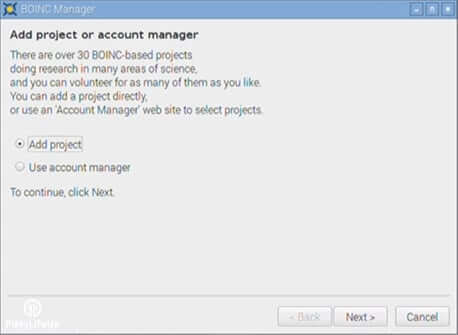
3. In this window, select either “add project” or if you have an account with either BAM! or Grid Republic then you can select “use account manager“.
4. On the project page scroll down to SETI@Home and select it. Once selected press next.
5. It will now connect, and then you will need to either create a new account or log in to an existing one.
6. Once done the project should be loaded onto the Pi and will soon start carrying out processing tasks.
Command Line
1. I will go through the command line version first, to begin you will need to query the SETI at home website for an account key. To do this enter the following line.
boinccmd --lookup_account http://setiathome.berkeley.edu <your_email> <your_password>Copy2. It should now print out the following lines.
status: Success

poll status: operation in progress

account key: <your_account_key>Copy
3. Lastly, run the following line to attach your BOINC program to your SETI@Home account.
boinccmd --project_attach http://setiathome.berkeley.edu <your_account_key>Copy4. Your account should now be added and be getting ready to load some tasks.
5. If you want to see the tasks that are currently being processed, then you just run the following command:
boinccmd --get_tasksCopy6. If you decide to go down the command line (CLI) route, then be sure to check out all the commands that are available to you over at BOINC’s wiki page. You will also find the following command will bring up all the commands you can use.
boinccmd -helpCopyConfiguring BOINC
Configuring BOINC can be a pretty complicated task if you’re doing it through the command line, as I briefly touched on before. If you’re doing it through the manager tool, then everything is a lot easier. I will touch on some of the options that are available to you below.
You change settings so that BOINC will run only under certain conditions. For example, if you just wanted to run while you’re asleep or whenever the Pi isn’t busy doing other stuff.
Command Line
To fully explain configuring every option via the command line will complicate this tutorial too much, so I will touch on a couple of basics.
I link below to the page that has all the settings that you’re able to set in the config XML (EXtensible Markup Language) file.
1. If you want to set up preferences for Raspberry Pi BOINC within the command line, then you can edit the config file by running the following command.
sudo nano /var/lib/boinc-client/cc_config.xmlCopy2. If you will find that this file is usually pretty empty. To find out all the options that you can add, be sure to check out the client configuration page at the BOINC wiki website.
If you make edits to the config file, then make sure you run the following command.
boinccmd --read_cc_configCopyVia the Manager
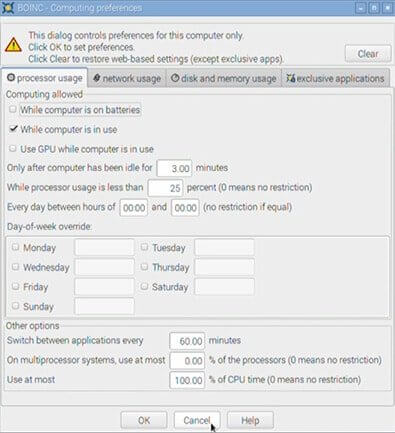
If you’re using the manager and would like to change things such as the running conditions, then go to tools and then select computing preferences. All these settings are self-explanatory, so I’ll let you decide the best settings for you.
Now, these might be a bit underwhelming, so if you’re more of a power user, then you can change it to a more advanced view. To do this, go up to view and then just select “advanced view“.
As you can see, the advanced view has a lot more tabs. I will just quickly go through what each of them contains.
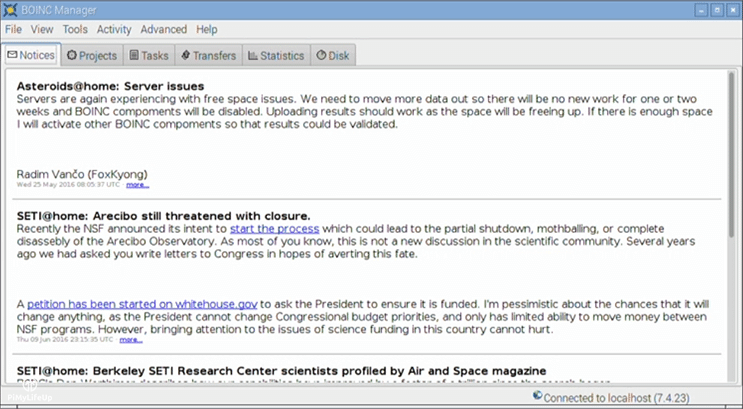
Notices
This screen contains news from any of the projects you’re currently running. For example, SETI@Home will provide you with any relevant news to the SETI program or similar programs.
The more projects you run, the more news you’re likely to have here.
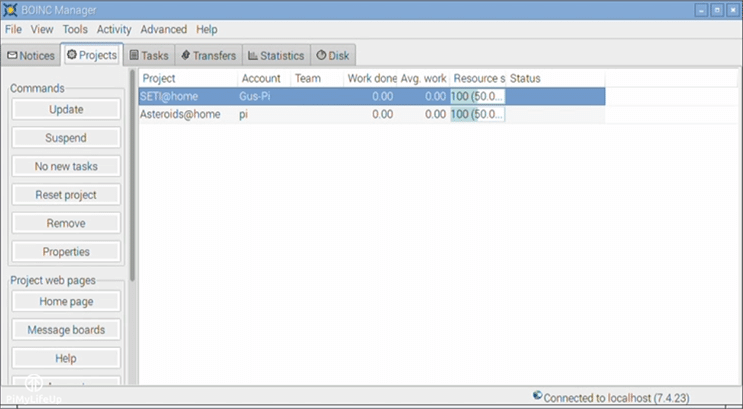
Projects
This screen contains all the projects that you are currently running. In here, you can control projects to a certain degree. For example, you can suspend projects or request that you no longer receive new tasks for that project.
You can also remove, update, and edit properties of any given project.
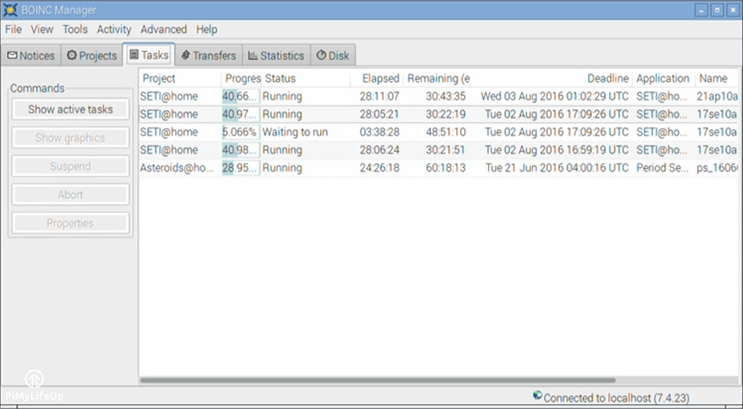
Tasks
The tasks screen shows you all the current tasks on the Pi. You can suspend, abort, and edit the properties of any given task.
As you can also see in the image below, you’re given stats such as progress, the time elapsed, estimated time remaining, running status, deadline, and other useful information.
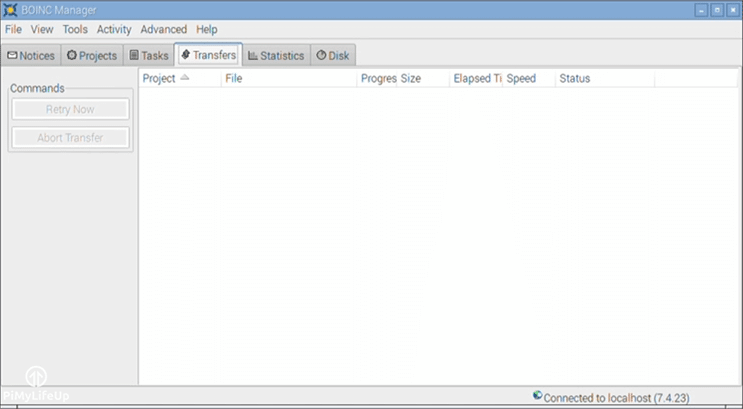
Transfers
This screen displays all the current downloads and uploads that are ready to start, completed, or currently in progress. You can abort the transfers or suspend if you don’t wish for something to be sent or received.
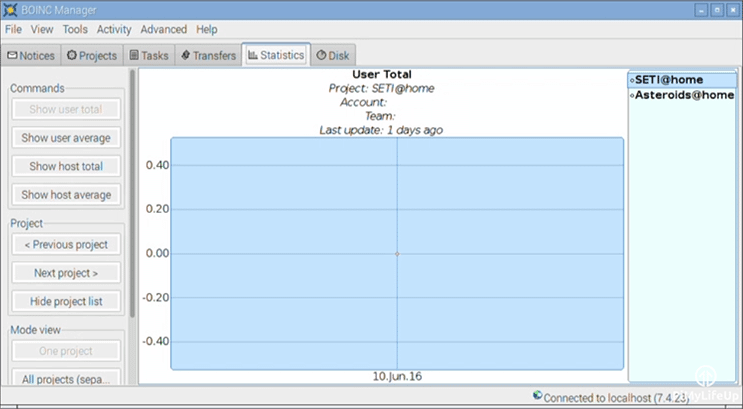
Statistics
This screen shows you all the statistics related to your project’s progress. The value on the left represents the credits received, and the values on the bottom are the dates.
To quickly explain to anyone who doesn’t know BOINC credits is a way of tracking the amount of CPU time a user has contributed to any given project. It helps prevent cheating by validating the project first. After validation, you are rewarded credits.
Disk
Disk shows you how much room is being taken up by BOINC and other programs. It also shows the amount of available free space on the device. This screen can be helpful if you’re running out of disk space or have limited space on the device you’re using.
There are, of course, even more settings in the menu that will satisfy any power user. You will find that the computing preference menu I touched on earlier is also expanded, allowing you to go into even more detail on how things should be run. If you’re craving more information on the advanced view, you can find it here.
Overall, BOINC is a great software package that you should certainly check out if you want to help process data to help cure diseases, search for extraterrestrial intelligence, study global warming, and much more then this is for you.
This software is a project that I will certainly leave running on one of my spare Pi’s just like I still have the Raspberry Pi ADS-B flight tracker running.
You can see my current statistics below!

If there is a project that is unable to be run on the Raspberry Pi, then you will find that it’s likely to be available for Windows, MAC, and x86 versions of Linux.
I hope you now have the Raspberry Pi BOINC up and running with little to no problems. If you have come across any problems, want to leave feedback, or anything else, then feel free to drop a comment below.


Keep in mind that SETI@home will stop distributing work soon. Read more about it here: https://setiathome.berkeley.edu/forum_thread.php?id=85267#2035163
I am running 40+ BOINC projects at the moment, there is more than just Seti. Not all will run a a Raspberry Pi as not all projects have ARM applications, but you might want to try e.g. the World Community Grid, MLC, Universe@Home, etc.
Does anyone know how to run Bionc in a Pi cluster? I have found lots of video’s of how to create a cluster. I can’t see any useful program examples.
Please help.
If you’re on a headless raspi you only need to install boinc-client – cuts out over 200Mb of extraneous applications for the graphical stuff that you don’t (and can’t) see.
apt-get install boinc-client
How do you install the graphical interface if you don’t already have it?
Thanks!
I understand what this line is about
boinccmd --lookup_account http://setiathome.berkeley.eduwhere can I find the url portion of this command for other projects please
Unfortunately there are much less projects supported on Raspberry Pi than on PC, last time I checked there were no biochemistry projects. Also RPi 1 is so slow that running single Einstein@home task, 24/7, with overclocked CPU, takes nearly all time before timeout. Please correct me if something changed 🙂
If you want to crunch biochemical project with Rasp, you need to install Android on Rasp and not Raspbian
I have been running Einstein@home for four days on my raspberry pi. IT shows workdone 312 but average work done is just 25.27. I am not able to get any credit on my gridcoin walllet which i have installed on my laptop. it shows ALL BOINC PROJECT EXHAUSTED. I need minimum RAC 100(AVERAGE WORK DONE) but i dont know how to increase it .
ALso can I install gridcoin wallet on raspberry pi.
Hi Amit, you need to run the BOINC projects for a longer time, about 6 weeks before your RAC will be near its maximum. So keep on going and you will get there.
Works, now I just need to cool it down from the low 80’s (<;
Your BoincStats widget is broken, I’m curious to see how much the Raspberry Pi(s) have contributed so far!
Working on why it’s broken! Will let you know when it has been fixed! 🙂
Should be fixed now!