In this tutorial, we will explore how to use the video player called OMXPlayer on the Raspberry Pi.
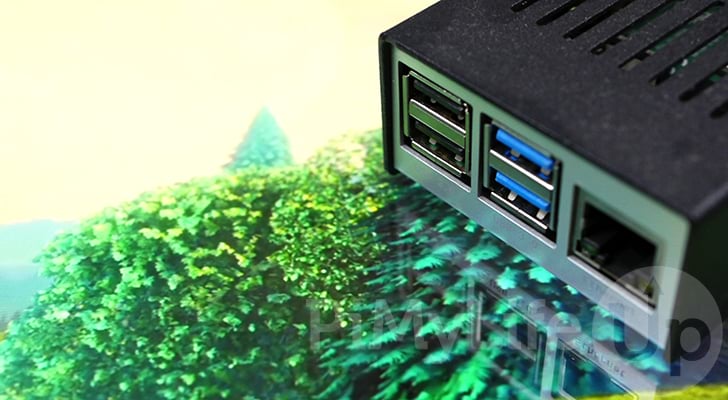
OMXPlayer is one of the best video players you can use on the Raspberry Pi, thanks to it being optimized for its hardware.
The Kodi team originally developed this software as a testbed for running videos on the Pi’s hardware. Thanks to being purpose-built for the hardware, it has been heavily optimized.
Even better is that you can use OMXPlayer from the command line. This allows you to use a lightweight operating system like Raspberry Pi OS Lite and still run videos.
While development has focused on improving VLC on the Raspberry Pi, it is still a great option.
The guide below will walk you through how you can use OMXPlayer on your device. It is possible to complete this on a Pi without having a keyboard or mouse connected to it.
Please note that this tutorial will only work on Raspberry Pi OS Buster and older. Starting from Bullseye, the underlying software this video player relies on has been deprecated and is no longer included.
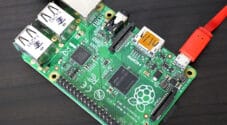
Equipment
For running OMXPlayer on the Raspberry Pi, we made use of the following equipment.
Recommended
- Raspberry Pi Amazon
- Micro SD Card Amazon
- Power Supply Amazon
- Ethernet Cable Amazon or Wi-Fi Amazon
- HDMI Cable Amazon
Optional
Installing OMXPlayer on your Raspberry Pi
Before you can start using OMXPlayer on your Raspberry Pi, you must install the video player to your device.
As OMXPlayer is available within the package repository, this is a reasonably straightforward process.
1. Our first step is to update Raspberry Pi OS, so we have a clean system to work off of.
Please run the following two commands on your system to update the package list, and upgrade any out-of-date packages.
sudo apt update
sudo apt upgrade
2. Once you have updated your Pi, we can now move on to installing OMXplayer. As the player is available from the official package repository, installing it is as simple as running a single command.
To install this video player, all you need to do is run the following command.
sudo apt install omxplayer3. You can verify that you have installed OMXPlayer successfully by running the following command.
If you have the package installed on your Raspberry Pi, it will give you a list of options that you can use to control the video player.
omxplayerUsing OMXPlayer on the Raspberry Pi
Once you have OMXPlayer installed on your device, we can now use it to start playing videos. Below we are going to go through some of the ways that you can use this video player.
1. To show you how to use this video player on your Raspberry Pi, we will start by downloading an example file.
We will be using a clip of Big Buck Bunny made by the Blender foundation.
wget https://files.pimylifeup.com/omxplayer/bigbuckbunny_30sclip.mp4Playing a Video or Audio file using OMXPlayer
The most basic usage of OMXPlayer is to use the following command. By using this, it will automatically detect the video type and play it.
All you need to do is use “omxplayer“, followed by the path to the file you want to play.
omxplayer PATHTOFILEFor example, we can play the clip we downloaded earlier by using the following command.
omxplayer bigbuckbunny_30clip.mp4Selecting the Audio Output Method
Using OMXPlayer, you can define where you want your audio output. This is useful for cases where you want the audio output to a different device.
To achieve this, we must use two options to tell OMXPlayer to output the audio to a different place.
omxplayer -p -o DEVICE PATHTOFILEThe first thing we need to use is the “-p” (“--passthrough“) option. This option tells the video player to pass through the audio to another device that we will specify with the next option.
The second option we use is “-o device” (“--adev device“). By utilizing this, we can specify the name of the device we want the audio output to.
The possible device options are the following.
hdmi– By using this device, audio will be output to the HDMI connection.local– It is also possible to force output to the analog headphone jack by using this option.both– Outputs audio to both the HDMI and Analog connections on your Pi.alsa[:device]– You can also specify a particular ALSA device to which you want to output your audio.
For example, you can use the following command to play our example file and output the audio through the HDMI port. We do this by using “-p” followed by “-o hdmi“.
omxplayer -p -o hdmi bigbuckbunny_30clip.mp4Likewise, if you want to output the audio to the headphone jack, you can use the following command by using “local” as the device.
omxplayer -p -o local bigbuckbunny_30clip.mp4Finally, if you want the audio output to both the headphone jack and the HDMI connection, you can use “both” as the device.
omxplayer -p -o both bigbuckbunny_30clip.mp4Choosing where to Display the Video
It is also possible to control where the video player outputs its video. OMXPlayer has an option called “--display n” that allows you to specify which display you want to use.
omxplayer --display n PATHTOFILEThere are a couple of default display options that you can use for this that we will go into in the list below.
5– On Raspberry Pi’s 1 – 3, the number5represents the display attached to the HDMI port on the device.
For the Pi 4, this value has been changed as there are now two HDMI ports.4– If you want the video player to output to the touchscreen display you will need to use the number4.2– On a Raspberry Pi 4, the number2represents the display attached to the HDMI0 port.7– Only on a Pi 4, the number7will represent the display that has been attached to the HDMI1 port.
For example, we would use the following command if we wanted OMXPlayer to display on HDMI0 of our Raspberry Pi.
omxplayer --display 2 bigbuckbunny_30clip.mp4Looping a Video with OMXPlayer
OMXPlayer has functionality that allows you to loop through a video. It will continue to loop the video file until the program is closed.
To make the video player loop the specified video file, you must include the “--loop” option as part of the command.
omxplayer --loop PATHTOFILEFor example, we need to use the following to get our Raspberry Pi to loop through our example video.
omxplayer --loop bigbuckbunny_30clip.mp4Playing a Video in Windowed Mode
By default, when you play a video using OMXPlayer, it will automatically take up the entirety of the display.
It is possible to change this It is possible to change this behavior by using the “--win x1 y1 x2 y2” option.
omxplayer --win x1 y1 x2 y2 PATHTOFILEIn this case, x1 represents the horizontal position of the screen on the display. y1, on the other hand, represents the vertical position of the video player.
The x2 option is used to specify the width of the screen. The y2 option is what will be used to set the height of the screen.
For example, if we wanted to position the video player at the top left corner, with a height of 640px and a width of 480px, we would use the following command.
omxplayer --win 0 0 640 480 bigbuckbunny_30clip.mp4Rotating the Video with OMXPlayer
Using OMXPlayer, you can rotate the orientation of the video that is being displayed on your screen. This is very useful if you want to display a portrait video on a screen in a portrait orientation.
To do this, we can utilize the “--orientation n” option. For this option, we have four different rotations that we can use. Those options being 0, 90, 180, or 270 degrees.
omxplayer --orientation n PATHTOFILEFor example, if we wanted to rotate our example video by 270 degrees, we can use the following command on our Raspberry Pi.
omxplayer --orientation 270 bigbuckbunny_30clip.mp4Controlling OMXPlayer on your Raspberry Pi
You can control OMXPlayer during the playback of audio and video files by using various keyboard bindings.
OMXPlayer might disable some of this functionality depending on the current file that is being played.
1. To get a list of key binds supported by the video player, you can use the following command on your Raspberry Pi.
omxplayer --keys2. From this command, you should see a list like we have below displayed in the command line.
For an action to happen, all you need to do is press the corresponding key. For example, to increase the playback speed, you can press the number 1 key.
    1           decrease speed
    2           increase speed
    <           rewind
    >           fast forward
    z           show info
    j           previous audio stream
    k           next audio stream
    i           previous chapter
    o           next chapter
    n           previous subtitle stream
    m           next subtitle stream
    s           toggle subtitles
    w           show subtitles
    x           hide subtitles
    d           decrease subtitle delay (- 250 ms)
    f           increase subtitle delay (+ 250 ms)
    q           exit omxplayer
    p / space   pause/resume
    -           decrease volume
    + / =       increase volume
    left arrow  seek -30 seconds
    right arrow seek +30 seconds
    down arrow  seek -600 seconds
    up arrow    seek +600 seconds
3. If you want to stop these key binds from working with the video player, you will need to use the “--no-keys” option.
By using this option, OMXPlayer will ignore all keyboard input.
omxplayer --no-keys PATHTOFILEConclusion
Hopefully, by the end of this guide, you will have an idea of how you can use the OMXPlayer video player on your Raspberry Pi.
It is a lightweight yet powerful video player that works well on the Pi’s limited hardware. One of the best things about the player is that you can use it directly from the command line to run it on a lite operating system.
If you have run into any issues with running OMXPlayer on your Raspberry Pi, please comment below.
Be sure to check out some of our other great Raspberry Pi projects, such as running Plex on the Pi.


sudo apt install omxplayer
doesn-t work for me… since i’m no advanced user, and no linux user at all it seems a little bit complicated for me.
the message i receive is:
El paquete omxplayer no está disponible, pero algún otro paquete hace referencia
a él. Esto puede significar que el paquete falta, está obsoleto o sólo se
encuentra disponible desde alguna otra fuente
The omxplayer package is not available, but some other package makes some references to it. This could mean the package is missing, it’s obsolete or it’s only available from another source
Can you help me?
Hi Uriel,
Please make sure they you are not running Raspberry Pi OS Bullseye. This player is only available on Raspberry Pi OS Buster and older.
New releases of the operating system have removed functionality that OMXPlayer was built upon.
Cheers,
Emmet
Thank you for this writeup. Very useful but I am stuck on square 1. With a new clean install of Raspbian bullseye on a Raspberry 3, I always get the following error when trying to run OMXplayer:
‘error while loading shared libraries: libbrcmEGL.so: cannot open shared object file: No such file or directory”
Apparently it is missing libbrcmEGL.so, but I have not figured out a way to fix this. Been going down one rabbithole after another trying to solve this. I get this error message no matter how I try to use OMXplayer – even just trying to get the help file to come up. Strangely I have not found anyone else reporting this problem. Any ideas? Thanks!
Hi Rumi,
Sadly if you want to use OMXPlayer you will need to stick with Raspberry Pi OS Buster or older.
The Pi foundation chose to remove several key components that OMXPlayer relied on and have marked it as “deprecated”.
Cheers,
Emmet
Thank you Emmet for all these useful programs and knowledge that you offer us.
Hi! I’m trying to make a python script that reproduces a video when an external button is pressed. But when I call omxplayer Park.mp4 it says invalid syntax. Can you help me on this? Thanks!
Hi Nicolas,
I would need to see how you are calling omxplayer from within your Python script to be able to offer a suggestion.
Cheers,
Emmet