In this Raspberry Pi tutorial, we will be showing you how to install Jenkins.
Jenkins is an open-source automation server designed to help automate tasks for software development.
The software includes functionality to handle both continuous integration and continuous delivery.
You can use Jenkins to compile your software automatically, run tests on it, and also “deliver” it to an end destination.
Jenkins is extremely configurable and allows you to control almost all aspects of the automation process.
The Raspberry Pi is a good fit for Jenkins when you want to handle basic tasks and compilation of small ARM programs.
An example of a lightweight task for Jenkins is to use it for packaging and uploading a simple PHP script, such as a WordPress plugin.
Equipment List
Here is a list of the equipment we recommend for this tutorial on installing Jenkins to your Raspberry Pi.
Recommended
- Raspberry Pi Amazon 1, 2, 3 or 4
- Micro SD Card Amazon
- Power Supply Amazon
- Ethernet Cable Amazon or Wi-Fi Amazon
Optional
We tested this tutorial on installing Jenkins using a Raspberry Pi 4 running the latest version of Raspbian Buster.
Preparing for Jenkins on the Raspberry Pi
1. To begin this guide, let’s first upgrade all the pre-existing packages.
To do this, you need to run the following two commands.
sudo apt update
sudo apt upgradeCopy
2. Now we need to install the latest version of Java to our Raspberry Pi.
We are required to install the Java runtime environment as Jenkins is built on top of the Java language.
Run the following command to install the OpenJDK 11 version of Java to your Pi.
sudo apt install openjdk-11-jreCopy3. Verify that you have successfully installed Java to your Raspberry Pi by running the command below.
java --versionCopyFrom this command, you should see something like the following appear in the terminal.
openjdk 11.0.6 2020-01-14
OpenJDK Runtime Environment (build 11.0.6+10-post-Raspbian-1deb10u1)
OpenJDK Server VM (build 11.0.6+10-post-Raspbian-1deb10u1, mixed mode)
This response shows the version of OpenJDK that you are running and indicates that you have successfully installed Java.
Installing Jenkins to the Raspberry Pi
1. Before we continue, we need to add the Jenkins repository key to our Pi’s key chain.
Adding the key will allow us to download Jenkins from their official package repository to our Raspberry Pi.
Run the following command to download and add the key.
curl https://pkg.jenkins.io/debian/jenkins.io-2023.key | gpg --dearmor | sudo tee /usr/share/keyrings/jenkins-archive-keyring.gpg >/dev/nullCopy2. Our next step is to add the repository into our sources list.
We will do this by making a file called “jenkins.list” within the “/sources.list.d/” directory using the following command.
The package handler automatically reads the files located in the “/sources.list.d/” directory for links to repositories.
sudo nano /etc/apt/sources.list.d/jenkins.listCopy3. Add the following text to the file. This text defines the link to the Jenkins repository.
deb [signed-by=/usr/share/keyrings/jenkins-archive-keyring.gpg] https://pkg.jenkins.io/debian binary/CopyOnce added, save the file by pressing CTRL + X, then Y, followed by ENTER.
4. With the new repository added, we need to go ahead and update the package list.
Update the list by running the following command.
sudo apt updateCopy5. Now finally, we can install Jenkins by using the command below.
sudo apt install jenkinsCopyThis command will install Jenkins, create a user for it to run under, and set up the software’s default configuration.
Unlocking Jenkins
To be able to set up Jenkins on your Raspberry Pi, you will need to unlock the setup screen.
1. If you don’t know your Raspberry Pi’s local IP address, you will need to obtain it by using the following command.
hostname -ICopy2. Next, we need to retrieve the initial admin password.
Run the following command to get this password using the cat command. You will need the string returned by this in step 4.
sudo cat /var/lib/jenkins/secrets/initialAdminPasswordCopyFrom this command, you should end up with a result a bit like what we have below. This result is the password you need to unlock your Jenkins installation.
9df8c9c4cf694754a0047771a53b9fe83. We can now begin the process of setting up Jenkins by going to the following web address in your favorite web browser.
Make sure that you replace “[RASPBERRYPIIPADDRESS]” with the IP that you retrieved in step 1 of this section.
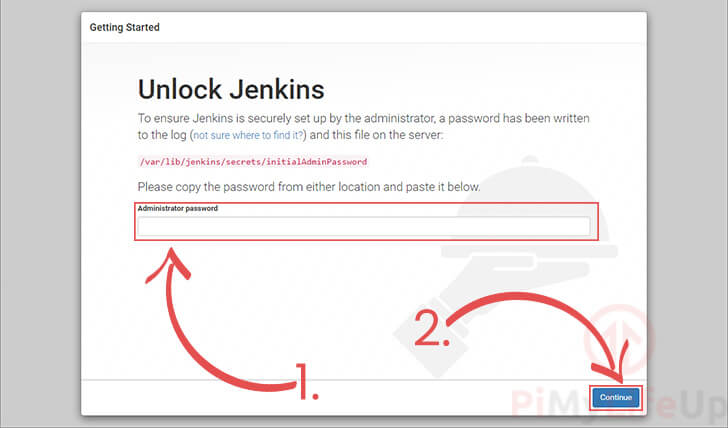
[RASPBERRYPIIPADDRESS]:80804. When you first go to the web address, you will be asked to unlock Jenkins.
In the field box on this page (1.), enter the password you retrieved in step 2.
Once you have entered the password, click the “Continue” button (2.).
Setting Up Jenkins
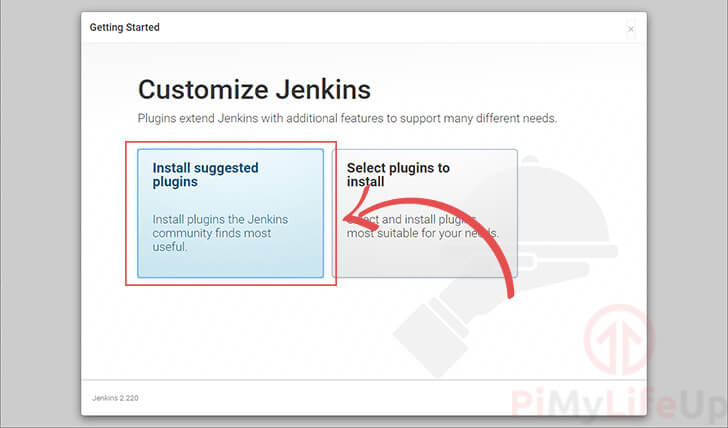
1. The next screen will ask you if you want to install the suggested plugins or select them for yourself.
For this guide, we are just going to click the “Install suggested plugins” button.
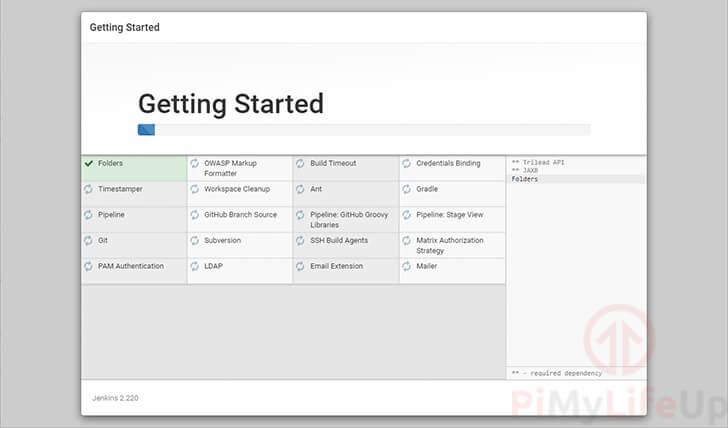
2. This process will take some time, so sit back and relax.
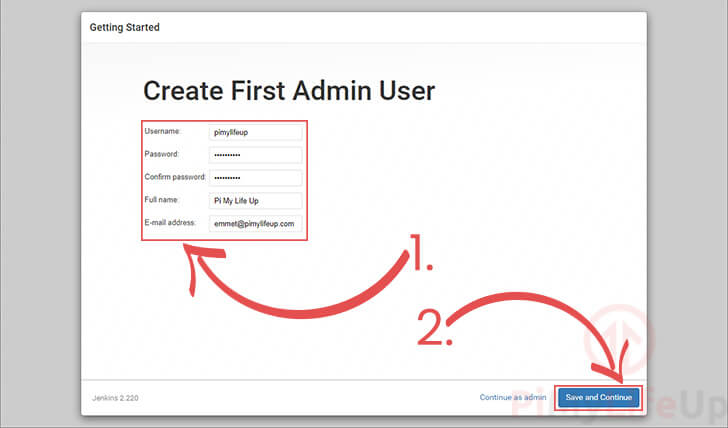
3. Next, you will be asked to create an admin user to interact with your Raspberry Pi Jenkins installation.
Enter the details for your user in the text boxes (1.).
Once you have entered all the details for your admin user, click the “Save and Continue” button (2.).
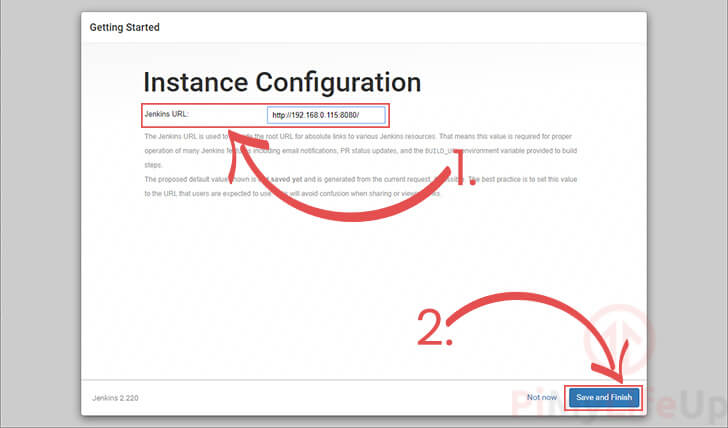
4. This screen will ask you to verify the URL it has generated for your Jenkins installation.
This URL should be your Raspberry Pi’s IP address followed by the port number 8080.
Please note that you should have your Raspberry Pi set up with a static IP address, as a change in IP will break the installation.
5. Your Raspberry Pi Jenkins installation is now set up and ready to use.
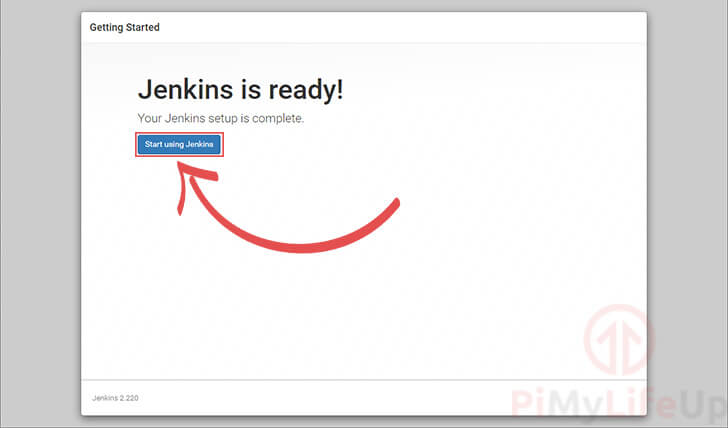
All you need to do is click the “Start using Jenkins” button to continue.
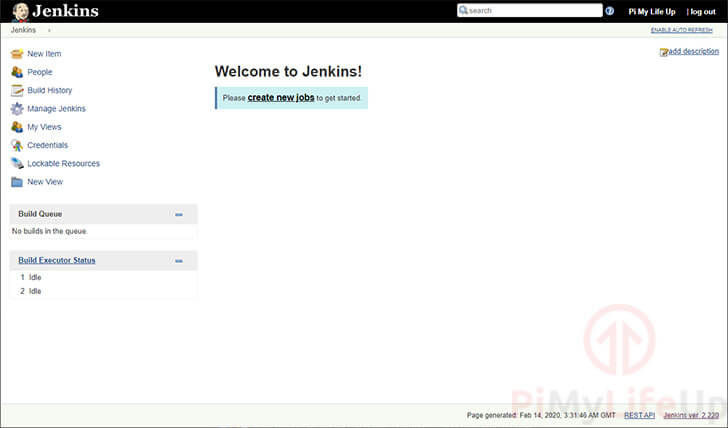
6. At this point, you should now have successfully installed Jenkins to your Raspberry Pi.
Controlling the Jenkins Service
If you ever want to control the Jenkins service, you can use sysmtectl
Retrieving the Status of the Jenkins Server
Use the following command to retrieve the current status of the Jenkins service.
sudo systemctl status jenkinsCopyStarting the Jenkins Service
To start the Jenkins service, you can run the command below.
sudo systemctl start jenkinsCopyStopping the Jenkins Service
If you want to stop the Jenkins service, you can try using the command below.
sudo systemctl stop jenkinsCopyDisabling the Jenkins Service
You can stop Jenkins from starting up at boot by disabling it with the following command.
sudo systemctl disable jenkinsCopyEnabling the Jenkins Service
Likewise, you can also enable the Jenkins service, so that is starts at boot by using the command below.
sudo systemctl enable jenkinsCopyHopefully, you will now have an idea on how to install Jenkins to a Raspberry Pi. You should also now know how to start, stop, and disable the Jenkins service.
If you have run into any issues with getting Jenkins set up, then feel free to drop a comment below.


Hi,
Please update your Jenkins Repository Key as it has been updated to
curl https://pkg.jenkins.io/debian/jenkins.io-2023.key | gpg --dearmor | sudo tee /usr/share/keyrings/jenkins-archive-keyring.gpg >/dev/nullRegards Alfred
Hi Alfred,
Thank you for pointing that out. I have updated the guide to point to the new repository key.
Cheers,
Emmet
Very nice tutoral.
Many thanks for this.
How could I delete it after installation?
Using purge should remove it.
sudo apt purge jenkinsThanks for the wonderful guide. Just a remark on the performance. Recently I’ve installed the Jenkins on Raspberry Pi 4 (4GB). As OS I’ve used the Centos 7.9 64-bit (aarch64).
The performance is much better than on 32-bit (armv7l). The UI is 100% usable and I’d say even fast. I definitely recommend to consider 64-bit OS on Raspberry Pi 4.
Thanks for the helpful guide. Worked well.
Nice guide to get Jenkins running, thank you for that! Now to get them jobs running 😉