In this tutorial, we will be showing you how to install Navidrome on your Raspberry Pi.
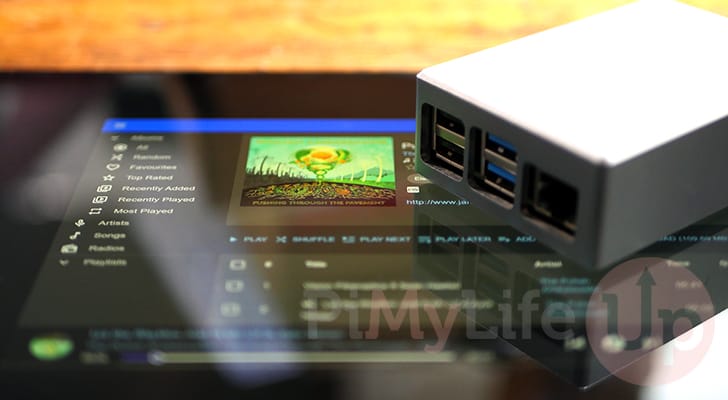
Navidrome is an open-source music server and streamer. You can think of this software as a self-hosted alternative to services like Spotify and Apple Music but for your own music files.
This music streamer even allows you to easily share your music playlists with others thanks to its easy-to-use web interface and great app support.
This Navidrome music server works on your Raspberry Pi by scanning your music files and creating a library. You can then sort your music into playlists through the web interface or a compatible client.
Like with the Plex Media Server, Navidrome will attempt to get cover art for your music. To help with the cover art fetching, ensure the file is named correctly or has metadata that the music server can fetch.
Equipment
Below you can find a list of the equipment we used while setting up Navidrome on our Raspberry Pi.
Recommended
Optional
This tutorial was last tested on a Raspberry Pi 5 running the latest version of Raspberry Pi OS Bookworm.
Installing Navidrome to the Raspberry PI
Over the following sections, we will show you how to install and run Navidrome on your Raspberry Pi.
We will be utilizing Docker to get this music server up and running easily. By using Docker, we don’t have to stress about setting up a web server and maintaining several dependencies.
Preparing your Raspberry Pi
1. Before you proceed any further, you must install and set up Docker on your Raspberry Pi. Docker is what we will be using to run Navidrome on our Pi.
Click and follow the guide we linked above to get everything set up with how we expect it to work.
https://pimylifeup.com/raspberry-pi-docker/2. After installing Docker, we can move on and create a directory to store our compose file for the Navidrome music server.
You can create this folder by using the following command in the terminal.
sudo mkdir -p /opt/stacks/navidrome/dataCopyBy using the “-p” tag, we are telling the mkdir command to create any missing directory within the given path.
3. Next, we must ensure that your current user owns the “data” part of the path, not root.
We can do this using the chown command on that directory.
sudo chown $USER: /opt/stacks/navidrome/dataCopy4. Next, you must change to the directory we created.
You can swap directories on a Linux system such as Raspberry Pi OS by using the cd command.
cd /opt/stacks/navidromeCopyWriting the Compose File for Navidrome on the Raspberry PI
5. Within our “navidrome” directory, we will want to write a Docker Compose file for Navidrome.
This file tells Docker how it should download and run the Navidrome image on our Raspberry Pi.
You can begin writing this file by using the command below. We use the nano text editor as it is one of the easier text-based editors.
sudo nano compose.yamlCopyIf you want a better way of managing Docker Compose files on your Pi, we highly recommend checking out Dockge.
6. Now, within this file, type in the following lines.
You must replace “<PATHTOMUSIC>” with the path to where you have your music stored. Whichever directory this is, your user must have read access to it.
version: "3"
services:
  navidrome:
    image: deluan/navidrome:latest
    user: 1000:1000
    ports:
      - "4533:4533"
    restart: unless-stopped
    environment:
      ND_SCANSCHEDULE: 1h
      ND_LOGLEVEL: info
      ND_SESSIONTIMEOUT: 24h
      ND_BASEURL: ""
    volumes:
      - "./data:/data"
      - "<PATHTOMUSIC>:/music:ro"Copy
7. After typing in the above lines, you can save and quit by pressing CTRL + X, followed by Y, and then the ENTER key.
Starting up the Navidrome Music Server
8. Once the Compose file is written, starting up the Navidrome music server on your Raspberry Pi is as simple as running the following command.
We use the “-d” option so that Docker will detach from the terminal session and run in the background.
docker compose up -dCopyAfter running the command, Docker will download the Navidrome image and start it using the variables we passed to it.
Accessing the Navidrome Music Web Interface
9. To access your Navidrome music server, you will want to know the IP address of your Raspberry Pi.
The easiest way to get the local IP address is to utilize the hostname command. If you haven’t done so already, you should seriously consider setting your Pi up to have a static IP address.
hostname -ICopy10. Once you know the IP of your Raspberry Pi, you will want to go to the following address in your favourite web browser.
Ensure that you replace “<IPADDRESS>” with the IP of your Pi.
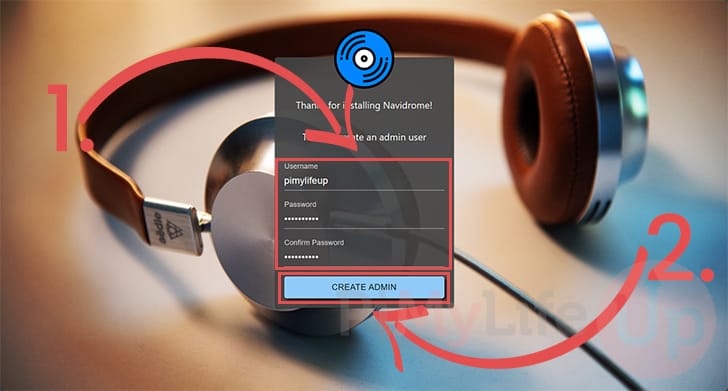
http://<IPADDRESS>:453311. When you first access the Navidrome web interface, you will be asked to create your first user.
Give this user a name you will remember, and a secure password (1.). You can use this user to create users for others later.
After typing out a username and password, click the “CREATE ADMIN” button (2.) to complete the setup experience.
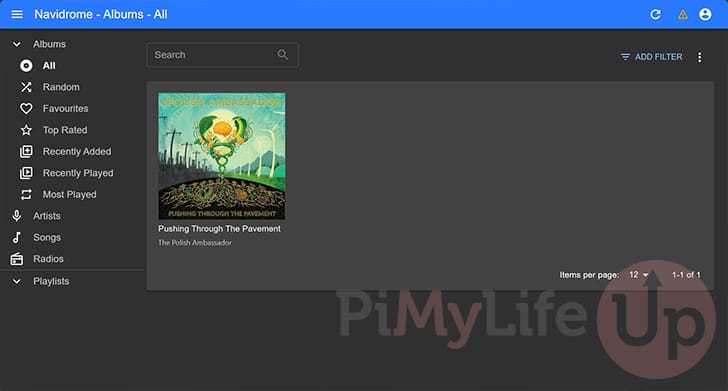
12. You should now have full access to the Navidrome web interface. If you have already added music to your folder, then the music server should have automatically detected them and added them to your library.
Updating Navidrome on your Raspberry Pi
Thanks to installing Navidrome using its official Docker container, updating the software is straightforward.
This section will walk you through the simple steps of getting Docker to download and use the latest version of the Navidrome music server on your Raspberry Pi.
1. First, we must change back to the directory where you wrote the Navidrome Docker Compose file.
Assuming you followed our tutorial exactly, this should be as simple as running the command below.
cd /opt/stacks/navidromeCopy2. Once we are in the correct directory, we can use Docker Compose to pull the latest version of the Navidrome image.
Getting Docker to download the latest version is as straightforward as using the command below.
docker compose pullCopy3. Even if Docker downloaded a new version of Navidrome, it won’t immediately use it
We have to use the following command to get Docker to update to the latest image. When it launches Navidrome, it will automatically take down the current image and move it over to your new one.
docker compose up -dCopyConclusion
Hopefully, you will now have the Navidrome music server up and running on your Raspberry Pi.
This music server lets you stream all your music from one central location. Its API allows music players to hook into all of its functionality very easily.
Please feel free to comment below if you have any questions or concerns about getting Navidrome working on your Pi.
If you found our tutorial to be useful, we recommend checking out our many other Raspberry Pi projects.


Brilliant tutorial. Worked first time using Pi5 and 500 GB M2 SSD plugged into USB port.