In this project, you will be learning how to install the Mono framework to your Raspberry Pi.

Mono is a software framework built as an open-source and free alternative to the .NET Framework. The team tries to achieve as much compatibility with the .NET framework as they can.
With Microsoft open-sourcing the .NET Core in 2016, Mono can support the vast majority of the core functionality with relative ease. Additionally, Mono is now actively maintained by Microsoft’s .NET Foundation and their subsidiary Xamarin.
Thanks to Mono being open-source, it has become the go-to way of utilizing software built open the .NET Framework on Linux systems like Raspberry Pi OS and Ubuntu.
We use Mono for our tutorial on running a Terraria server on the Raspberry Pi. The TShock software we use in that tutorial was built on the .NET framework. Mono allows us to run the TShock server without needing it to be rewritten or recompiled for our ARM Linux system.
This tutorial will walk you through the straightforward process of installing Mono onto a Raspberry Pi.
Equipment
Below is a list of the equipment you will need when installing the Mono Framework on your Raspberry Pi.
Recommended
Optional
Was teste this tutorial on a Raspberry Pi 400 running the latest version of Raspberry Pi OS Bullseye.
Installing Mono on the Raspberry Pi
The process of installing Mono to the Raspberry Pi is straightforward thanks to it being available as a part of the official Raspberry Pi OS package repository.
If you are using a desktop version of Raspberry Pi OS, you will need to be using the terminal. Open the terminal from the desktop by pressing CTRL + ALT + T.
Alternatively, you can run this tutorial on a headless Raspberry Pi. Then, you will just need to complete these steps over an SSH connection.
1. Before installing the Mono framework, we should ensure our operating system uses the latest packages.
You can update the package list and upgrade any existing packages by using the following two commands on your system.
sudo apt update
sudo apt upgrade
When prompted if you would like to continue with the package upgrade, press the Y key then ENTER.
2. Once the update process has finished, you can now install the Mono framework.
Installing Mono is as straightforward as using the following command on your Raspberry Pi.
sudo apt install mono-completeAgain, when you are asked if you would like to continue, type in Y, then press the ENTER key.
3. Due to the considerable number of packages that will be installed, this process can take a little bit of time to complete.
4. To verify that Mono is now installed on your Raspberry Pi you can either try running our Terraria server tutorial or by running the command below.
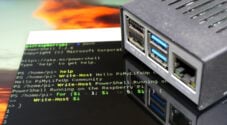
monoIf you run this command, you should see a list of arguments that can be used alongside this command. This indicates to you that Mono has been installed successfully to your Pi.
Conclusion
By this stage of the tutorial, you should have Mono successfully installed on your Raspberry Pi.
You can use Mono to help run software written using the .NET Framework on Linux systems.
If you have run into any issues with installing the Mono framework, please comment below.
Be sure to check out some of our other Raspberry Pi guides and projects.