In this tutorial, we will walk you through setting up a Cloudflare Tunnel on the Ubuntu operating system.
A Cloudflare Tunnel allows you to create a secure connection between your Ubuntu device and the Cloudflare network. Using this tunnel, you can have people access a service on your device without ever opening any ports in your firewall.
Additionally, if you use this tunnel to access a web service that uses HTTP or HTTPS you won’t even need to have Cloudflared installed to another device. Users can simply connect to your attached domain name to view your web service.
Best of all, this service won’t cost you anything for the vast majority of use cases. Cloudflare offers a lot with its free service.
Please note that the one catch is that you will need a domain name configured on Cloudflare for this tutorial to work. Your tunnels will be attached to a domain name when you route them.
Installing the Cloudflare Tunnel on Ubuntu
These next couple of sections will walk you through the simple process of installing the Cloudflare Tunnel software on your Ubuntu device.
We will be utilizing the official package repository to make updating the tunnel software as simple as possible.
Preparing Ubuntu to Run Cloudflared
1. Before we do anything, let us ensure that our Ubuntu operating system is up to date by running the following two commands.
The first command will update the package list cache. The second will upgrade any out-of-date packages.
sudo apt update
sudo apt upgrade -yCopy
2. We can now install the two packages we need to set up the Cloudflared repository on our Ubuntu system.
Cloudflared is the tool that will allow us to set up a Cloudflare tunnel easily.
sudo apt install curl lsb-releaseCopyAdding the Cloudflare Tunnel Repository to Ubuntu
3. Once everything is in place, we will want to add the official Cloudflare repository to our Ubuntu system.
First, we must download the GPG key for the repository. This key helps verify the packages that are coming from the repository.
curl -L https://pkg.cloudflare.com/cloudflare-main.gpg | sudo tee /usr/share/keyrings/cloudflare-archive-keyring.gpg >/dev/nullCopy4. You can now run the command below to add the Cloudflared repository to Ubuntu.
The advantage of using the official repository is that we can easily obtain the latest version of Cloudflared.
echo "deb [signed-by=/usr/share/keyrings/cloudflare-archive-keyring.gpg] https://pkg.cloudflare.com/cloudflared $(lsb_release -cs) main" | sudo tee /etc/apt/sources.list.d/cloudflared.listCopy5. Your next step is to update the package list cache so the package manager becomes aware of the new packages.
Updating the package list cache is as simple as running the command below within the terminal.
sudo apt updateCopyInstalling the Cloudflare Tunnel on Ubuntu
6. Now that you have added the official Cloudflared repository, we can install the Cloudflare Tunnel to Ubuntu.
You can install the Cloudflare Tunnel by running the following command.
sudo apt install cloudflaredCopySetting up your Cloudflare Tunnel on Ubuntu
The following sections will show you how to set up the Cloudflare Tunnel on Ubuntu. We will walk through authenticating your device with Cloudflare and then creating and routing traffic through the tunnel.
Connecting to the Cloudflare Service
1. We must associate our Ubuntu Cloudflared installation with the Cloudflare service before creating a Cloudflare tunnel.
Luckily for us, the Cloudflared tool makes creating this connection a simple process that we can start by running the command below.
cloudflared tunnel loginCopy2. You will now see the following message appear within the terminal. You must go to the URL in this message and follow the prompts to log in to your account.
If you are running this on a version of Ubuntu with a desktop interface, the tool will attempt to open a web browser to the displayed URL automatically.
Cloudflared will automatically detect when you have logged in and complete the connection.
Please open the following URL and log in with your Cloudflare account:

https://dash.cloudflare.com/argotunnel?callback=https%3A%2F%2Flogin.cloudflareaccess.org%2FXXXXXXXXXX

Leave cloudflared running to download the cert automatically.
3. After your Ubuntu system has authenticated itself with the Cloudflare tunnel service, you will see the following message appear within the terminal.
This message tells you where the credentials are stored. Cloudflared will use this file whenever it communicates with Cloudflare.
You have successfully logged in.
If you wish to copy your credentials to a server, they have been saved to:
/home/pimyubu/.cloudflared/cert.pem
Creating the Tunnel to Cloudflare
4. With our Ubuntu system now authorized with Cloudflare, we can use the tool to create a new tunnel.
Creating a tunnel is as simple as running the command below in the terminal. Replace “TUNNELNAME” with the name you want to assign to your new Cloudflare Tunnel.
For our example, we will be naming our tunnel “pimytunnel“.
cloudflared tunnel create TUNNELNAMECopy5. Once the tunnel is created, you will see the following message appear within the terminal.
You should note the tunnel ID as you will need this later in the tutorial.
Tunnel credentials written to /home/pimyubu/.cloudflared/XXXXXXXX-XXXX-XXXX-XXXX-XXXXXXXXXXXX.json. cloudflared chose this file based on where your origin certificate was found. Keep this file secret. To revoke these credentials, delete the tunnel.
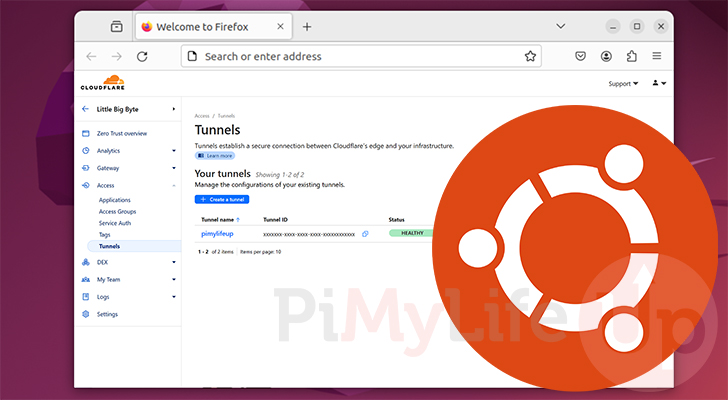
Created tunnel pimytunnel with id XXXXXXXX-XXXX-XXXX-XXXX-XXXXXXXXXXXXRouting your Cloudflare Tunnel to a Domain Name on Ubuntu
6. After creating a Cloudflare Tunnel on Ubuntu, you can route your tunnel through any domain name associated with your Cloudflare account.
Associating a tunnel with a domain name allows you to access that tunnel through the given domain name. If your program uses HTTP or HTTPS protocols, the other users won’t need to have Cloudflared installed to access the tunnel.
You can associate the tunnel with a domain name by using the following command in the terminal. When typing out this command, you will need to replace the following values:
TUNNELNAME: First, you must swap out the tunnel name placeholder with the name of the tunnel you want the domain name to be associated with.DOMAINNAME: Next, replace this placeholder with the domain name you want to be pointed to your tunnel.
cloudflared tunnel route dns TUNNELNAME DOMAINNAMECopy7. Upon successfully creating the route to your tunnel, you will see the following message appear within the terminal.
2022-10-18T04:54:54Z INF Added CNAME DOMAINNAME which will route to this tunnel tunnelID=XXXXXXXX-XXXX-XXXX-XXXX-XXXXXXXXXXXXForwarding Traffic Through the Cloudflare Tunnel on Ubuntu
8. While you now have the Cloudflare Tunnel created on your Ubuntu system, it currently leads to nothing.
Linking a tunnel to a service running on your system is simple. In this example, we will point our tunnel to a specific URL on our device.
Use the command below to link your tunnel to a local URL on your system.
PORT: Replace “PORT” with the port belonging to the app you want to expose on your Ubuntu system.
For example, if you want to expose the HTTP port of your web server, you can replace this with “80“.TUNNELNAME: Next, you must swap this value with the name of the Cloudflare tunnel you want associated with your URL.
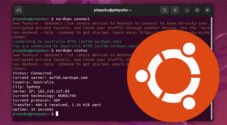
cloudflared tunnel run --url localhost:PORT TUNNELNAMECopy9. The tunnel between your application and Cloudflare will begin to run on your Ubuntu system.
It will remain open as long as your tunnel is currently running. You can close this tunnel by pressing CTRL + C on your keyboard.
2022-10-18T09:34:40Z INF Starting tunnel tunnelID=XXXXXXXX-XXXX-XXXX-XXXX-XXXXXXXXXXXX
2022-10-18T09:34:40Z INF Cannot determine default configuration path. No file [config.yml config.yaml] in [~/.clouddflare-warp /etc/cloudflared /usr/local/etc/cloudflared]
2022-10-18T09:34:40Z INF Version 2022.10.0
2022-10-18T09:34:40Z INF GOOS: linux, GOVersion: go1.18.6, GoArch: arm
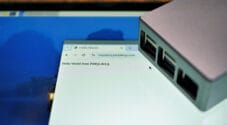
2022-10-18T09:34:40Z INF Settings: map[url:localhost:80]10. Before you close the tunnel on your Ubuntu system, you should test and verify that it works.
The simplest way is to access the service you set up. If everything is working fine, you can move on to configuring it to start at boot.
Starting the Cloudflare Tunnel when Ubuntu Boots
11. Now that you know your Cloudflare Tunnel is working on your Ubuntu system, you will want to configure it to begin when your device powers on.
For this to occur, we must write a “config.yml” file within our current user’s home directory. The Cloudflare daemon will read this on boot and start your tunnel.
sudo nano ~/.cloudflared/config.ymlCopy12. Within this file, type in the following lines. These lines define our tunnel, but you must replace a fair few values with your own.
<TUNNELNAME>: The first thing you must do is replace this with the name you assigned to your tunnel earlier in this guide.<USERNAME>: Next, you must replace “<USERNAME>” with your users name.<UUID>: You must add the UUID you got when you first created the Cloudflare tunnel on your Ubuntu device.<DOMAINNAME>: Swap out this value with the domain name you are associating with your tunnel.<PROTOCOL>: This is the protocol you want to be used for the connection. For example, if you are connecting the tunnel to a web server, you likely want to use “http” or “https“.
You can also use other protocols, such as “ssh” for an SSH connection or “tcp” for a TCP connection such as what is used by a Minecraft server.<PORT>: Finally, you must replace the “PORT” with the port your program listens to. Web servers typically listen on port80for HTTP and port443for HTTPS.
tunnel: <TUNNELNAME>
credentials-file: /home/<USERNAME>/.cloudflared/<UUID>.json

ingress:
    - hostname: <DOMAINNAME>
      service: <PROTOCOL>://localhost:<PORT>
    - service: http_status:404Copy
13. After adding the above lines to the file, you can save and quit by pressing CTRL + X, then Y, followed by the ENTER key.
14. Now that you have written the configuration file, we must tell the Ubuntu Cloudflare Tunnel to utilize it. We can do this by using the following command.
This command will copy our new config file to where Cloudflared expects it and set it up as a service that can be run on boot.
sudo cloudflared --config ~/.cloudflared/config.yml service installCopy15. Your next step is enabling the Cloudflared service to start when your Ubuntu device powers on.
Enabling the service is as simple as using the command below.
sudo systemctl enable cloudflaredCopy16. Finally, with the service enabled, we can start up the Cloudflare Tunnel on Ubuntu by running the command below.
sudo systemctl start cloudflaredCopyConclusion
At this stage, you will hopefully understand how to create a Cloudflare tunnel on the Ubuntu operating system.
A Cloudflare Tunnel allows you to create a secure connection between you and Cloudflare without opening any ports. Traffic can then come through this encrypted tunnel to connect to your service.
To add extra security, you can implement Cloudflare’s various security features, such as Zero Trust.
Please feel free to comment below if you have questions about setting up a Cloudflare Tunnel.
If you found this guide to be helpful, we highly recommend checking out our many other Ubuntu projects.