In this tutorial, we will be showing how you can list services on the Ubuntu operating system.
Services are processes that run in the background, performing various tasks on your Ubuntu system. NGINX and Apache are some programs you might be familiar with that are often run as a service.
We often create services within our Ubuntu guides to get the software to start at boot and run continually in the background.
Knowing what services are currently set up is crucial to managing your system.
Since all versions of Ubuntu since version 15 use systemctl to manage their services, we will be focusing on using that tool.
By the end of the following steps, you will know how you can list services on your Ubuntu system.
Listing Services on Ubuntu using Systemctl
Listing services is a very straightforward thing to do once you have the terminal open. The systemctl tool allows us to list all active services with a simple command.
Listing Active Services
To get Ubuntu to list the currently active services, you will want to use the following command. By default, systemctl will only list units that are currently active. However, we can control this behaviour.
Additionally, without specifying any additional options, the results will be paginated.
sudo systemctl list-unitsCopyIf you prefer the list of services on your Ubuntu device not to be paginated, you will want to use the “--no-pager” option. This option tells systemctl to print the entire list of services to the terminal.
sudo systemctl list-units --no-pagerCopyExample of Listing Services on Ubuntu
Now that you know how to list active services let us explore it in action and the data it gives us.
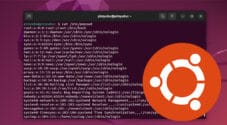
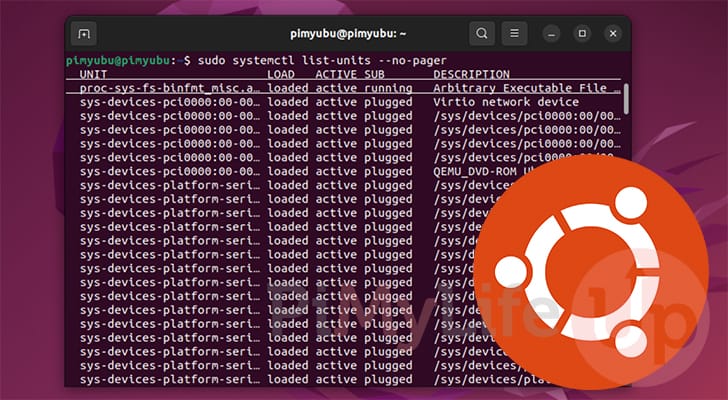
1. Within the terminal, run the following command to list the active services on your Ubuntu device.
sudo systemctl list-units --no-pagerCopy2. After running the above command, you will see a list similar to the one below. We have taken a small selection, but it gives you an idea of what systemctl will return.
  UNIT                            LOAD      ACTIVE SUB       DESCRIPTION
  avahi-daemon.socket             loaded    active running   Avahi mDNS/DNS-SD Stack Activation Socket
  dbus.socket                     loaded    active running   D-Bus System Message Bus Socket
  docker.socket                   loaded    active running   Docker Socket for the API
  syslog.socket                   loaded    active running   Syslog Socket

LOAD   = Reflects whether the unit definition was properly loaded.
ACTIVE = The high-level unit activation state, i.e. generalization of SUB.
SUB    = The low-level unit activation state, values depend on unit type.
161 loaded units listed. Pass --all to see loaded but inactive units, too.
To show all installed unit files use 'systemctl list-unit-files'.
At the top of each result, you will see the following headings.
- UNIT: This value represents the name of the service. It is not necessarily the same name as its service file.
- LOAD: This tells you whether the service is currently loaded in by systemd.
- ACTIVE: Indicates whether the service is currently marked as active or not.
- SUB: The low-level status of the service. For example, a service could be active but waiting or exited.
- DESCRIPTION: This should give you an idea of what the service is used for. This value is specified within the service file.
At the bottom of the results, you will see a value indicating how many services are currently loaded on your Ubuntu system. This doesn’t necessarily mean these services are chewing up resources, but they are active.
Listing All Services on Ubuntu
Changing the list units command to list all services on your Ubuntu system is straightforward.
All we need to do is include another option that tells systemctl that we want it to list all services. Simply place “--all” at the end of the command.
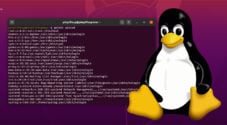
sudo systemctl list-units --no-pager --allCopyWhen you run this command, you will see every service on your system, including those that are inactive. You can see an example of this with our result below.
  UNIT                              LOAD      ACTIVE   SUB       DESCRIPTION
  emergency.target                  loaded    inactive dead      Emergency Mode
  first-boot-complete.target        loaded    inactive dead      First Boot Complete
  getty-pre.target                  loaded    inactive dead      Login Prompts (Pre)
  getty.target                      loaded    active   active    Login Prompts
  graphical.target                  loaded    inactive dead      Graphical Interface
  local-fs-pre.target               loaded    active   active    Local File Systems (Pre)
  local-fs.target                   loaded    active   active    Local File Systems

LOAD   = Reflects whether the unit definition was properly loaded.
ACTIVE = The high-level unit activation state, i.e. generalization of SUB.
SUB    = The low-level unit activation state, values depend on unit type.
270 loaded units listed.
To show all installed unit files use 'systemctl list-unit-files'.
Only Listing Inactive Services on Ubuntu
The systemctl tool also allows you to list services based on their current state.
To list services on your Ubuntu system based on its state, you will want to use the “--state” option, followed by the state.
A simple syntax for this is what we have shown below.
sudo systemctl list-units --state=<STATE>CopyFor example, if we only wanted to list inactive services on our Ubuntu device, we would use the following command.
sudo systemctl list-units --state=inactiveCopyHow To List Service Files on Ubuntu
While we have shown you how to list your Ubuntu device’s active and inactive services, you may want to know where their service files are located.
This section will show how you can use the same systemctl command to output each service as a path to its service file.
Listing All Service Files on Ubuntu
Unlike listing the services, listing service files will, by default, list every service file on your system regardless of whether they are enabled or disabled.
To list service files on Ubuntu, you must use the following command within the terminal. The major change with this command is the change from “list-units” to “list-units-files“.
sudo systemctl list-units-filesCopyLike with listing services, if you don’t want the results to be paginated, you need to include the “--no-pager” option.
sudo systemctl list-units-files --nopagerCopyExample of Listing Service Files
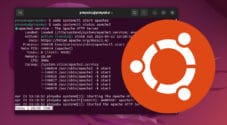
Below, you can see a small example of the data that you will get by listing service files on your Ubuntu system.
UNIT FILE                         STATE           VENDOR PRESET
poweroff.target                   disabled        disabled
printer.target                    static          -
reboot.target                     disabled        enabled
remote-cryptsetup.target          disabled        enabled
remote-fs-pre.target              static          -
remote-fs.target                  enabled         enabled

279 unit files listed.
You will notice there are three headers that we will quickly go over.
- UNIT FILE: This is the name of the service file. If you want to override or edit this service, this is the file you will want to edit.
- STATE: The state tells you the status of the service. It can be “
enabled“, “disabled“, or “static“. - VENDOR PRESET: This column will show you what the service is set to by default. This helps show whether a service has been enabled when it is typically disabled or vice versa.
At the bottom of the list, you will see a summary of the number of service files that are available on your system.
Listing Service Files Based On State
You can also be more selective with what service files are listed by systemctl on Ubuntu. All we need to do is use the “--state” option to specify the state we want.
After the “--state” option, you will want to specify the state you want that service file to be in when listed.
sudo systemctl list-units-files --state=<STATE>CopyFor example, if you wanted to list only disabled service files, you would use the following command within the terminal.
sudo systemctl list-units-files --state=disabledCopyConclusion
At this point in the guide, you should now understand how to list services on the Ubuntu system.
Knowing how to list services can better help you manage your system.
Please leave a comment below if you have any questions about listing services.
If you found this tutorial useful, be sure to check out our many other Ubuntu guides.