In this tutorial, we will be showing you how to install Adminer on the Raspberry Pi.
Adminer is a web-based database management tool that is very much like phpMyAdmin. It is built to be lightweight and is written within a single PHP file.
Using Adminer on your Raspberry Pi is a great solution for managing your databases, whether that be PostgreSQL, MariaDB, SQLite, or even MongoDB.
It is an excellent solution for those looking for a database tool that isn’t super heavy while still capable of performing every action you might require.
The interface might not be as pretty or fleshed out as phpMyAdmin and other tools, but you will still find it easy to navigate.
To run Adminer on our Raspberry Pi, we will use Docker. The advantage of using Docker to run this tool is that we don’t have to worry about what web server you are running. Instead, Adminer will have everything it needs to operate within its container.
Another advantage of running a database tool like this is that updating PHP on your host system won’t break Adminer.
Equipment
Below is a list of equipment we used while setting up Adminer on our Raspberry Pi.
Recommended
Optional
This tutorial was last tested on a Raspberry Pi 400 running the latest version of Raspberry Pi OS Bookworm 64-bit.
Installing Adminer to the Raspberry Pi
In the following section, we will walk you through all the steps to installing Adminer on the Raspberry Pi.
Preparing your Raspberry Pi
1. Before we start, we must ensure that our operating system is up-to-date by using the following two commands.
The first command updates the package list cache. The second upgrades any out-of-date packages.
sudo apt update
sudo apt upgrade -yCopy
2. After the update completes, your next step is to install Docker on your Raspberry Pi.
Our guide will have Docker installed in a few short steps.
3. Our next step is to create a directory to store the Adminer compose file.
We can create this directory by using the mkdir command within the terminal.
sudo mkdir -p /opt/stacks/adminerCopyUsing the “-p” option, the mkdir command will create all directories in the specified path if missing.
4. With the directory now created, we can change to the “/opt/stacks/adminer” directory by using the command below.
cd /opt/stacks/adminerCopyWriting the Compose File for Adminer on the Raspberry Pi
5. At this stage, we can finally begin writing the Compose file for Adminer on the Raspberry Pi.
This compose file tells Docker what image to download and how to configure the container.
sudo nano compose.yamlCopy6. Within this file, type in the following lines. Adminer doesn’t require much configuration besides the image name and the ports it should operate on.
This configuration will set Adminer to operate on port “8080“. If you need this to operate on a different port, swap “8080” on the left side with the port you want to use instead.
version: '3.1'

services:

  adminer:
    image: adminer
    restart: always
    ports:
      - 8080:8080Copy
7. After adding this line to the file, you can save and quit by pressing CTRL + X, Y, and then the ENTER key.
Starting the Raspberry Pi Adminer Container
8. To start up the Adminer container on your Raspberry Pi, all you need to do is use the following command.
It will immediately download and run the database management tool on your device. If you want a good tool for managing these containers on your Raspberry Pi, you should check out Dockge.
docker compose up -dCopyUsing the “-d” option, Docker will detach from the current terminal session after it has started Adminer.
Accessing the Admin Web Interface
9. Now that you have Adminer up and running on your Raspberry Pi, we can access its web interface.
To do this, you must know the IP address of your device. You can get this IP by using the hostname command.
hostname -ICopy10. Once you have your IP address, go to the following URL in your favourite web browser.
Ensure you replace “<IPADDRESS>” with your Pi’s IP. Additionally, if you changed the port Adminer is operating on, you will need to replace that as well.
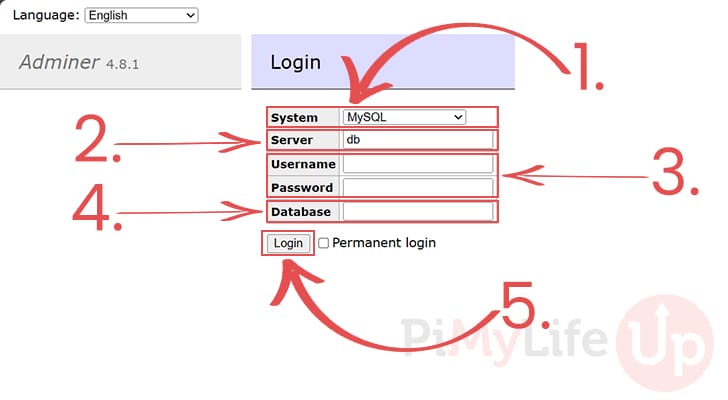
http://<IPADDRESS>:808011. You can now log in to your database using Adminer. You have to fill out various fields, but it’s not as complicated as it may look.
- First, you will want to set the database type you are using. Typically, this is set to “
MySQL” by default. - Next, you must specify the IP address for your database server.
- You must also specify the username and password to a user on the database you want to connect to.
- The “Database” option is optional but is helpful if there is a database you want to connect straight into.
Finally, after completing your details, click the “Login” button (5.).
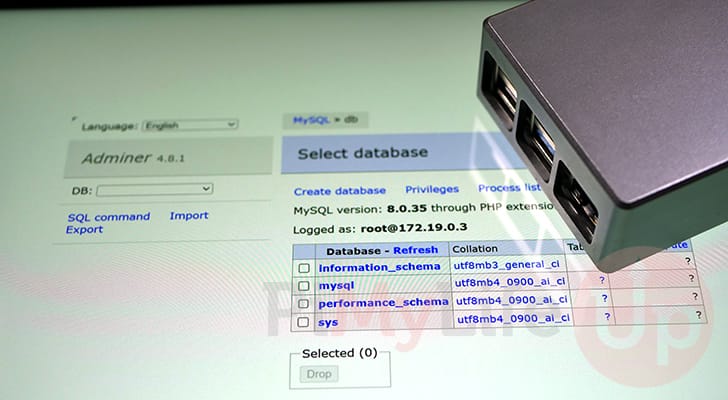
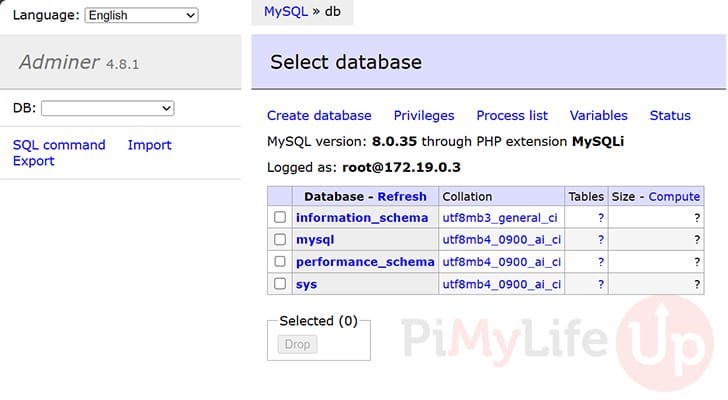
12. Below you can see we are using Adminer on our Raspberry Pi to connect to our local database server.
Updating Adminer
The update process is super simple since we installed Adminer using a Docker container. All we need to do is utilize Docker Compose to re-pull the image.
1. Let us start by changing into the directory where we saved our Docker compose file earlier.
cd /opt/stacks/adminerCopy2. Next, we must use Docker Compose to pull the new image.
This will see if a newer version of the Admiener image is available and download it to the system.
docker compose pullCopy3. If a new version is available, you must restart the currently running container to utilize it.
Use the command below to restart Adminer and move it to the new image.
docker compose up -dCopyConclusion
Hopefully, you will now have Adminer up and running on your Raspberry Pi.
This is a lightweight yet powerful database management tool you can run on your device.
We install this software using Docker to help isolate it from any other web server you might be running.
Please feel free to leave a comment below if you have had any issues getting Adminer to run on your device.
If you found this tutorial helpful, please check out our many other Raspberry Pi projects.


In 5th step it should be “sudo nano compose.yaml”
There is a typo “compoose” here which cant detect the yaml file.
Hi Abid,
Thank you very much for pointing out the typo. I have quickly corrected that step.
Kind regards,
Emmet