In this tutorial, we will be showing you how to install MongoDB on the Ubuntu operating system.

MongoDB is a document-oriented database server that you can run on Ubuntu. Unlike MySQL, MariaDB, or PostgreSQL, it does not rely on the traditional table-based structure.
It is a super versatile database engine used by various companies thanks to its ability to handle a huge amount of unstructured data. This database style is called NoSQL.
While MongoDB is available through the official Ubuntu repository, the version provided is often old and missing core features or fixes.
Luckily, adding the official package repository for MongoDB is a straightforward process. Using this, you know you can get your desired version of Mongo and are always getting the latest available version.
Installing MongoDB on Ubuntu
Over the following sections, we will walk you through the process of installing MongoDB to your Ubuntu system.
We will show you how to add the official package repository so you can get the latest version. We will also show you how to test and verify that the server is working.
If you prefer a more visual guide on installing MongoDB on Ubuntu, be sure to check out the embedded guide below. As always, we still have our written tutorial that you can follow by scrolling passed this embed.
Preparing Ubuntu to Install MongoDB
1. We need to update the package list cache Before installing and setting up MongoDB on our Ubuntu device.
Updating the package list cache is as simple as using the command below.
sudo apt updateCopy2. Once the package list cache is updated, we can install the packages we need to set up the official repository.
These packages usually come bundled with Ubuntu, but to be safe, we can use the command below to ensure they are installed.
sudo apt install gnupg curl lsb-releaseCopygnupg: The first package we install can be used to convert the MongoDB GPG key into the format that the apt package manager expects.curl: Within this guide, we will use the curl package to download the GPG key to our keychain.lsb-release: We use this package to grab the codename for your Ubuntu version.
Adding the Official MongoDB Repository
3. To simplify the number of adjustments you need to make to the next few commands, let us define a bash variable containing the MongoDB version we install to install.
Each major release of MongoDB has its own repository and GPG key. Using the line below, we are setting our version to the “8.0” branch.
If you intend to use a different release, such as “8.0“, 6.0” or “4.4“, then replace “8.0” with that version.
MONGO_VERSION=8.0Copy4. After defining the version of MongoDB we intend to install to our Ubuntu system, our next step is to save the GPG key for that version.
This GPG key is used to verify the packages that we download from the MongoDB repository.
We can grab this key by using the following command within the terminal. You can see that this command uses the “MONGO_VERSION” variable we set in the previous step to insert the version number.
curl -fsSL https://pgp.mongodb.com/server-$MONGO_VERSION.asc | sudo gpg -o /usr/share/keyrings/mongodb-server-$MONGO_VERSION.gpg --dearmorCopy5. The next step is to add the MongoDB repository to our Ubuntu device by using the command below. This creates a source file for the particular version of MongoDB we intend on installing.
Here we again use our “MONGO_VERSION” variable to insert the version of MongoDB. We also use the “lsb_release” command to insert the code name of your Ubuntu installation.
echo "deb [ arch=amd64,arm64 signed-by=/usr/share/keyrings/mongodb-server-$MONGO_VERSION.gpg ] https://repo.mongodb.org/apt/ubuntu $(lsb_release -sc)/mongodb-org/$MONGO_VERSION multiverse" | sudo tee /etc/apt/sources.list.d/mongodb-org-$MONGO_VERSION.listCopy6. Since changed the available repositories, we must update the package list cache. If we don’t perform an update the apt package manager will be unaware of the new versions of MongoDB.
Use the following command to update the list of available packages that we can install on Ubuntu.
sudo apt updateCopyInstalling MongoDB on to Ubuntu from the Official Repository
7. We can finally install MongoDB to our Ubuntu system using the following command.
Thanks to the repository that was set up earlier, we will know that we are getting the version of MongoDB that we want. This installs process should only take a few minutes to complete.
sudo apt install mongodb-orgCopyStarting the MongoDB Server on Ubuntu
8. With MongoDB installed, you will likely want to start the database server.
Starting the server is as simple as using the following command within the terminal.
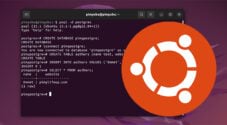
sudo systemctl start mongodCopy9. We can verify that the service has successfully started using the command below.
This command will retrieve and output the status of the “mongod” service that we started.
sudo systemctl status mongodCopyIf everything is working properly, you should see “Active: active (running)” within the output.
pimyubu@pimyubu:~$ sudo systemctl status mongod
● mongod.service - MongoDB Database Server
     Loaded: loaded (/lib/systemd/system/mongod.service; disabled; vendor preset: enabled)
     Active: active (running) since Thu 2024-01-18 01:01:43 AEDT; 4s ago
       Docs: https://docs.mongodb.org/manual
   Main PID: 17392 (mongod)
     Memory: 73.3M
     CGroup: /system.slice/mongod.service
             └─17392 /usr/bin/mongod --config /etc/mongod.confCopy
10. Once you have verified that the MongoDB server is running on Ubuntu you will want to enable the service.
By enabling the service, we allow it to be automatically started when your device powers on.
sudo systemctl enable mongodCopy11. The final thing you can do to verify that this database server is up and running is to utilize the command below.
Running the following will send a simple command to the server to request the connection status.
mongosh --eval 'db.runCommand({ connectionStatus: 1 })'CopyIf you see the text “ok: 1” within the response then everything should be working.
Current Mongosh Log ID: 65a7e01c06797b0cbae590d9
Connecting to:          mongodb://127.0.0.1:27017/?directConnection=true&serverSelectionTimeoutMS=2000&appName=mongosh+2.1.1
Using MongoDB:          7.0.5
Using Mongosh:          2.1.1

For mongosh info see: https://docs.mongodb.com/mongodb-shell/

{
  authInfo: { authenticatedUsers: [], authenticatedUserRoles: [] },
  ok: 1
}
Conclusion
At this stage, you should now have the MongoDB database server installed on your Ubuntu system.
While you could install MongoDB straight from the Ubuntu repository, this would have left you with an out-of-date version. Luckily, adding the official repository and installing your deserved version is a relatively straightforward process.
Please feel free to comment below if you have any issues with installing this server on your system.
If you found this tutorial helpful, we recommend checking out our other Ubuntu tutorials and guides.