This tutorial will show you the various ways you can add a repository on an Ubuntu system.
A repository is where your Ubuntu system will download and install packages from whenever you use the apt package manager.
While Ubuntu provides numerous packages through its official repositories, it may not include all the packages you need. There is also a chance the packages included are older than what that software is releasing itself.
Luckily the apt package manager that Ubuntu relies on allows you to add your repositories to download packages from.
In the following sections, we will show how you can manually add a package repository to your Ubuntu system and add a PPA repository.
Manually Adding a Repository on Ubuntu
Knowing how to add a repository on Ubuntu manually is a very useful skill, and with newer versions of Ubuntu is almost a requirement.
This section will explain how exactly you can add a repository manually and why we are using particular directories.
Additionally, this follows newer expectations from Ubuntu with the repository and its GPG key manually added to separate locations. While it is possible to use a tool like “add-apt-repository“, this functionality is deprecated and no longer supported by newer releases of Ubuntu.
Key Details of Manually Adding a Repository
Before we get started with an example of manually adding repositories, we should go over a few key details.
The two main things we want to discuss are the directories in which we will store the repository and its GPG key.
/etc/apt/sources.list.d/– This directory is where you will write any of your new source file. A source file contains one or more the links to a repository.
While you can add everything to the main “sources.list” file, this is bad practice as it bloats out that file and makes it harder to remove or modify a particular repository quickly.
When updating the package list cache, your Ubuntu system will automatically search this folder for new repositories./usr/share/keyrings/– This directory is where any GPG key for your repositories will be stored. The package system uses a GPG key to verify the contents of the packages you are downloading are authentic.- If a package you download hasn’t been signed by the key you reference in this directory, it will be discarded.
How to Manually Add a Repository and GPG key on Ubuntu
Now that we have quickly gone over the two directories crucial to adding a repository to Ubuntu manually, let us show you an example and explain what we are doing in each section.
For this example, we will be adding the Spotify repository to our Ubuntu device. That service provides the following components that we need to import.
- Key:
https://download.spotify.com/debian/pubkey_5E3C45D7B312C643.gpg - Repo:
http://repository.spotify.com stable non-free
Importing a Repositories GPG Key
Before you can download packages from a new repository on Ubuntu, you will need to add the public key. This key helps tell the system that the packages its downloading are authentic.
Without this key, the APT package manager will refuse to download any packages from the new repository.
1. Before proceeding, you should ensure that the GPG key you are downloading is actually in the correct format.
Sometimes even though the key you are downloading ends in “.gpg“, it is using the “pgp” format.
The easiest way to check this is to utilize the curl command to print out the contents of the key.
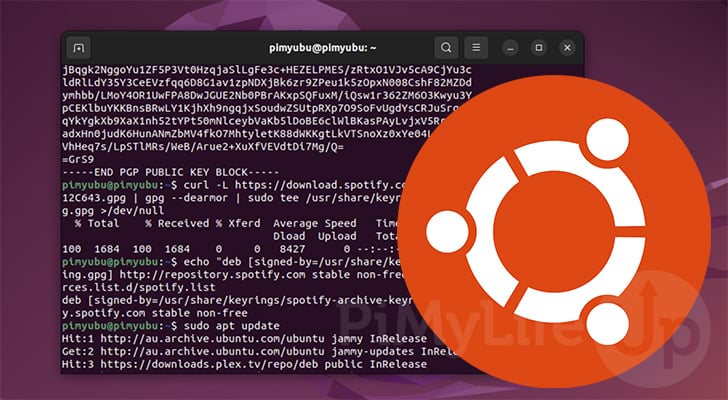
curl https://download.spotify.com/debian/pubkey_5E3C45D7B312C643.gpgCopy2. If you were to run the previous command, you would see that this key starts with the following text.
This text shows us that the key is using the PGP format, and we will need to convert it.
-----BEGIN PGP PUBLIC KEY BLOCK-----3. Once you have verified the format of your GPG key, we can proceed to save it to the system.
This step will differ if you notice that your key is using the PGP format, as we need to pipe it through the GPG tool to convert it.
Converting PGP to GPG Key and Saving
If the repository key you are trying to save on Ubuntu is using the PGP format, then we need to convert it.
Converting a key from PGP to the GPG format the package manager expects is a super simple process.
First, we grab the key we want to save using the curl command. We then utilize a pipe (|) to pass the retrieved key directly to the GPG tool.
We can convert the key by using a couple of options with this GPG tool while also saving it to the required directory.
--dearmor: The dearmor option tells the GPG tool that it needs to convert the key being passed into it. This allows us to convert a PGP key to the format Ubuntu expects.-o: The other option allows us to save the converted key directly to where we want it. In our case, we use this option to save the key directly to the “/usr/share/keyrings/” directory
curl https://download.spotify.com/debian/pubkey_5E3C45D7B312C643.gpg | gpg --dearmor -o /usr/share/keyrings/spotify.gpgCopySaving your GPG Key
If the GPG key for the repository you are adding to Ubuntu is already in the correct format, we can copy it to our destination folder.
Like converting the key, we still use curl to download it to your system.
However, this time we will pipe (|) it to the “tee” command to save the file to the “/usr/share/keyrings/” directory.
curl https://download.spotify.com/debian/pubkey_5E3C45D7B312C643.gpg | sudo tee /usr/share/keyrings/spotify.gpgCopyAdding a Repository to Ubuntu
4. With the GPG key now saved to your Ubuntu system, you can move on to adding the repository itself.
To add a repository, we will be creating a new file within the “/etc/apt/sources.list.d/” directory. Typically, you will want to name this to reflect the repository you are adding.
For example, the repository we are adding is for Spotify, so we will name this file “spotify.list“.
5. What you need to enter into this file usually follows the following format.
Some repositories may require you to include additional information, so pay attention to their documentation.
Below is an example of what you should have at a basic level. The square brackets allow you to define additional information. Our syntax below defines the GPG key it should use to verify this repository.
deb [signed-by=/usr/share/keyrings/NAMEOFGPGKEY.gpg] REPOSITORYLINK OPTIONSFor example, to write this for the Spotify repository, we would end up with the following.
deb [signed-by=/usr/share/keyrings/spotify] http://repository.spotify.com stable non-free6. While you could use something like the nano text editor to add this new repository, you can also use a shorthand command like the following.
With this, we start by using echo to print the strings discussed in the previous step.
We then pipe (|) this response to the tee command, which will save this line into a file called “spotify.list” within the “/etc/apt/sources.list.d/” directory.
echo "deb [signed-by=/usr/share/keyrings/spotify.gpg] http://repository.spotify.com stable non-free" | sudo tee /etc/apt/sources.list.d/spotify.listCopy7. After adding a repository on Ubuntu, you will need to refresh the package list cache for the system to be aware of it.
To refresh this cache, you must run the following command within the terminal.
sudo apt updateCopyAdding a PPA Repository to Ubuntu
One of the other ways to add a repository to the Ubuntu system is when it is provided as a Personal Package Archive (PPA).
The main difference between a standard repository and a PPA is that these are a collection of packages hosted on Canonical’s Launchpad servers.
An example of a popular repository that is provided through a PPA is the one managed by Ondrej, which allows you to install newer and older versions of PHP to Ubuntu.
This section will walk you through the straightforward steps to add a PPA repository to Ubuntu. We will use the PHP one we just mentioned to showcase this.
1. To add a PPA repository on Ubuntu you need to ensure that you have the “software-properties-common” package installed to your system.
Before installing this package, ensure you have an updated list using the following command.
sudo apt updateCopy2. Once the update completes, all you need to do to install the “software-properties-common” package is to use the command below in the terminal.
sudo apt install software-properties-commonCopy3. With that done, we can finally use the “add-apt-repository” tool to add the PPA repository to our Ubuntu system.
The basic syntax for using the tool to add a PPA is shown below.
sudo add-apt-repository ppa:REPOSITORYNAMECopyIn our case, we would use the following command to add the Ondrej PHP repository to our system.
sudo add-apt-repository ppa:ondrej/phpCopy4. Whenever a repository has been added to the Ubuntu system, you should perform an update of the package cache.
Updating this cache is as straightforward as using the command below in the terminal.
sudo apt updateCopyConclusion
At this point in the tutorial, you should know how to add a repository to Ubuntu. Whether this will be manually adding it or by utilizing the “add-apt-repository” tool to add a PPA.
A package repository allows Ubuntu to install packages that aren’t available through its official repositories.
Please comment below if you have issues or need assistance adding a repository to your Ubuntu system.
We have plenty of other Ubuntu guides and general Linux tutorials if you found this tutorial helpful.