This tutorial will show you how to install the MySQL database server on Ubuntu.
MySQL is a popular open-source relational database management system that is a key part of the LAMP (Linux, Apache, MySQL, PHP) stack. The Oracle Corporation actively develops and maintains MySQL.
SQL database servers are crucial to a lot of different pieces of software. This includes software like WordPress, Nextcloud, and more.
If you prefer, you can install MariaDB to Ubuntu instead of MySQL. However, we won’t be covering the differences between these two within this guide.
Within this tutorial, you will learn how to install the MySQL server to your Ubuntu device. In addition, we will also run you through some initial configuration steps to help lock down your installation.
For the following steps, you will need to use a user with superuser privileges or the root user.
Table of Contents
- Installing the MySQL Server on Ubuntu
- Changing your Root MySQL User to Authenticate using a Password
- Securing your MySQL Installation on Ubuntu
- Creating a New MySQL User on Ubuntu
- Check the Status of the MySQL Server on Ubuntu
- Conclusion
Installing the MySQL Server on Ubuntu
In this first section, we will be showing you how to install MySQL on the Ubuntu operating system.
Installing MySQL is relatively straightforward as it is available in the default package repository. However, the version of MySQL that gets installed will differ depending on what version of Ubuntu you are running.
The following steps will need to be completed within the terminal. You can open the terminal on Ubuntu by pressing CTRL + ALT + T.
1. Before we can install MySQL on Ubuntu, our first step is to update the package list. The package list is what apt uses to know what packages can be installed and where to download that package from.
Update the package list by using the following command within the terminal.
sudo apt updateCopyWhen prompted, supply your password to elevate your user to the superuser role.
2. Once the package list finishes updating, we can now install MySQL.
To install the MySQL server to Ubuntu, you must use the following command within the terminal.
sudo apt install mysql-server -yCopyUsing the “-y” option, we are telling apt that we want to install this package. This option will bypass the prompt that typically appears, asking you to confirm the installation.
3. We can verify that MySQL is now installed on our Ubuntu device using the following command in the terminal.
This command retrieves the version from the installed copy of MySQL.
mysql --versionCopyBelow you can see the version returned after installing MySQL on our operating system.
mysql Ver 8.0.29-0ubuntu0.22.04.2 for Linux on x86_64 ((Ubuntu))4. At this point, you can immediately start using your MySQL server.
However, there are some steps that you can take to help secure your Ubuntu MySQL installation that we will cover shortly. In addition
Changing your Root MySQL User to Authenticate using a Password
When you first install MySQL to your Ubuntu device, the installation process will configure the root MySQL user to authenticate using “auth_socket“. This plugin allows you to log in to the root user without a password as the root user.
This behavior is acceptable for some use cases but can be problematic. For example, the script we use to secure the MySQL installation on Ubuntu can get stuck if you try to activate the validate password plugin.
If you prefer the default login method, skip to the next section. Remember to answer “n” to activate the “validate password” component.
1. To change the root MySQL users to use a password instead, we will need to open the MySQL client.
Use the following command within the terminal to open up the MySQL client and login to the local server with the root user.
sudo mysql -u rootCopyAfter running this command, you will notice that you aren’t asked for any authentication. This is because you are using “sudo” and are logging into the root user, which is currently using “auth_socket” for authentication.
2. Now that the MySQL command-line interface is open, we can change the root user to use the “caching_sha2_password” plugin instead.
To change the root user to use a password, you will need to use the following command. When typing in this command, you will need to make sure that you replace “PASSWORDHERE” with your own secure password.
ALTER USER 'root'@localhost IDENTIFIED WITH caching_sha2_password BY 'PASSWORDHERE';CopyThis piece of SQL is relatively simple. It tells MySQL to alter the “root” user, changing it to be identified using the “cacching_sha2_password” plugin, with the specified password being used for authentication.
3. If MySQL successfully altered the user, you should see the following appear after running the last command.
Query OK, 0 rows affected (0.01 sec)Copy4. Now that you are done with the MySQL client on your Ubuntu device, we can quit using the following command.
quitCopy5. From now on, if you want to access your Ubuntu MySQL server using the root user, you need to make sure you use the “-p” option.
This option tells the MySQL client that you want to authenticate yourself with the server using a password.
mysql -u root -pCopySecuring your MySQL Installation on Ubuntu
After you first install MySQL on Ubuntu it is left reasonably insecure. This is because features that leave the server open to attack are enabled.
Luckily for us, MySQL has a script that helps us secure the installation quickly. As we run through the script, we will explain each action’s benefits.
1. You can start the script to secure your MySQL installation by using the following command in the terminal.
Be prepared, as you will have several prompts that you will need to answer. We will do our best to explain those prompts.
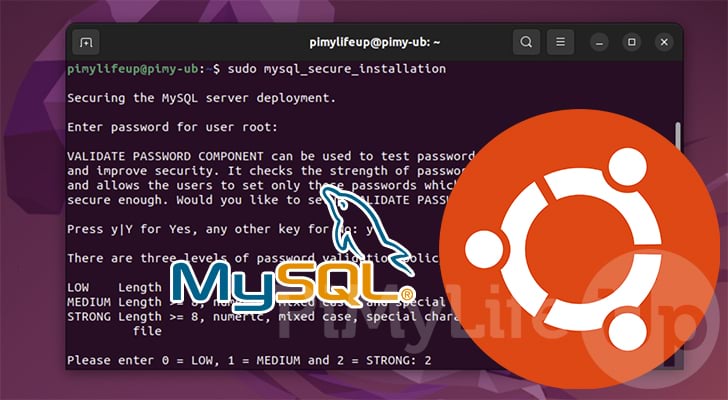
sudo mysql_secure_installationCopy2. If you have changed your root user to be authenticated by a password, you will be prompted to enter the user’s password before continuing.
All you need to do is enter the password for your root MySQL user and press the ENTER key to continue.
Enter password for user root:3. You will first be asked if you want to enable the “validate password” component.
This component helps ensure that a specific strength of password is used for all of your MySQL users. This reduces the chance of someone gaining access to your databases due to a weak password.
Please note, if you are not using a password for your root user, you can’t enable this functionality as it will attempt to set a password for your root user, which it won’t be able to do.
VALIDATE PASSWORD COMPONENT can be used to test passwords
and improve security. It checks the strength of password
and allows the users to set only those passwords which are
secure enough. Would you like to setup VALIDATE PASSWORD component?

Press y|Y for Yes, any other key for No:
If you want this functionality, press y or Y then ENTER and proceed to the next step.
Otherwise, type in any other key and press ENTER, then skip to step 6.
4. If you decided to activate the password validate component for your Ubuntu MySQL server, you need to decide how strict it is.
You can pick three options that we will quickly go through.
- LOW (
0) – This option enforces passwords to have a minimum length of 8 characters.
For example, “pimylife” would be a valid password under this option. - Medium (
1) – The medium option makes the password require a number, mixed case (both capital and lower case letters), and a special character (E.G.!@#$%). Additionally, it also enforces a minimum length of 8 characters.
For example, “Pimylife1!” would be considered a valid password. - STRONG (
2) – The strong option is the medium option, but one additional requirement. This final requirement means your password must not contain strings longer than four characters that match a known dictionary word.
For example, “Pimyup1!@” would be a validated password.
Choose between the three options, and type in the corresponding number. For our example, we chose “STRONG” so we typed 2 and pressed the ENTER key.
There are three levels of password validation policy:

LOW    Length >= 8
MEDIUM Length >= 8, numeric, mixed case, and special characters
STRONG Length >= 8, numeric, mixed case, special characters and dictionary file

Please enter 0 = LOW, 1 = MEDIUM and 2 = STRONG:
5. After setting the policy level, you will be given a password strength estimate for your current root password.
You will be prompted if you want to change the password for your root MySQL user.
Since our password is a bit weak, we will be pressing y then ENTER. You will be prompted to enter a new password and asked if you want to continue with that new one.
However, if you are okay with your password, press any other key, then the ENTER key.
Estimated strength of the password: 50
Change the password for root ? ((Press y|Y for Yes, any other key for No) :
6. Now that you have set a password policy for your MySQL users, you will be asked a series of questions.
For each of these questions, type Y, then press the ENTER key. Rather than breaking each out into their own step, let us quickly run through them now
Remove anonymous users?– By default, MySQL allows users to log in without a user. This is dangerous, so removing this type of user is best.Disallow root login remotely?– While it can be useful to use the root user remotely, it also allows a bad actor to abuse this and try to gain access to your Ubuntu MySQL server using it.
It is best to disable this functionality. You can create a user with less rights that will be safer to use remotely.Remove test database and access to it?– For most use cases, the test database will not be required at all, and being an open database is dangerous for production use.Reload privilege tables now?– Forcing a reload on the privilege table ensures all user, role, and password changes take effect immediately. You will want to type “Y” for this option, so the rest of the options take effect.
7. You should now have your Ubuntu MySQL installation secured and can now move on to creating a new MySQL user that you should use instead of the root user.
The root user has a lot of power and should only be used when necessary.
Creating a New MySQL User on Ubuntu
So far, we have installed MySQL to Ubuntu, changed the root user to use password verification, and finally secured the installation.
Our next step is to create a user that you will use to access the MySQL server instead of the root user.
The root user has ultimate power over the MySQL server on your Ubuntu device. The problem with this is that power becomes potentially risky, a bad actor can do a lot of damage very quickly.
To work around this, we can create an ew user that has a more restricted set of privileges.
1. First, we will need to use the MySQL command-line interface to connect to our MySQL server..
You can log in to the server by using the following command.
sudo mysql -u root -pCopyIf you changed the root user to use password verification, you will be prompted to type in a password. However, if you choose not to change this, remove the “-p” option.
2. Our first step now that we are logged in is to create our new MySQL user for Ubuntu.
You can create a user using the following command, but the are a few things you might want to change.
USERNAME– This is the name you want to use to identify your new user. For our example, we will be using “pimylifeup” as the username.HOST– This is the host that is allowed to log in using this username.- If you only want to allow the localhost to log in using this user, then use “
localhost“. - If you want any host to be able to login with this user, you need to use the percentage sign (
%). - You can also restrict access to a specific IP address by using something like “
127.0.0.1“.
- If you only want to allow the localhost to log in using this user, then use “
PASSWORD– Finally, the password is what you will use to authenticate your user when logging in.
CREATE USER 'USERNAME'@'HOST' IDENTIFIED BY 'PASSWORD';Copy3. With the user created, our next step is to grant it some actual privileges. Without any privileges, this user will be pretty useless.
We won’t be mindlessly just granting our user all privileges. Otherwise we would be just recreating the root user we are trying to move away from.
Instead we will grant our user the “CREATE“, “ALTER“, “DROP“, “INSERT“, “UPDATE“, “DELETE“, “SELECT“, “REFERENCES“, and “RELOAD” privileges.
CREATE,ALTER,DROP– These allow the user to manipulate databases, tables, and users.INSERT,UPDATE,DELETE– Allow the user to add, update, and delete data from tables on the MySQL server.SELECT– This allows the user to select any data within a table.REFERENCES– The SQL user can create foreign keys.RELOAD– This allows the user to reload the privileges table.
In addition to these privileges, we also use “WITH GRANT” which allows this user to grant any other user the same privileges it has. Without this, you can create a user but won’t be able to give it any privileges.
Finally, we are granting these privileges to all databases. This is due to us using “*.*” as the “on” option.
When using the following command, you need to replace both USERNAME and HOST. These will be the same values you used in the previous section.
GRANT CREATE, ALTER, DROP, INSERT, UPDATE, DELETE, SELECT, REFERENCES, RELOAD on *.* TO 'USERNAME'@'HOST' WITH GRANT OPTION;Copy4. Since we have made a new user, we will need to flush the privilege table for our new user to take effect.
To flush the privileges on our Ubuntu MySQL server, we only need to use the following command.
FLUSH PRIVILEGES;Copy5. Now, quit out of the MySQL client by using the command below.
quitCopy6. Now, it is best to test that you can log in using your new SQL user. These steps will assume you allowed the user to log in from localhost.
You can log in using the command below. Make sure you replace USERNAME with the name you used when creating the user.
mysql -u USERNAME -pCopyWhen prompted, enter the password you gave to this new user.
Check the Status of the MySQL Server on Ubuntu
Finally, you should now have installed the MySQL server to Ubuntu. Within this section, we will be showing you how you can check the status of the MySQL service.
Checking the service is useful when you are experiencing issues with connecting to the server.
1. To retrieve the status of the MySQL server on Ubuntu, you need to use the following command.
This command polls the system service manager and requests it to check the status of the provided service.
sudo systemctl status mysqlCopyAfter running this command, you should get something like what we have shown below.
With our response, you can see that MySQL is running by looking at “Active: active (running)” and that the server is enabled to start at bootup by looking for “enabled;“.
● mysql.service - MySQL Community Server
     Loaded: loaded (/lib/systemd/system/mysql.service; enabled; vendor preset: enabled)
     Active: active (running) since Thu 2022-06-30 15:55:36 AEST; 5h 18min ago
    Process: 2554 ExecStartPre=/usr/share/mysql/mysql-systemd-start pre (code=exited, status=0/SUCCESS)
   Main PID: 2562 (mysqld)
     Status: "Server is operational"
      Tasks: 38 (limit: 4624)
     Memory: 360.8M
        CPU: 15.128s
     CGroup: /system.slice/mysql.service
             └─2562 /usr/sbin/mysqld
2. If MySQL isn’t running for some reason, you can start it using the following command.
sudo systemctl start mysqlCopy3. You can also stop the MySQL server from running on your Ubuntu device by running the command below.
sudo systemctl stop mysqlCopy4. You can stop your Ubuntu MySQL install from starting at boot by “disabling” the service. A service can be disabled by using the following command.
sudo systemctl disable mysqlCopy5. Finally, you can ensure that MySQL starts when Ubuntu boots by “enabling” the service.
You can enable the MySQL service by using the command below within the terminal.
sudo systemctl enable mysqlCopyConclusion
Throughout this tutorial, we aimed to teach you how to install MySQL to Ubuntu. On top of installing this software, we also tried to show you how you can improve the security of your installation.
Please comment below if you have questions about installing this database server on Ubuntu.
We have plenty of guides worth checking out if you want to explore Ubuntu further. In addition, we also have numerous general Linux tutorials.