This tutorial will teach you how to install MariaDB on the Ubuntu operating system.
MariaDB is an open-source database system often used as an alternative to the popular MySQL server developed by the MariaDB Corporation.
Since being forked from an older MySQL release after Oracle acquired MySQL, this software has been actively developed to improve its functionality and speed.
You can use MariaDB as a drop-in replacement for MySQL in most cases. However, recent releases have diverged from MySQL, so check the functionality required if you want to swap from MySQL to MariaDB.
MariaDB on Ubuntu works perfectly as a part of your LAMP (Linux, Apache, MySQL/MariaDB, PHP) or LEMP (Linux, Nginx, MySQL/MariaDB, PHP) stacks.
Over the following sections, we will show you how to install MariaDB to Ubuntu. Additionally, you will also learn how to secure the initial installation.
These steps shown in this guide will work on most releases of Ubuntu. You can install MariaDB on most versions, including Ubuntu 22.04, Ubuntu 20.04, and Ubuntu 18.04.
Installing MariaDB on Ubuntu
Within this section, we will be showing you how to install MariaDB on Ubuntu. This process is reasonably straightforward, thanks to MariaDB being available in the official repository.
Depending on your version of Ubuntu, the version of MariaDB that is installed can differ. For example, on Ubuntu 22.04, we will be installing MariaDB 10.6.
For the following steps, you will need to use the terminal on Ubuntu. If you are on the desktop version, you can open this quickly by pressing CTRL + ALT + T on your keyboard.
1. Before we install anything, our first step is to perform an update of the package list. The package list is the cache of all available packages and where to download them.
If you try to install MariaDB on Ubuntu before updating the list, you may either install an older release or run into an error while installing.
You can update this package list by using the following command within your terminal.
sudo apt updateCopy2. Once the package list update completes, we can move on to installing the database server.
All we need to do now to install the MariaDB server to Ubuntu is to run the following command.
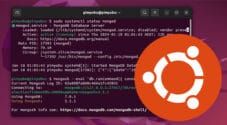
sudo apt install mariadb-serverCopy3. After installing MariaDB, the operating system should have automatically started the server.
We can verify this by using the “systemctl” to get the status of its service with the following command.
sudo systemctl status mariadb.serviceCopyIf everything has started correctly, you should see a message similar to the one shown below. The main thing you need to look for here is “Active: active (running)“.
● mariadb.service - MariaDB 10.6.7 database server
     Loaded: loaded (/lib/systemd/system/mariadb.service; enabled; vendor preset: ena>
     Active: active (running) since Wed 2022-07-06 21:17:28 AEST; 1s ago
       Docs: man:mariadbd(8)
             https://mariadb.com/kb/en/library/systemd/
    Process: 20565 ExecStartPre=/usr/bin/install -m 755 -o mysql -g root -d /var/run/>
    Process: 20566 ExecStartPre=/bin/sh -c systemctl unset-environment _WSREP_START_P>
    Process: 20568 ExecStartPre=/bin/sh -c [ ! -e /usr/bin/galera_recovery ] && VAR= >
    Process: 20614 ExecStartPost=/bin/sh -c systemctl unset-environment _WSREP_START_>
    Process: 20616 ExecStartPost=/etc/mysql/debian-start (code=exited, status=0/SUCCE>
   Main PID: 20597 (mariadbd)
     Status: "Taking your SQL requests now..."
      Tasks: 17 (limit: 4624)
     Memory: 57.1M
        CPU: 181ms
     CGroup: /system.slice/mariadb.service
             └─20597 /usr/sbin/mariadbd
If you see “Active: inactive (dead)“, try running the following two commands. The first command will enable MariaDB to start when Ubuntu starts. The second will start the service immediately.
sudo systemctl enable mariadb
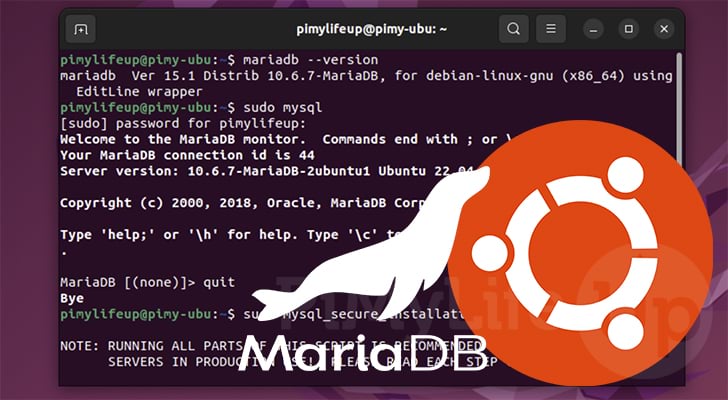
sudo systemctl start mariadbCopy4. You can verify that MariaDB has been installed on Ubuntu by using the command below.
By using the “-V” option, we are telling MariaDB to return its version.
mariadb -VCopyBelow is the version string we got after running the command on Ubuntu 22.04.
mariadb Ver 15.1 Distrib 10.6.7-MariaDB, for debian-linux-gnu (x86_64) using EditLine wrapperSecuring your MariaDB Installation on Ubuntu
With MariaDB installed on our Ubuntu system, we can move on to securing it.
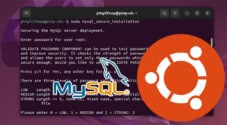
MariaDB comes with a special script that we can use to help secure the installation called “mysql_secure_installation“. This section will run you through using this script.
1. Within the terminal, run the following command to begin the process of securing your new database server.
There will be a few questions that you will need to answer. Most of these are simple.
sudo mysql_secure_installationCopy2. Since we only just installed MariaDB on Ubuntu, you can safely press the ENTER key at this prompt.
This is because we haven’t set a password for our root user.
Enter current password for root (enter for none):3. By default, MariaDB will set your root user to use “unix_socket” for authentication. Basically, this means the only way to connect to your root user is to connect using “sudo“, as this option enforces using system credentials.
Since this is enabled by default, type in “n” and press the ENTER key.
Switch to unix_socket authentication [Y/n]4. If you use “unix_socket” authentication, setting a root password won’t achieve anything.
This means you can press “n” and then ENTER at this option to continue.
Change the root password? [Y/n]
If you decide to press “Y” and then the ENTER key, you will be prompted to enter a new password for the root user and then asked to confirm it.
5. You will be asked if you want to remove anonymous users from your MariaDB installation on Ubuntu.
These users pose a risk as they allow anyone to log into the MariaDB Server without needing a user.
Type in Y and press ENTER to remove these users.
Remove anonymous users? [Y/n]
6. Next, you will be asked if you want to disallow access to the root user remotely.
The root user on a MariaDB server holds a lot of power. Allowing remote access allows an attacker to potentially brute force the user’s password.
Disallow remote logins to the remote user by typing in Y and pressing the ENTER key.
Disallow root login remotely? [Y/n]
7. When MariaDB is installed on your Ubuntu device, it automatically creates a database called “test” that anyone can access.
As this database is purely for testing, it can be safely removed by typing in Y and then pressing ENTER.
Remove test database and access to it? [Y/n]
8. Finally, you will be prompted to reload the privilege tables. Without reloading the table, any changes to users won’t take effect.
You can reload this table by typing in Y and then pressing the ENTER key.
Reload privilege tables now? [Y/n]
9. At this point, you will now have successfully finished securing your MariaDB installation.
You can now start using the database server for your needs.
Cleaning up...

All done!  If you've completed all of the above steps, your MariaDB
installation should now be secure.

Thanks for using MariaDB!
Creating an Alternate Admin User for MariaDB
As mentioned earlier in this guide, the default root user is configured to use “unix_socket” for authentication.
Instead of modifying the root user to use password authentication, we will create an alternate MariaDB user. This user will have slightly restricted privileges but can do almost anything you need.
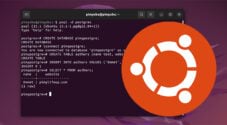
1. Start connecting to your MariaDB server on Ubuntu using the following command.
This command will open the MariaDB command-line interface and automatically connect to the local server.
sudo mariadbCopy2. Now that we have the command line interface open, we can use it to create our new user on the MariaDB server.
Using the command below, you can create a new user. You will need to replace a few things before running this command.
USERNAME– The username is utilized to identify your user and is what is used when logging into the server using this user.HOST– The “HOST” parameter is used to specify where you can log in to this user from.
We will quickly run through a couple of options you can use in this place.- To lock the user down so you can only log in from the current system, you can use “
localhost” as the host. - You need to utilize the percentage sign (
%) to allow access to this user from any location. - You can also lock this user so only a specific IP address can access it. MariaDB will block any access from any other IP address.
PASSWORD– The password you will use to authenticate yourself when logging in with this user.
- To lock the user down so you can only log in from the current system, you can use “
CREATE USER 'USERNAME'@'HOST' IDENTIFIED BY 'PASSWORD';Copy3. Now that we have created our new administrative user, let us grant it some privileges so it can do something.
While we could grant this user all privileges, that is far from ideal. You will likely only need a specific subset of privileges for most remote administrative tasks.
The privileges that we will be granting this user are the following.
CREATE,ALTER,DROP– We grant these privileges so our users can control users, tables, and databases.INSERT,UPDATE,DELETE– By granting these privileges, the user can add, delete, and updates data within tables.SELECT– This privilege allows our new user to select data within tables.REFERENCES– We grant the references privilege so the user can create foreign keys.RELOAD– This privilege allows our new user to reload the privileges table.WITH GRANT– Finally, we use this option so that our new user can grant privileges to other users. The user won’t be able to grant more permissions than it already has.
Additionally, this command grants our new user these privileges on all databases and tables by using “*.*“.
When typing in this command, make sure that you replace 'USERNAME'@'HOST' with the details you used in the previous command.
GRANT CREATE, ALTER, DROP, INSERT, UPDATE, DELETE, SELECT, REFERENCES, RELOAD on *.* TO 'USERNAME'@'HOST' WITH GRANT OPTION;
Copy
4. Even though we have created the new user and granted, it privileges it won’t be able to do anything yet.
We need to flush the privileges table, which we can do using the command below.
FLUSH PRIVILEGES;Copy5. Finally, quit out of the MariaDB command line interface by using the following command.
quitCopy6. You have now successfully created a new MariaDB user that can create and alter users, tables, and databases.
If you ever want to log in using the command line interface using this new user, then you will want to use the command below. You will, of course, need to replace “USERNAME” with the username of your new user.
mariadb -u USERNAME -pCopyConclusion
In this tutorial, we showed you how you could install the MariaDB server to your Ubuntu device.
In addition to showing you how to install the server, we also walked you through the process of securing it and creating a different admin user.
Please comment below if you have questions about setting up MariaDB on Ubuntu.
After finishing this guide, check out our many other Ubuntu tutorials. We also have guides that cover general Linux usage.